Integration of Chat360 Android SDK
Chat360 is a top-tier chatbot service provider that offers businesses and organizations a comprehensive platform to build and deploy intelligent chatbots. One of its key offerings is its Android SDK integration, which allows businesses to easily integrate chatbot functionality into their existing Android apps.
With Chat360’s Android SDK integration, businesses can provide their users with a seamless and integrated chat experience, enhancing customer engagement and improving overall user experience. The integration process is straightforward and requires just a few lines of code to enable chatbot functionality within an Android app.
Installation:
- To integrate Chat360 into your Android project using Gradle, specify the following configurations in the App level
build.gradlefile. - Add it in your root
build.gradleat the end of repositories:
    allprojects {
	    repositories {
	                    ...
		                maven { url 'https://jitpack.io' }
                    }
                }
- Add the dependency
    dependencies {
	     implementation 'com.github.sumanel:chat360-android-sdk:<latest version>'
	        }
- Note: By putting + at the end, you need not worry about updating and releasing your app for every patch we make in SDK. Still, if you want to use the exact and latest version, please visit the GitLab repository mentioned
- https://github.com/sumanel/chat360-android-sdk/releases
-
File Provider:
- Add the following key in your strings.xml file, this will override the default file provider used by SDK.
- Overriding the file provider path will avoid conflict with other apps using Chat360 Chatbot SDK. You can suffix your application id with “.fileprovider” Example — applicationId: “com.abc.xyz” then application_id_for_provider = com.abc.xyz.fileprovider
<string name="application_id_for_provider"> your.application.id.fileprovider </string>
-
Basic Usage:
- Import the Chat360 library into your Activity.
    import com.chat360.chatbot.common.Chat360
    import com.chat360.chatbot.common.CoreConfigs
- After the library is imported the basic bot can be presented with a few lines as below
- Example
onCreatemethod of the Activity:
    class MainActivity : AppCompatActivity() {
    private val botId = "your-bot-id" // Replace with your actual bot ID
    private val flutter = false
    private val meta = mapOf("Key" to "Value")

    override fun onCreate(savedInstanceState: Bundle?) {
        super.onCreate(savedInstanceState)
        setContentView(R.layout.activity_main)

        val chat360 = Chat360().getInstance()
        chat360.coreConfig = CoreConfigs(botId, applicationContext, flutter, meta, false)

        // Set custom base URL (optional)
        chat360.setBaseUrl("https://your-custom-domain.com")

        // Configure window event handler (Only works if your bot has window event component enabled)
        // Note: If your bot doesn't have this component enabled, this configuration will have no effect
        chat360.setHandleWindowEvent { eventData ->
            // Handle window events and return updated metadata
            val metaMap = when (eventData) {
                "user_connected" -> mapOf(
                    "connection_time" to java.time.ZonedDateTime.now().toString()
                )
                "message_sent" -> mapOf(
                    "last_message_time" to java.time.ZonedDateTime.now().toString()
                )
                else -> mapOf()
            }
            metaMap
        }

        // Custom configurations
        chat360.coreConfig!!.statusBarColor = R.color.purple_500
        chat360.coreConfig!!.closeButtonColor = R.color.white
        chat360.coreConfig!!.statusBarColorFromHex = "#4299E1"
        chat360.coreConfig!!.closeButtonColorFromHex = "#ffffff"
    }
}
- Configuration Options
- botId: The unique identifier for your chatbot.
- applicationContext: The context of your application.
- flutter: Boolean indicating if Flutter integration is required.
- meta: A map of additional metadata for the chatbot.
- useNewUI: boolean to use new UI.
- isDebug: A additional debug tag for Chat36O internals.
-
Advanced Configuration
Custom Base URL
You can set a custom base URL for the Chat360 service:
chat360.setBaseUrl("https://your-custom-domain.com")
Window Event Handler
The SDK allows you to handle various window events and dynamically update metadata based on these events. Important: This functionality requires the window event component to be enabled for your bot. If your bot does not have this component enabled, the setHandleWindowEvent will have no effect. Please contact Chat360 support to enable this component for your bot.
   chat360.setHandleWindowEvent { eventData ->
    // Handle different types of events
    val metaMap = when (eventData) {
        "user_connected" -> mapOf(
            "connection_time" to java.time.ZonedDateTime.now().toString()
        )
        "message_sent" -> mapOf(
            "last_message_time" to java.time.ZonedDateTime.now().toString()
        )
        "user_typing" -> mapOf(
            "typing_timestamp" to java.time.ZonedDateTime.now().toString()
        )
        // Add more event handlers as needed
        else -> mapOf()
    }
    metaMap  // Return updated metadata
}
- Tracking user interactions
- Adding dynamic timestamps
- Updating session information
- Responding to specific chat events
The event handler receives event data as a parameter and can return updated metadata as a Map. This is useful for:
-
Example
Here's a complete example of a simple implementation:
   class MainActivity : AppCompatActivity() {
    // Initialization and configuration...
    // (Refer to the previous sections)

    override fun onCreate(savedInstanceState: Bundle?) {
        super.onCreate(savedInstanceState)
        setContentView(R.layout.activity_main)

        // ... Configuration code

        findViewById(R.id.buttonOpenActivity).setOnClickListener {
            chat360.startBot(this)
        }
    }
}
- Conclusion
Integrating the Chat360 Android SDK is straightforward and allows you to provide a seamless chatbot experience within your application.
-
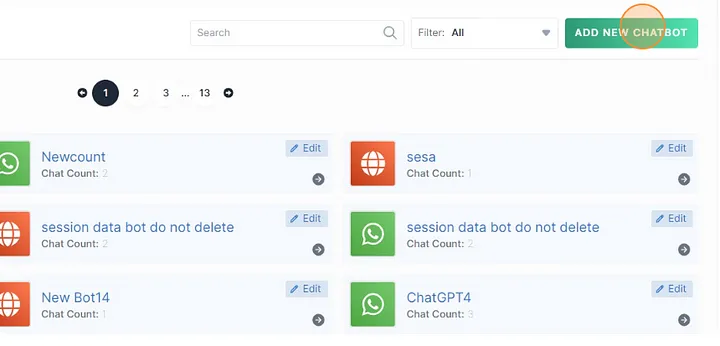
Get your Bot_id:
- The dashboard that was given to you, Click "ADD NEW CHATBOT"
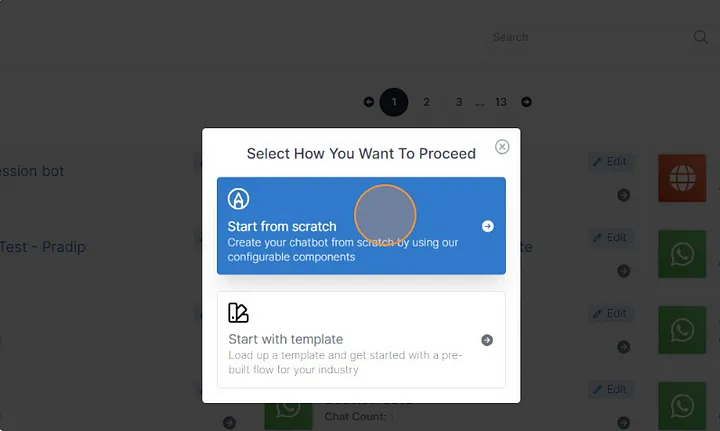
Create a Bot
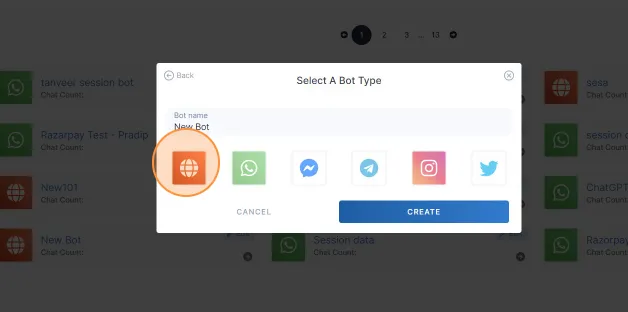
- Select bot process.
- Select Web Bot.
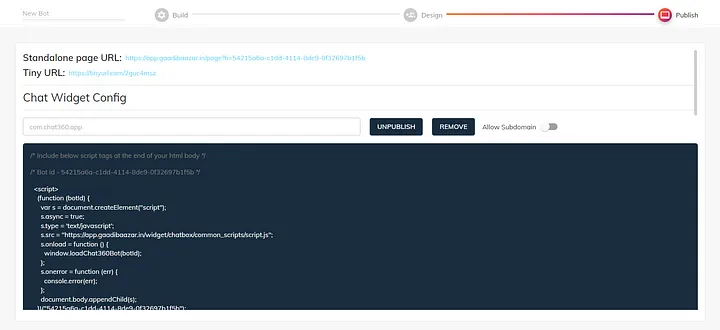
- Navigate to Publish.
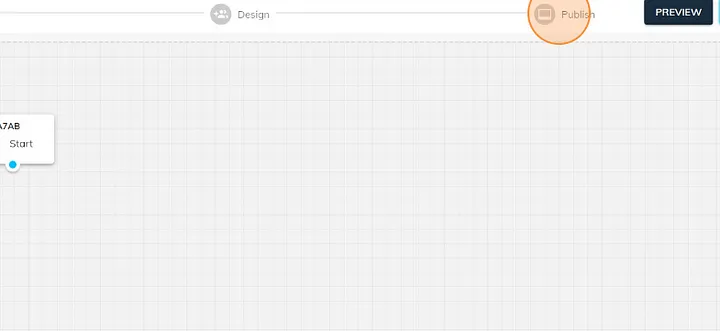
- Click the "Website URL" field.
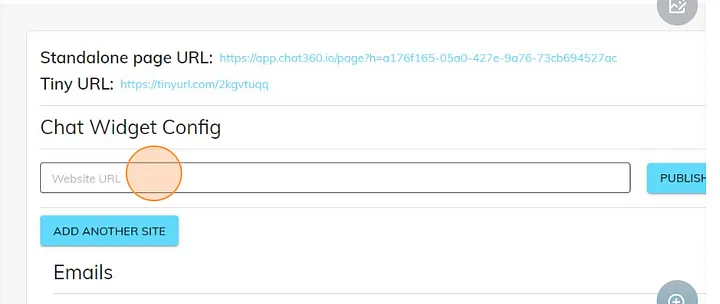
- Enter your app id in above field and publish it. After publishing it, you can see the bot id below:
-
CoreConfigs:
- CoreConfigs can be used to set the bot id and other bot-related settings. It is recommended to set all appropriate configs before starting the bot.
-
Initialize CoreConfig:
- CoreConfigs requires
botIDto initialize. All other settings are optional.
chat360.config = new CoreConfig("<BOT-ID>",<APPLICATION-CONTEXT>,false, meta);
-
Colors:
- The status bar color can be set on
statusBarColorcolor variable.
Status bar:
chat360.coreConfig!!.statusBarColor = R.color.purple_500
Or
chat360.coreConfig!!.statusBarColorFromHex = "#4299E1"
- Note: If both
statusBarColorandstatusBarColorFromHexis used thenstatusBarColorFromHexwill take priority.
Close button:
- The close button color can be set on
closeButtonColor.
chat360.coreConfig!!.closeButtonColor = R.color.white
Or
chat360.coreConfig!!.closeButtonColorFromHex = "#ffffff"
- The Close button can be disabled by giving Boolean value to
showCloseButton.
chat360.coreConfig!!.showCloseButton = false
- Note: If both
closeButtonColorandcloseButtonColorFromHexis used thencloseButtonColorFromHexwill take priority.
Permissions:
- We are declaring and asking for the following permission in our manifest file.
    <uses-permission android:name="android.permission.INTERNET" />
    <uses-permission android:name="android.permission.ACCESS_NETWORK_STATE" />
    <uses-permission android:name="android.permission.READ_EXTERNAL_STORAGE" />
- All permissions will be asked at the run time except the INTERNET. For attachments (picking files/images from phone storage).
<uses-permission android:name="android.permission.READ_EXTERNAL_STORAGE" />
Conditional Permission:
Record Audio:
- If you want to use Speech to text feature, please add the following permission to your manifest.
    <uses-permission android:name="android.permission.RECORD_AUDIO" />
    <uses-permission android:name="android.permission.MODIFY_AUDIO_SETTINGS" />
Location:
- If your bot requires Location permission, please add the following permission to your manifest.
    <uses-permission android:name="android.permission.ACCESS_FINE_LOCATION" />
    <uses-permission android:name="android.permission.ACCESS_COARSE_LOCATION" />
Dependencies:
- Add the following to
build.gradle(project) file.
    dependencies{
            classpath 'com.google.dagger:hilt-android-gradle-plugin:2.42'
    }
- The following dependencies are used in the chatbot SDK.
    implementation 'androidx.core:core-ktx:1.9.0'
    implementation 'androidx.appcompat:appcompat:1.7.0-alpha01'
    implementation 'com.google.android.material:material:1.7.0'
    implementation 'androidx.constraintlayout:constraintlayout:2.1.4'
    testImplementation 'junit:junit:4.13.2'
    androidTestImplementation 'androidx.test.ext:junit:1.1.5'
    androidTestImplementation 'androidx.test.espresso:espresso-core:3.5.1'

    implementation 'com.google.dagger:hilt-android:2.42'
    kapt 'com.google.dagger:hilt-compiler:2.42'
Important:
- If an issue arises during the release build process, the following configuration should be added to the
proguard-rules.profile in the app to resolve it.
    -keep public class com.chat360.chatbot.** {
        *;
    }
Demo App:
- A demonstration application has been established to enhance comprehension of integrating an SDK into an Android app, and it can be found at the following GitHub link:
- https://github.com/sumanel/chat360-android-sdk