Roles
-
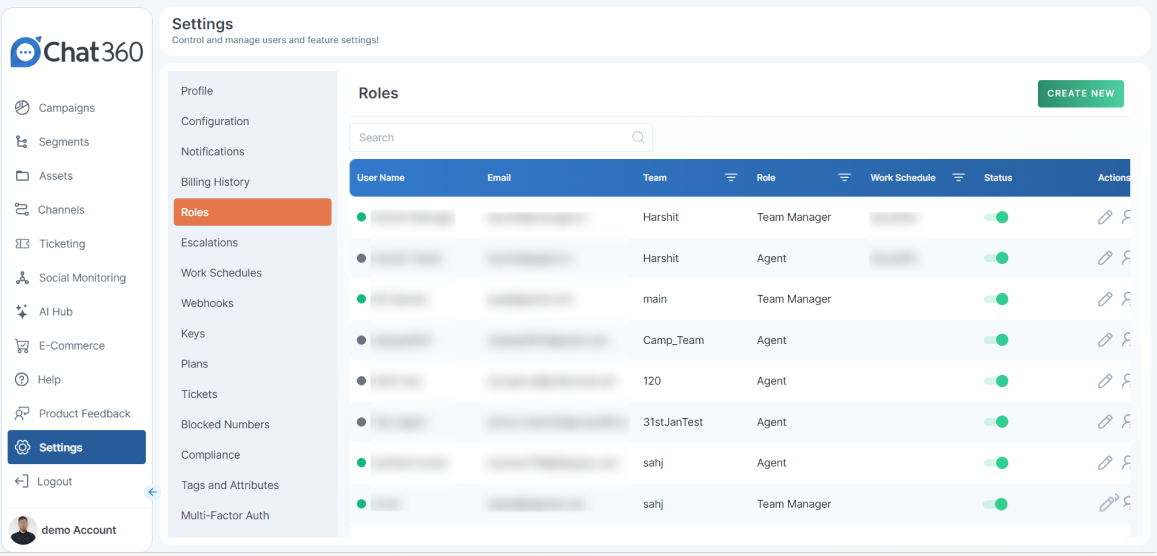
A. Creating Roles
- Go to Settings → Roles.
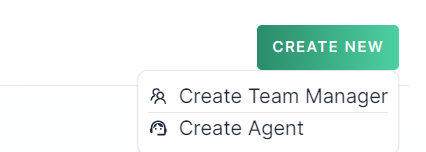
- Click Create New at the top right.
- Choose Team Manager or Agent from the Role Type dropdown.
-
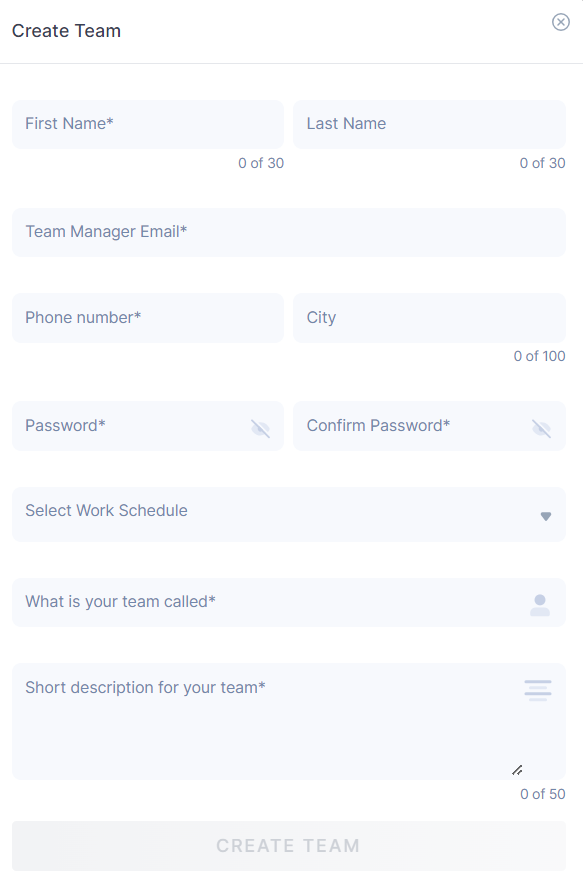
B. Team Manager Role
-
Setup
- Fields: First Name, Last Name, Email, Phone, City, Password, Work Schedule, Team Name, Team Description.
- Click Create Team.
-
Permissions
- Live Chat: View assigned chats.
- Analytics: View dashboards.
- Campaigns: View campaign configurations.
- Contacts: Manage contacts.
- Settings:
- Profile: Edit own profile.
- Roles: Manage only their team’s agents.
- Tickets: View/manage tickets for themselves & agents.
- Plans: View subscription details.
-
Limitations
-
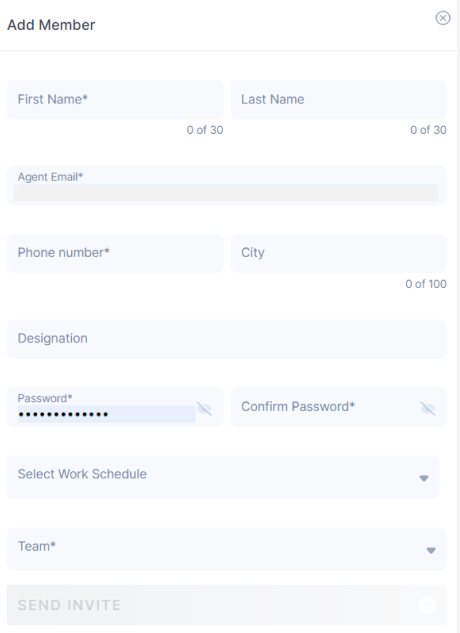
C. Agent Role
-
Setup
- Fields: First Name, Last Name, Email, Phone, City, Designation, Password, Work Schedule, Team.
- Click Send Invite.
-
Permissions
- Live Chat: View and manage assigned chats.
- Contacts: Access contact details.
- Settings:
- Profile: Manage own profile.
- Tickets: View/manage own tickets.
-
Limitations
- No access to Analytics, Campaigns, Roles, Social Monitoring, AI Hub, E-Commerce, or system configurations (e.g., Billing, Webhooks, Blocked Numbers, Compliance, Tags & Attributes, Scheduler Reports).
-
1. Access Roles
2. Create New Role
Cannot access system-wide controls such as Billing History, Webhooks, Keys, Compliance, Blocked Numbers, Tags & Attributes, Scheduler Reports, or Full System Configuration.
-
D. Live Chat & Assignment Controls
-
Team Manager
- View: Assigned and archived chats for their team.
- Agent Assignment: Assign agents to chats (once pre-assigned by Admin).
-
Agent
- Self-Assignment: Assign chats to themselves or reassign to other teams (if permitted).
- View: Live and archived chats specific to them.
By leveraging these Settings features, administrators can enforce security (via blocking), maintain data quality (through feedback and tagging), and grant precise permissions (using Roles) to ensure a controlled and efficient Chat360 environment.
Thank you for your feedback!
We appreciate your feedback!