CleverTap Integration
-
Overview
The CleverTap integration enables Chat360 to leverage CleverTap’s segmentation, engagement triggers, and analytics alongside Chat360’s omnichannel messaging. Once configured, you can sync customer segments from CleverTap, trigger WhatsApp campaigns in Chat360 based on CleverTap events, and view unified performance metrics in one place.
-
Step 1: Integration with CleverTap on the Chat360 Platform
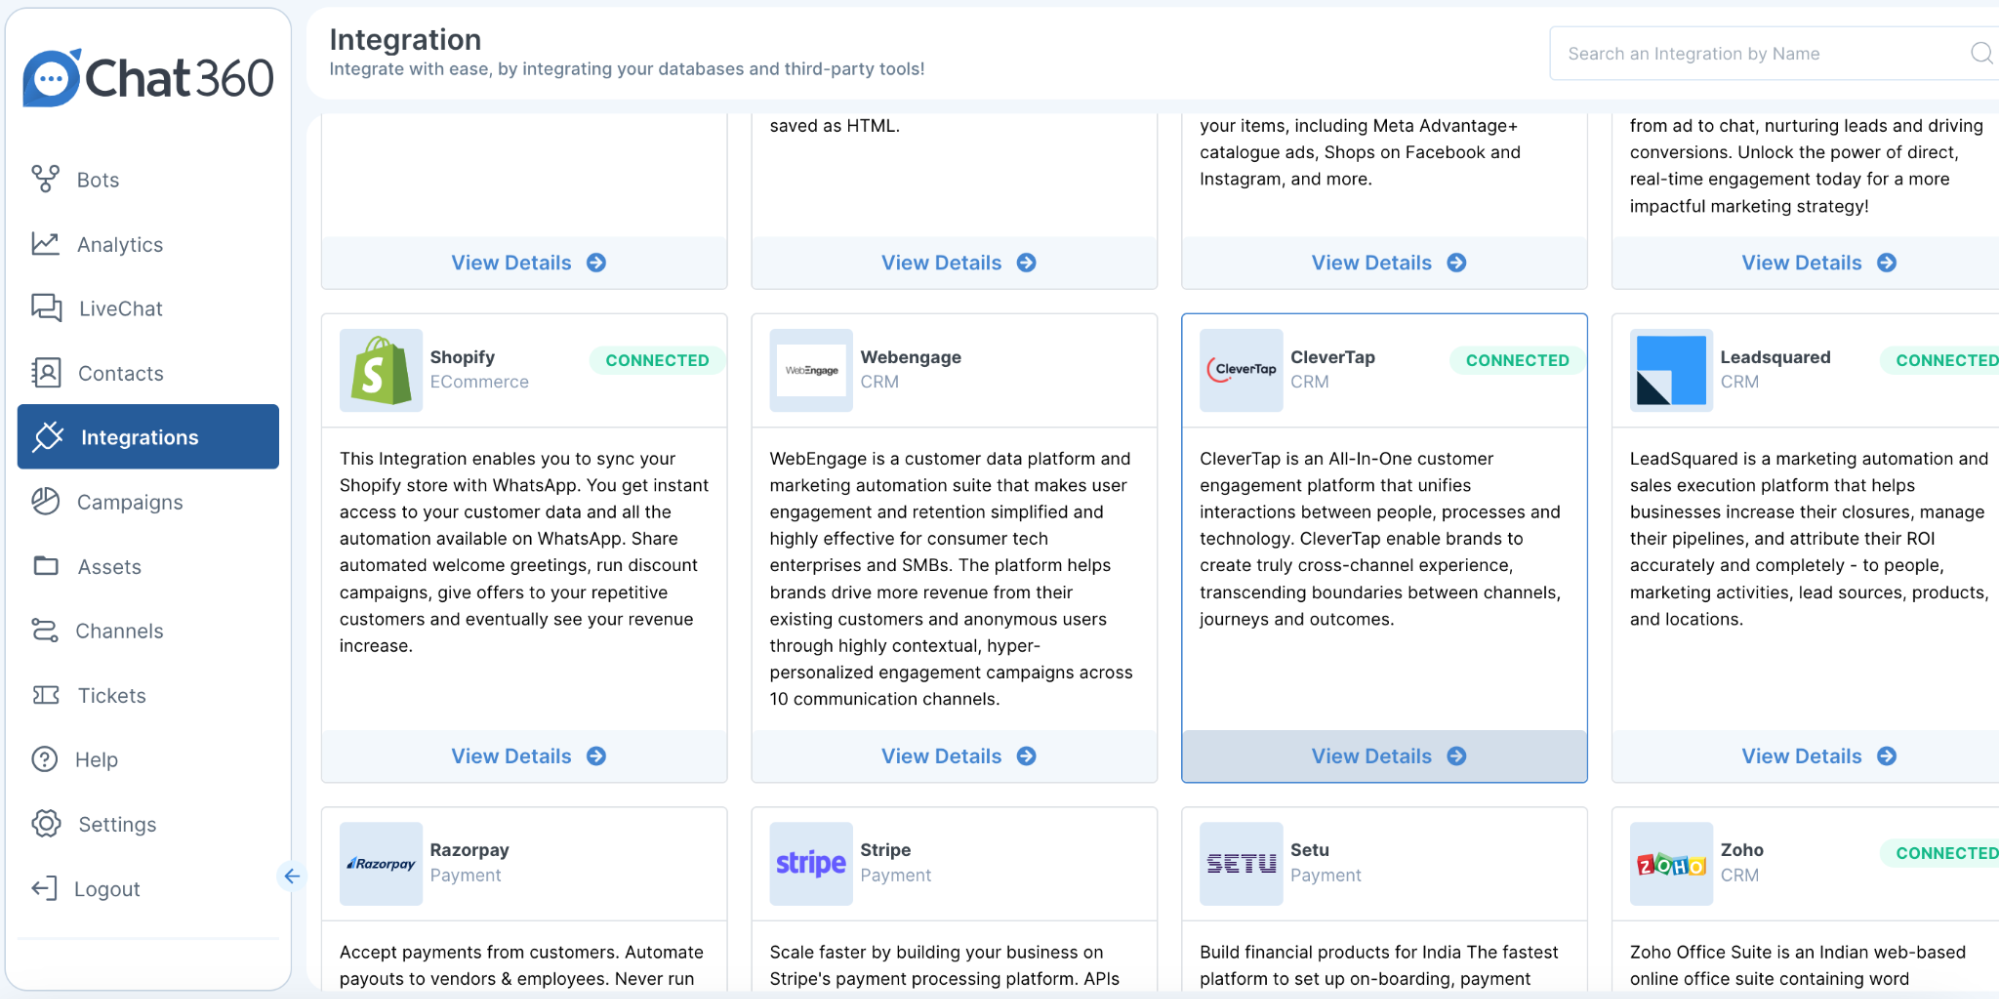
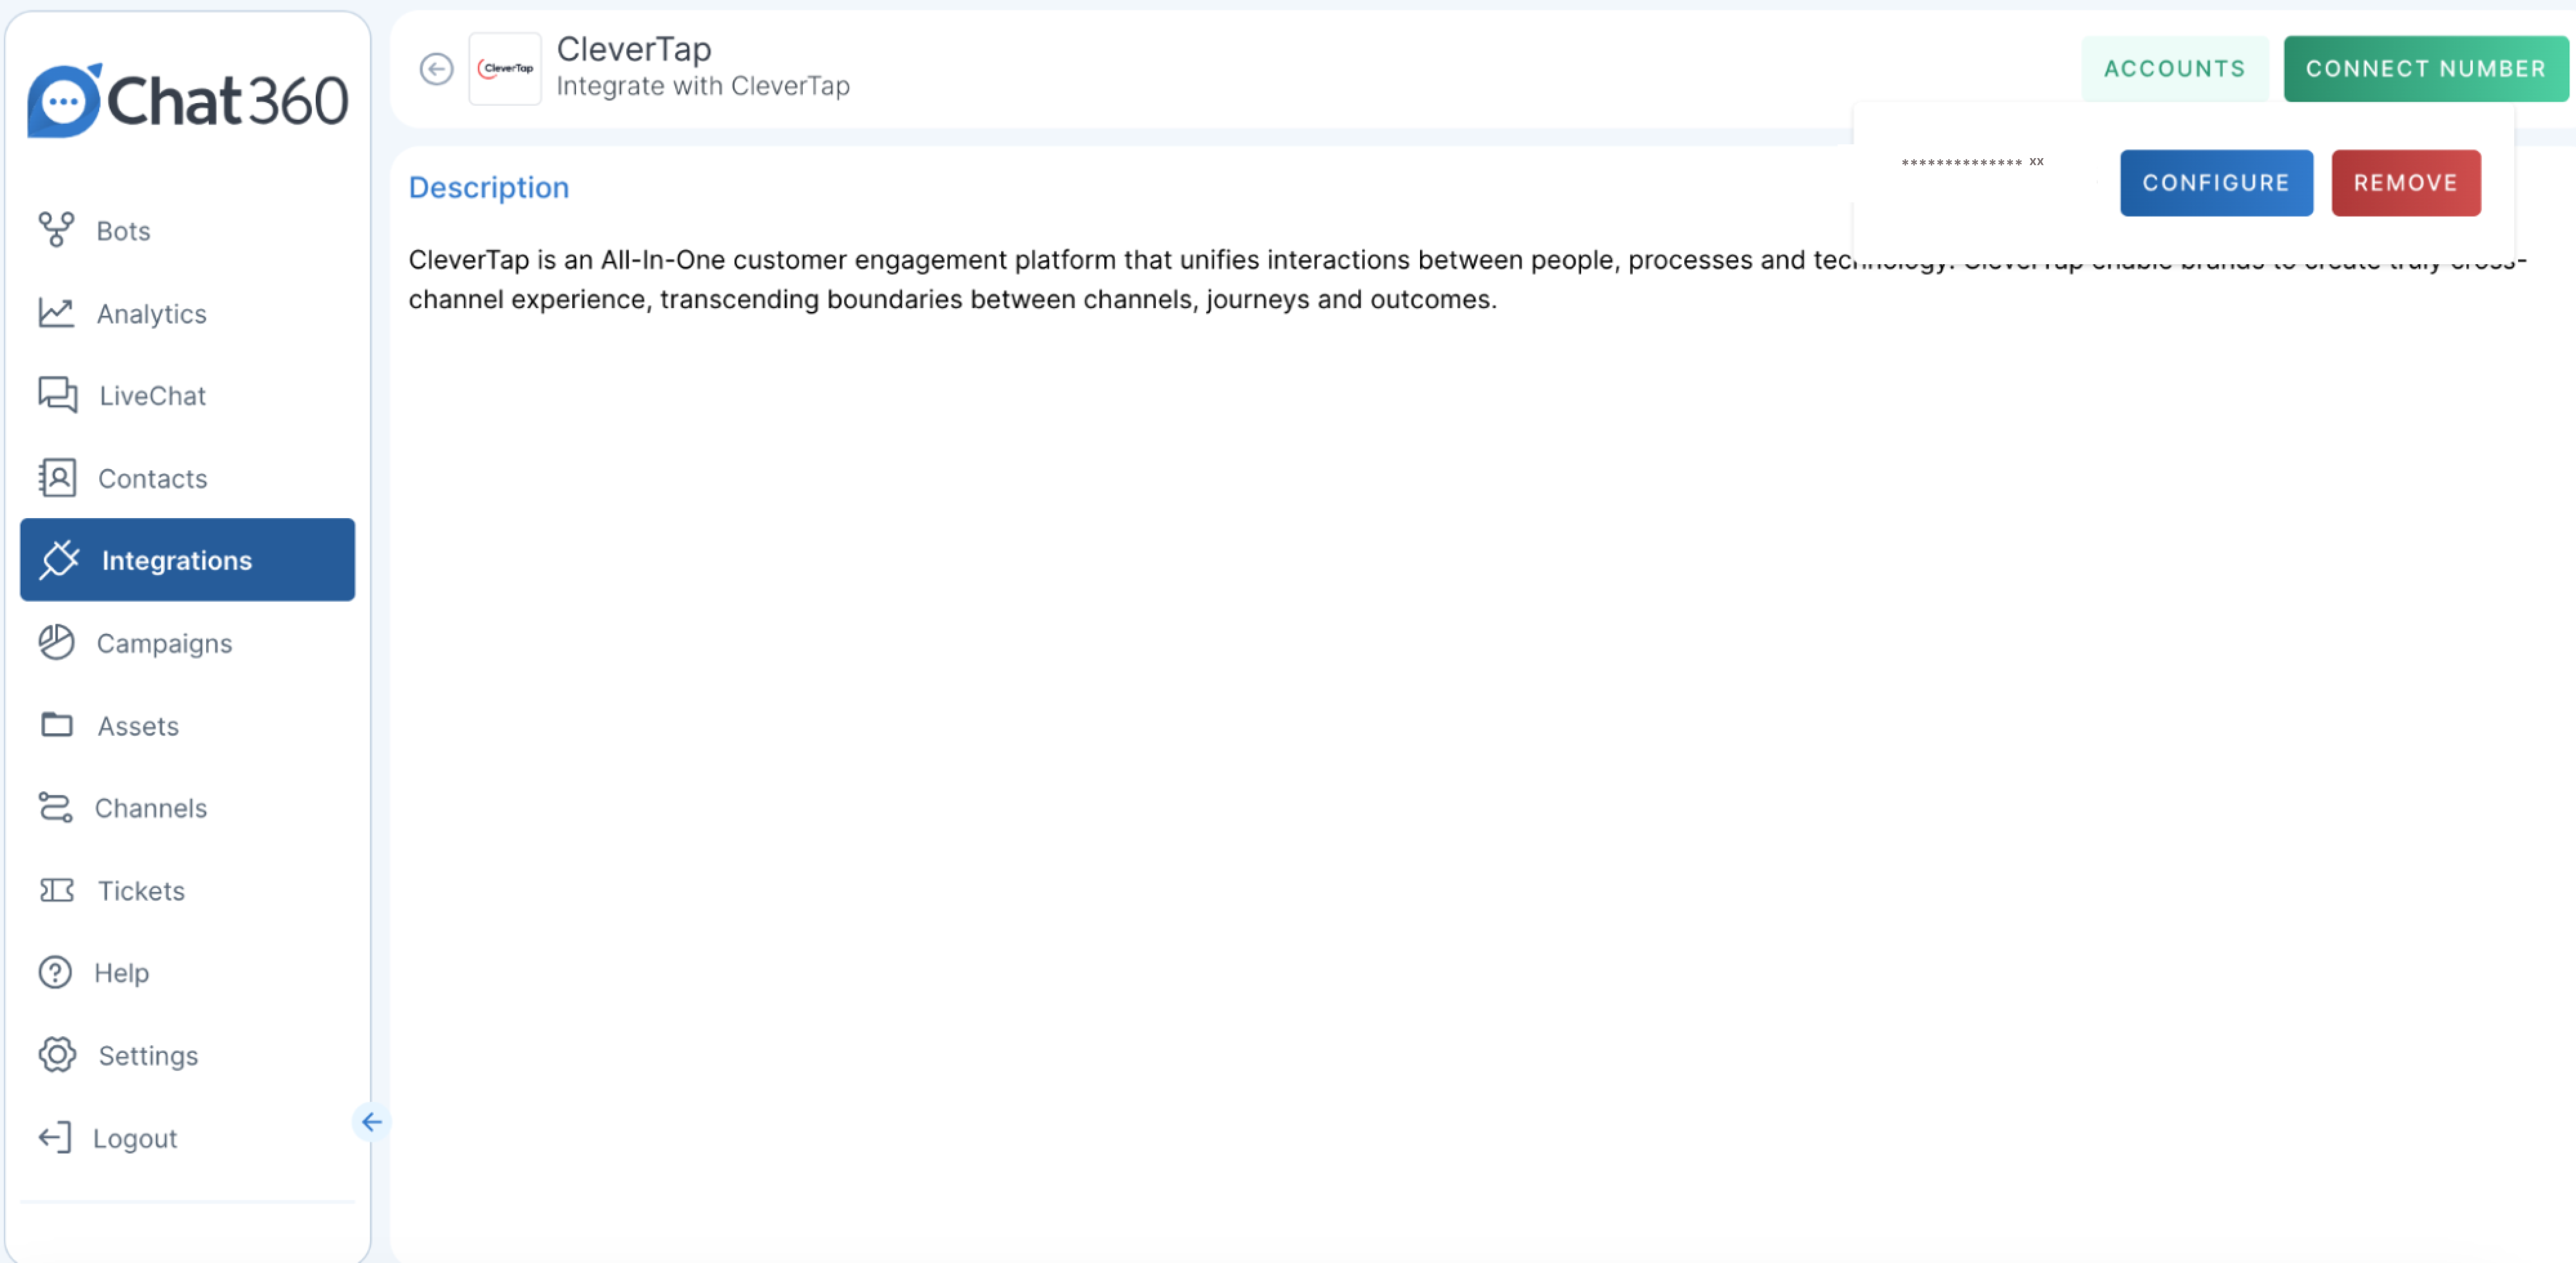
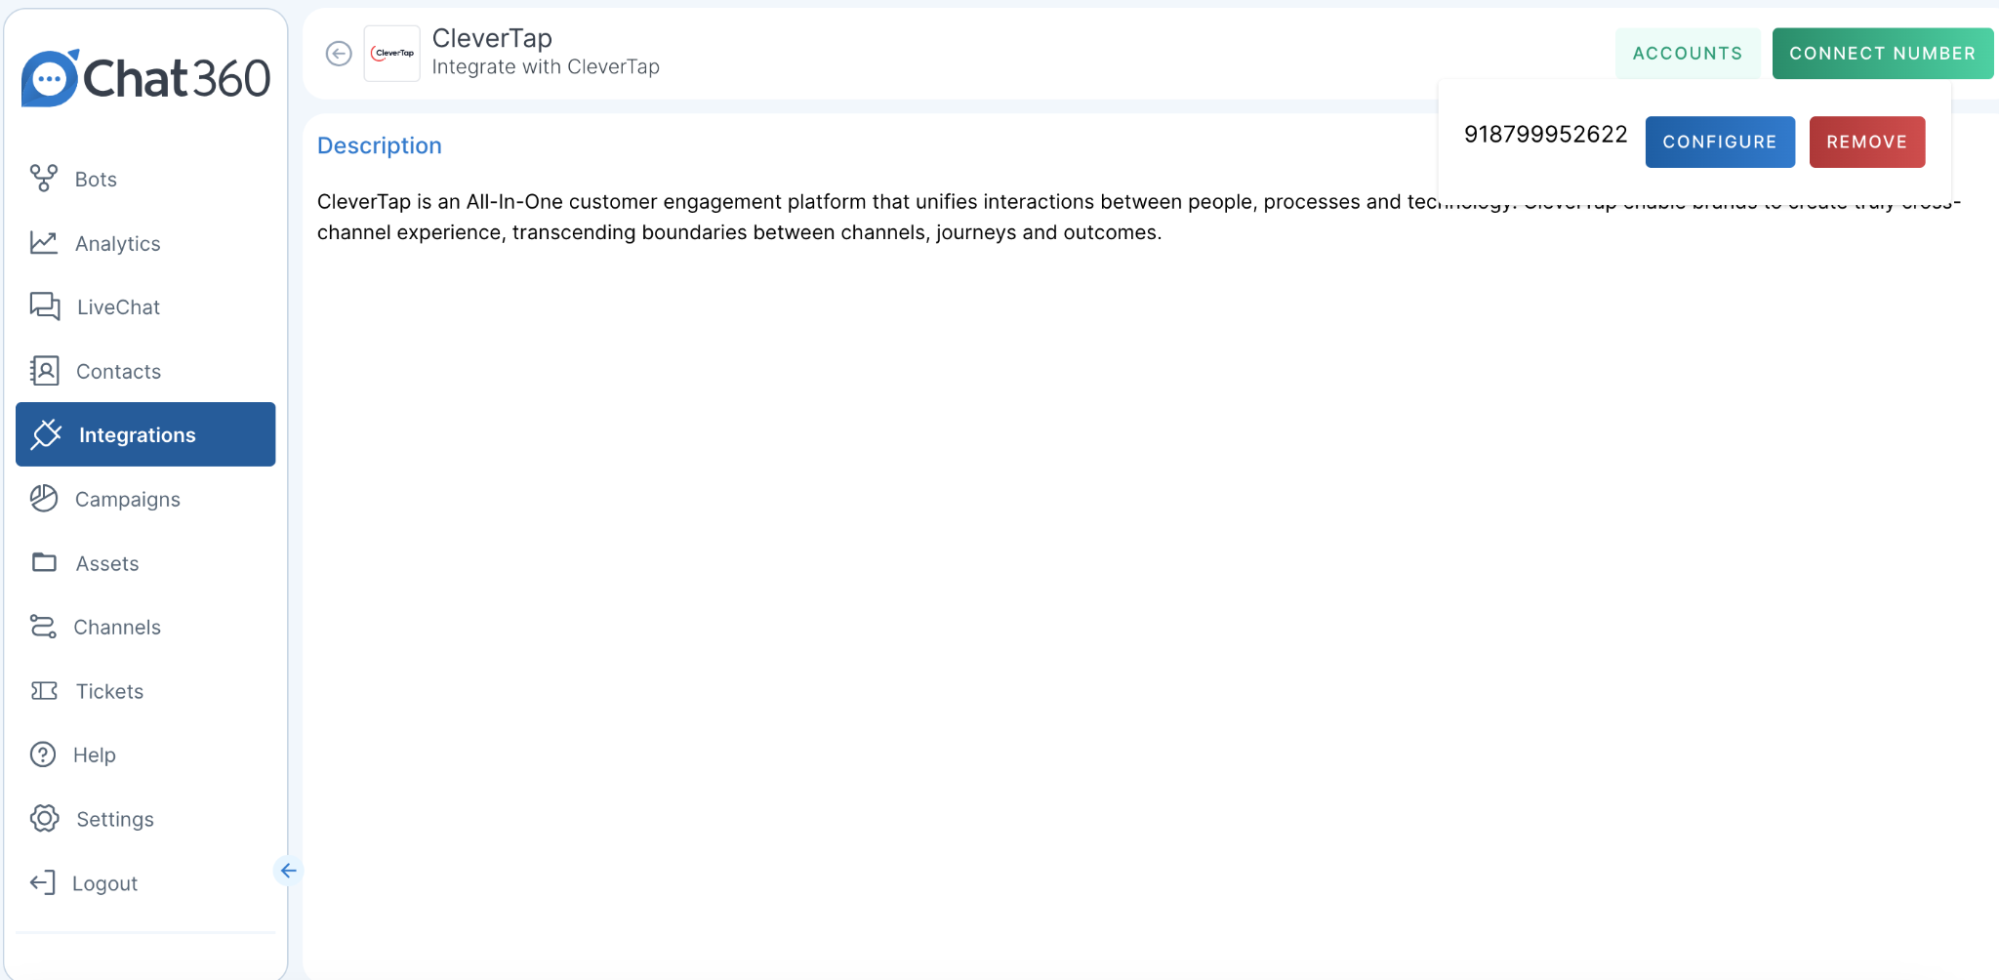
- Integrations → CleverTap: In Chat360, navigate to Integrations and select CleverTap.
- Click View Details and then Add Account to register your CleverTap credentials.
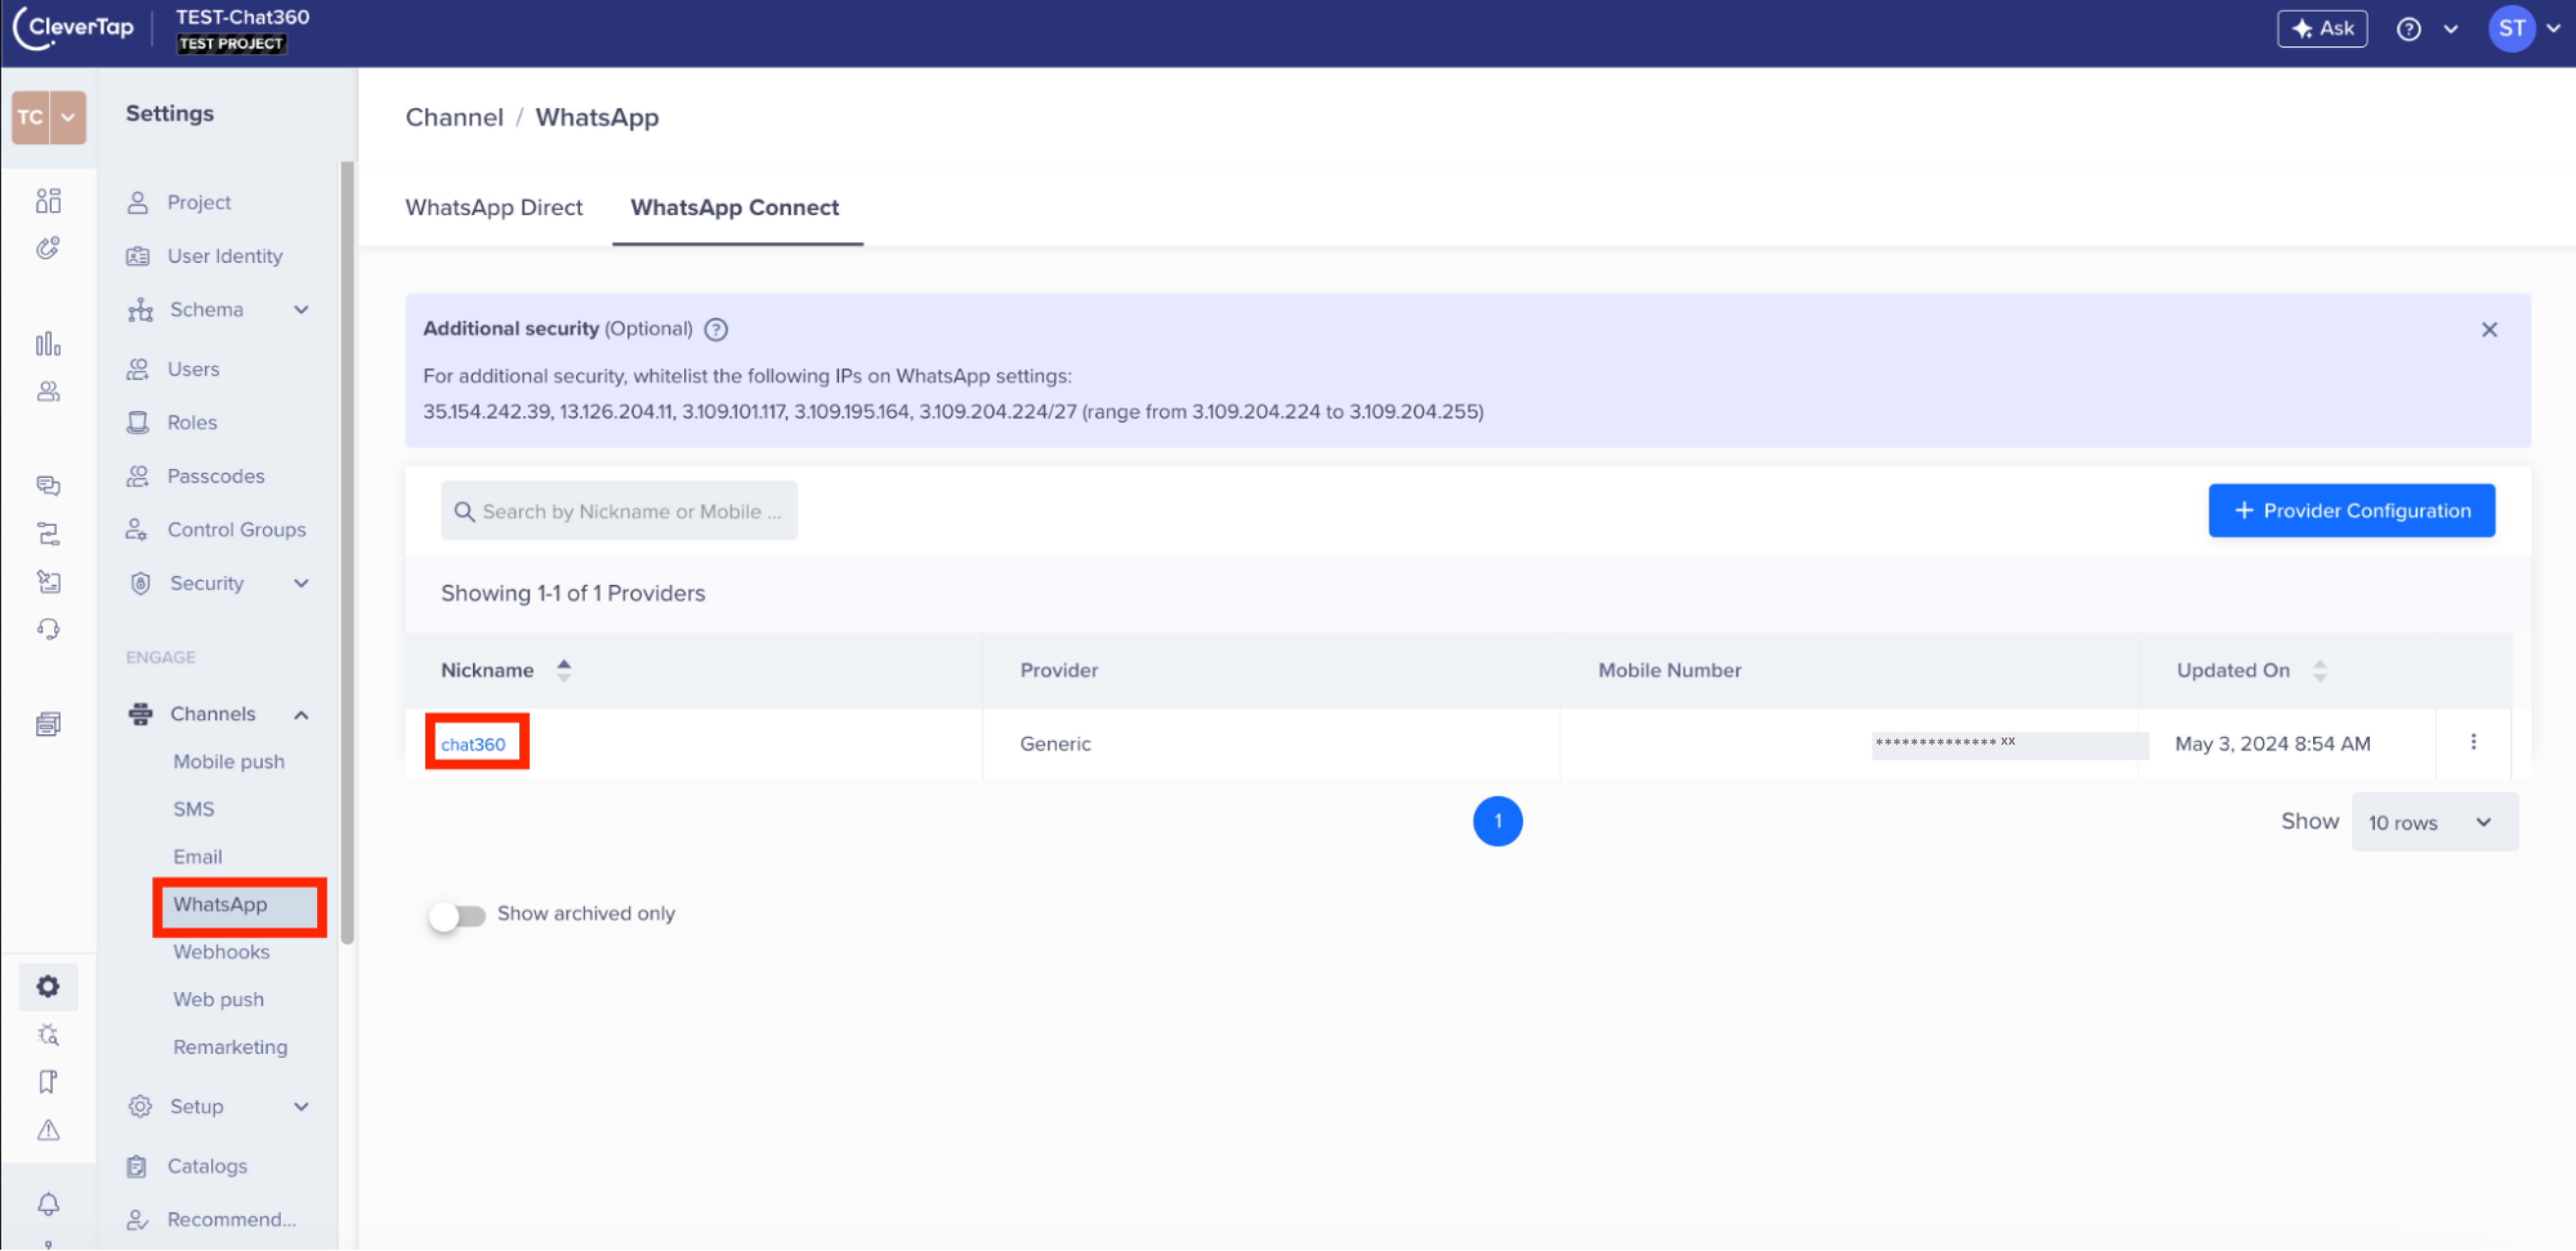
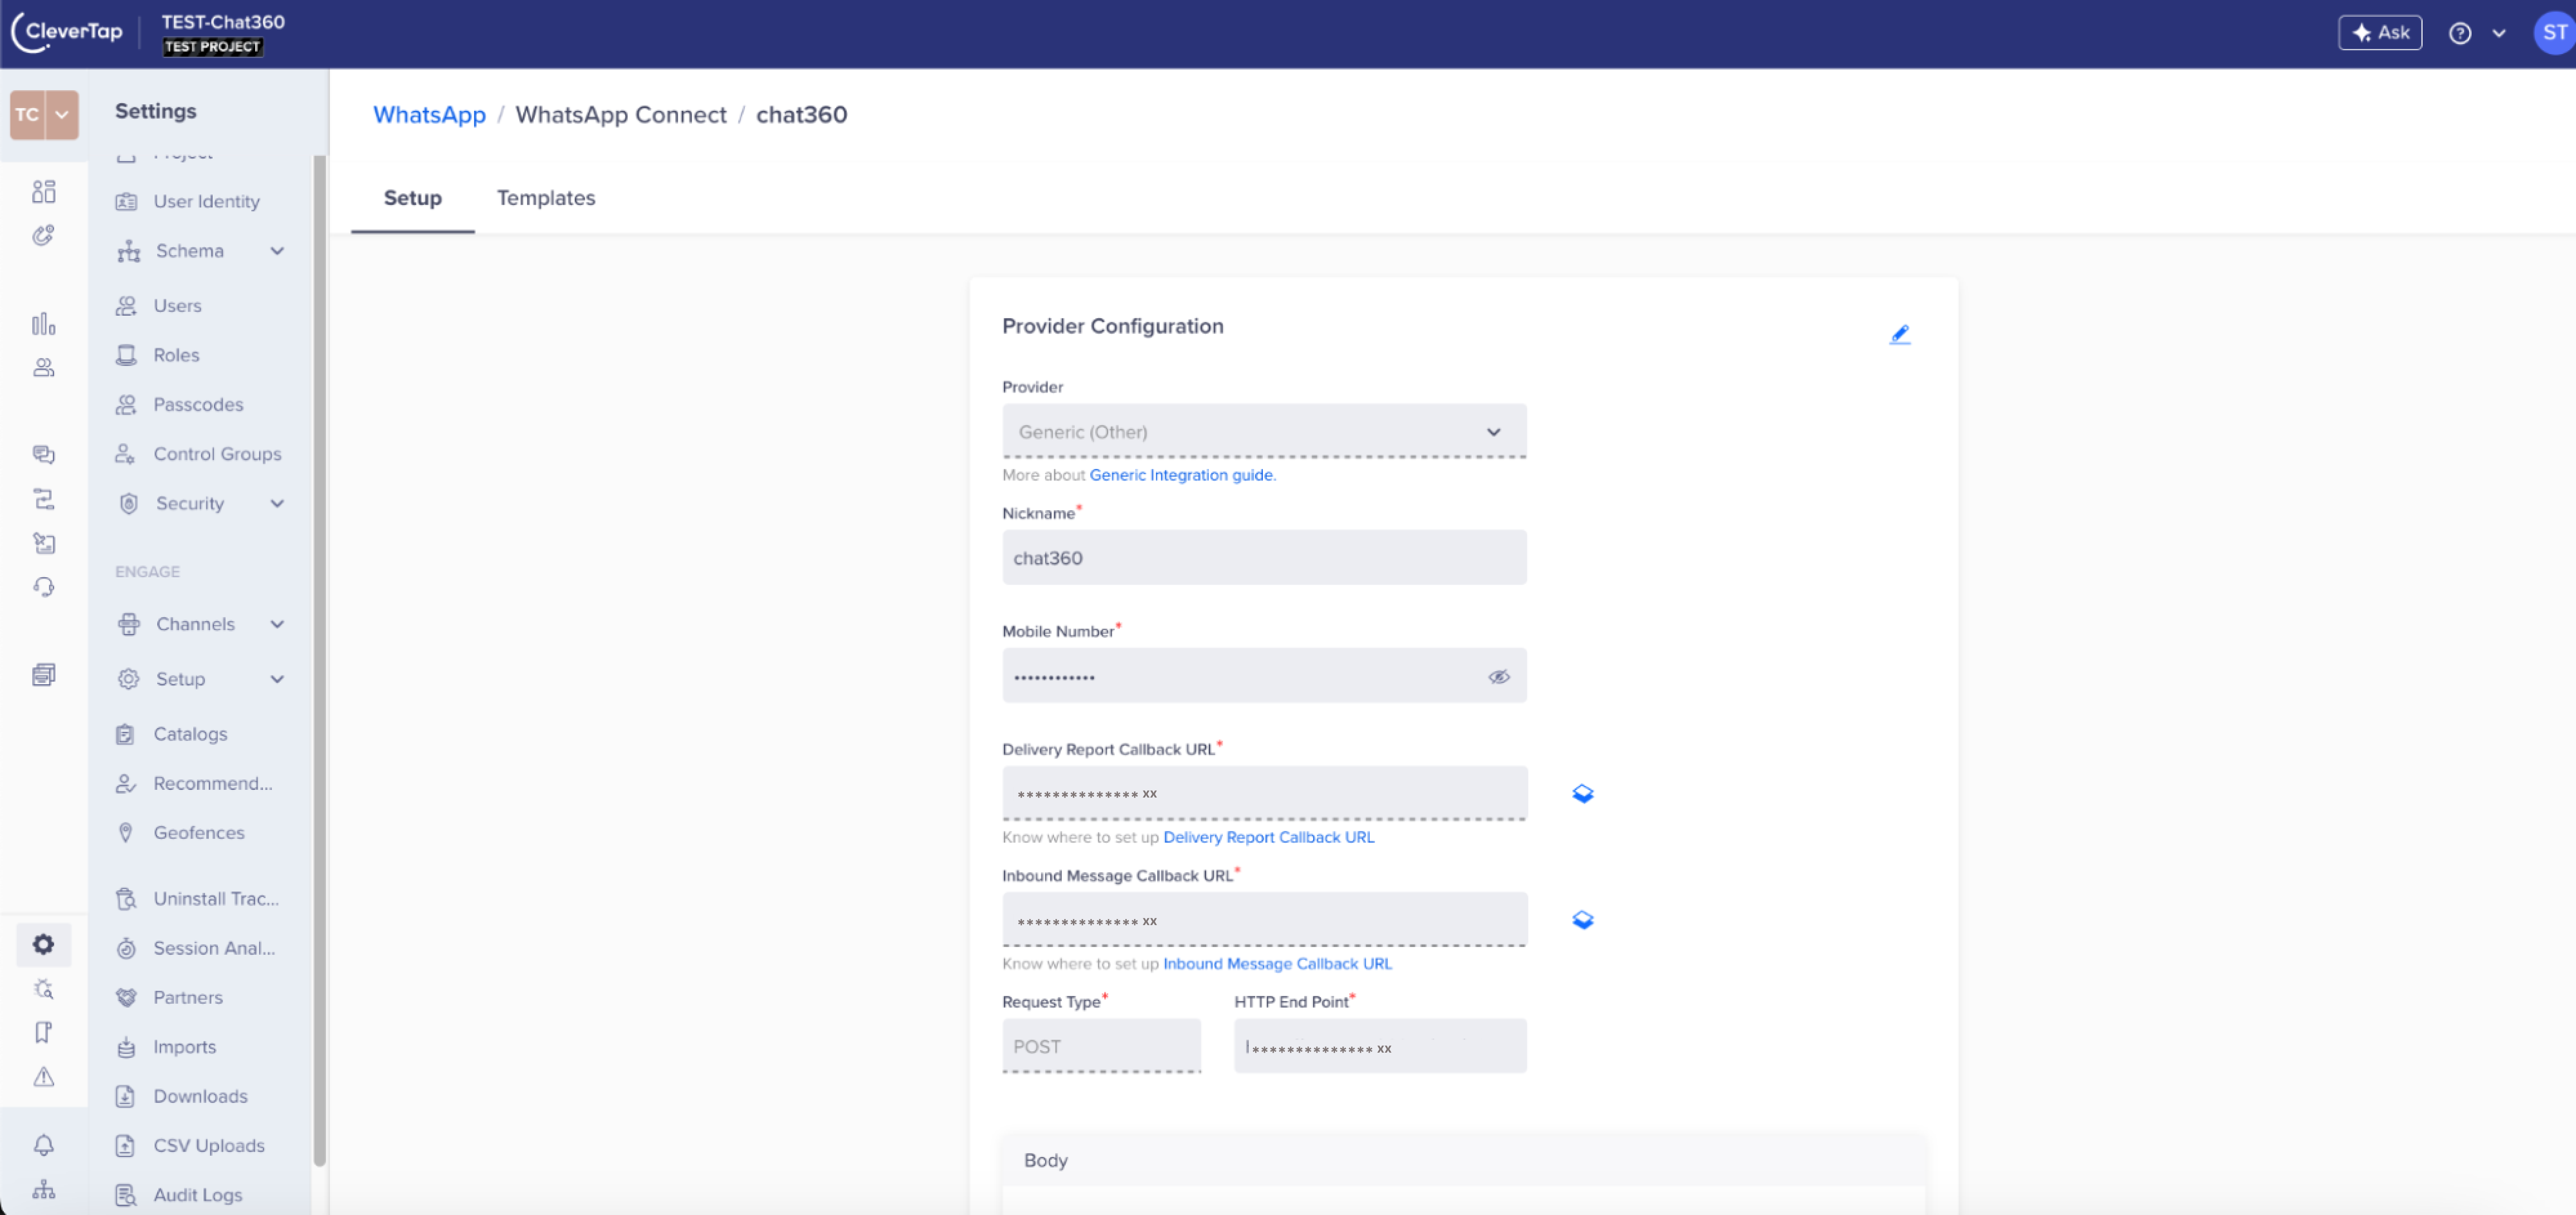
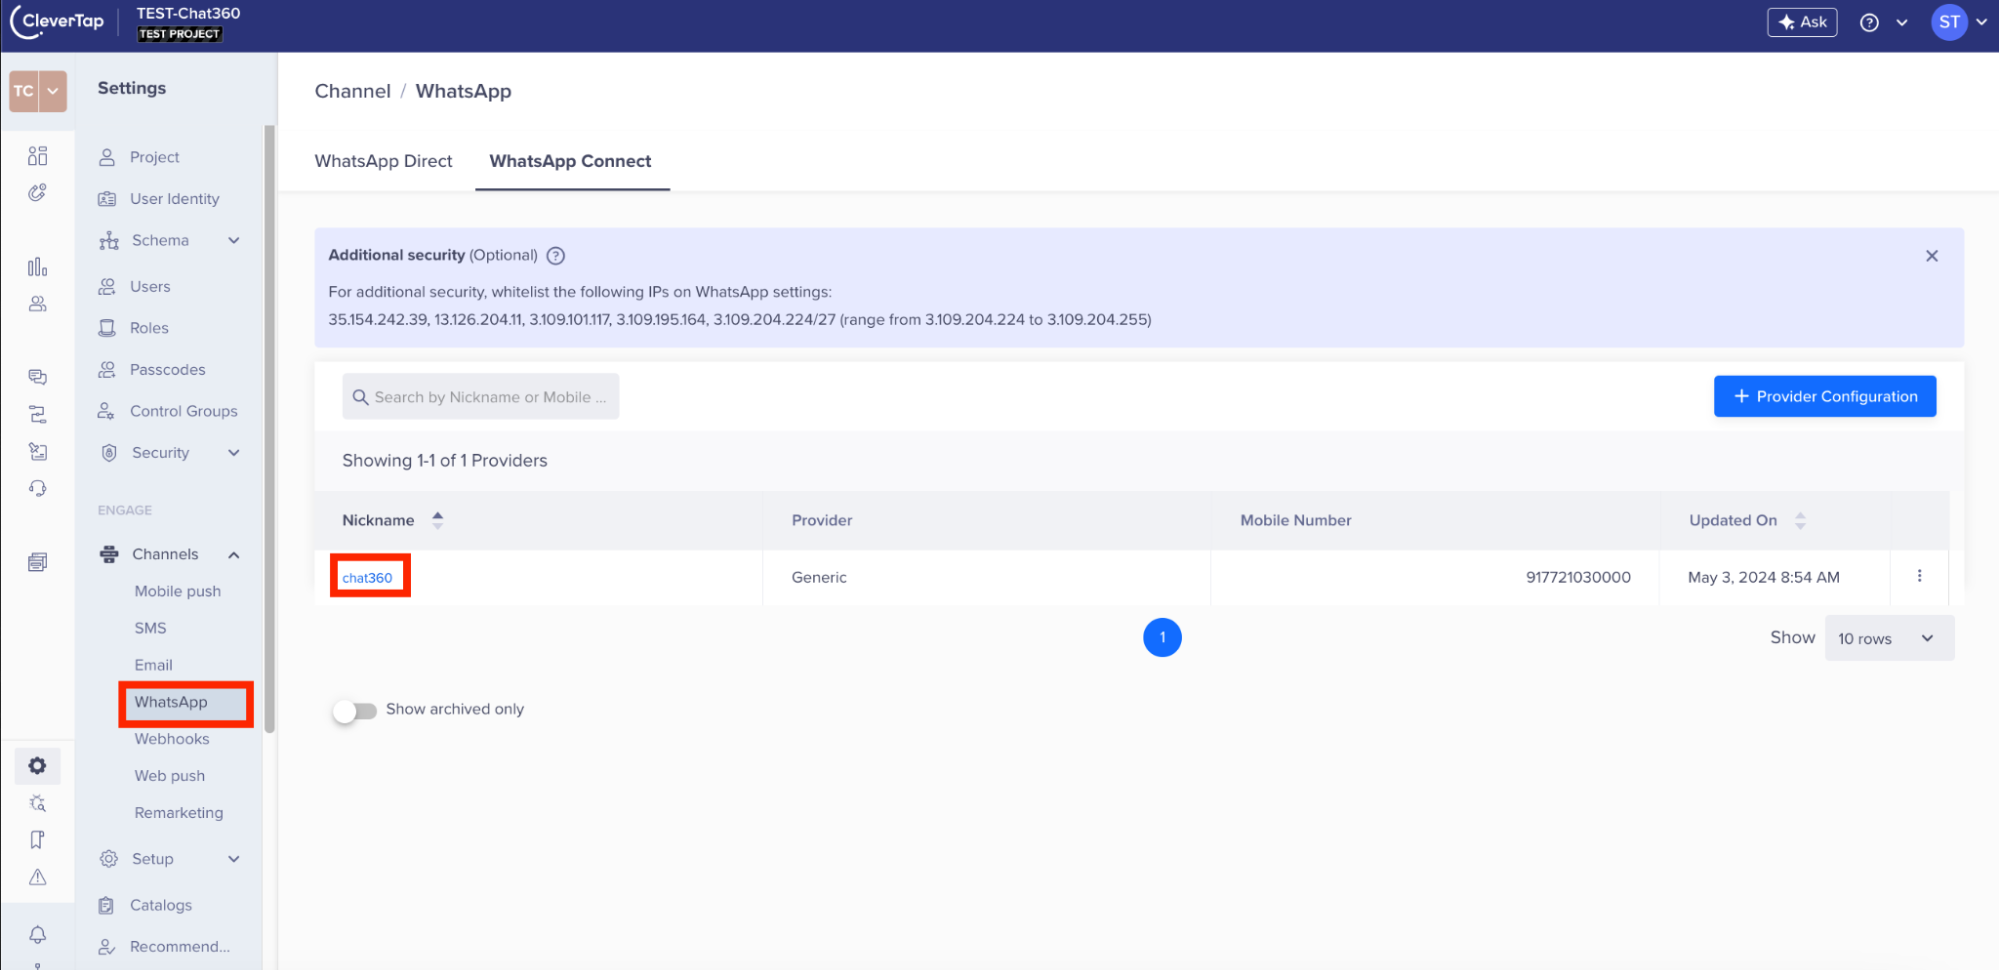
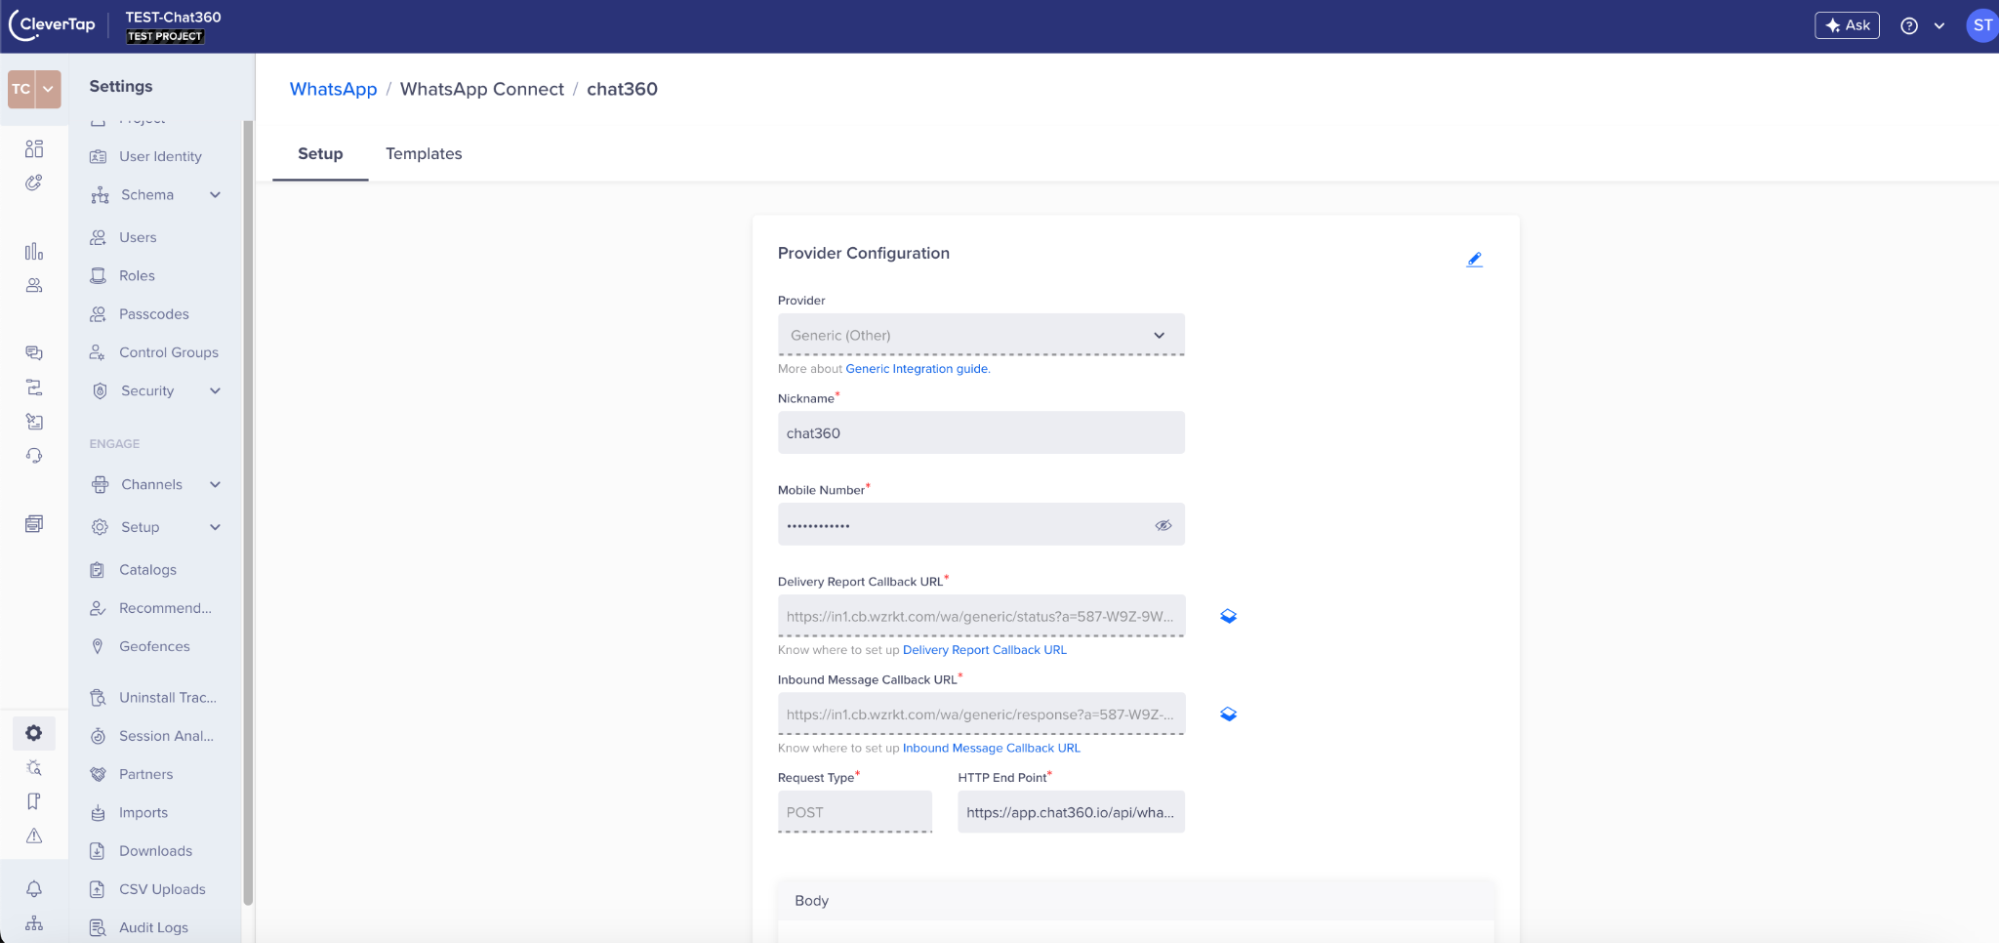
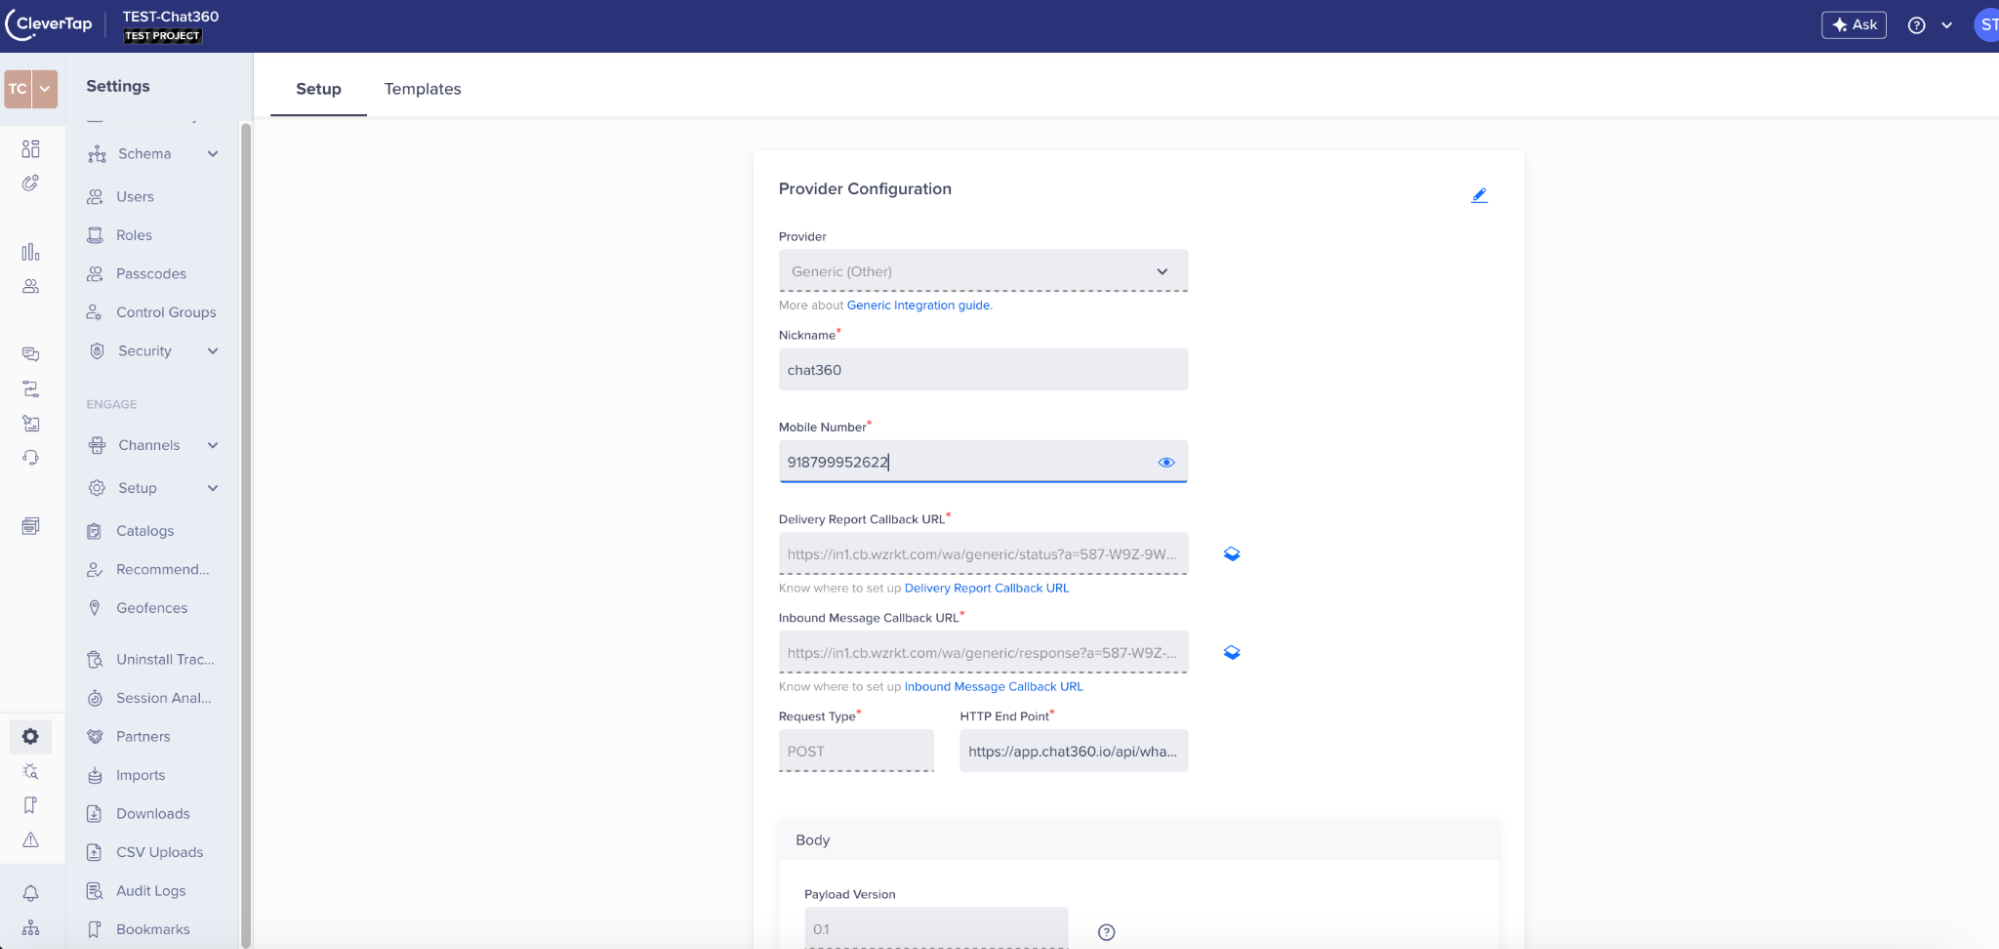
- CleverTap Dashboard: Log into CleverTap and go to Settings → Channels → WhatsApp
- Click the three-dot Edit icon next to WhatsApp Connect to open the Setup page.
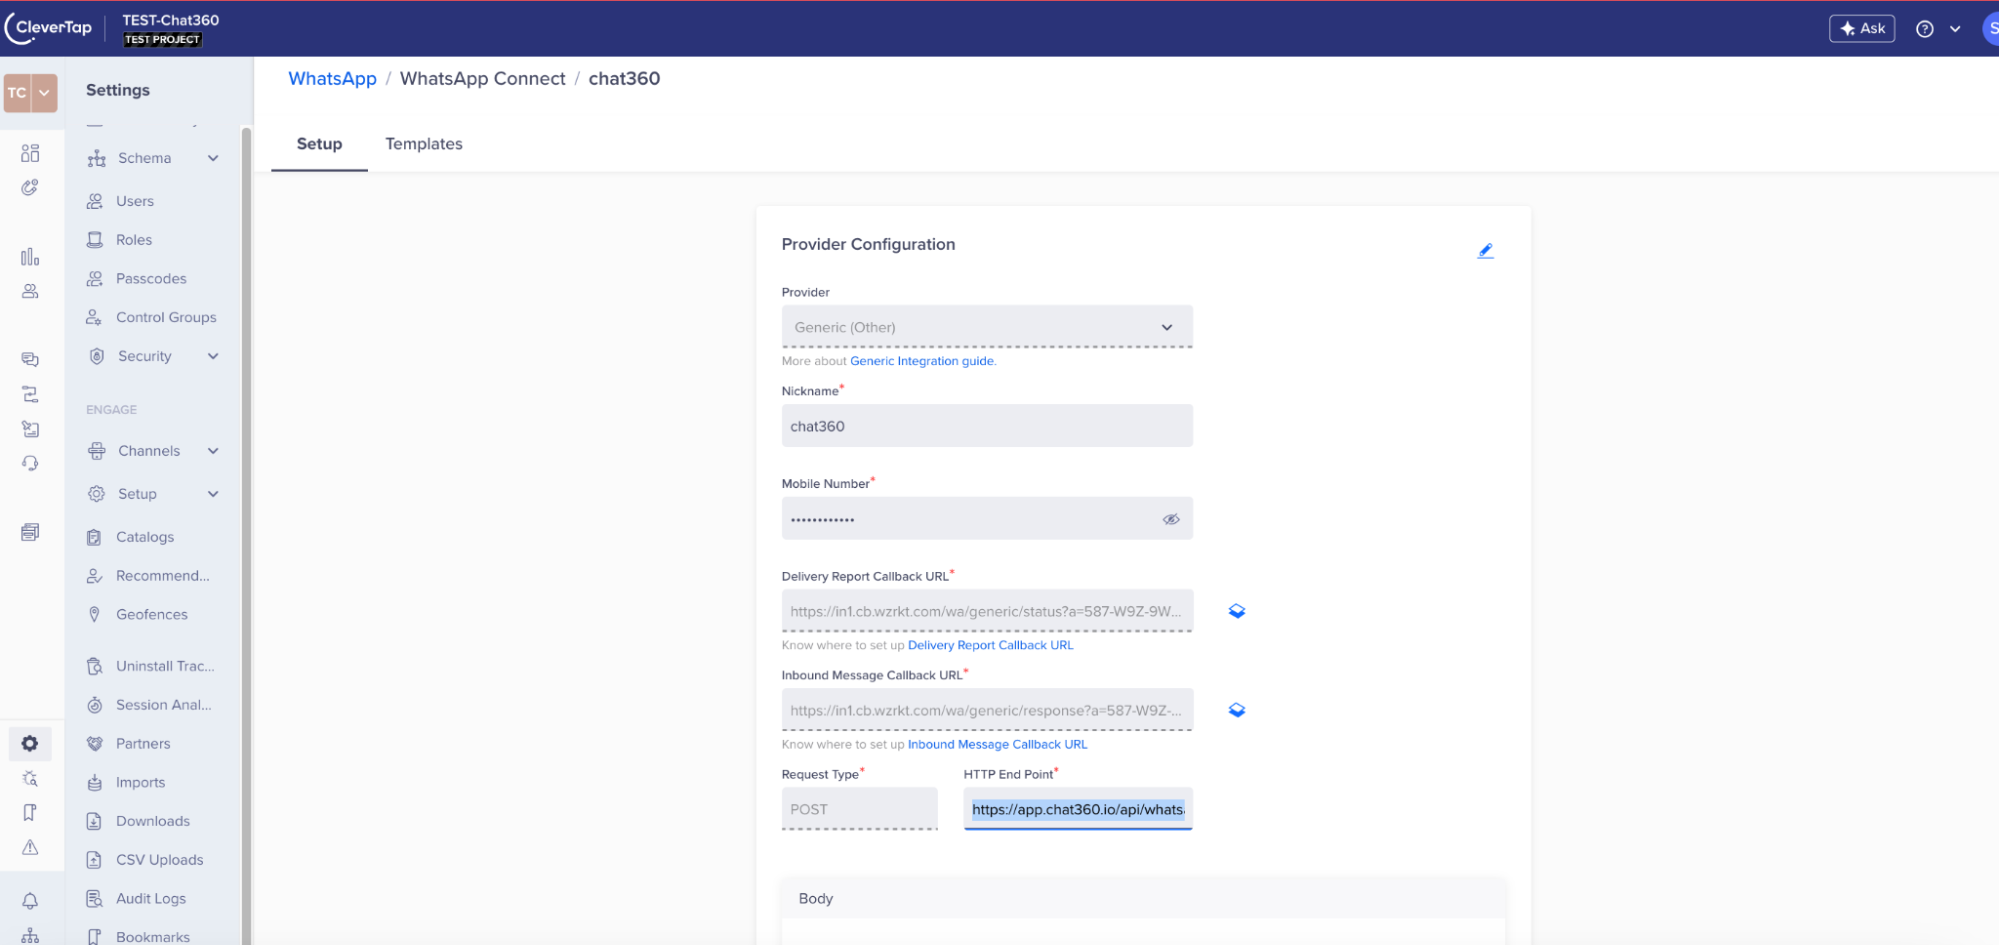
- Copy the Configuration URL and any required API endpoints listed.
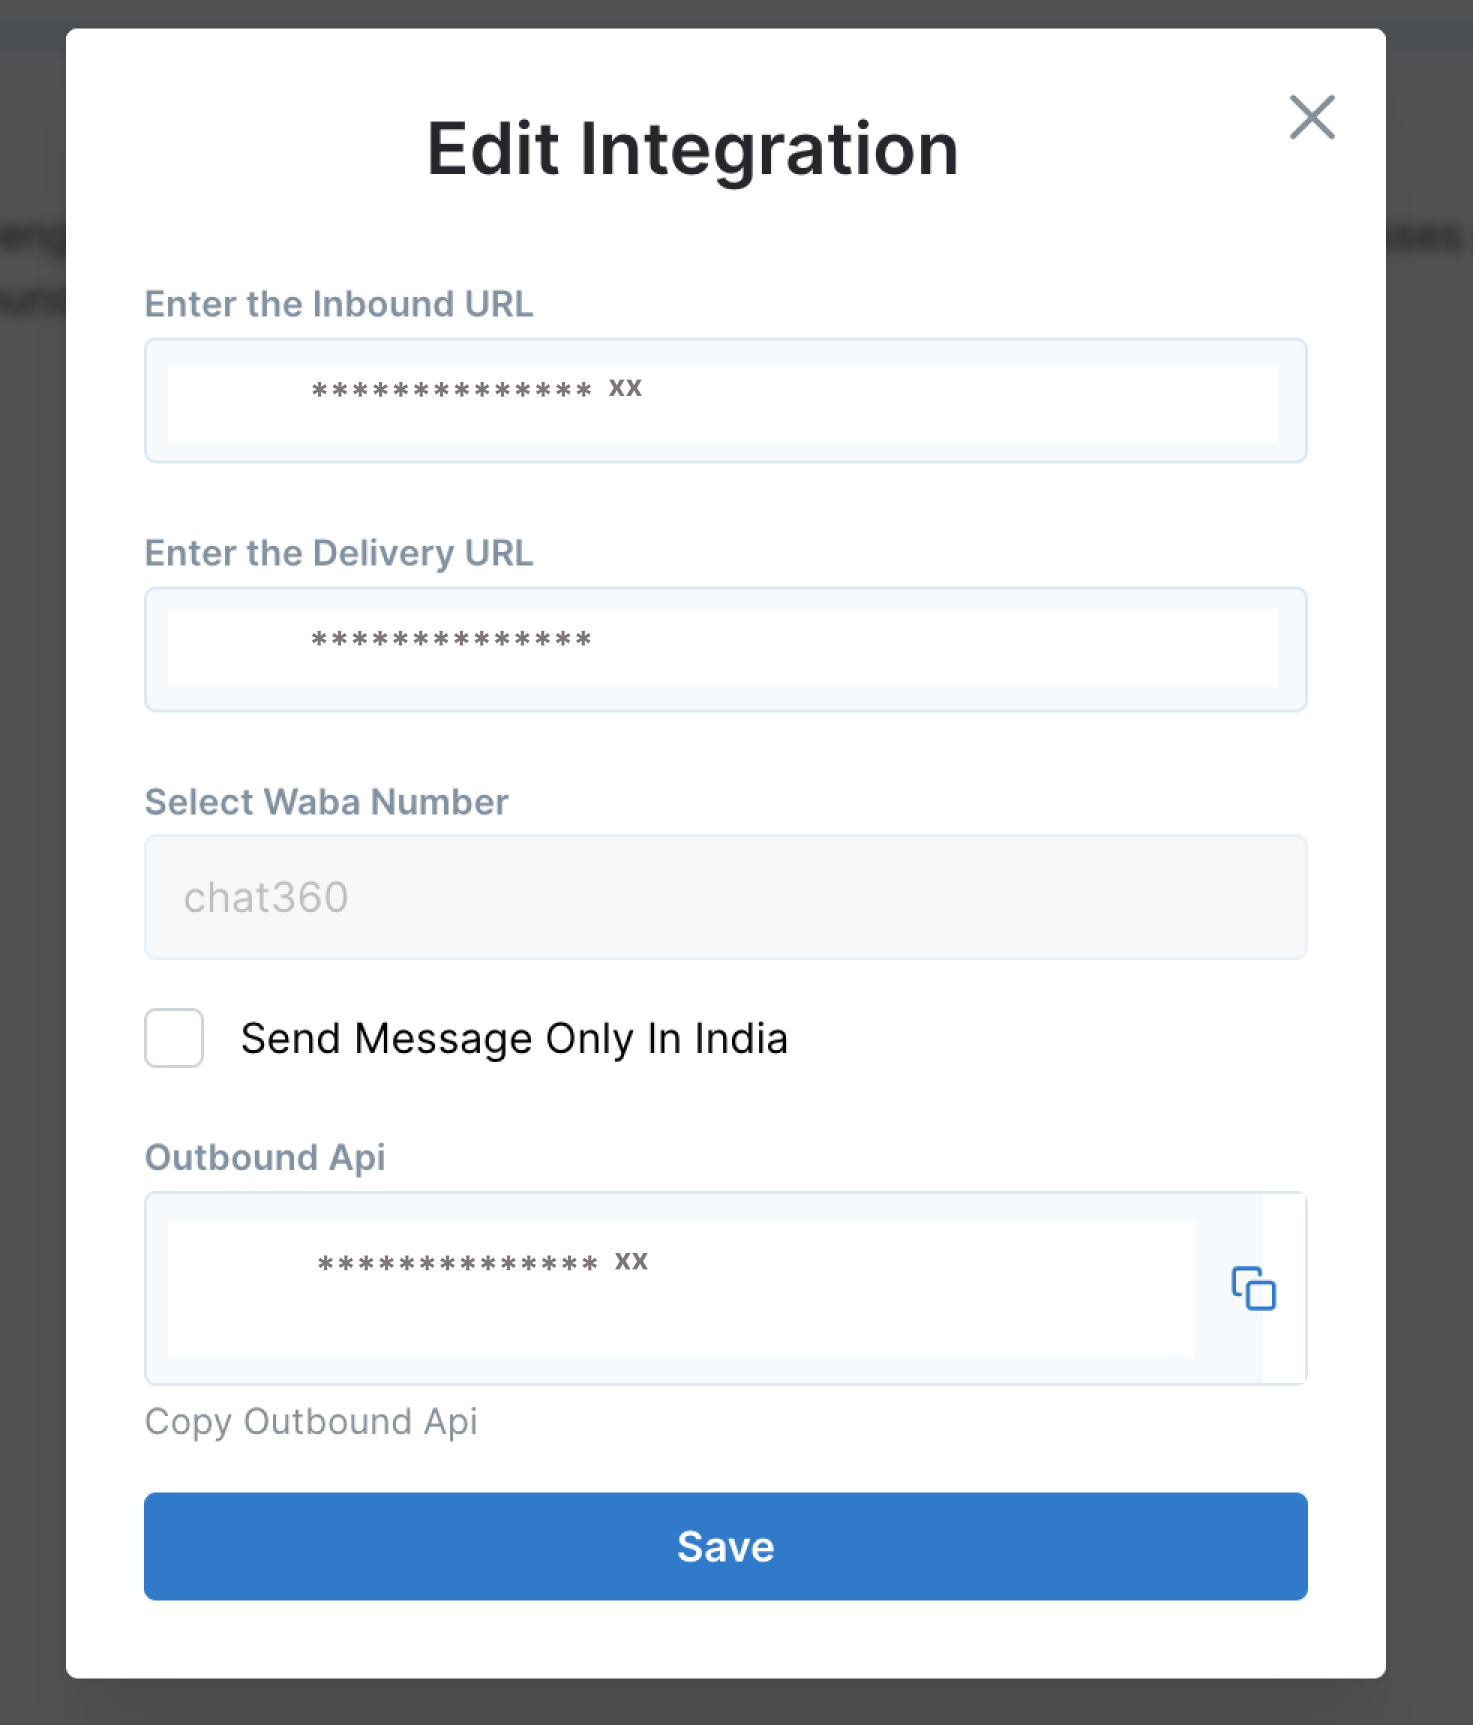
- Return to Chat360’s CleverTap integration screen.
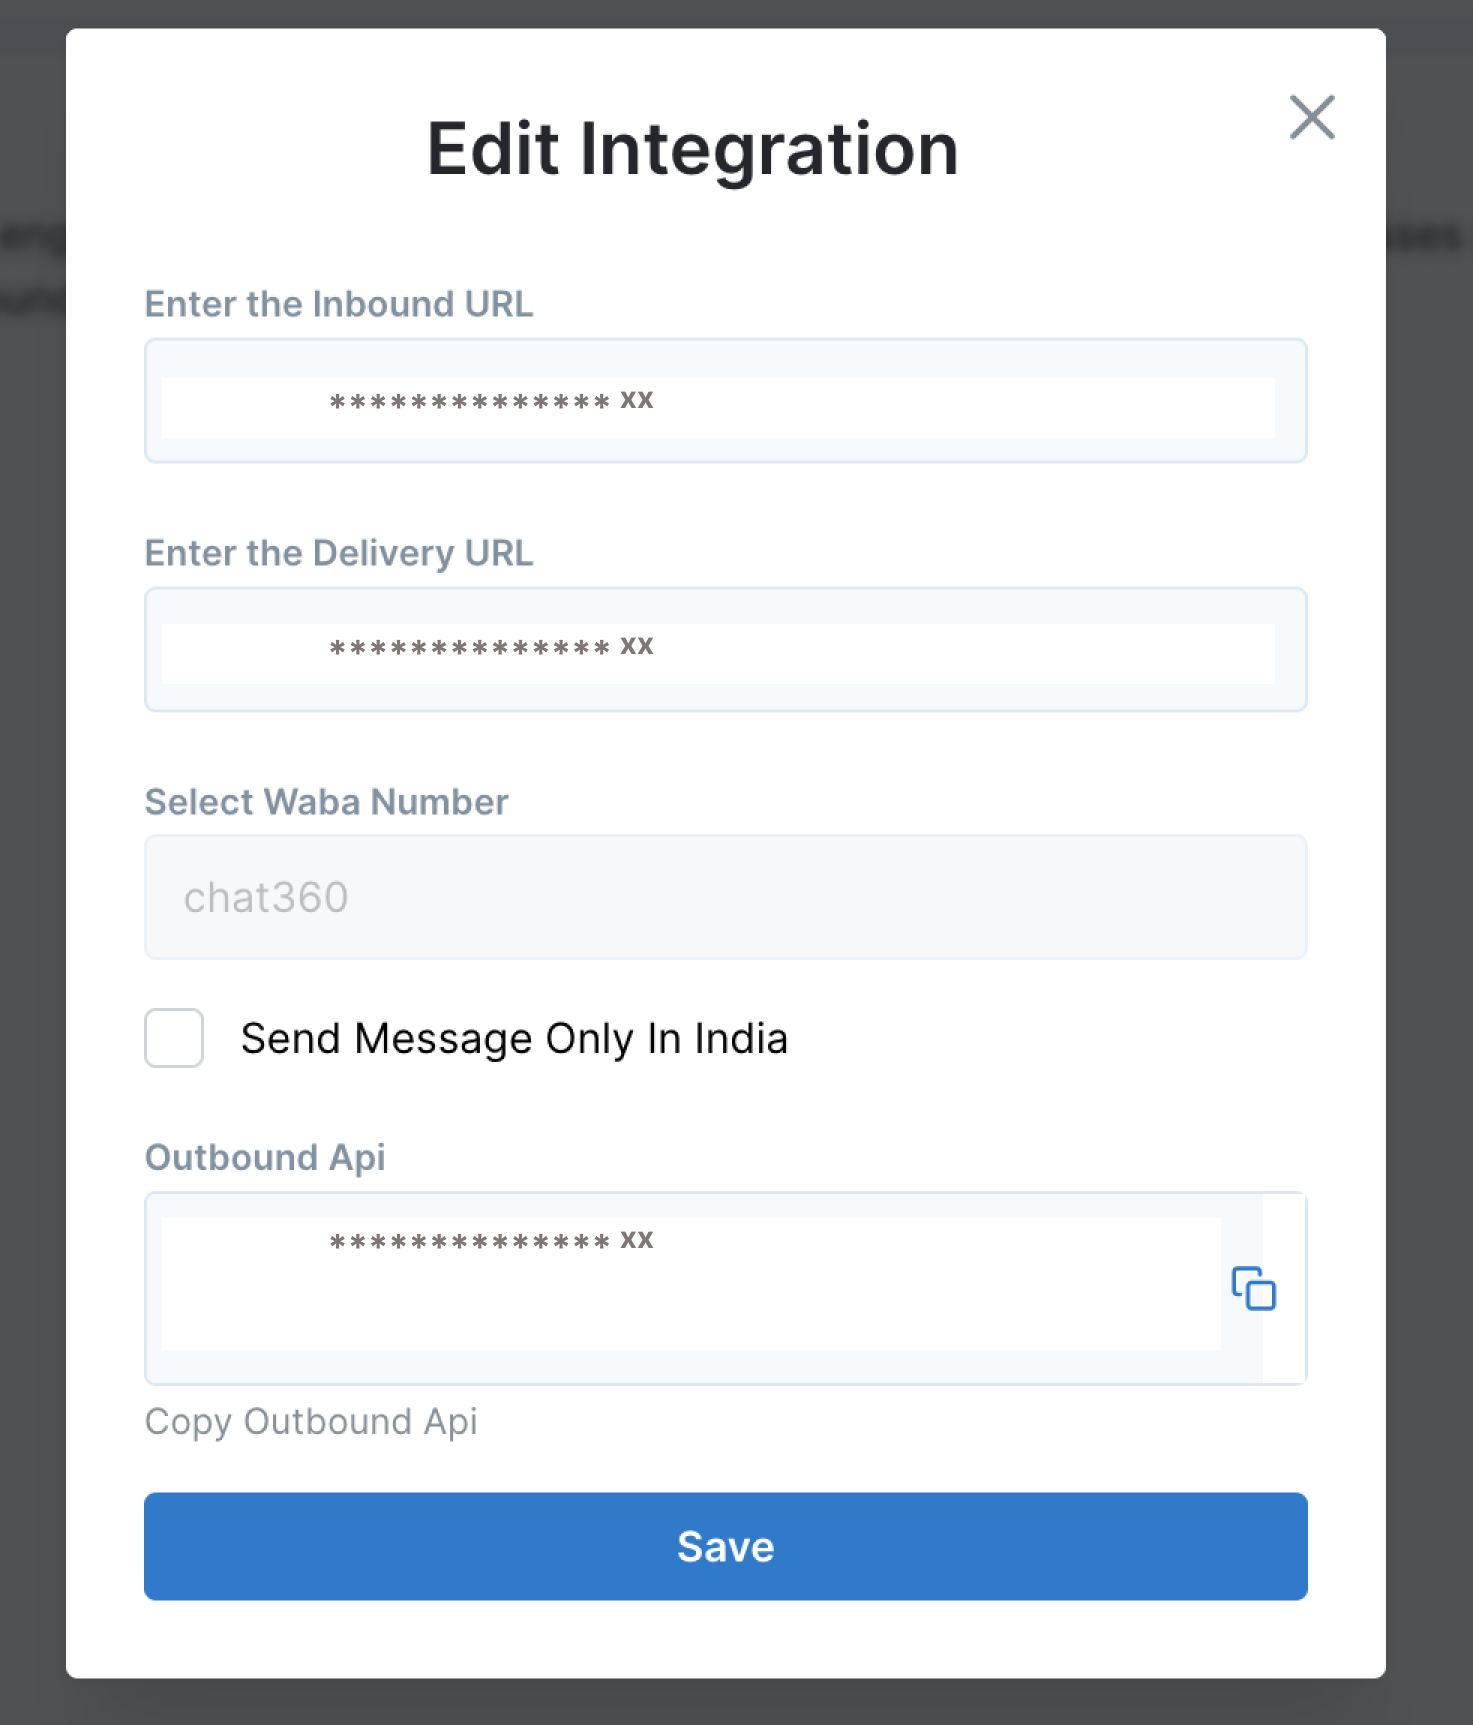
- Paste the CleverTap Configuration URL and API keys into the corresponding fields.
- Click Save, then Test Connection to verify integration success.
- Ensure the test succeeds and that Chat360 displays a “Connected” status for CleverTap.
- You’re now ready to sync segments and trigger campaigns.
-
1. Connect CleverTap Account
2. Retrieve CleverTap Configuration URL
3. Apply Configuration in Chat360
4. Validate & Finalize
-
Key Benefits
- Unified Segments: Automatically import CleverTap customer segments into Chat360 for targeted messaging.
- Event-Driven Campaigns: Trigger WhatsApp workflows in Chat360 when users meet CleverTap behavioral criteria.
- Real-Time Sync: Keep audiences up-to-date without manual exports—new and updated segments flow instantly.
- Integrated Analytics: Combine CleverTap engagement insights with Chat360 delivery and conversion metrics for end-to-end reporting.
-
Step 2: Uploading CSV Data into CleverTap
-
Overview
-
Configuration Steps:
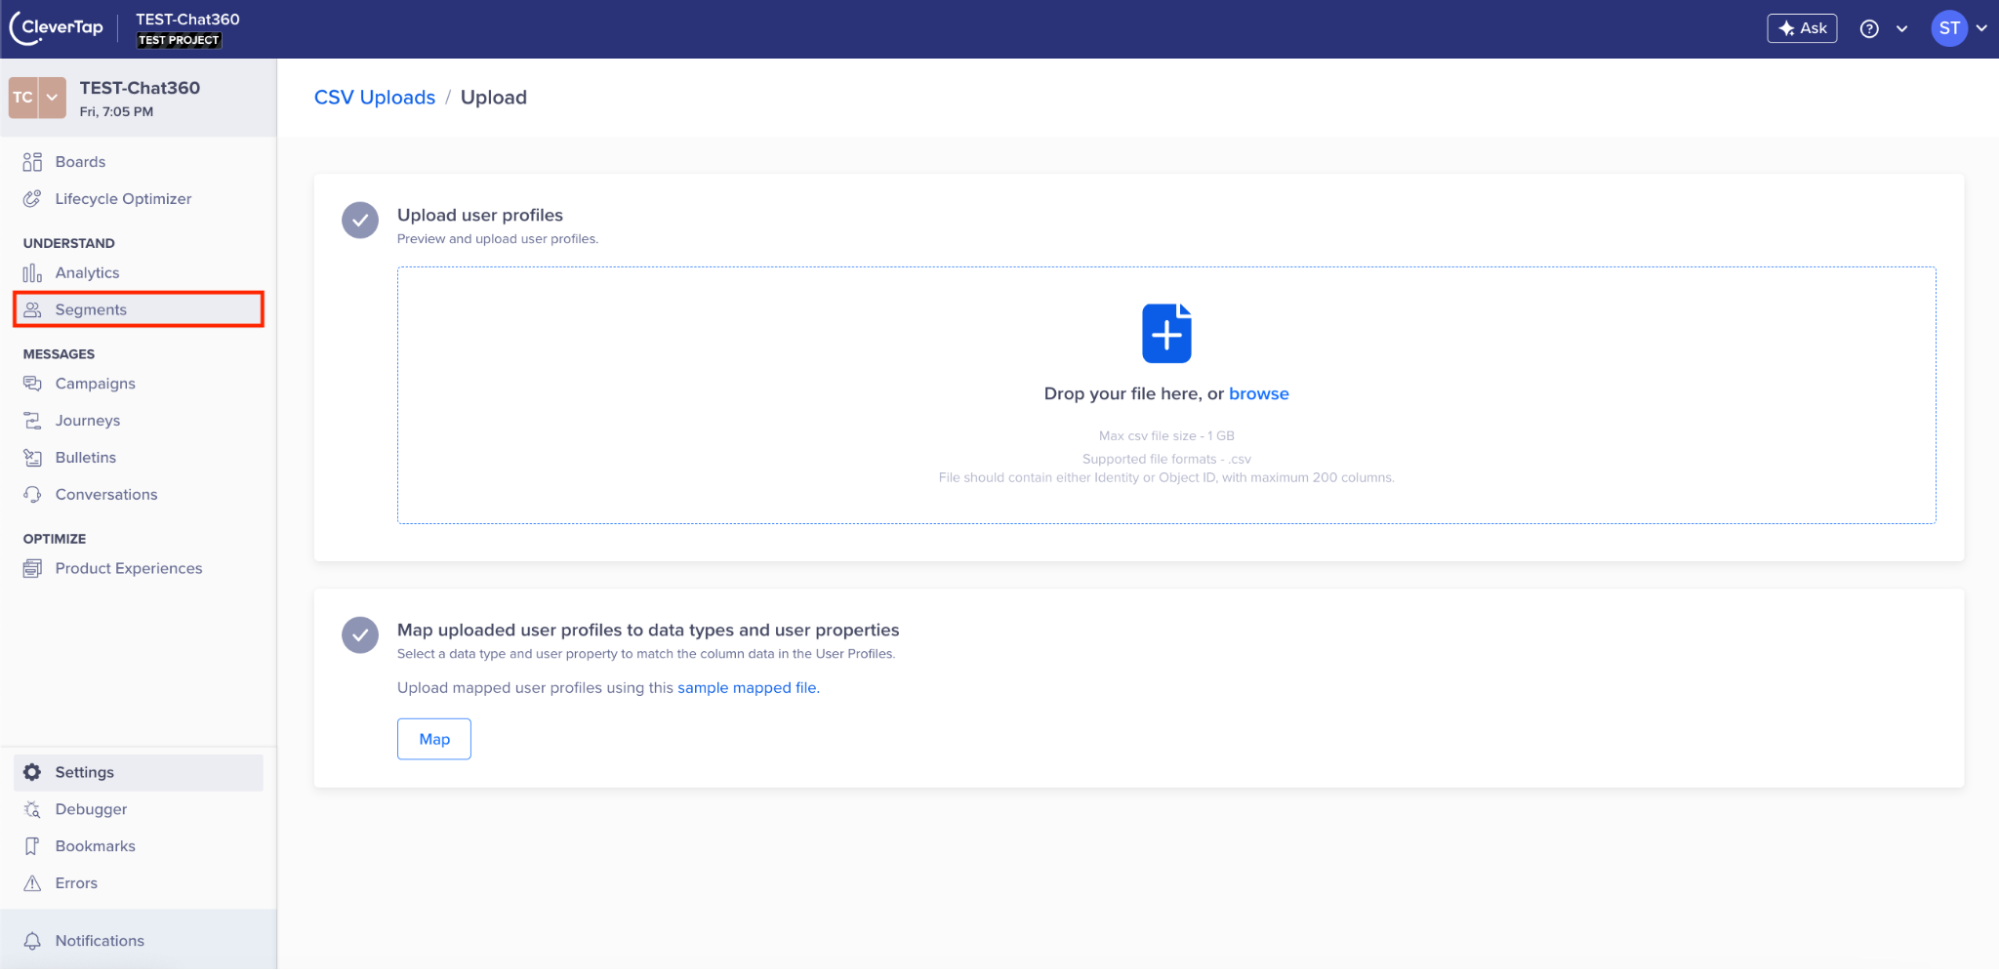
1. Access CSV Uploads
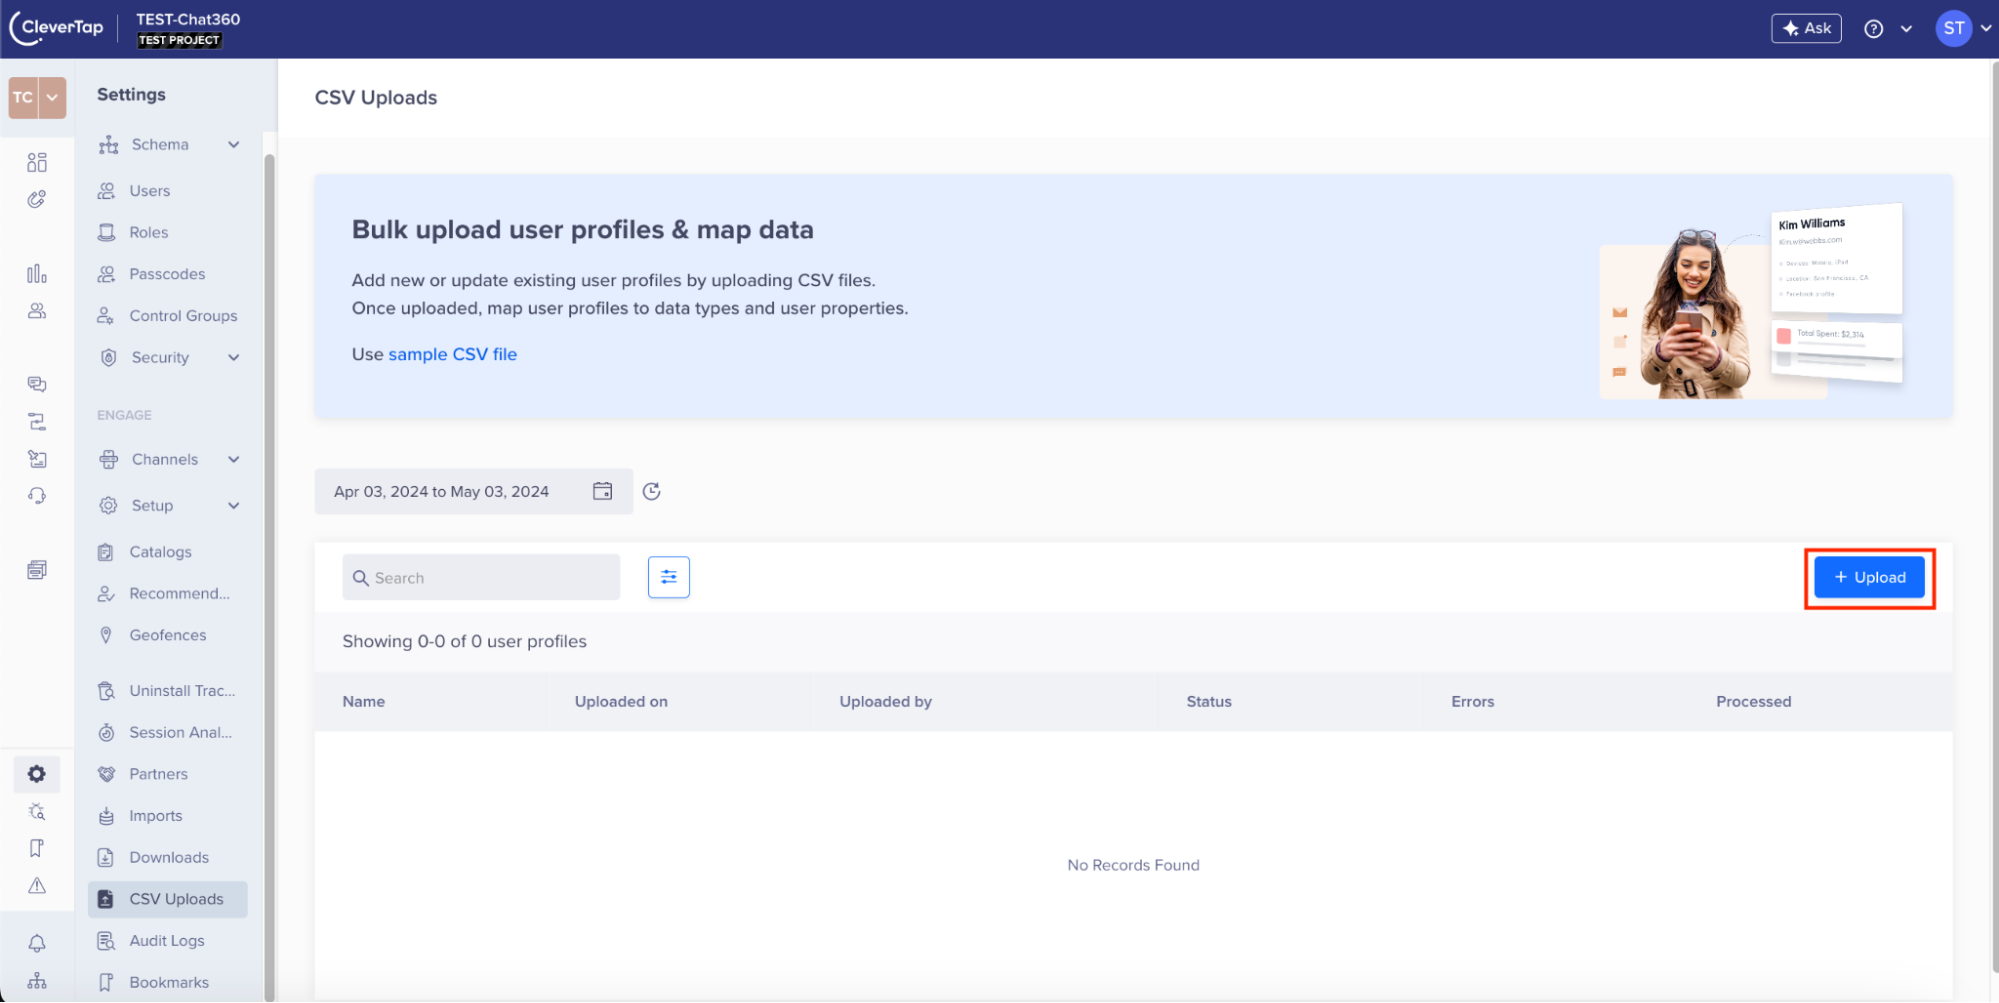
- Engage → CSV Uploads: In your CleverTap dashboard, navigate to Engage, then select CSV Uploads.
- Click the Upload button.
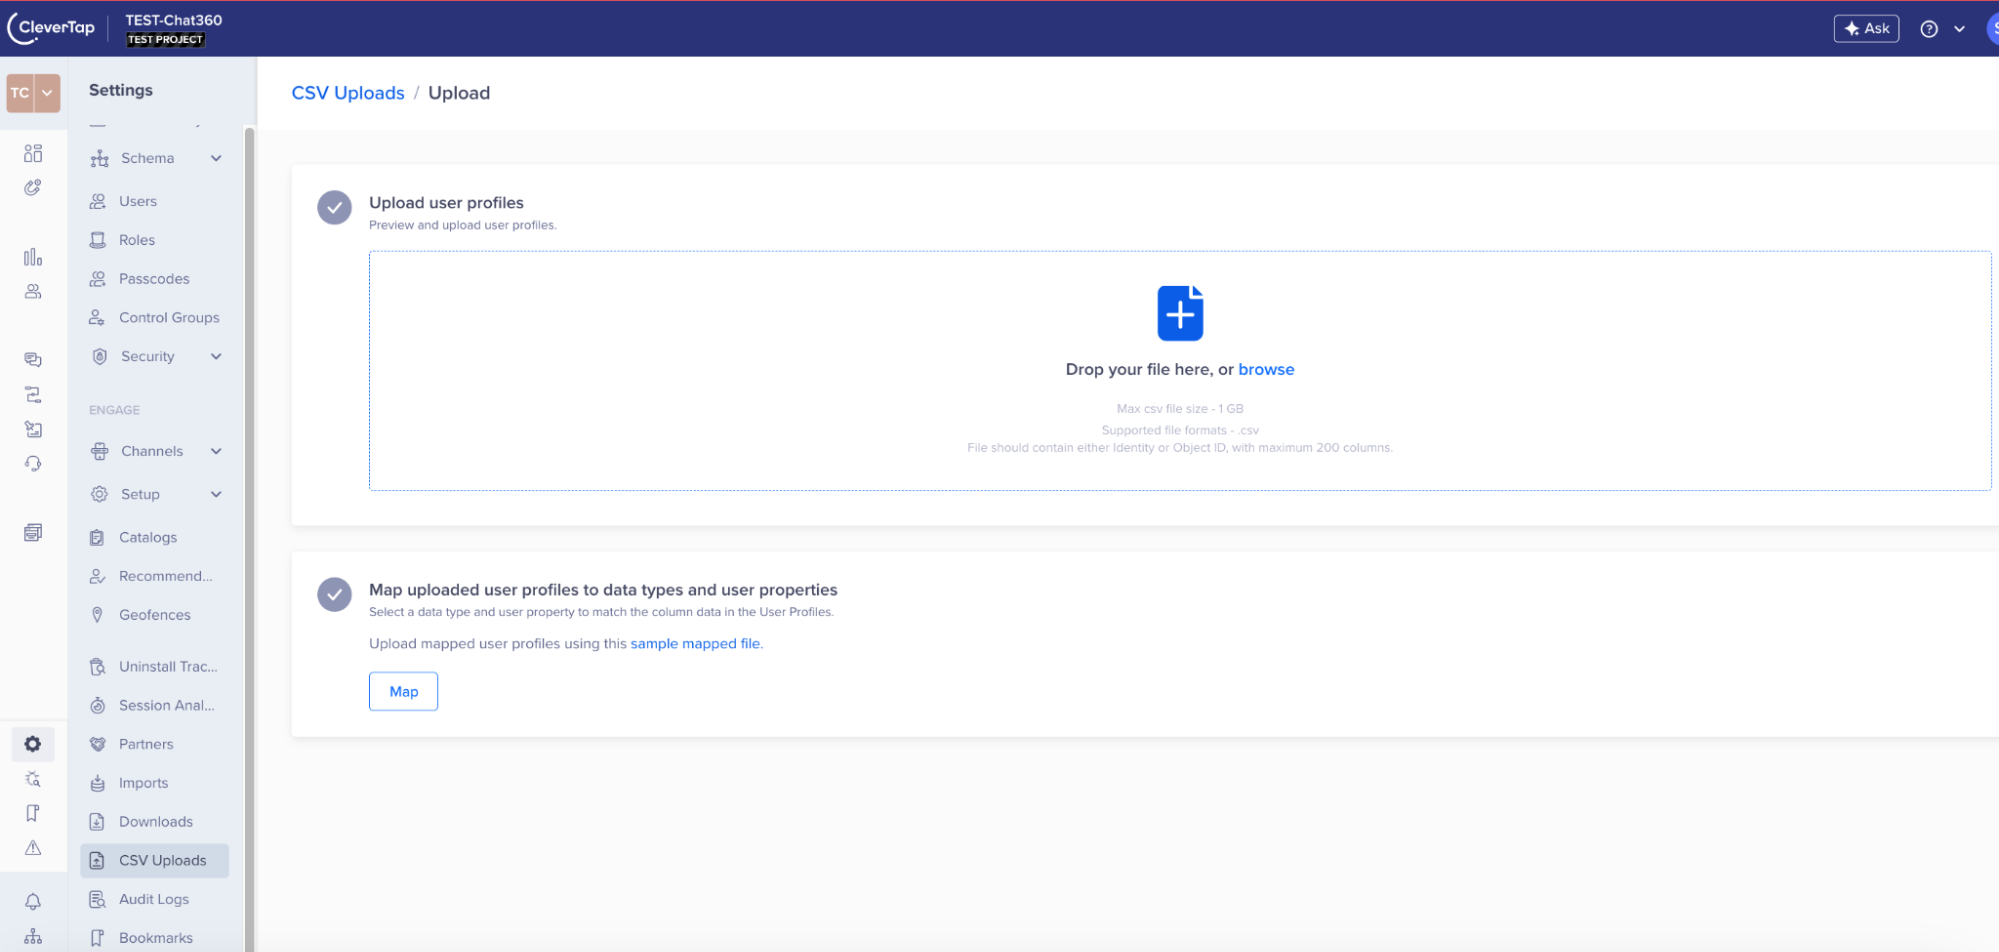
- In the file dialog, choose your CSV (formatted per your sample template).
- Confirm the upload and wait for the processing indicator to complete.
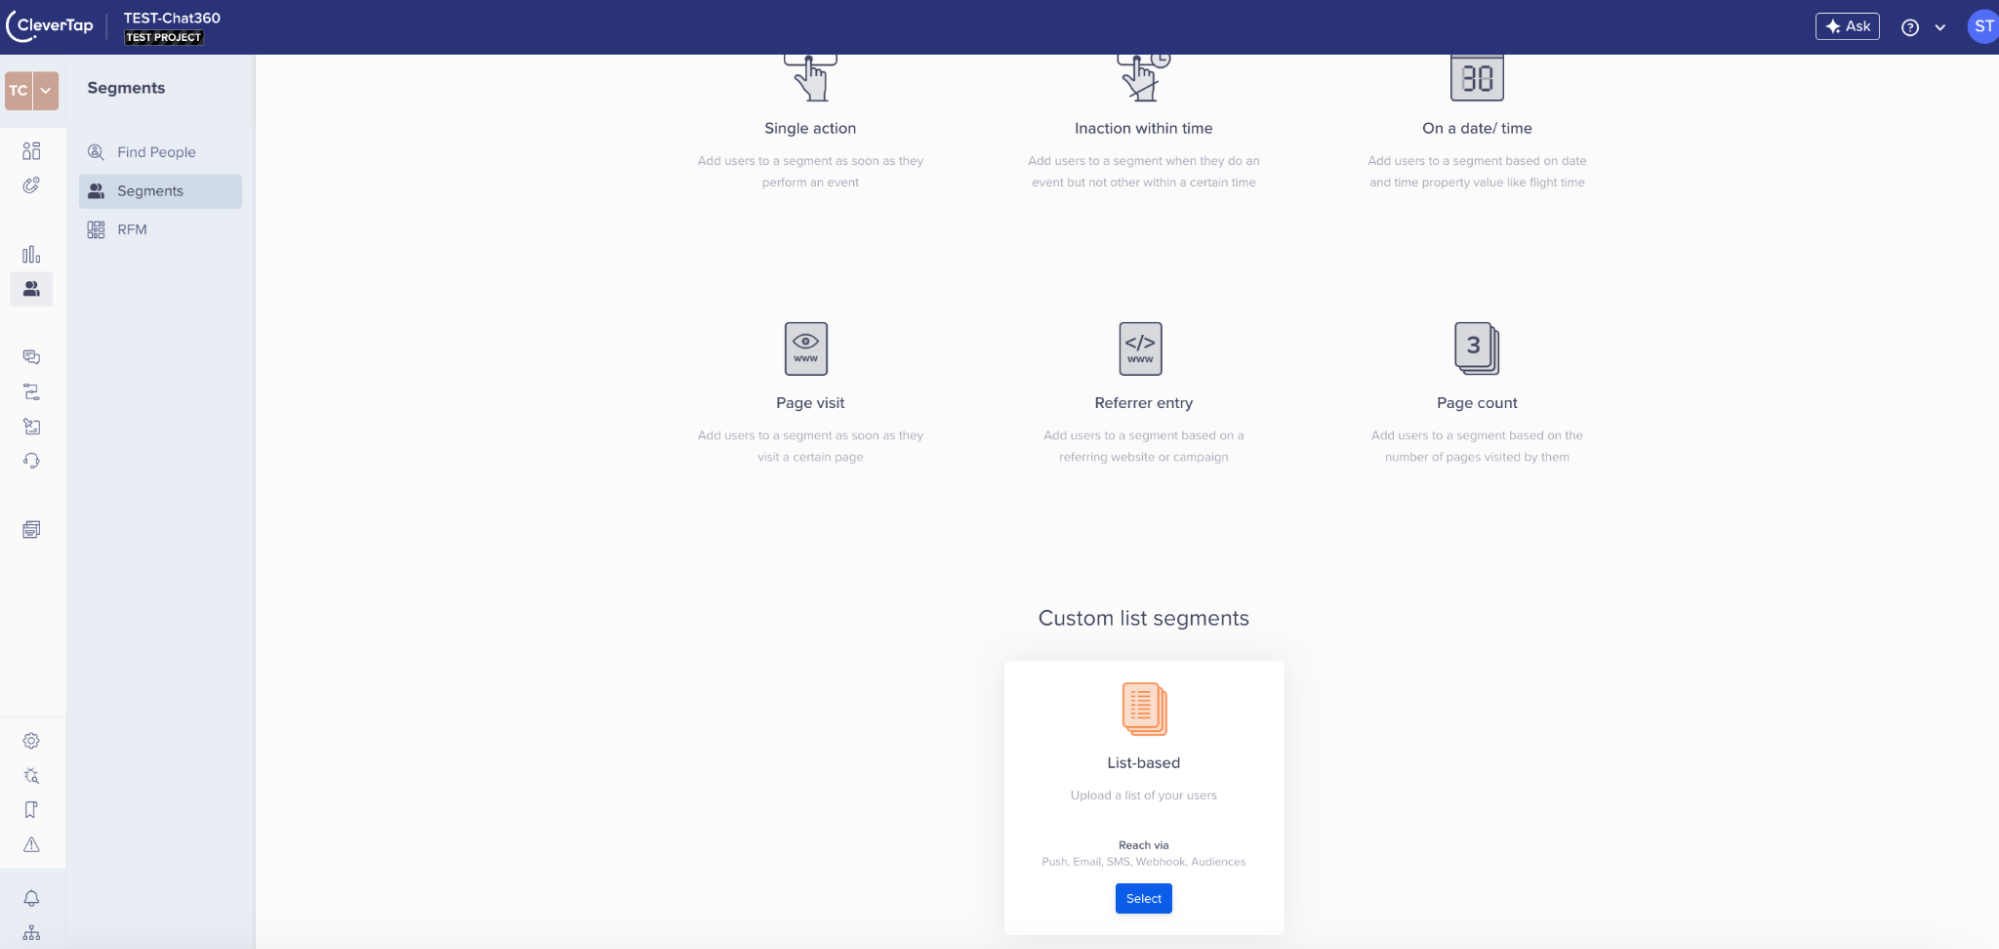
- Engage → Segment: After upload, go to Segment under Engage.
- Click Create Segment (or Update Segment) to begin mapping your new data.
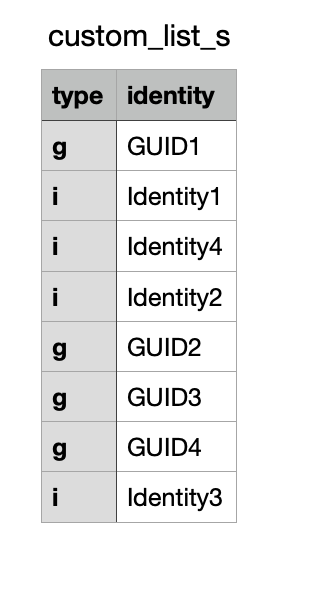
- Choose List Based under Custom List Segments.
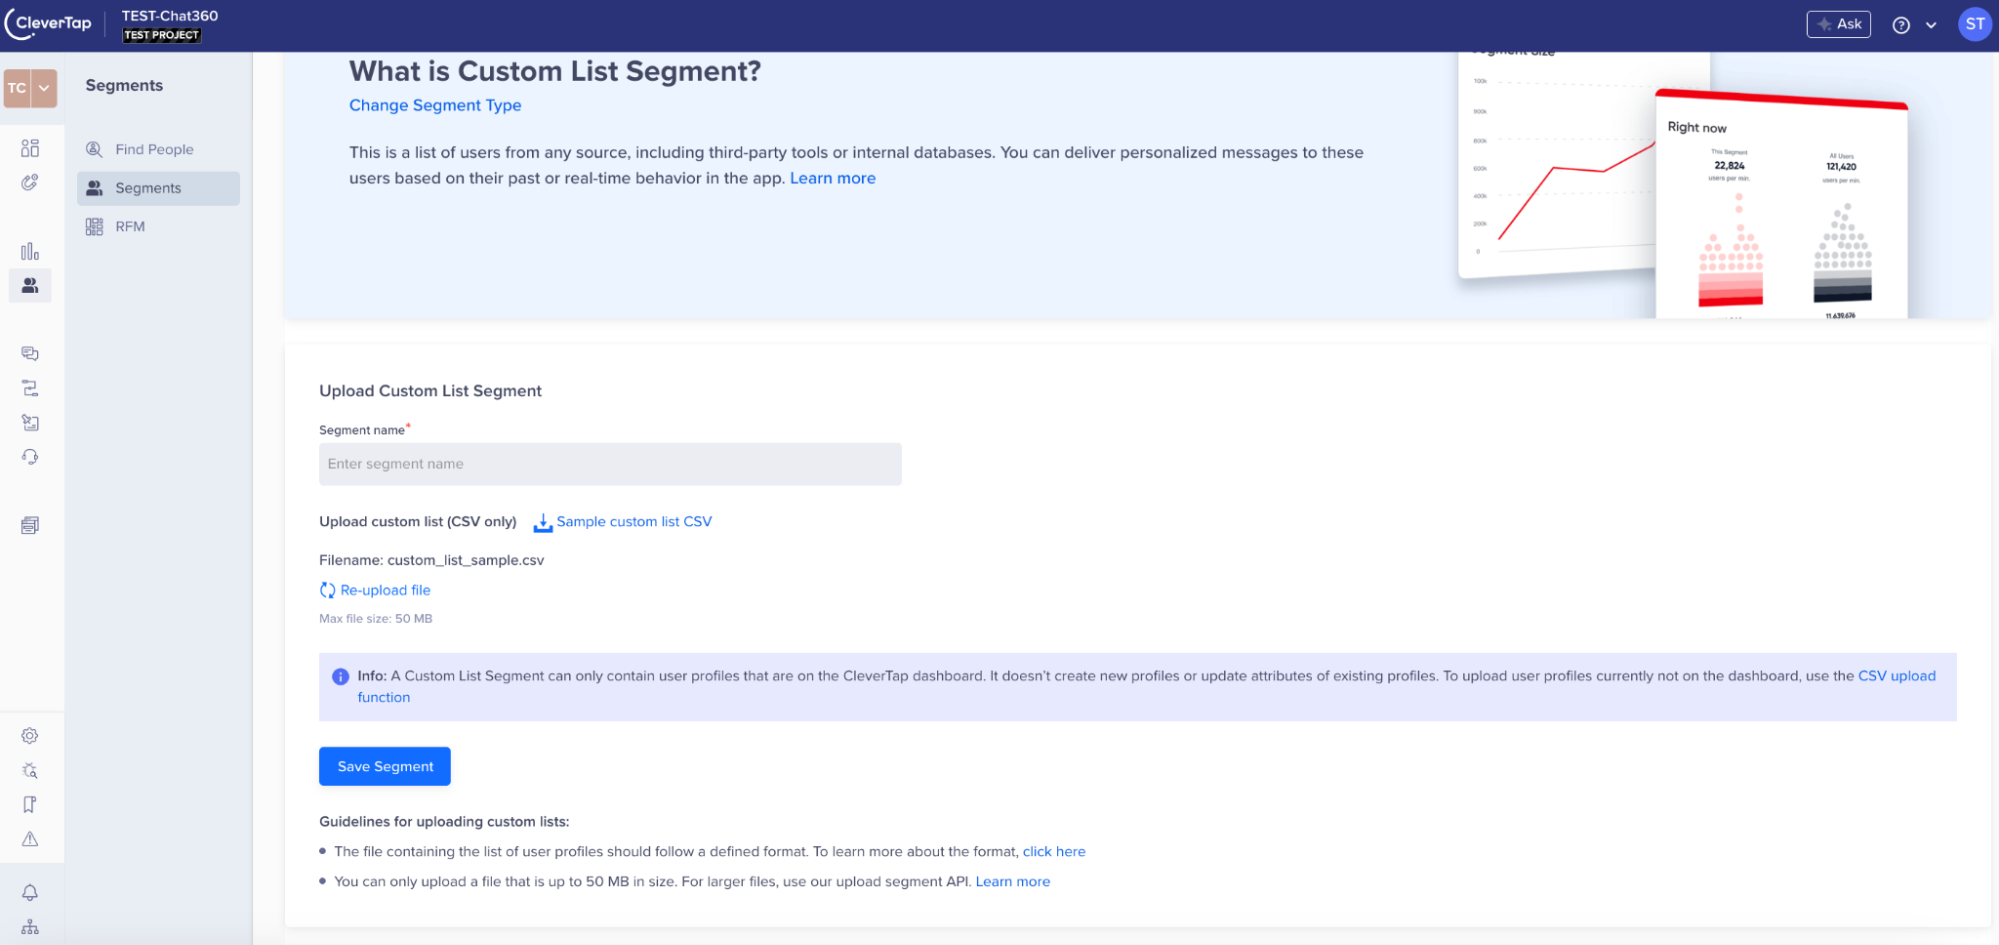
- Map your CSV columns to segment attributes (e.g., email, phone, user ID).
- Review mapping errors highlighted by the system and correct any formatting issues.
- Verify that your segment preview shows the expected number of users.
- Click Save to make the segment available for campaign targeting in both CleverTap and Chat360.
Uploading customer lists via CSV allows you to quickly import and segment users in CleverTap for targeted campaigns. Properly formatted CSVs ensure accurate segmentation and seamless activation of these audiences in Chat360 workflows.
2. Upload Your File
3. Managing Uploaded Data:
4. Configure List-Based Segment
5. Finalize & Save
-
Key Benefits
- Rapid Onboarding: Bulk upload ensures large audiences are imported in minutes.
- Precision Targeting: List-based segments allow precise control over who receives your campaigns.
- Seamless Sync: Once saved, segments automatically refresh in Chat360 for immediate activation.
- Error Handling: Inline validation highlights formatting errors before finalization.
-
Step 3: Selecting and Configuring WhatsApp Templates
-
Overview
-
Configuration Steps:
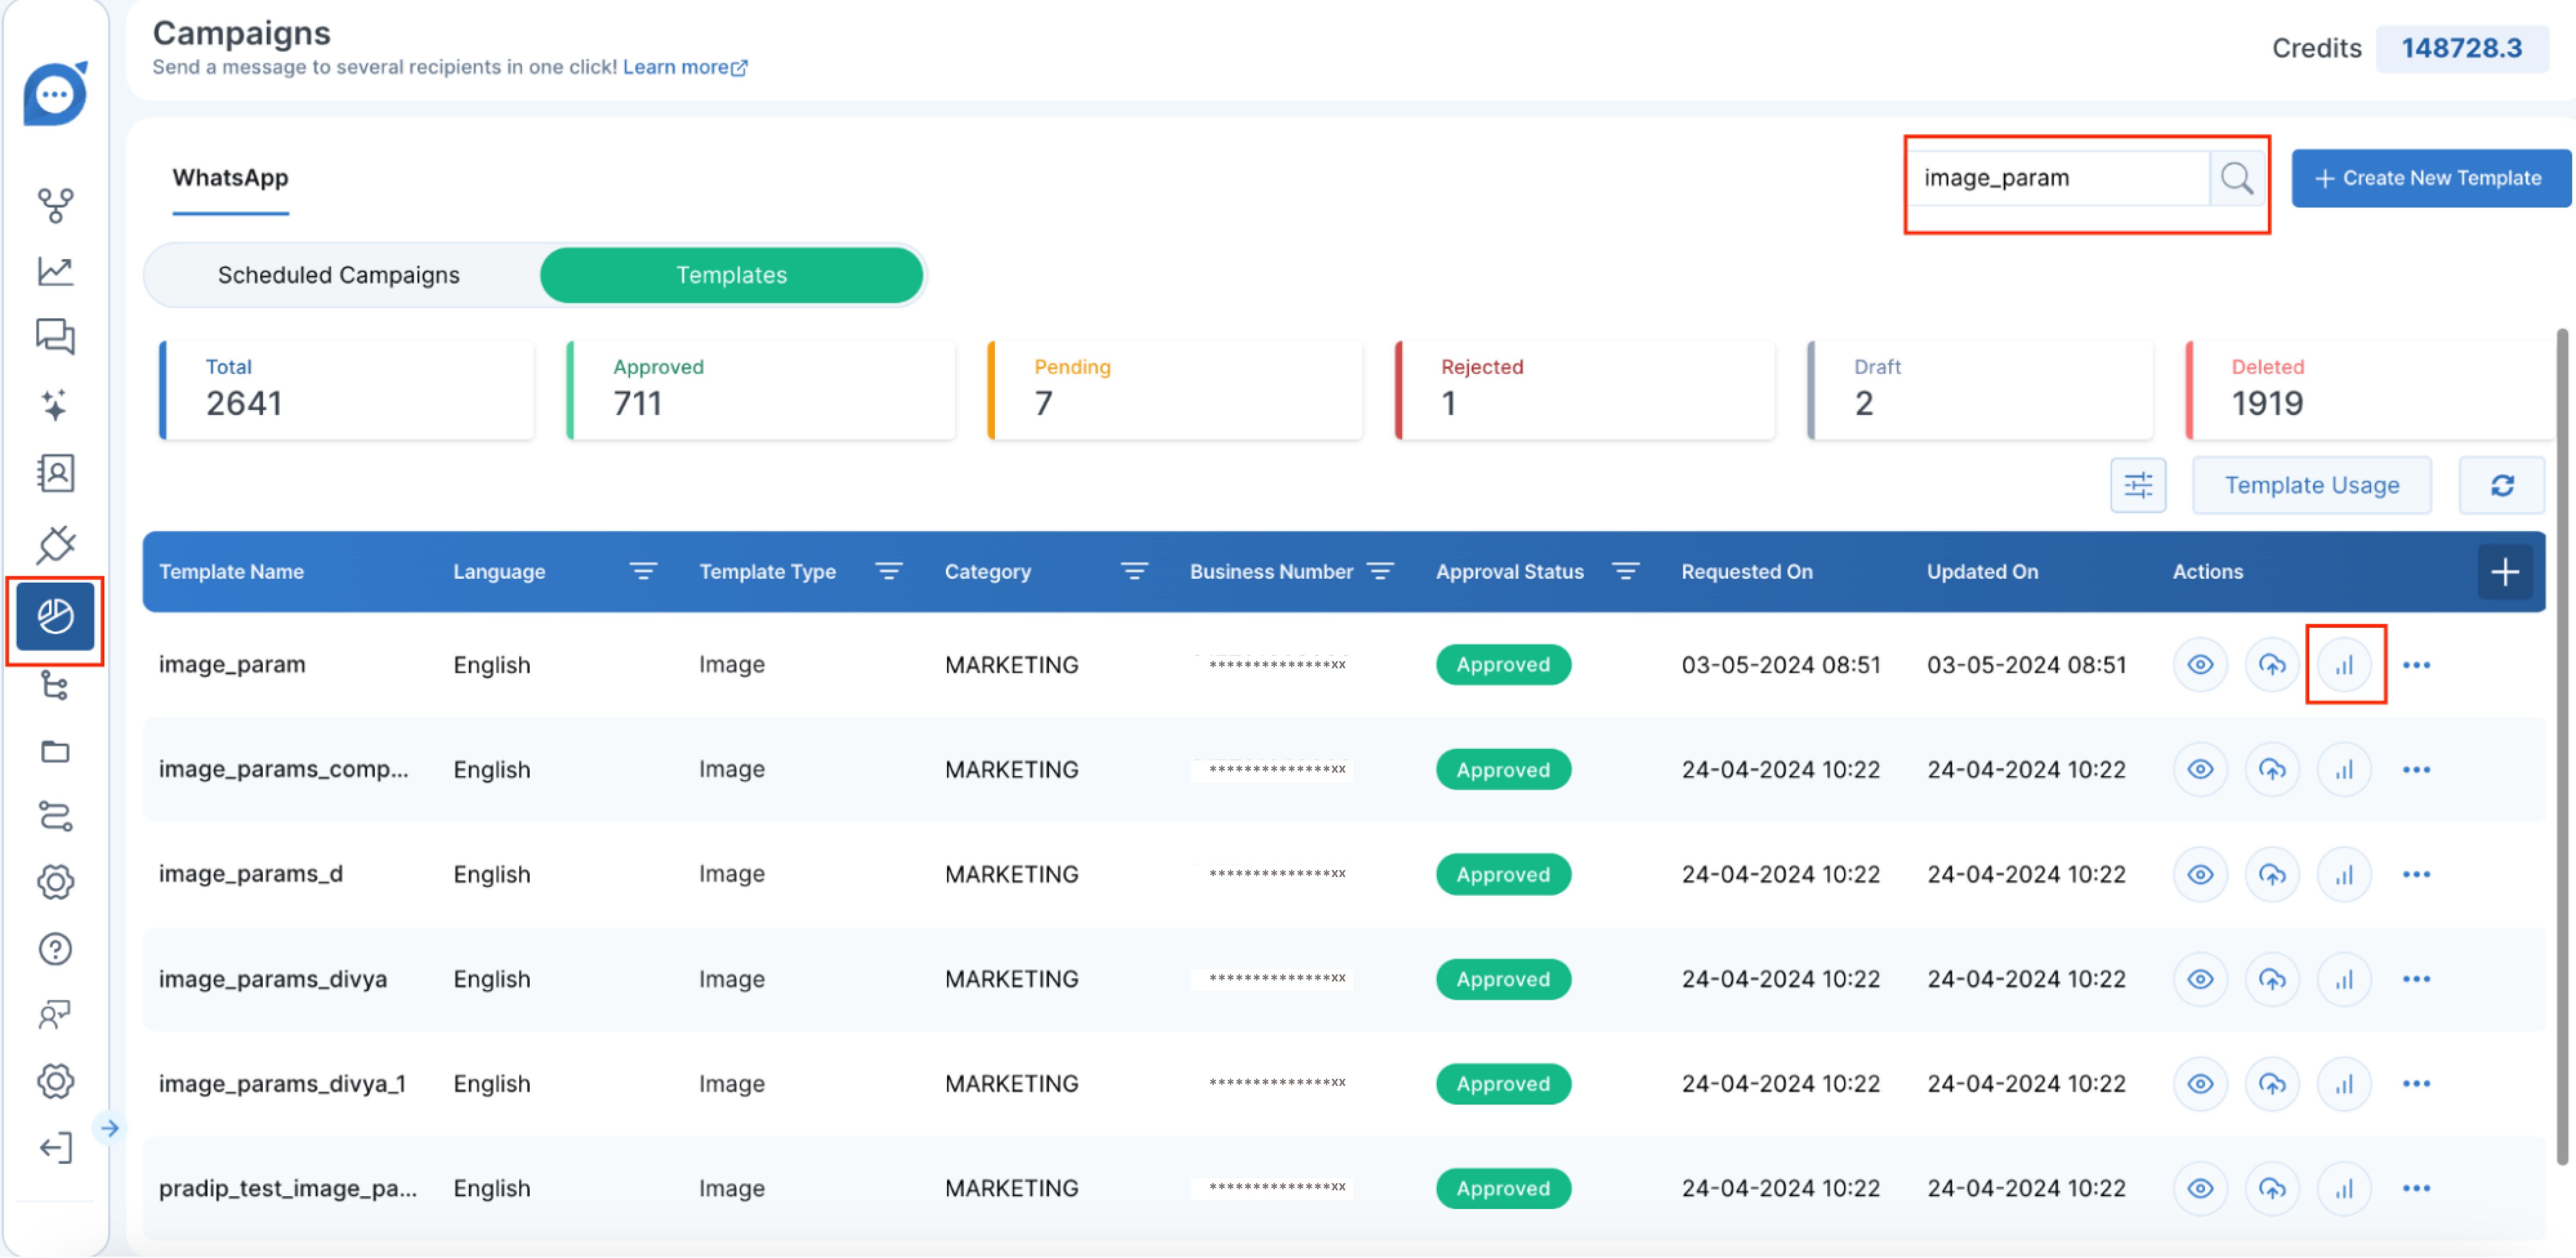
1. Access Template Management
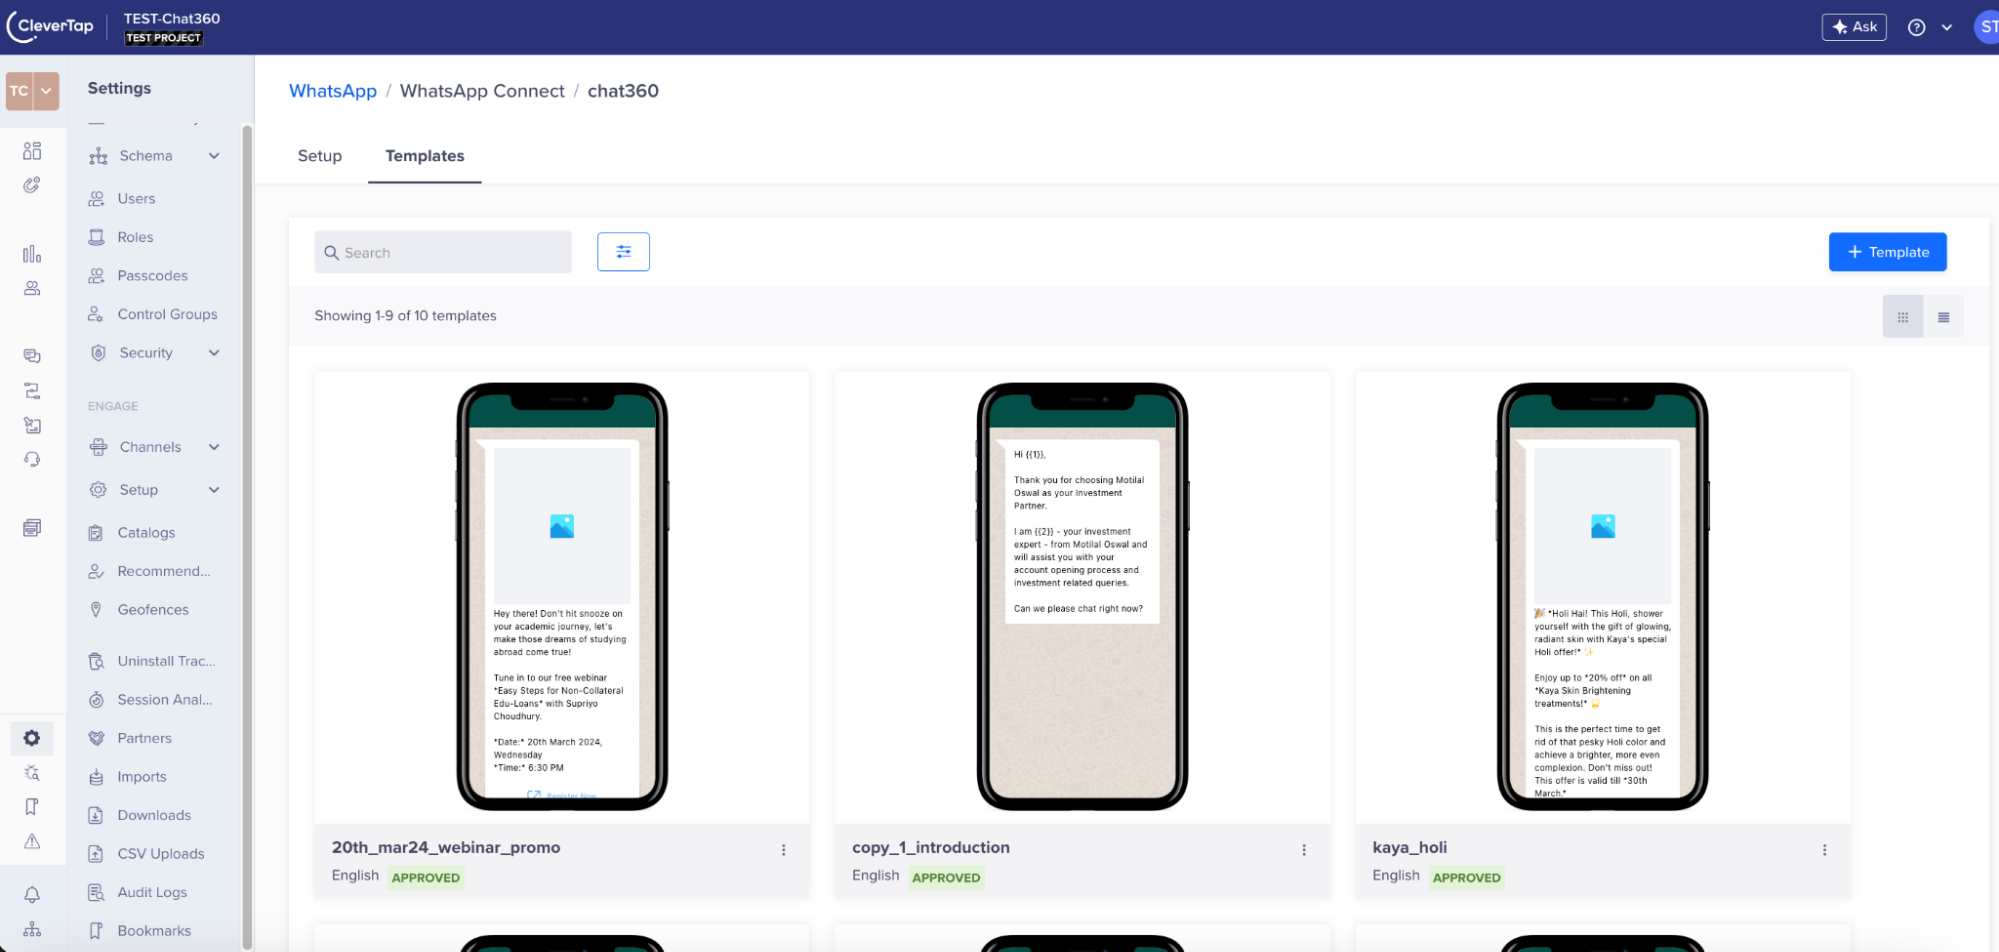
- Engage → WhatsApp: In CleverTap, navigate to Engage, then select WhatsApp.
- Select Number: Choose the WhatsApp number you configured in Chat360 to open its settings.
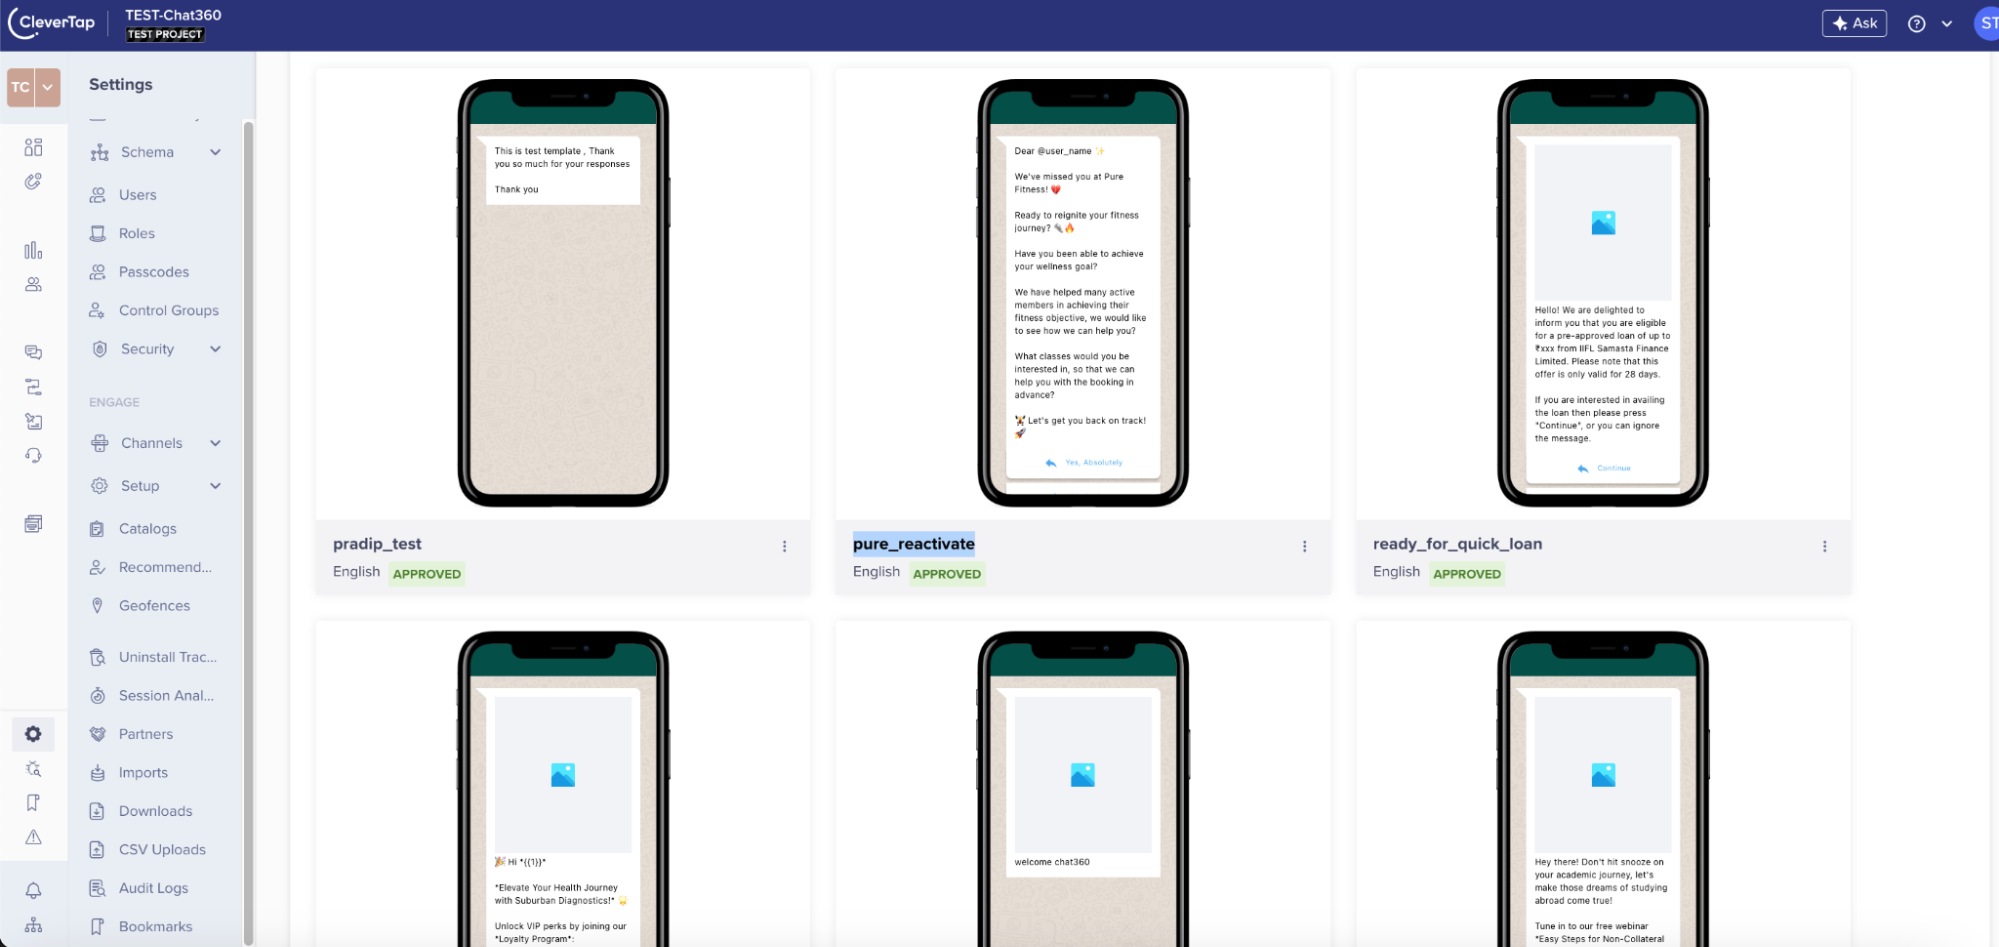
- Click Template in the number’s settings pane. This view lists all WhatsApp message templates available for that number.
- Before proceeding, ensure that the HTTP endpoint is connected with the outbound API from the Chat360 Dashboard. This connection is crucial for the templates to function correctly.
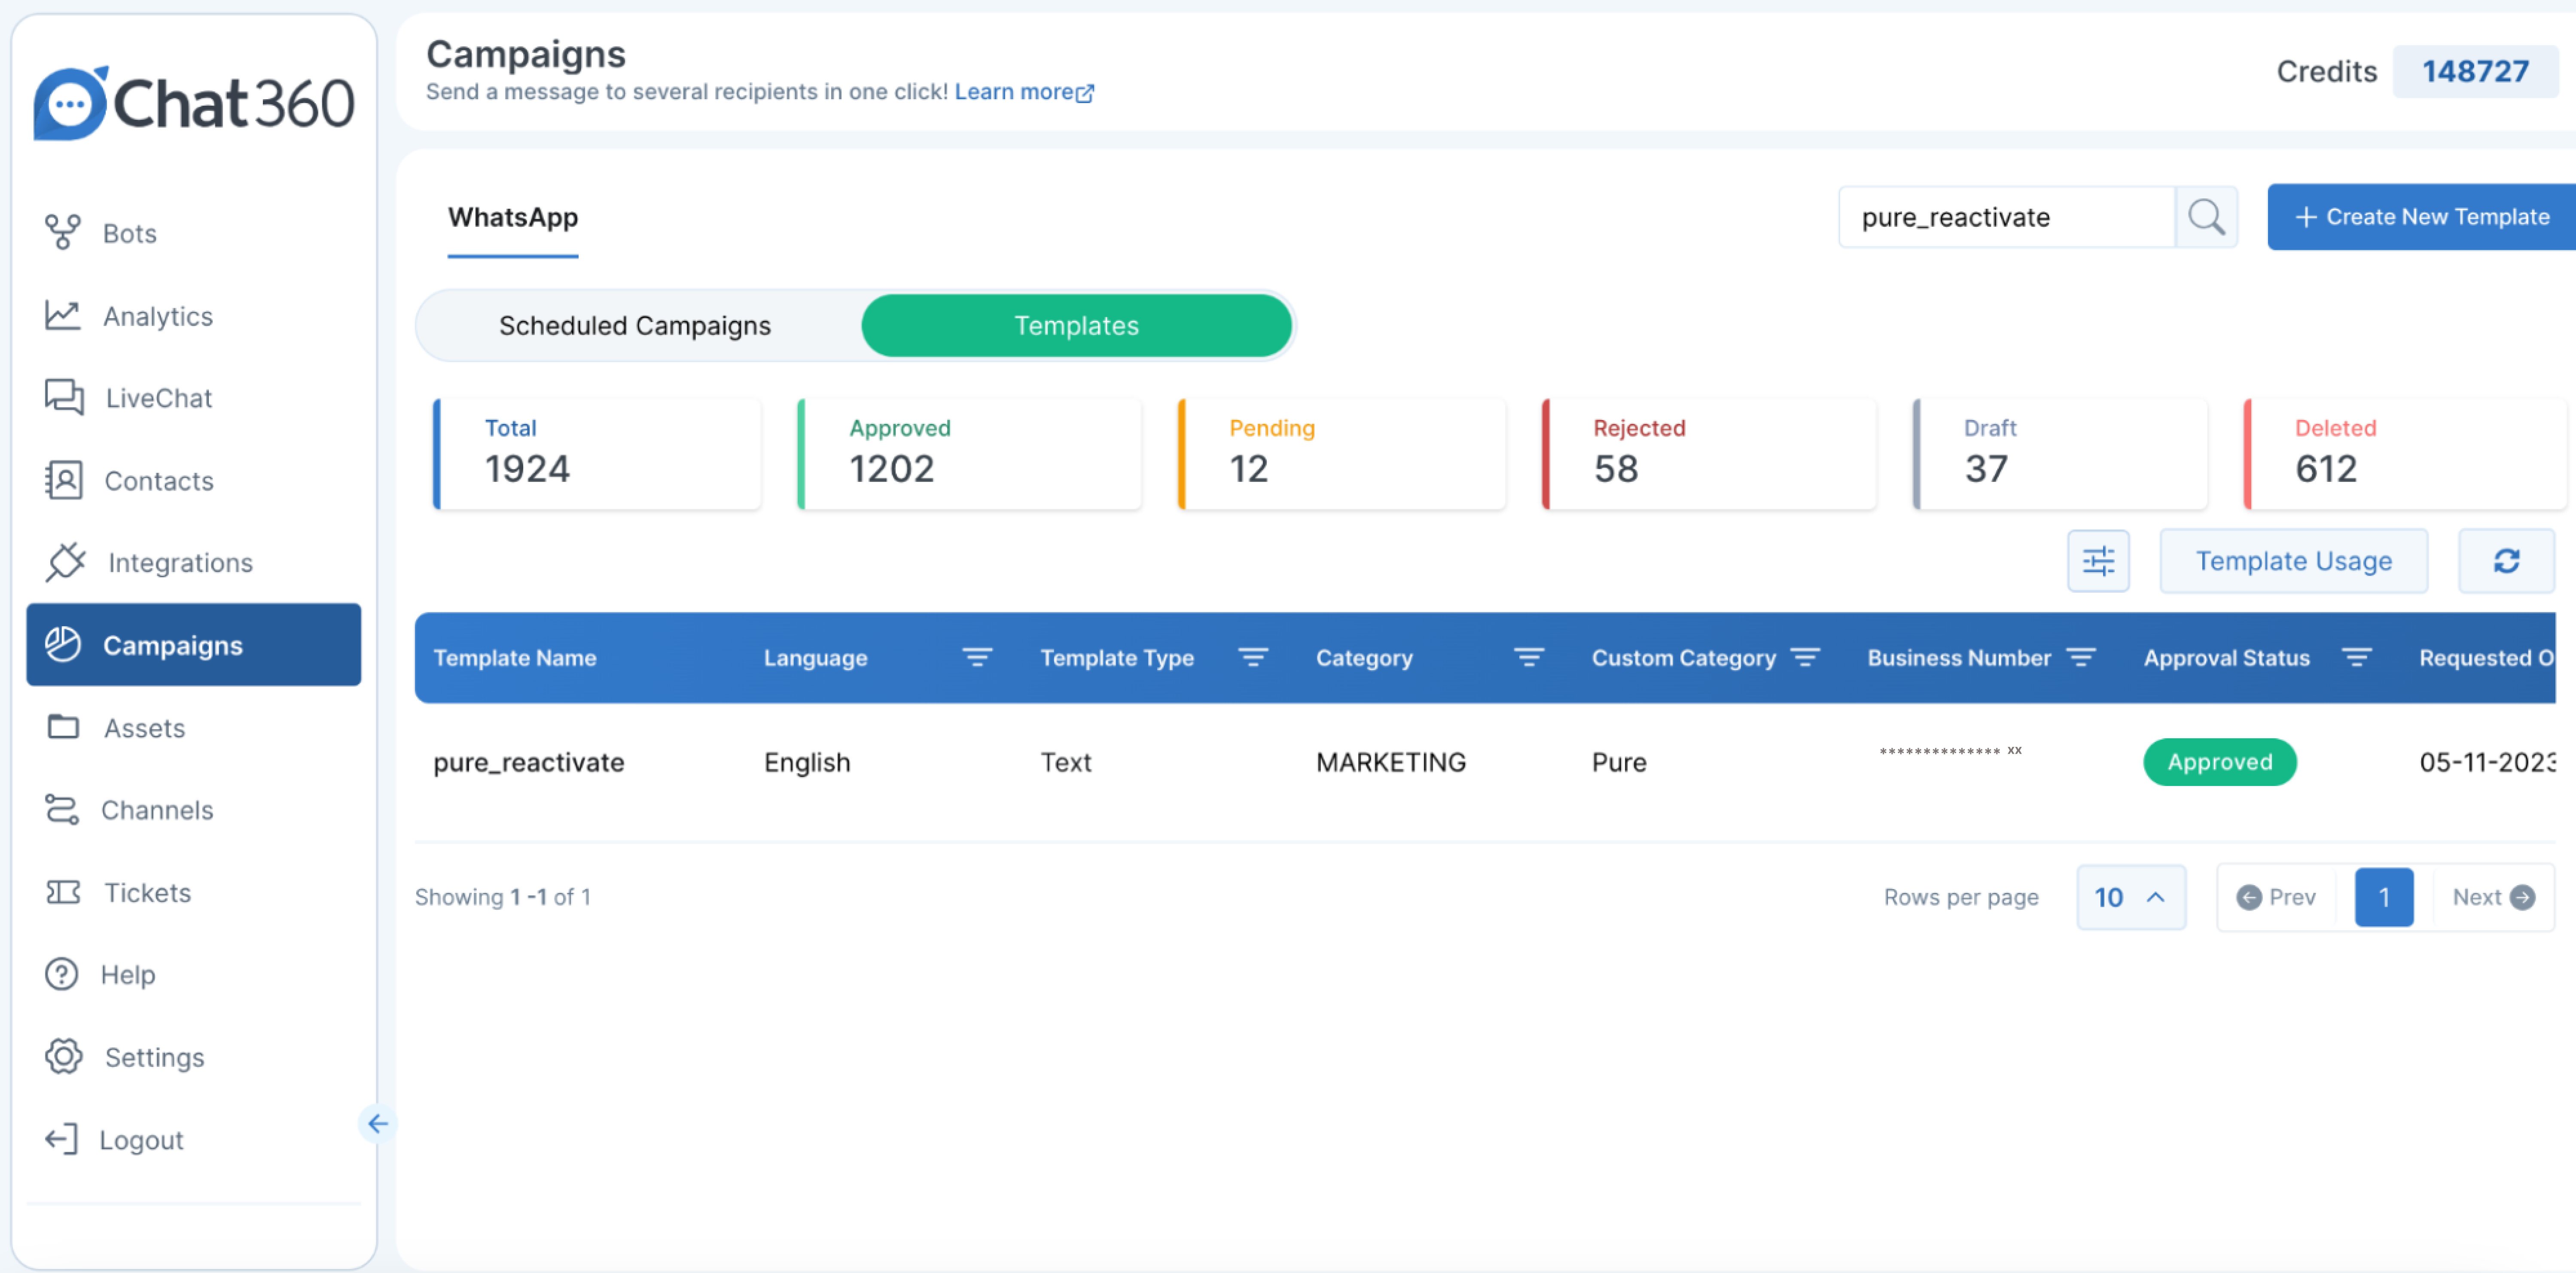
- Browse & Select: Review the list of approved templates. Ensure each appears as “Active” in both CleverTap and Chat360 under Campaigns → Templates.
- Compatibility Check: Templates with mismatched parameters or unsupported media will be flagged—only select those compatible with both systems.
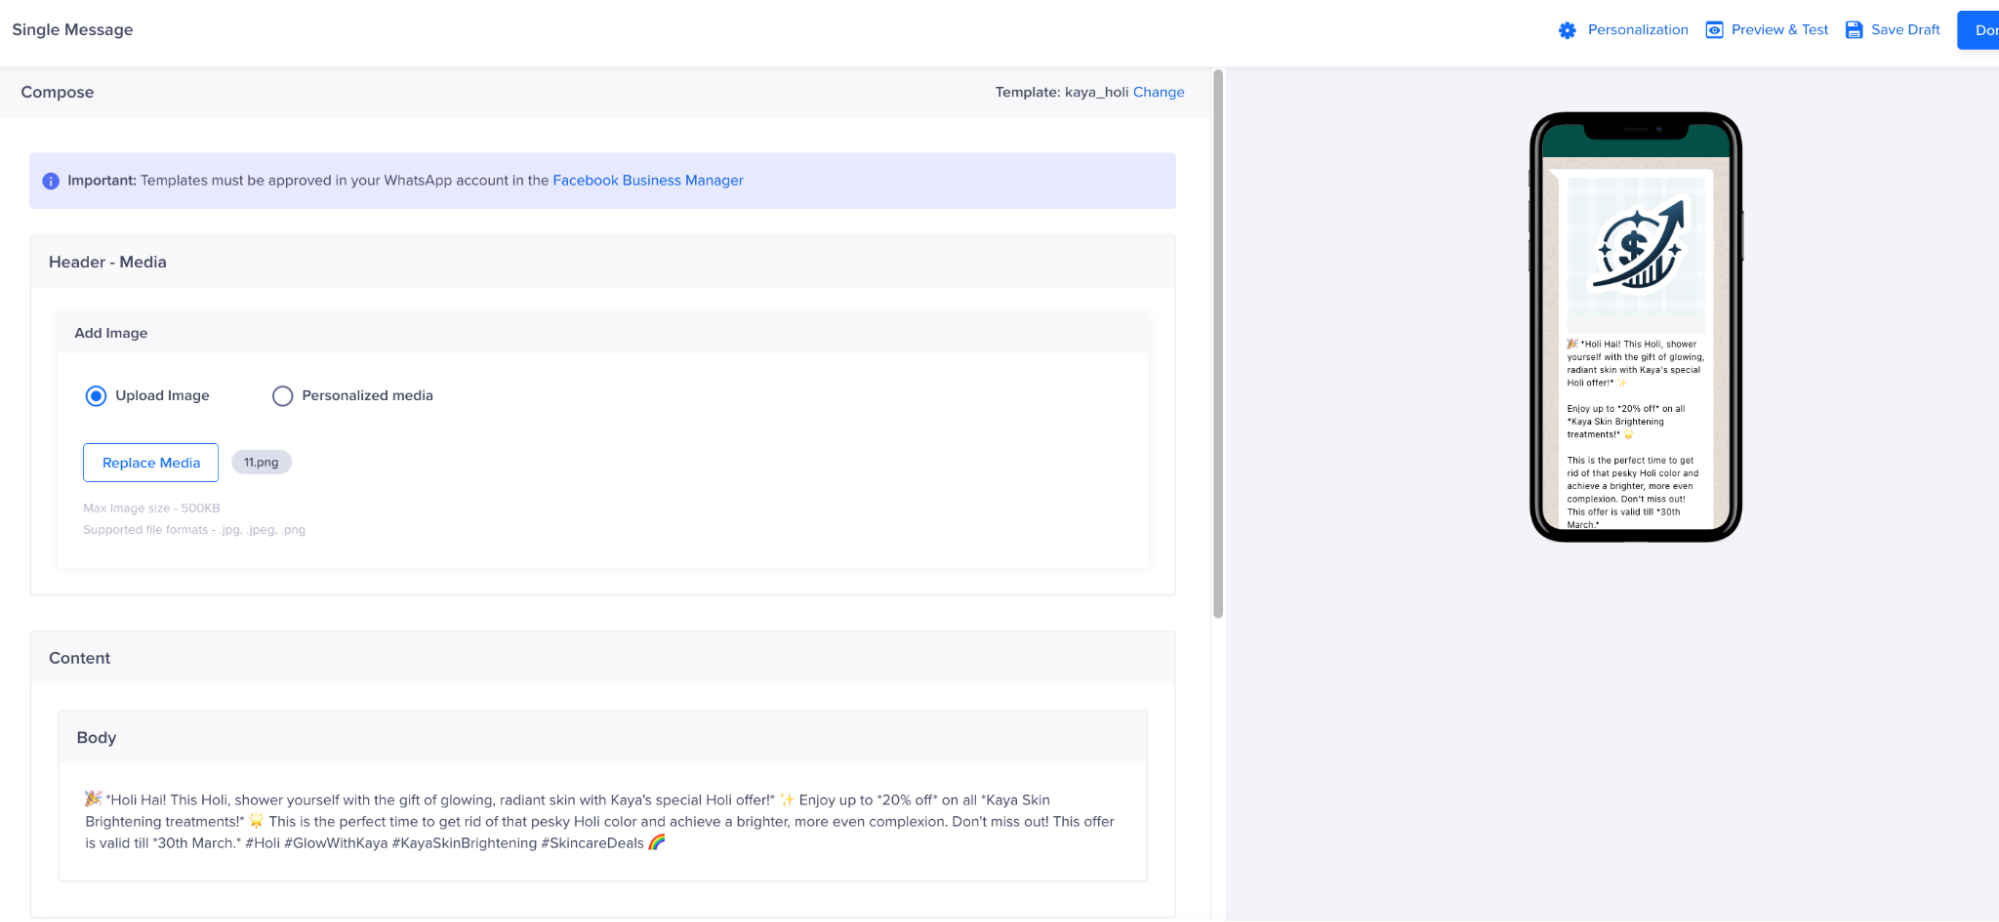
- Add New Templates: Click Add Template if none of the existing templates meet your needs.
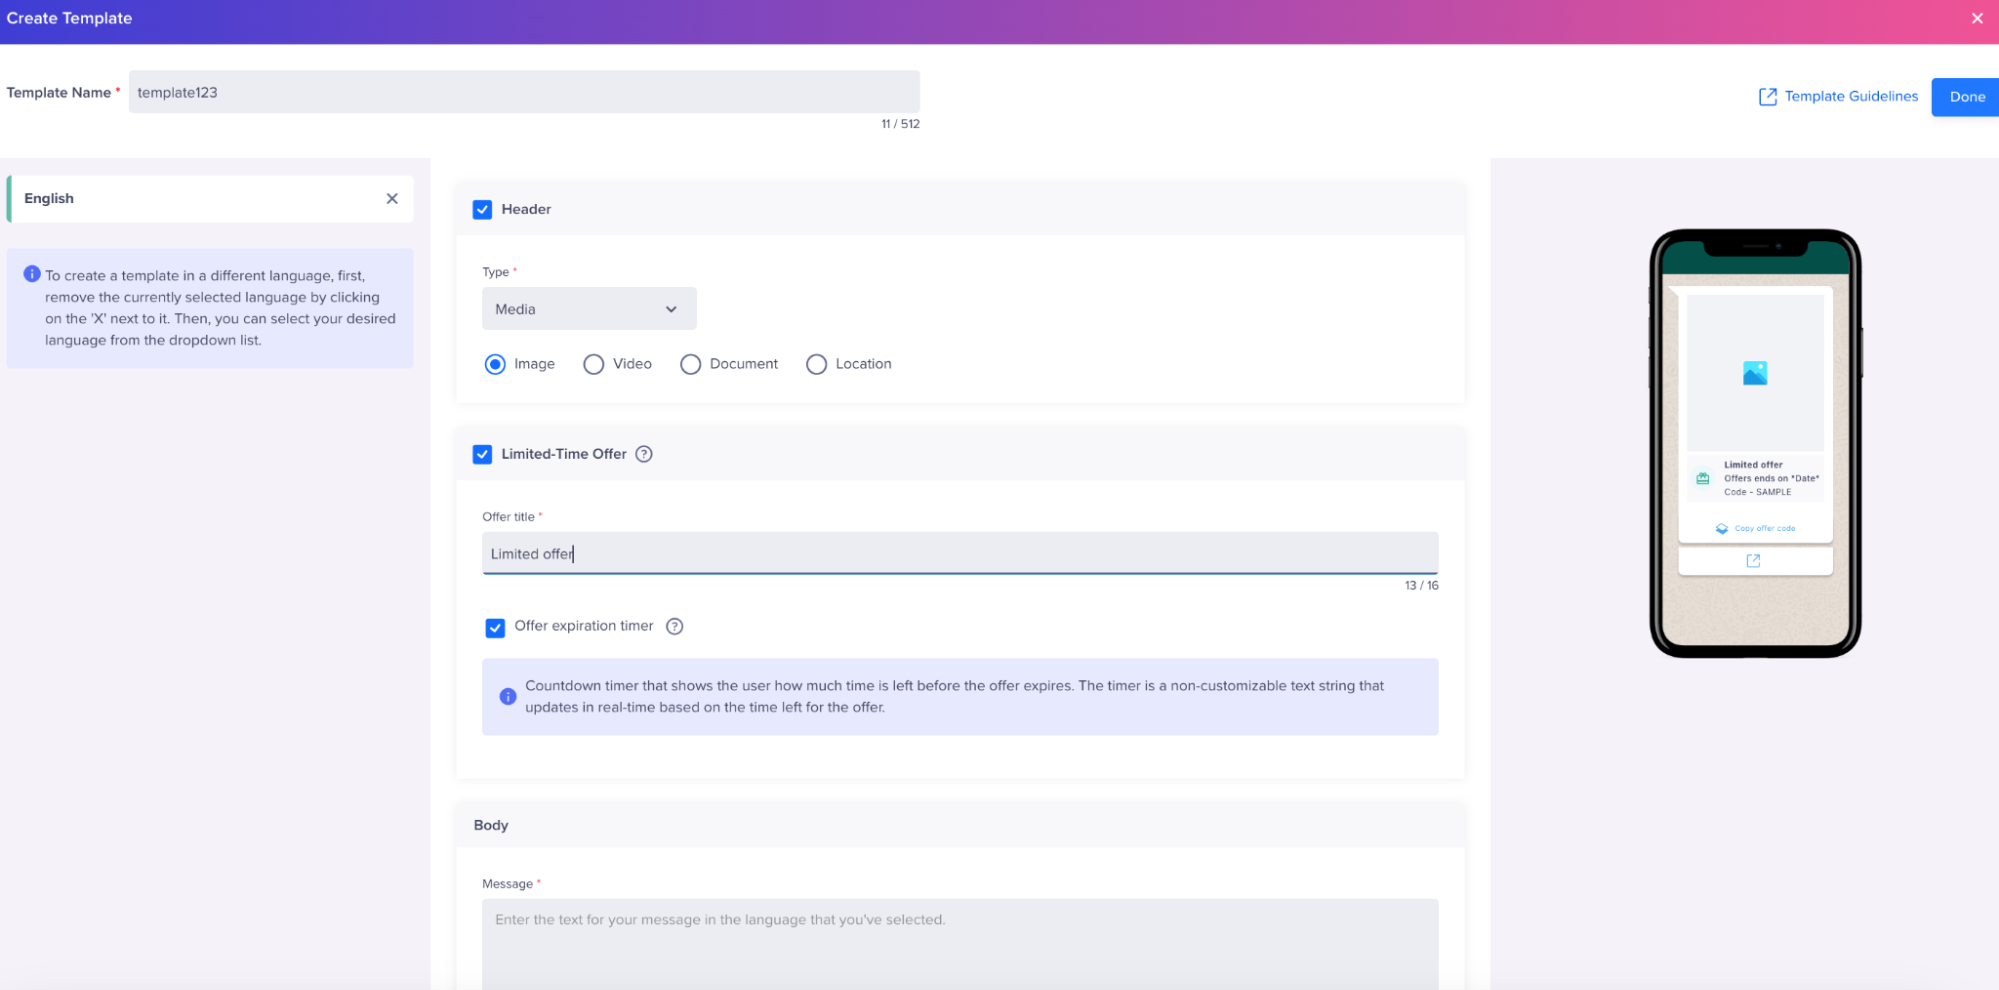
- Design: Enter the template name, category (e.g., Utility, Marketing, Authentication), and body text. Attach media (images, documents) within the size limits and parameter rules.
- Parameter Mapping: Define any dynamic placeholders (e.g., {{user_name}}) so customer-specific data fills correctly at send time.
- Preview: Use the built-in preview to verify text, buttons, and media render properly on mobile and desktop.
- Finalize: Click Done to save. The template is now ready for scheduling in both CleverTap campaigns and Chat360 workflows.
In this step, you link CleverTap segments to approved WhatsApp message templates. Ensuring templates are correctly configured and synchronized between CleverTap and Chat360 guarantees your campaigns deliver the right content in the right format.
2. Open the Template Section
3. Verify API Connection
4. Choose or Import an Existing Template
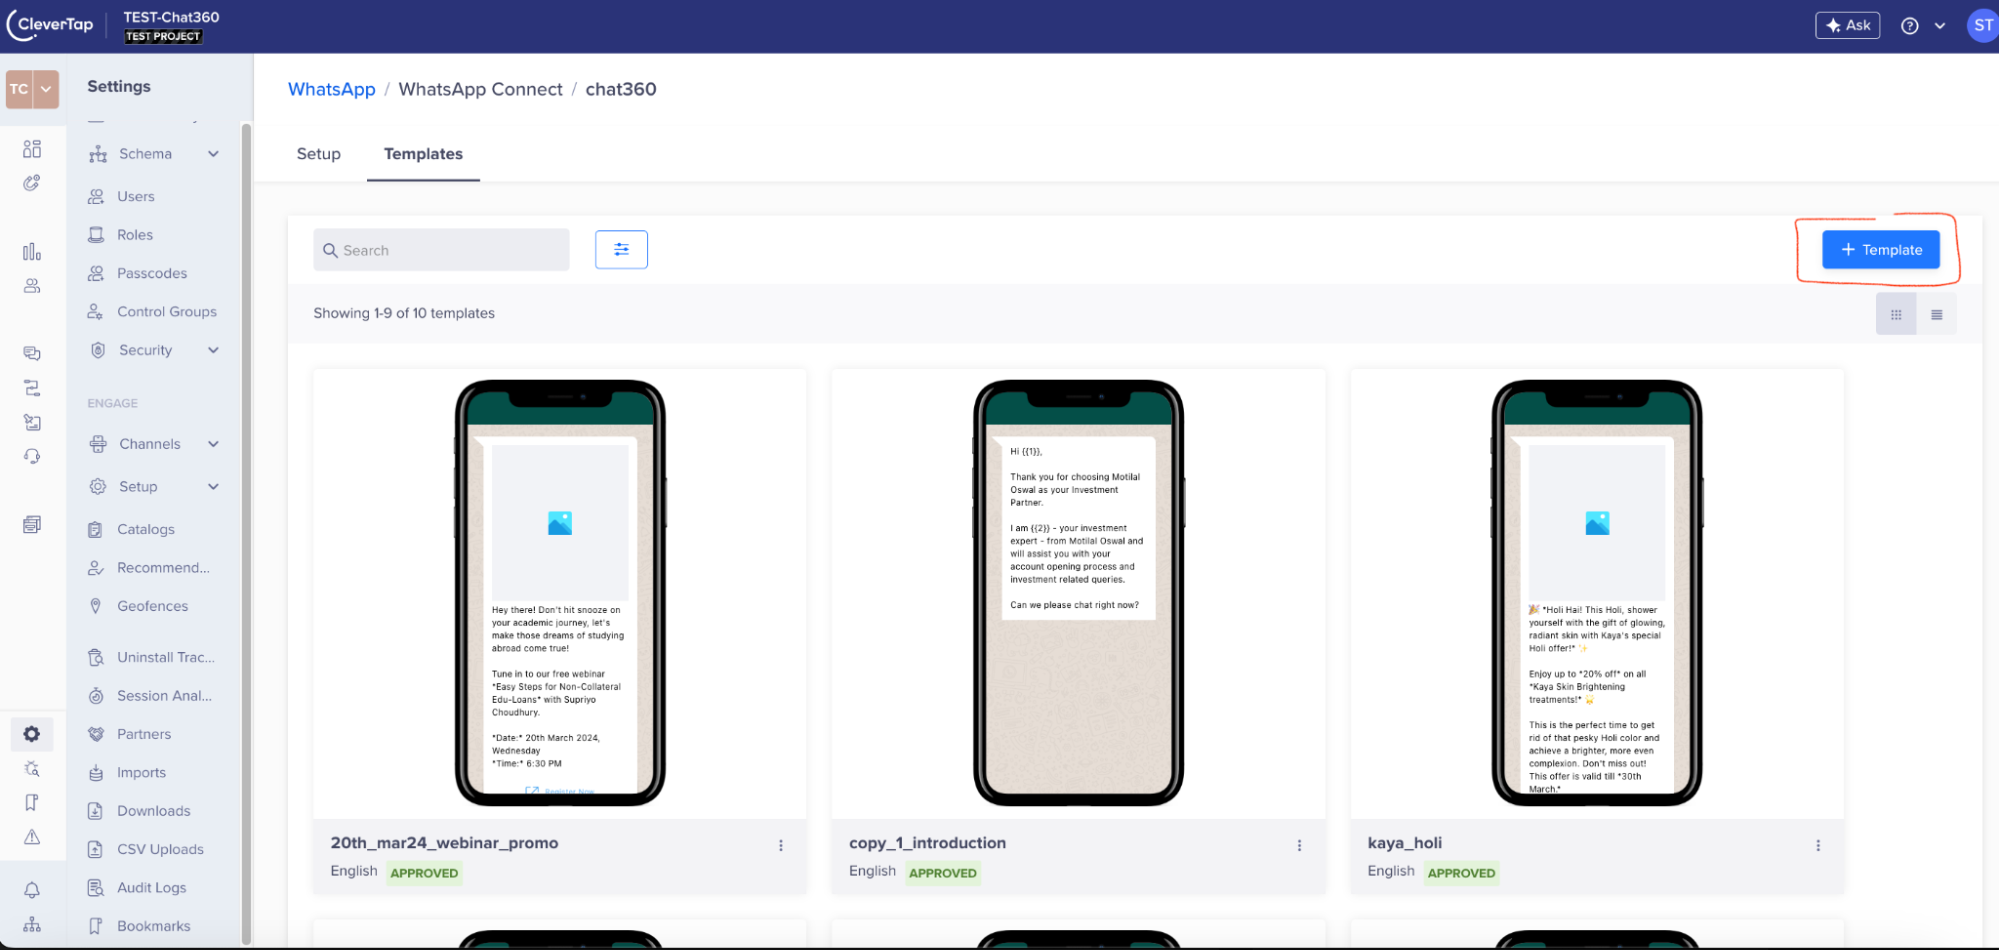
5. Create Custom Templates (Optional)
6. Review & Save
-
Key Benefits
- Unified Template Library: Maintain one set of templates across CleverTap and Chat360, reducing duplication.
- Error Prevention: Real-time compatibility checks prevent failed sends due to unsupported content.
- Custom Branding: Build unique templates with media and buttons to reinforce brand identity.
- Dynamic Personalization: Placeholders ensure each recipient receives tailored messages, boosting engagement.
-
Step 4: Configuring Data to Send a Campaign in CleverTap
-
Overview
-
Accessing Campaign Data
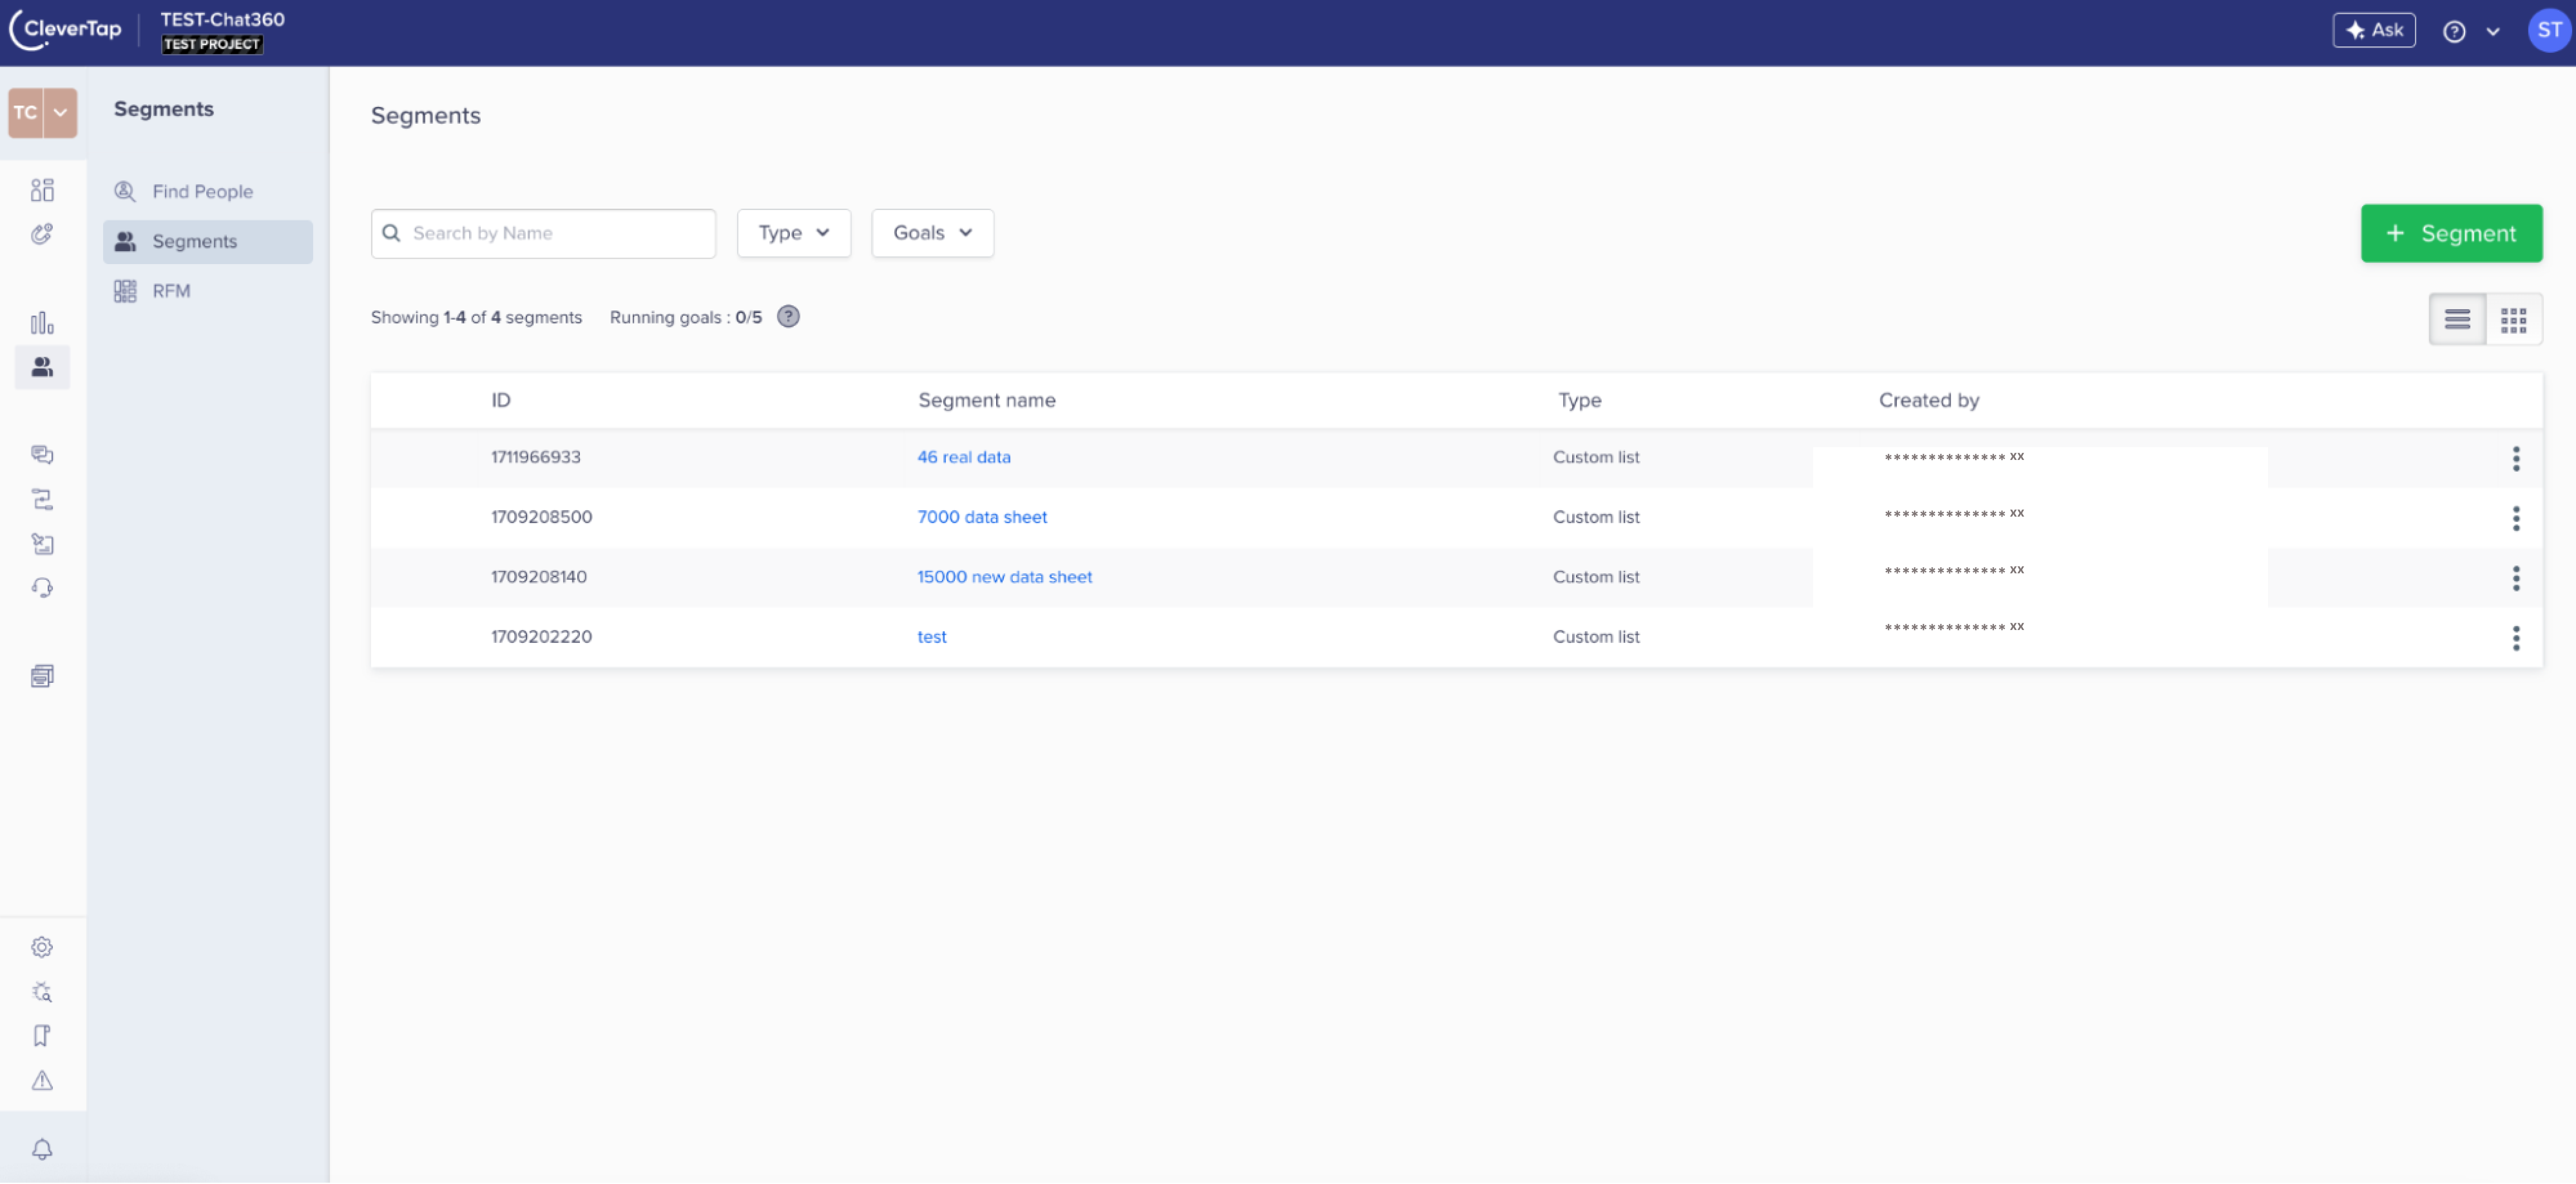
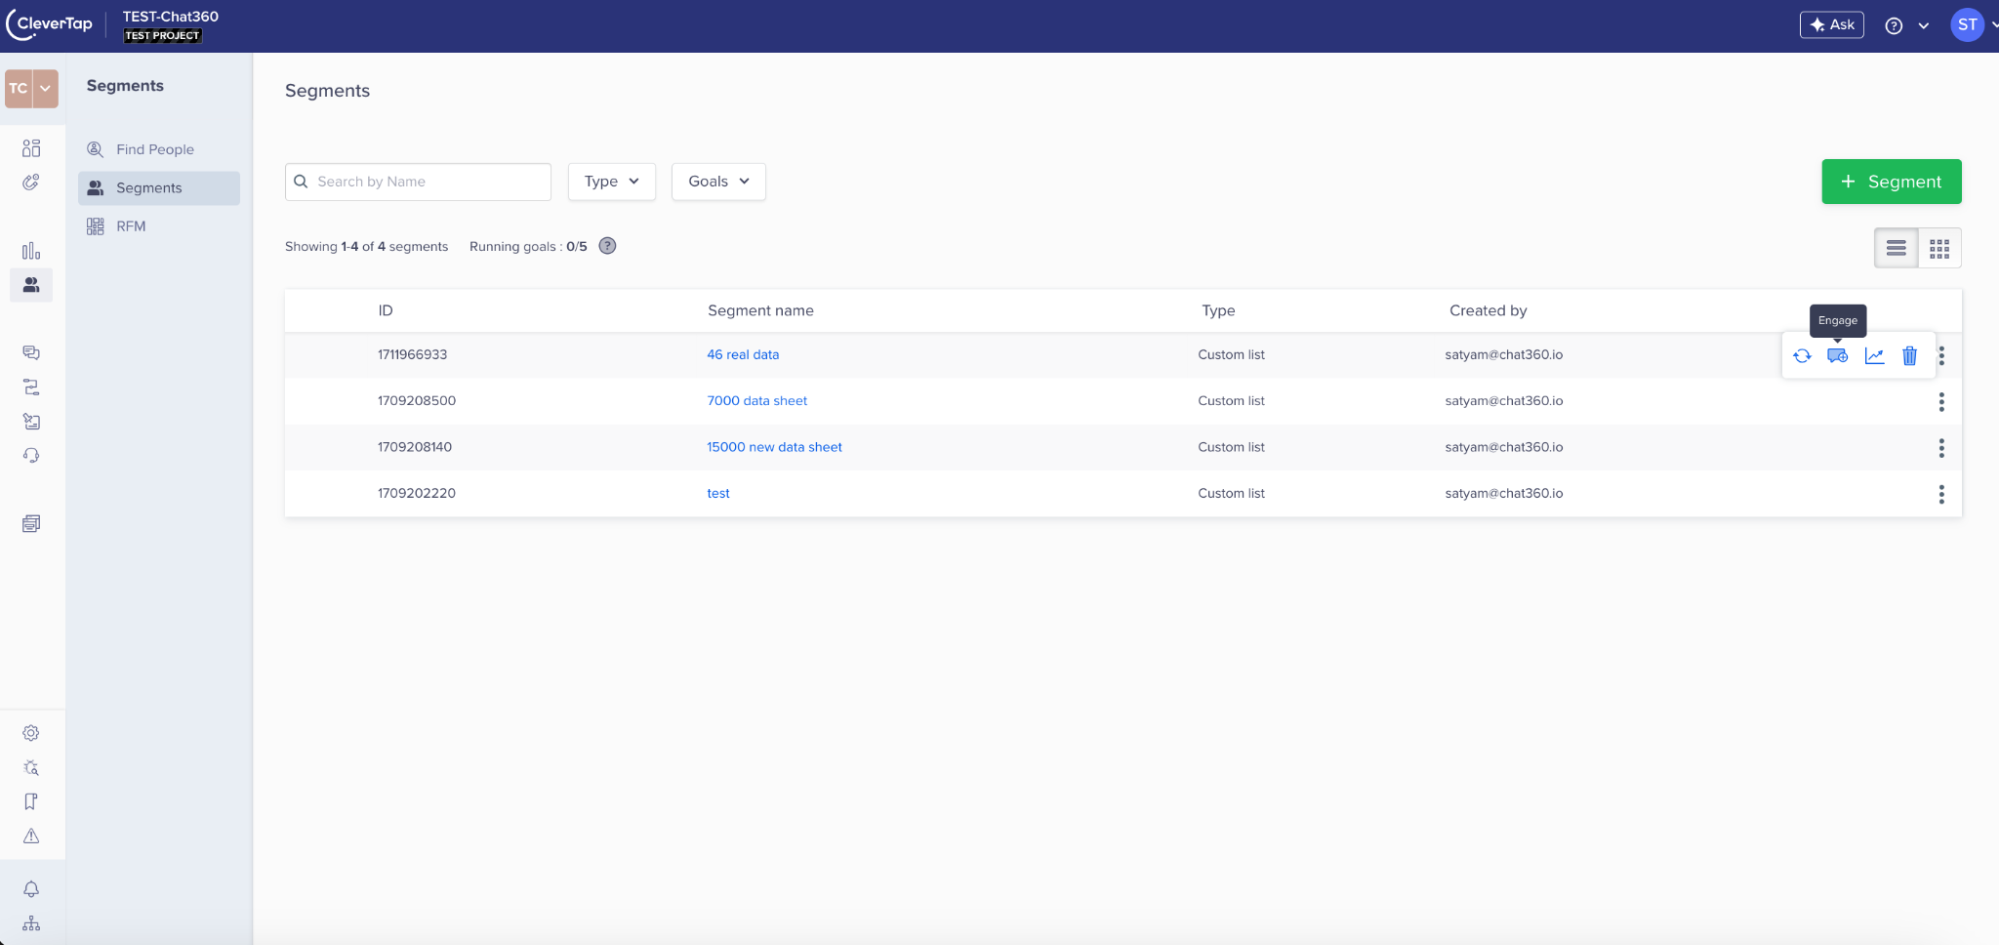
1. Navigate to Segment Section
- Go to your CleverTap dashboard.
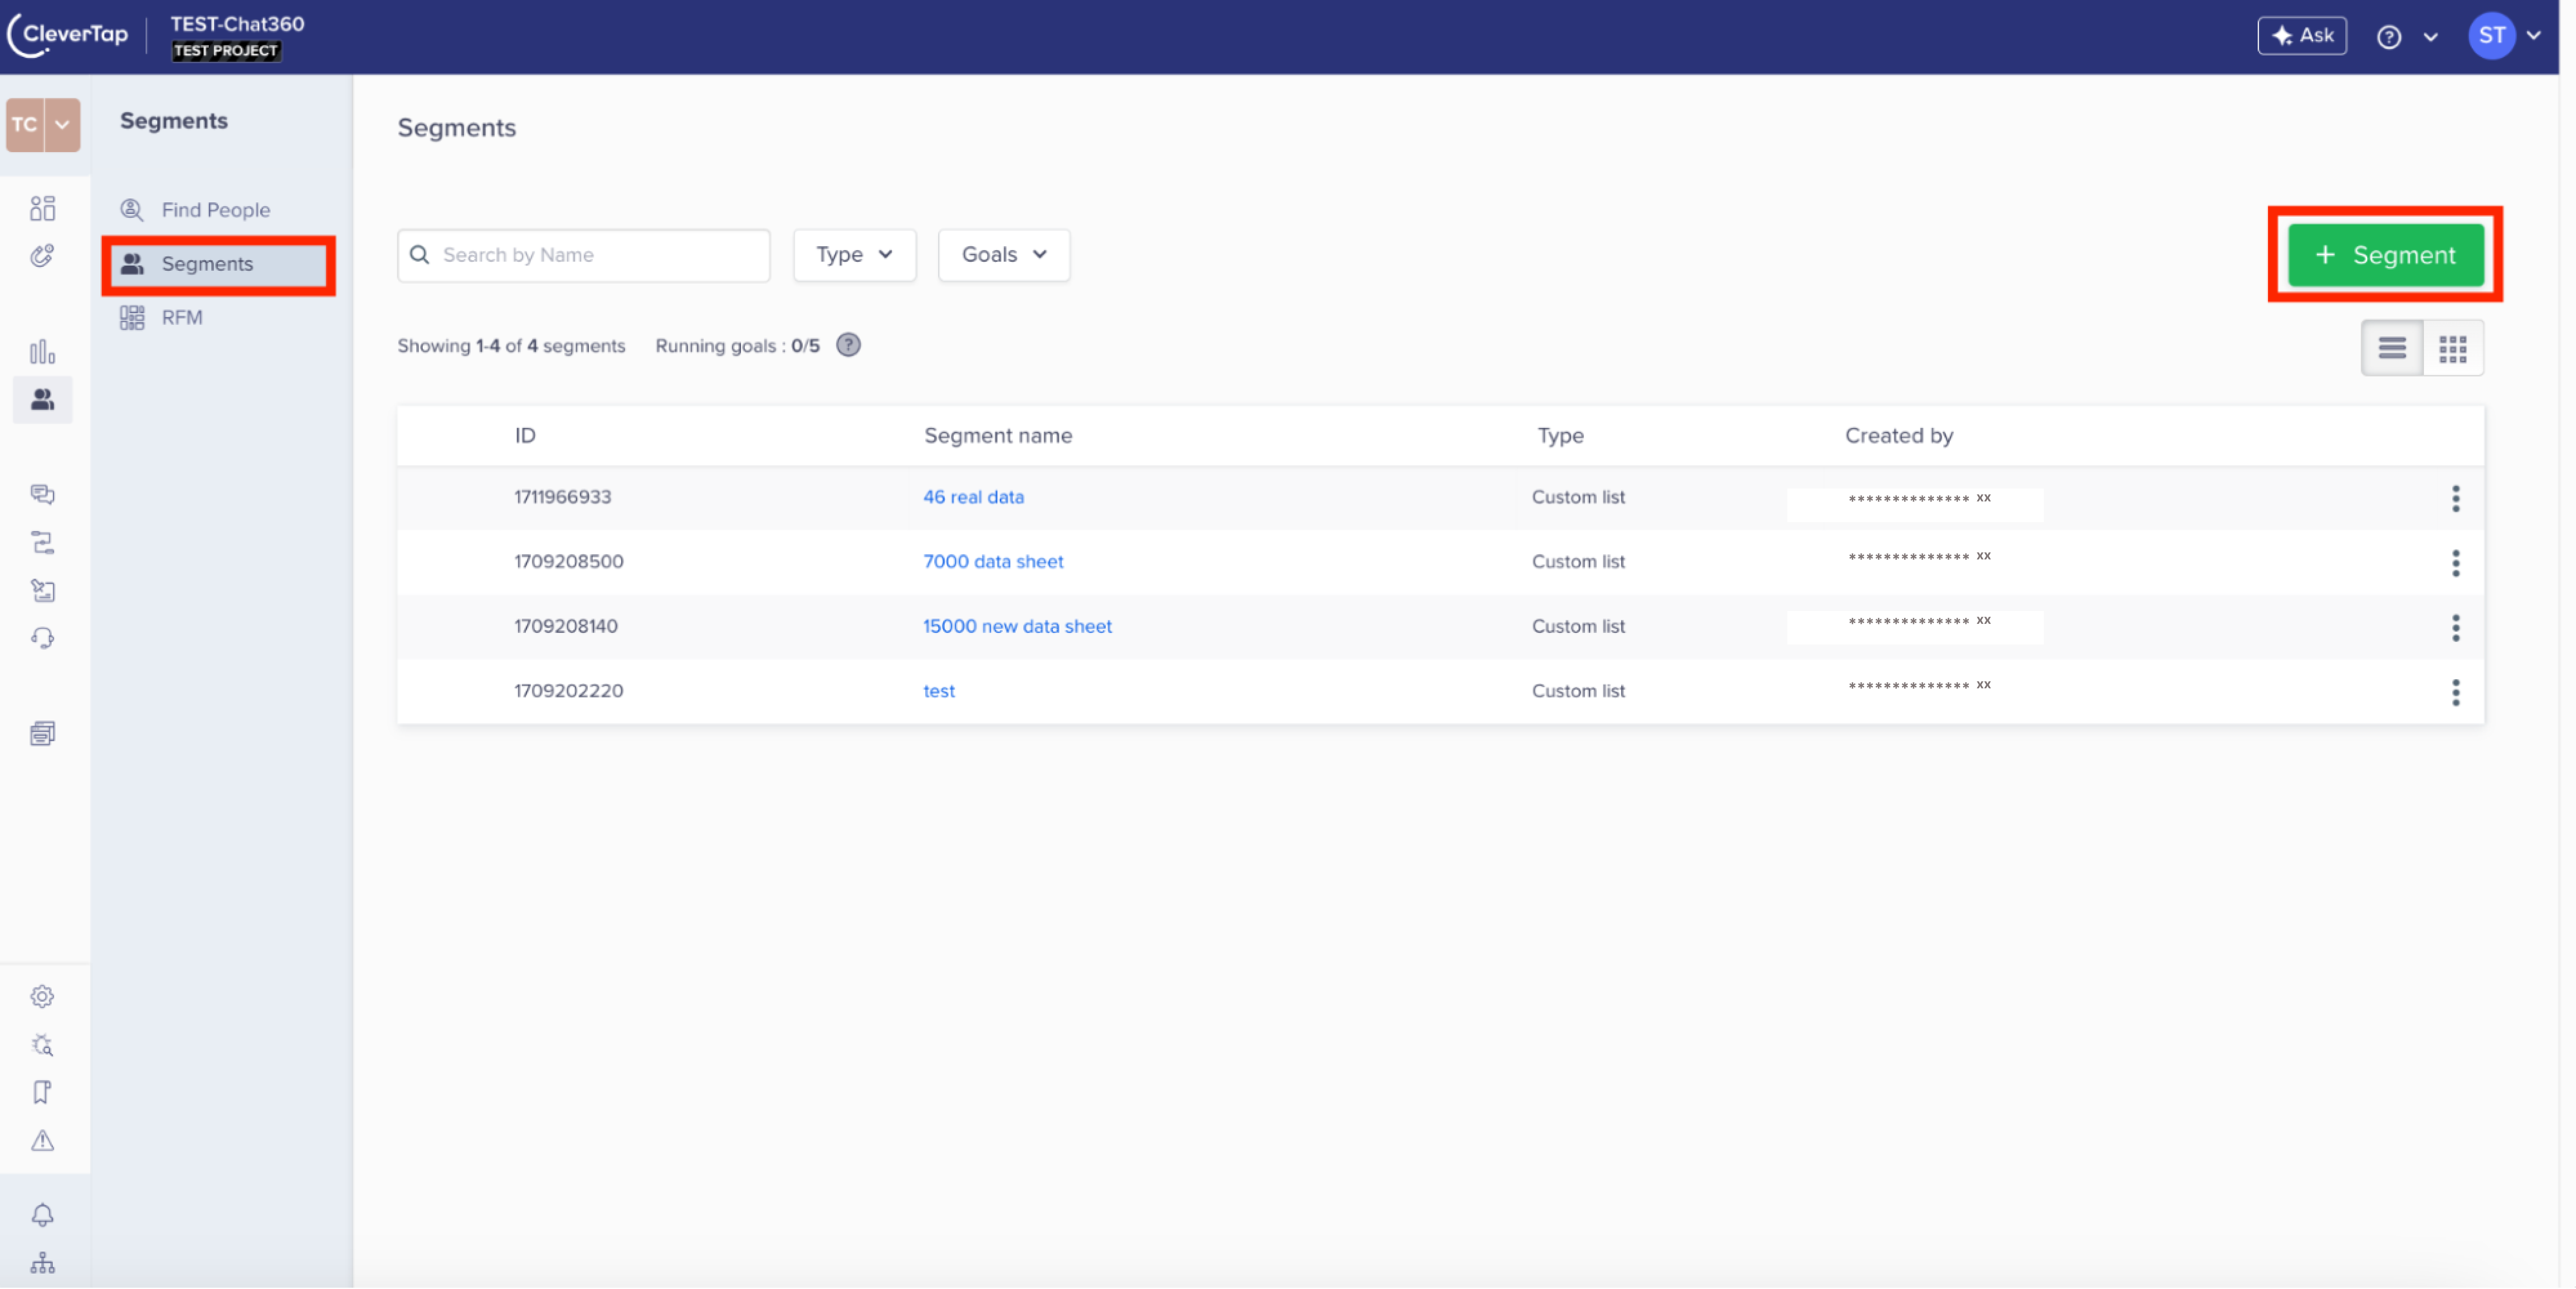
- Click on ‘Segment’ from the left panel. This is where all your user groupings and data-driven audiences are stored.
- Look for the segment you created using the uploaded CSV or from a live campaign filter.
- Use search or filters to identify segments by name, tags, or creation logic.
-
Engaging with Data
1. Select the Segment for Campaign
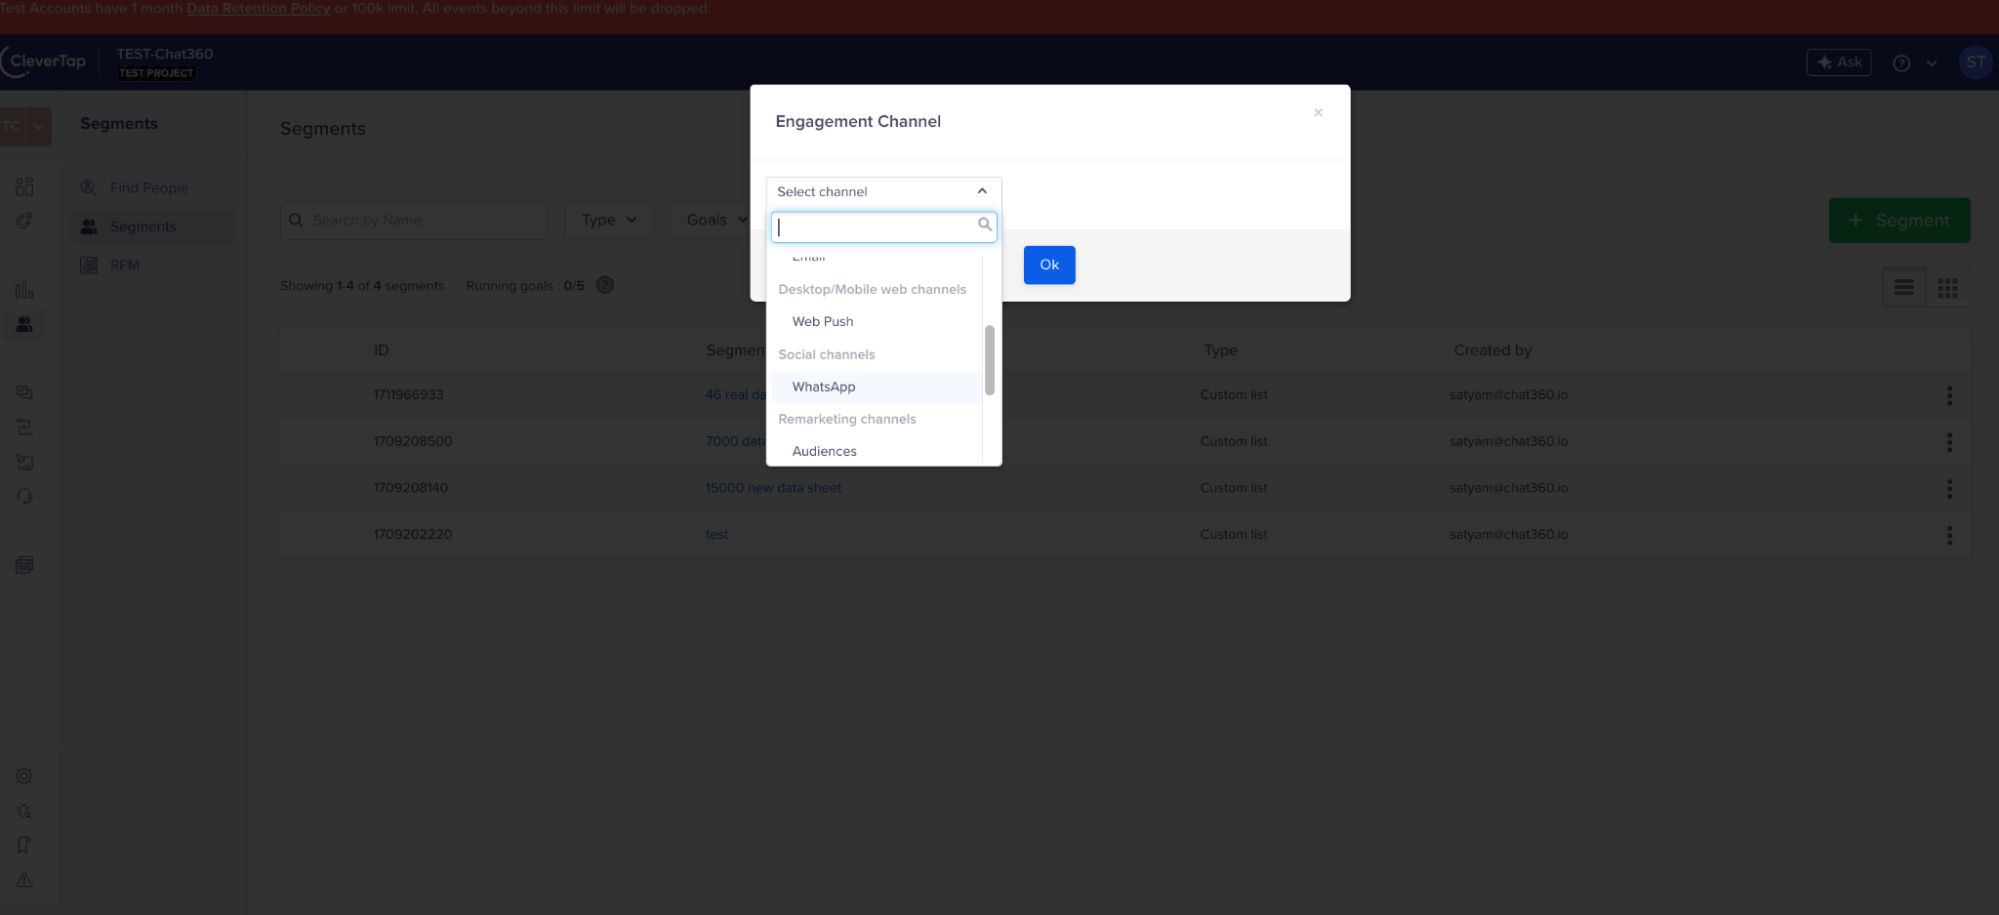
- Click the three dots (⋮) or the ‘Options’ menu next to your selected segment.
- This menu provides interaction tools like starting campaigns, viewing users, or editing segmentation rules.
- From the options menu, choose ‘WhatsApp’ as the channel to trigger the campaign creation flow.
- This links your selected segment directly with the WhatsApp messaging module in CleverTap.
-
Campaign Template and Configuration
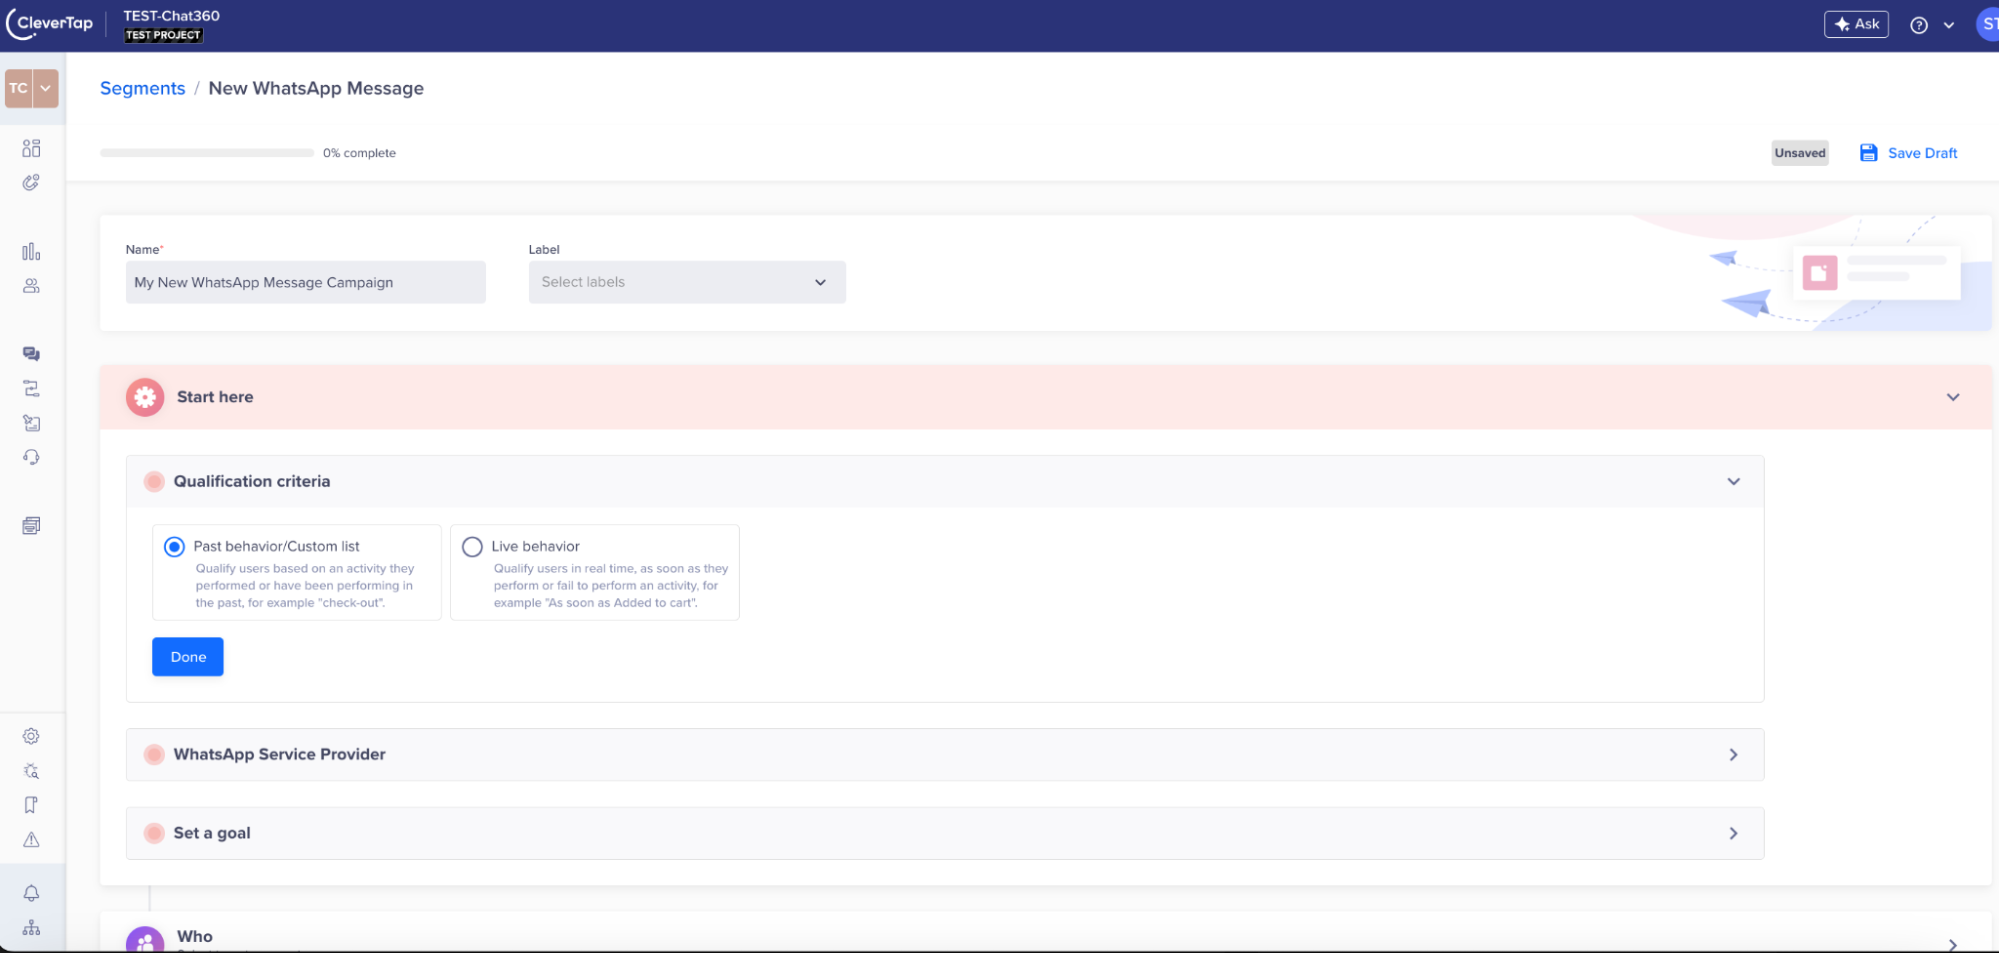
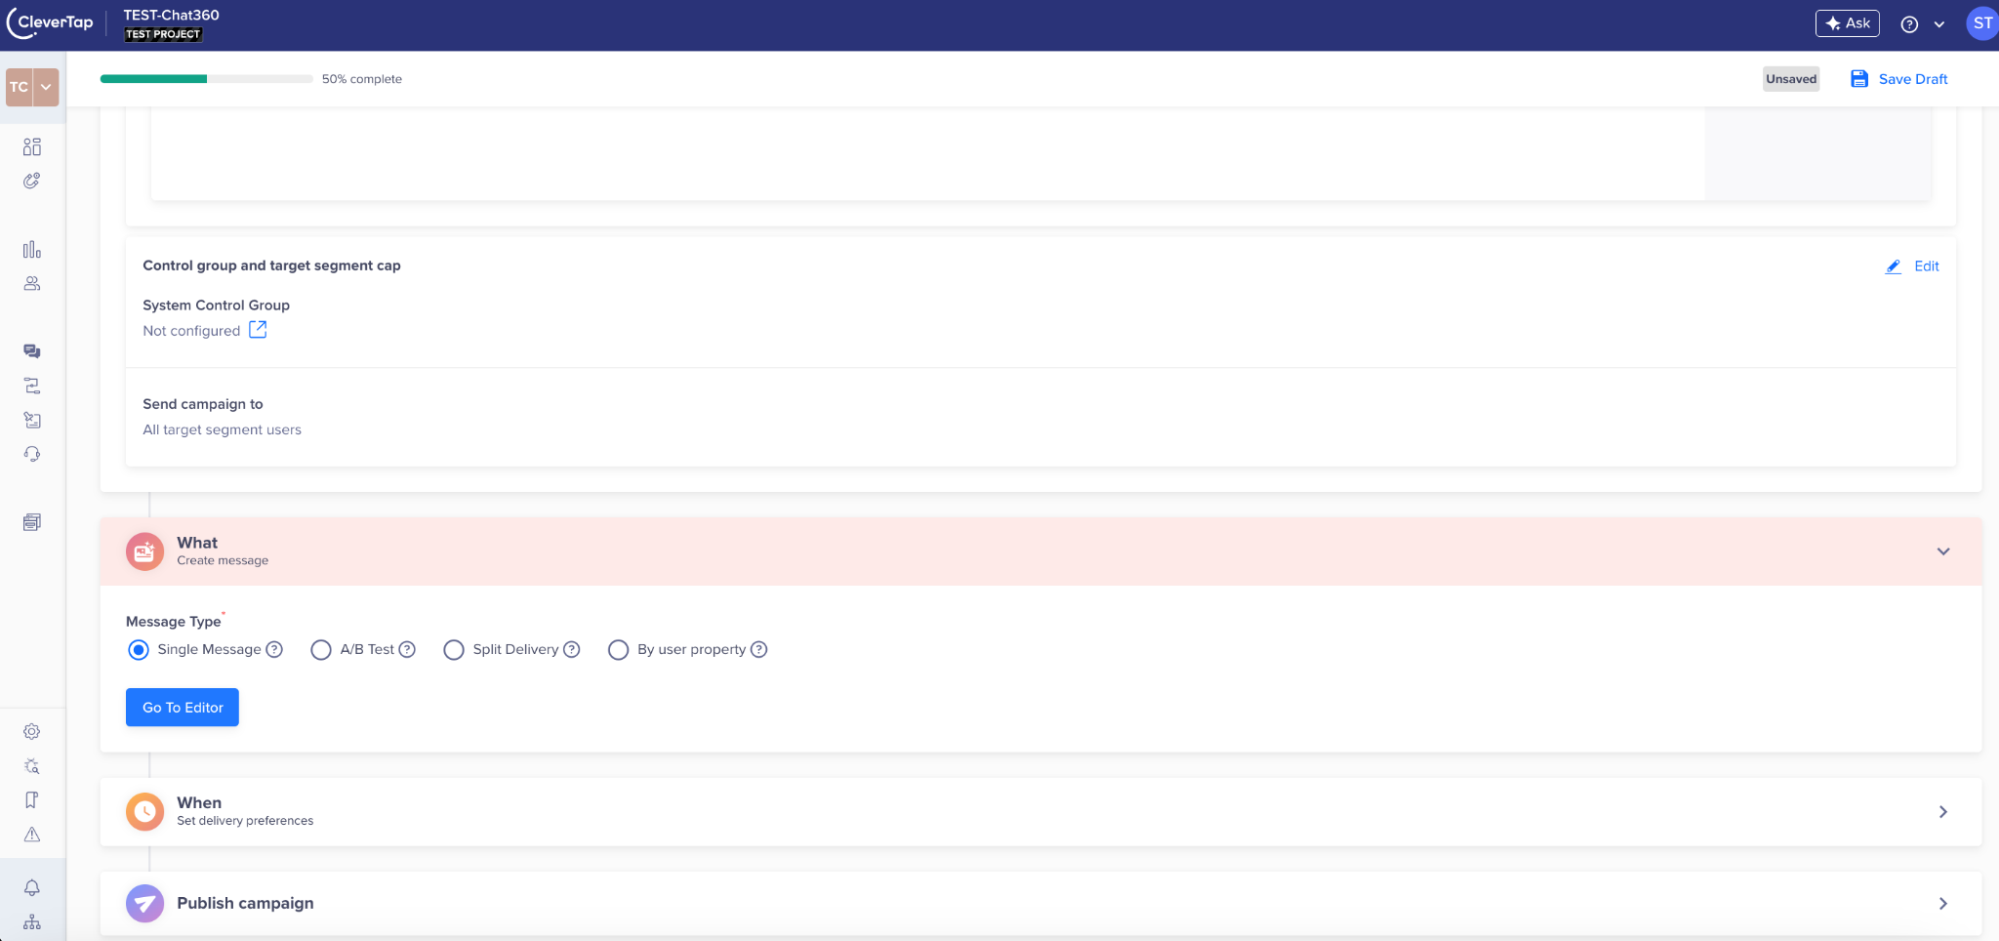
1. Select the Template
- Once redirected to the campaign setup page, select the template you configured previously in Step 3.
- The list will show templates that are synced and active in both CleverTap and Chat360.
- Modify message content within the selected template if allowed.
- You can add images, links, and text to enhance the message based on campaign goals.
- Ensure compliance with WhatsApp guidelines (no promotional content in non-marketing templates, correct variable mapping, etc.).
-
Scheduling and Sending the Campaign
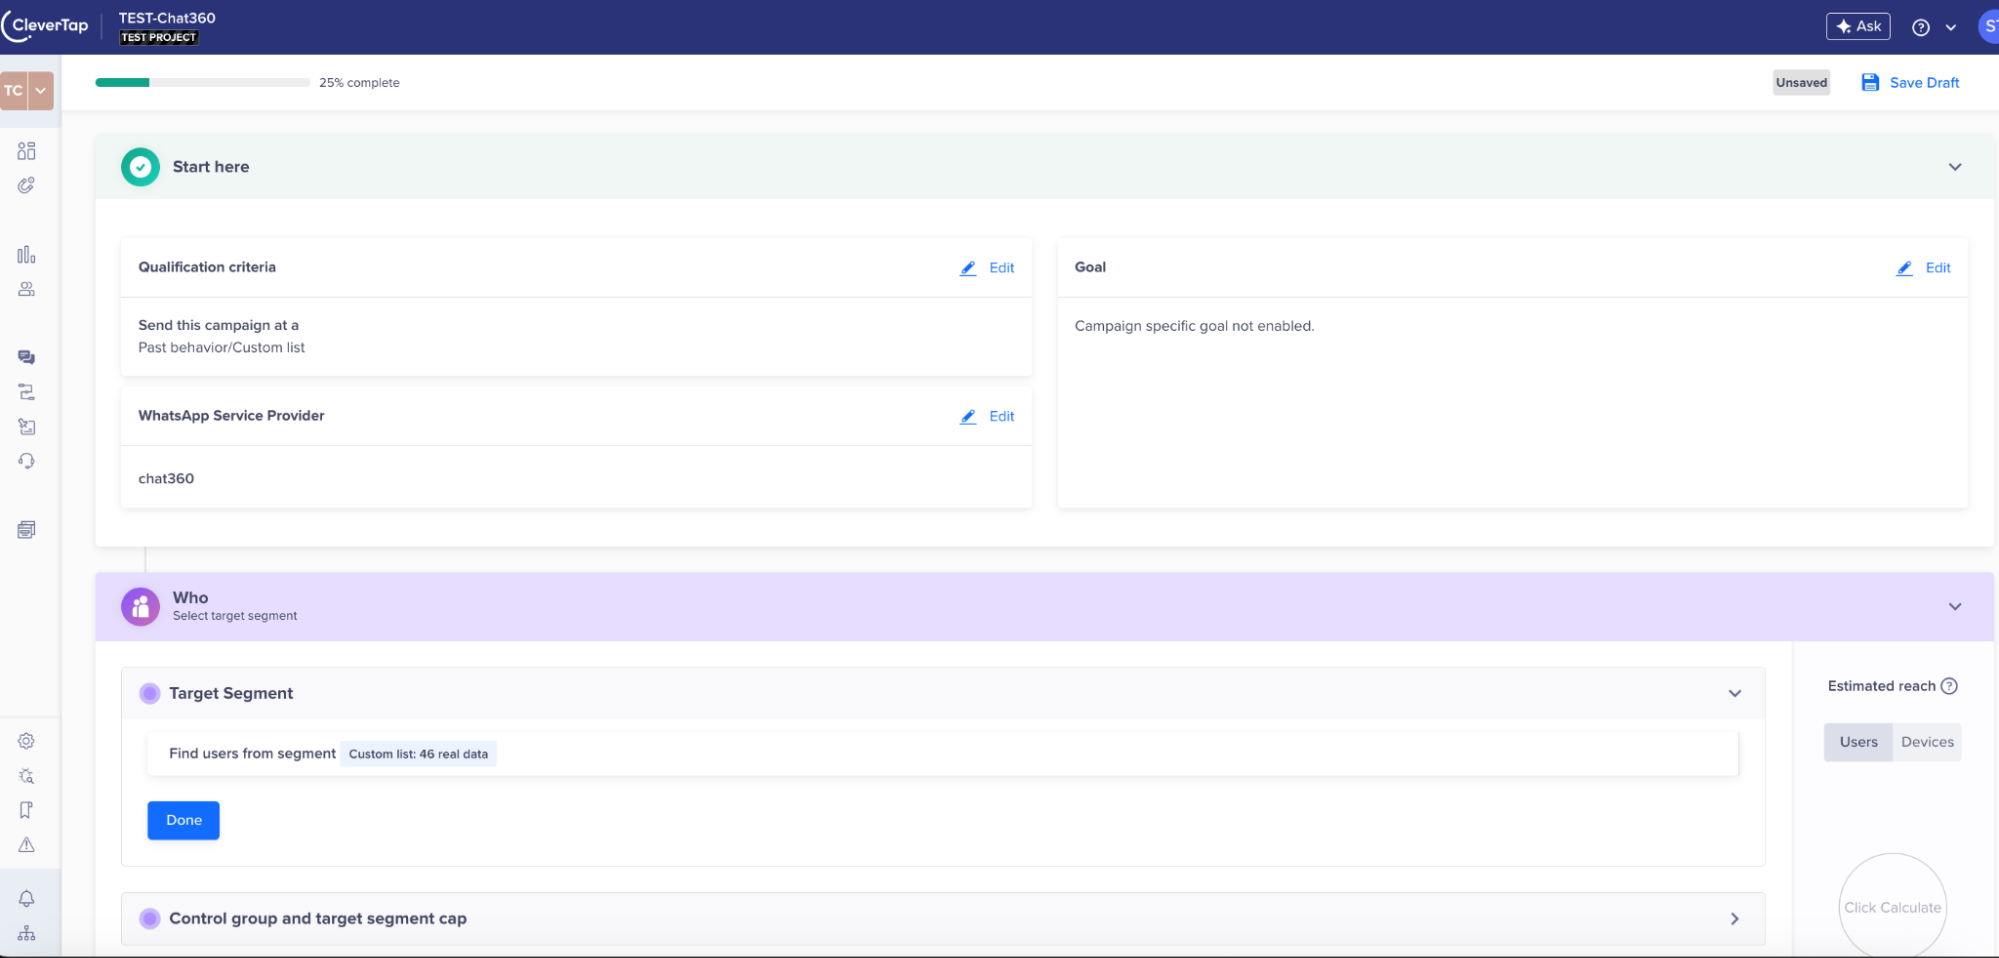
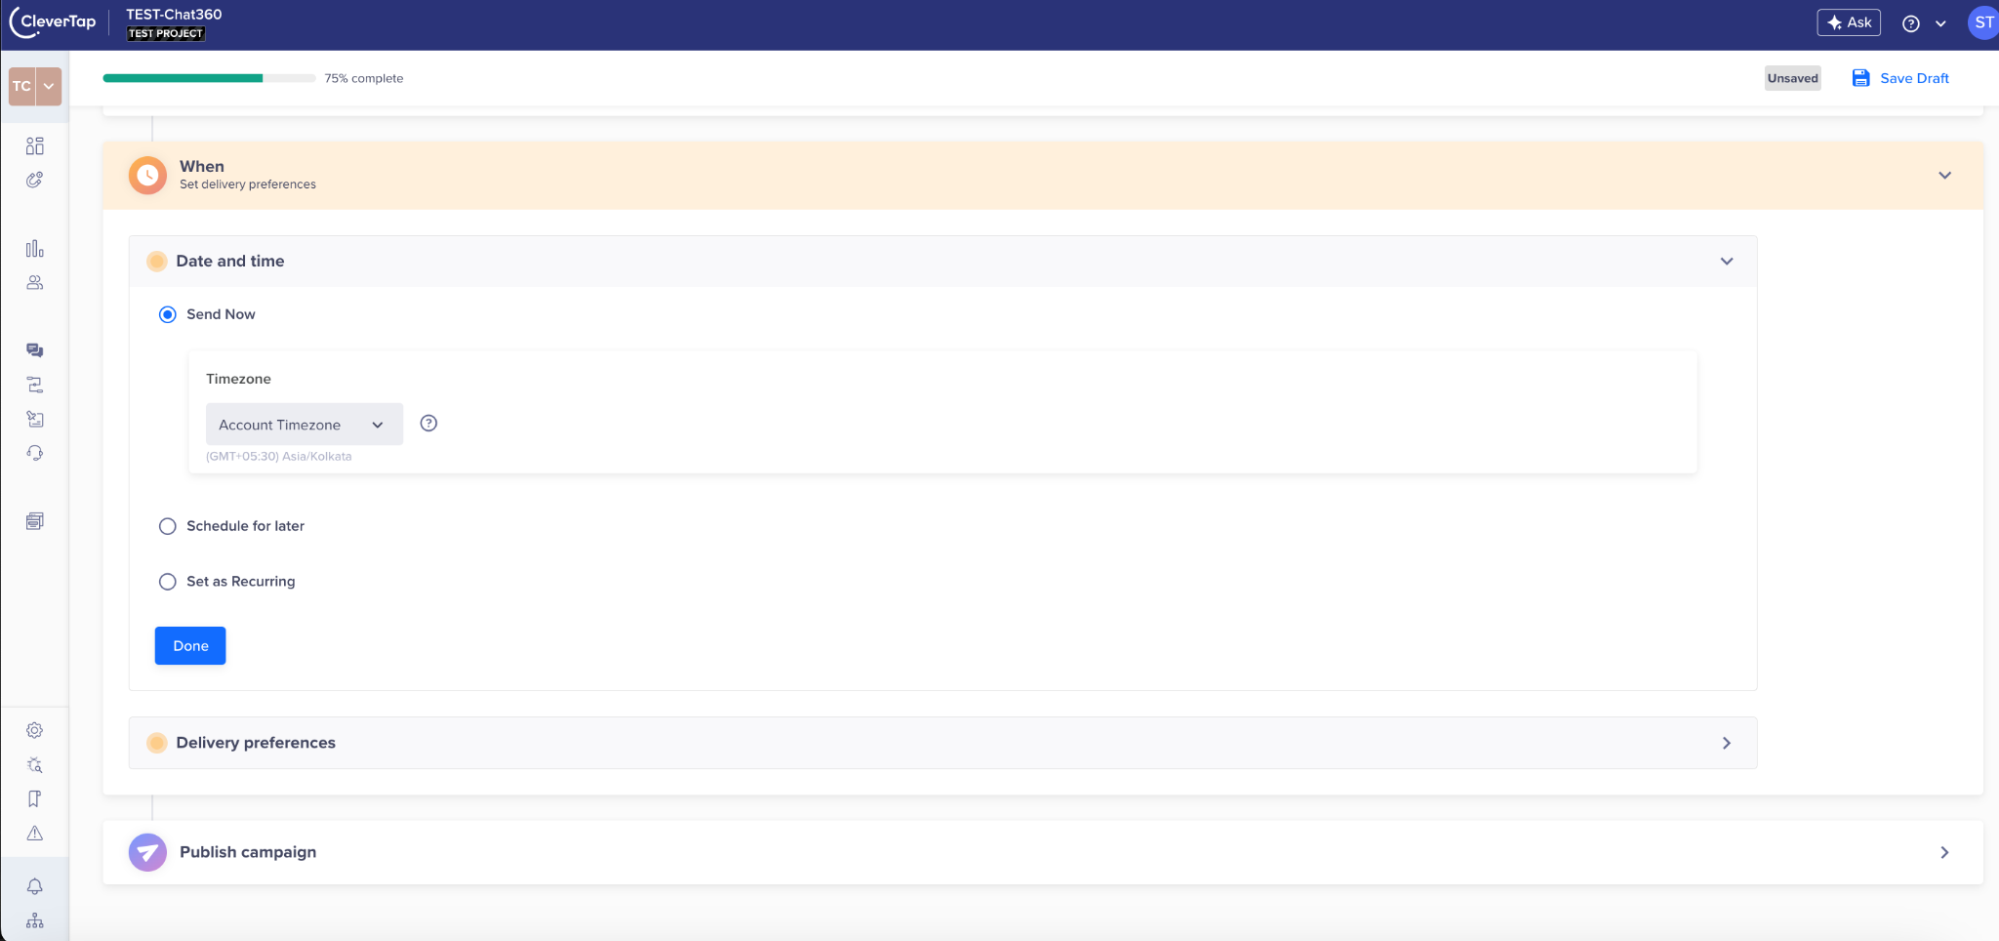
1. Finalise Details
- Double-check the selected segment, template, and custom content.
- Confirm that all dynamic fields in the template are properly mapped and values are accurate.
- Choose one of the two delivery methods:
- Immediate Send: Triggers the campaign as soon as it is published.
- Scheduled Delivery: Pick a future date and time for the campaign. Make sure to align the time zone with the target audience.
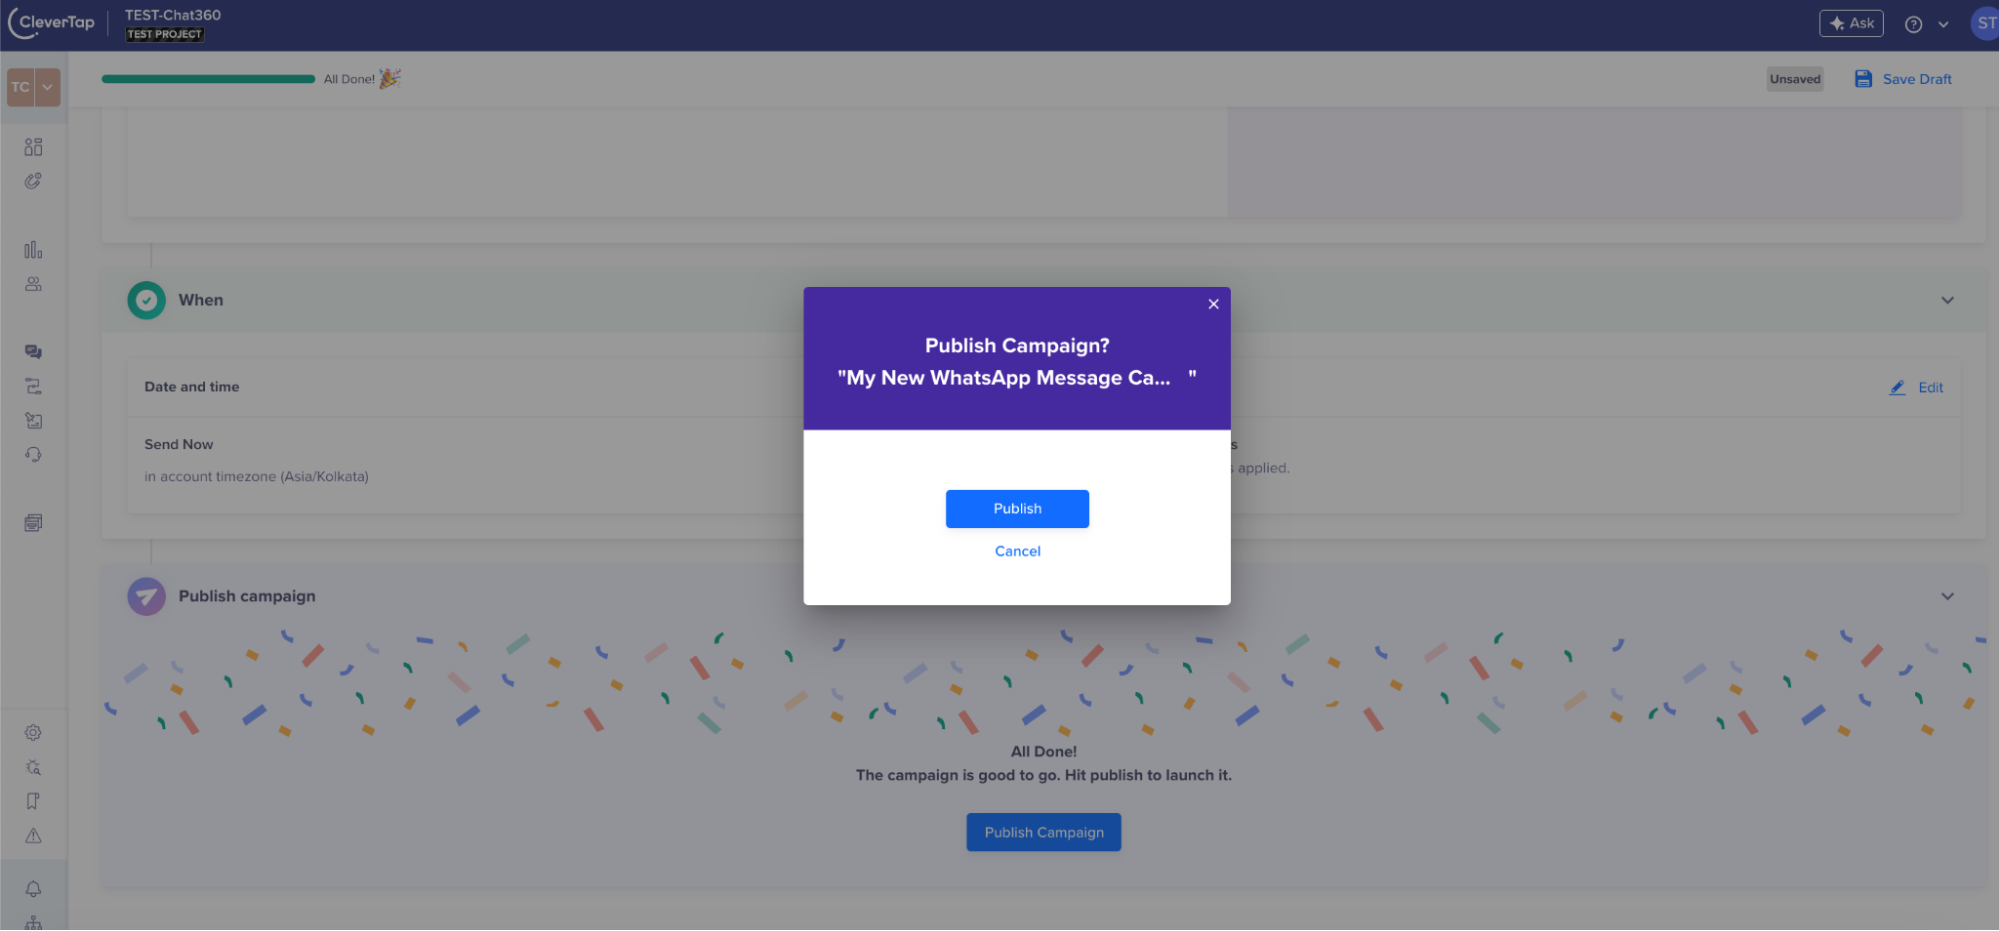
- Click ‘Done’ to complete your configuration.
- Then click ‘Publish’ to initiate the campaign execution. This queues messages for dispatch via WhatsApp.
- Monitoring Campaign Performance: 1. Campaign Analytics Section:
- After publishing, go to the ‘Campaign’ tab under ‘Engage’ in CleverTap.
- Here, you can view real-time performance stats: delivery rate, click-through rate, reads, replies, and failures.
- Use analytics to identify which segments responded well.
- Apply these insights to refine templates, adjust scheduling strategies, or improve targeting in future campaigns.
This step connects your segmented user data in CleverTap to a WhatsApp campaign using the template configured in earlier steps. It includes targeting the right audience, linking them with a relevant message template, and scheduling the delivery of your campaign.
2. Locate Your Data Segment
2. Initiate WhatsApp Campaign Connection

2. Customise Content
2. Set the Schedule
3. Launch the Campaign
-
Step 5: Accessing Analytics for Campaigns in CleverTap
-
Navigating to Campaign Analytics
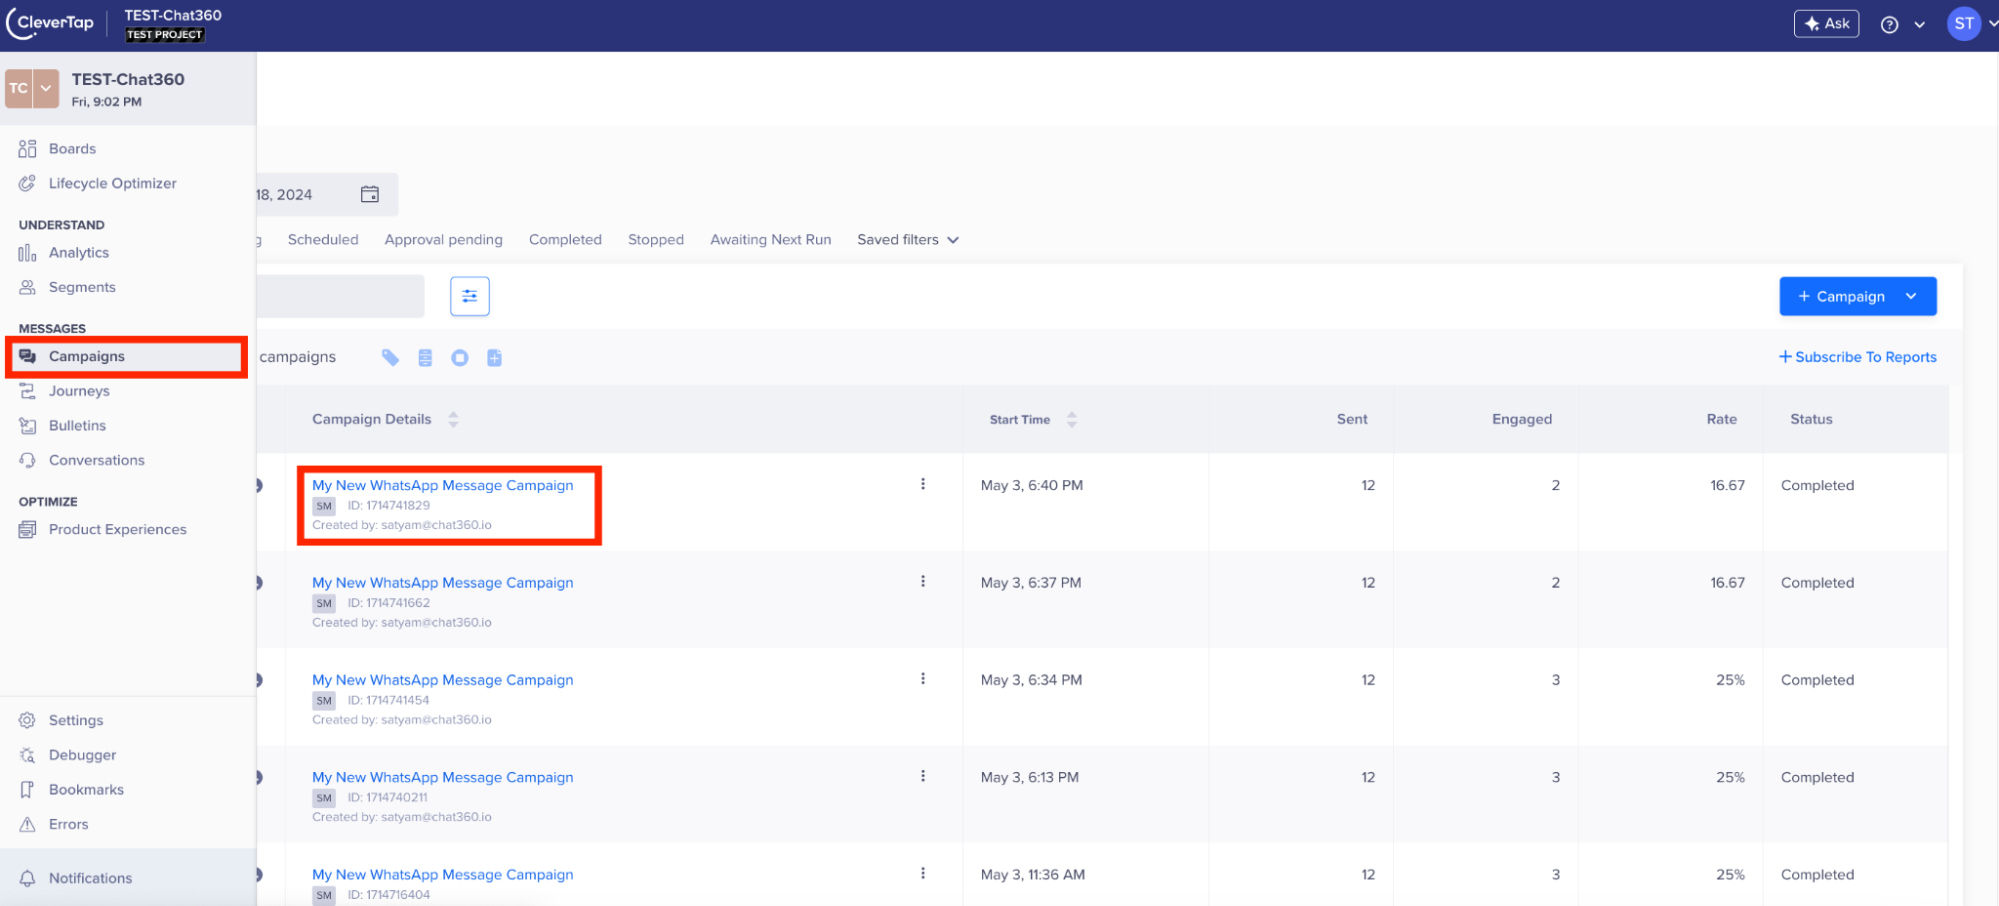
1. Go to Campaign Section
- Log in to your CleverTap dashboard.
- Navigate to the ‘Campaign’ section via the main dashboard or under the ‘Engage’ menu.
- This area contains a consolidated list of all campaigns across different channels, including WhatsApp.
- Scroll through or use the search bar to locate the specific campaign whose performance you want to review.
- Selecting the right campaign is essential for ensuring you’re tracking the correct KPIs and engagement data.
-
Viewing Campaign Analytics
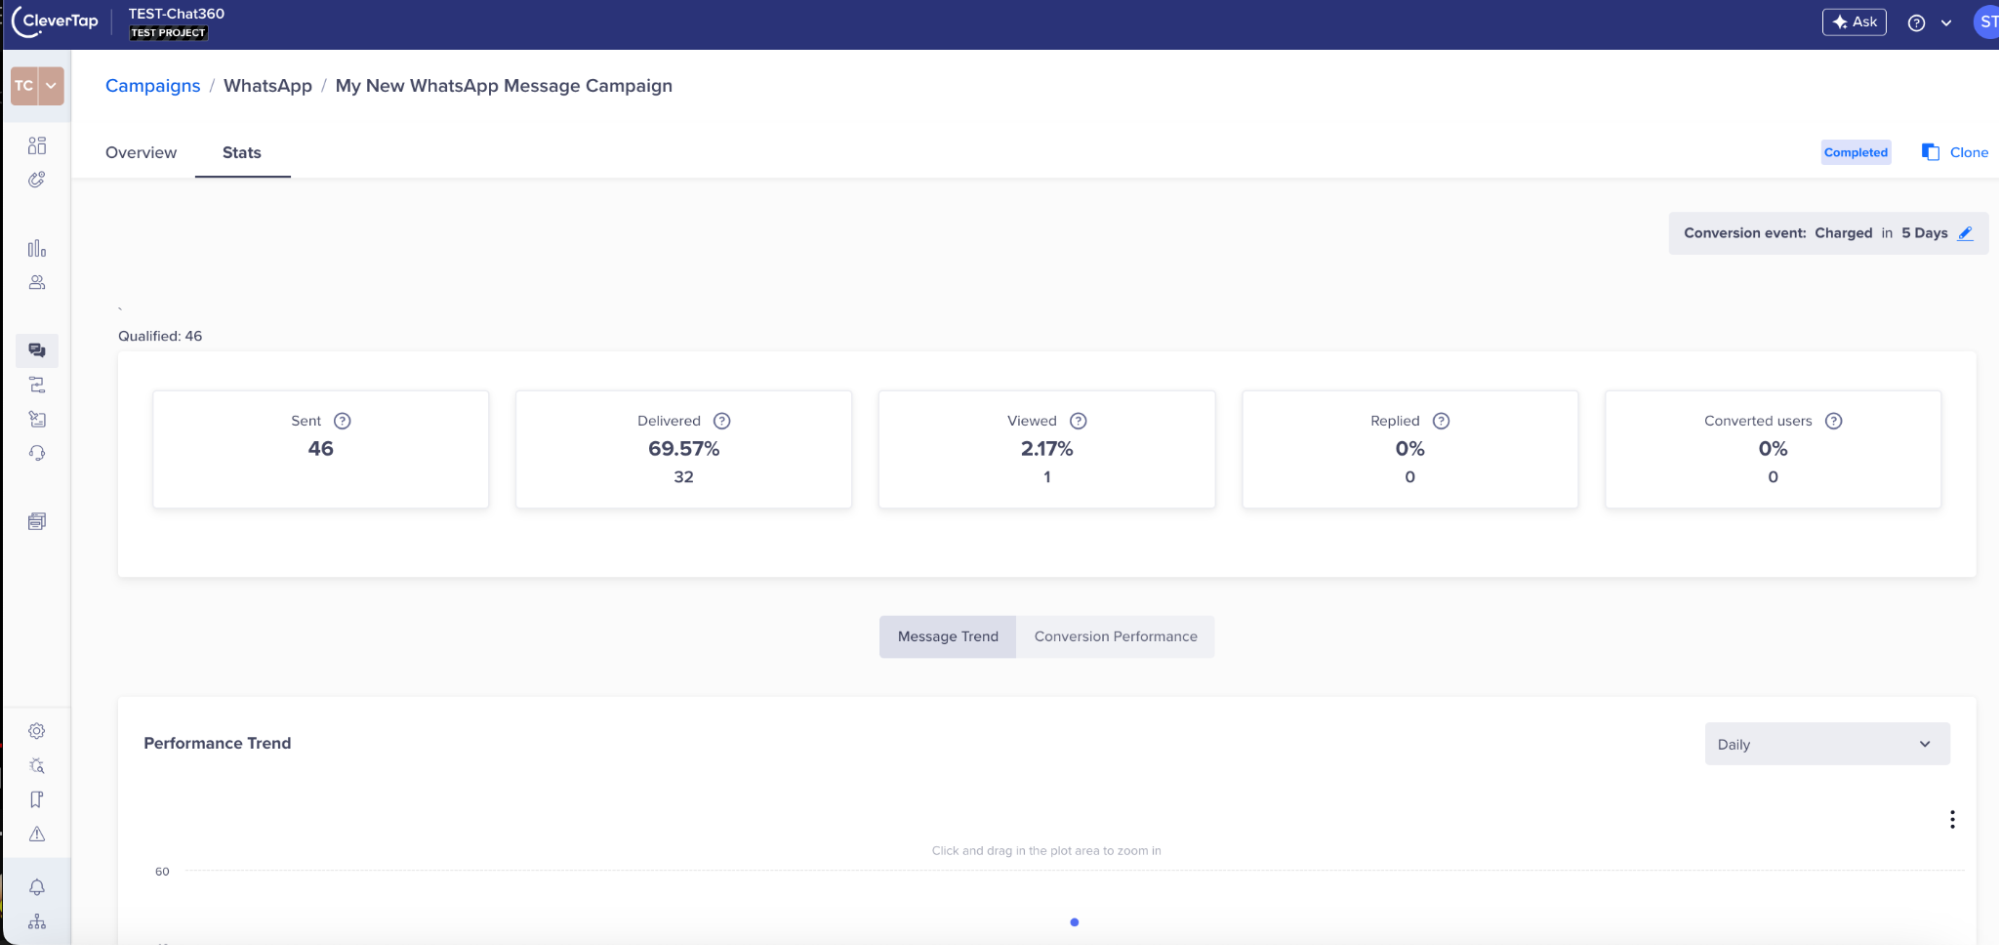
1. Access Analytics View
- Once you've located your campaign, click on the ‘Analytics’ button or link positioned next to the campaign name.
- This opens a detailed dashboard with channel-specific insights.
- Delivery Rate: Number of messages successfully delivered vs. total messages sent.
- Click-through Rate (CTR): Percentage of users who clicked on links within the message.
- Read/Open Rate: How many users opened or read the message.
- Reply/Engagement Rate: Number of replies or interactions triggered by the campaign message.
- Bounce/Failure Rate: Messages that failed due to delivery issues or invalid contacts.
-
Utilising Analytics for Future Campaigns
1. Gather Actionable Insights
- Use the performance metrics to determine which templates, message formats, and user segments are generating the best outcomes.
- Identify time slots, device types, or content styles that lead to higher user engagement.
- Adjust future messaging strategies based on what’s working—whether it's shorter message formats, image inclusion, or call-to-action design.
- Optimize your audience segmentation for better targeting and reduced bounce rates.
- Refine template content and campaign frequency to align with successful historical patterns.
2. Select the Campaign
2. Review Performance Metrics
The analytics section will display a broad range of key performance indicators, such as:
2. Apply Learnings to Future Campaigns
-
Use Case Examples
- 1. E-Commerce: Personalized Cart Abandonment Recovery Use Case:
- Cart abandonment data is captured in CleverTap via website/app activity.
- A segment is created in CleverTap with users who abandoned their carts in the past 24 hours.
- A WhatsApp campaign is triggered via Chat360 using a rich media template that includes:
- Product image
- Custom message (e.g., “Hi Sarah, you left this item in your cart. Still interested?”)
- CTA Button: “Complete Purchase”
- 2. Healthcare: Appointment Reminders & Follow-ups Use Case:
- Appointment data is uploaded to CleverTap via CSV.
- Chat360 WhatsApp templates are used to send:
- Appointment reminders 24 hours before the scheduled time.
- Follow-up messages with health tips or feedback forms post-appointment.
- Messages include calendar links or “Reschedule Now” buttons.
- 3. Travel: Real-Time Flight Alerts & Ticket Promotions Use Case:
- Real-time data syncs into CleverTap based on API or manual upload.
- Segments are created for:
- Passengers traveling in the next 48 hours.
- Users browsing weekend getaways on the website.
- Chat360 sends timely WhatsApp alerts with:
- Flight updates and digital boarding passes.
- Promotional packages via carousels and rich cards.
- 4. BFSI: EMI Reminders and Loan Offers Use Case:
- EMI schedules are managed via CSV uploads in CleverTap.
- Segments are created for:
- Users with pending EMIs.
- Users pre-approved for loan offers.
- Chat360 sends:
- EMI reminders with payment links.
- Pre-approved loan templates with a “Apply Now” CTA.
- 5. EdTech: Re-Engagement and Class Reminders Use Case:
- Student activity is tracked in CleverTap.
- Chat360 is used to send:
- Class reminders 30 minutes before session start.
- Re-engagement nudges to inactive learners with a free class invite.
- 6. Retail: Flash Sale Announcements Use Case:
- CleverTap segments users who viewed a product but didn’t purchase.
- A Chat360 WhatsApp campaign is triggered with:
- Product image, discounted price, countdown timer.
- CTA: “Buy Now” with UTM tracking enabled.
A fashion e-commerce brand wants to recover abandoned carts using personalized WhatsApp nudges.
How It Works:Improved recovery rate and conversion due to instant, personalized outreach on WhatsApp.
A diagnostic lab wants to reduce no-shows for health checkups.
How It Works:Reduces no-shows and improves customer satisfaction through proactive engagement.
A travel agency wants to notify users of flight delays and upsell weekend travel packages.
How It Works:Enhances trust with real-time alerts and increases bookings via timely offers
A lending company wants to remind users about upcoming EMIs and promote personal loans.
How It Works:Improves repayment rate and increases cross-sell of financial products.
An online learning platform wants to re-engage inactive students and send session reminders.
How It Works:Boosts attendance and reduces churn by targeting users with context-aware reminders.
A D2C brand wants to notify users of limited-period flash sales.
How It Works:Drives urgency, increases CTR, and accelerates sales through direct conversion channels.
-
Key Advantages of Integration
| Feature | Description |
|---|---|
| 🎯 Hyper-Targeted Campaigns |
Segments based on behavior, events, or custom lists |
| 🔁 Automated Retargeting |
Triggered WhatsApp templates based on user journeys |
| 📈 Real-Time Analytics |
Measure delivery, read, click, and reply rates per campaign |
| 📂 Cross-Channel Orchestration |
Combine WhatsApp with Email, Push, and In-App messages |
| 🔄 Seamless Sync |
CSV upload + live API data sharing ensures up-to-date user lists |