Email Campaign
-
Overview:
-
Setup & Configuration
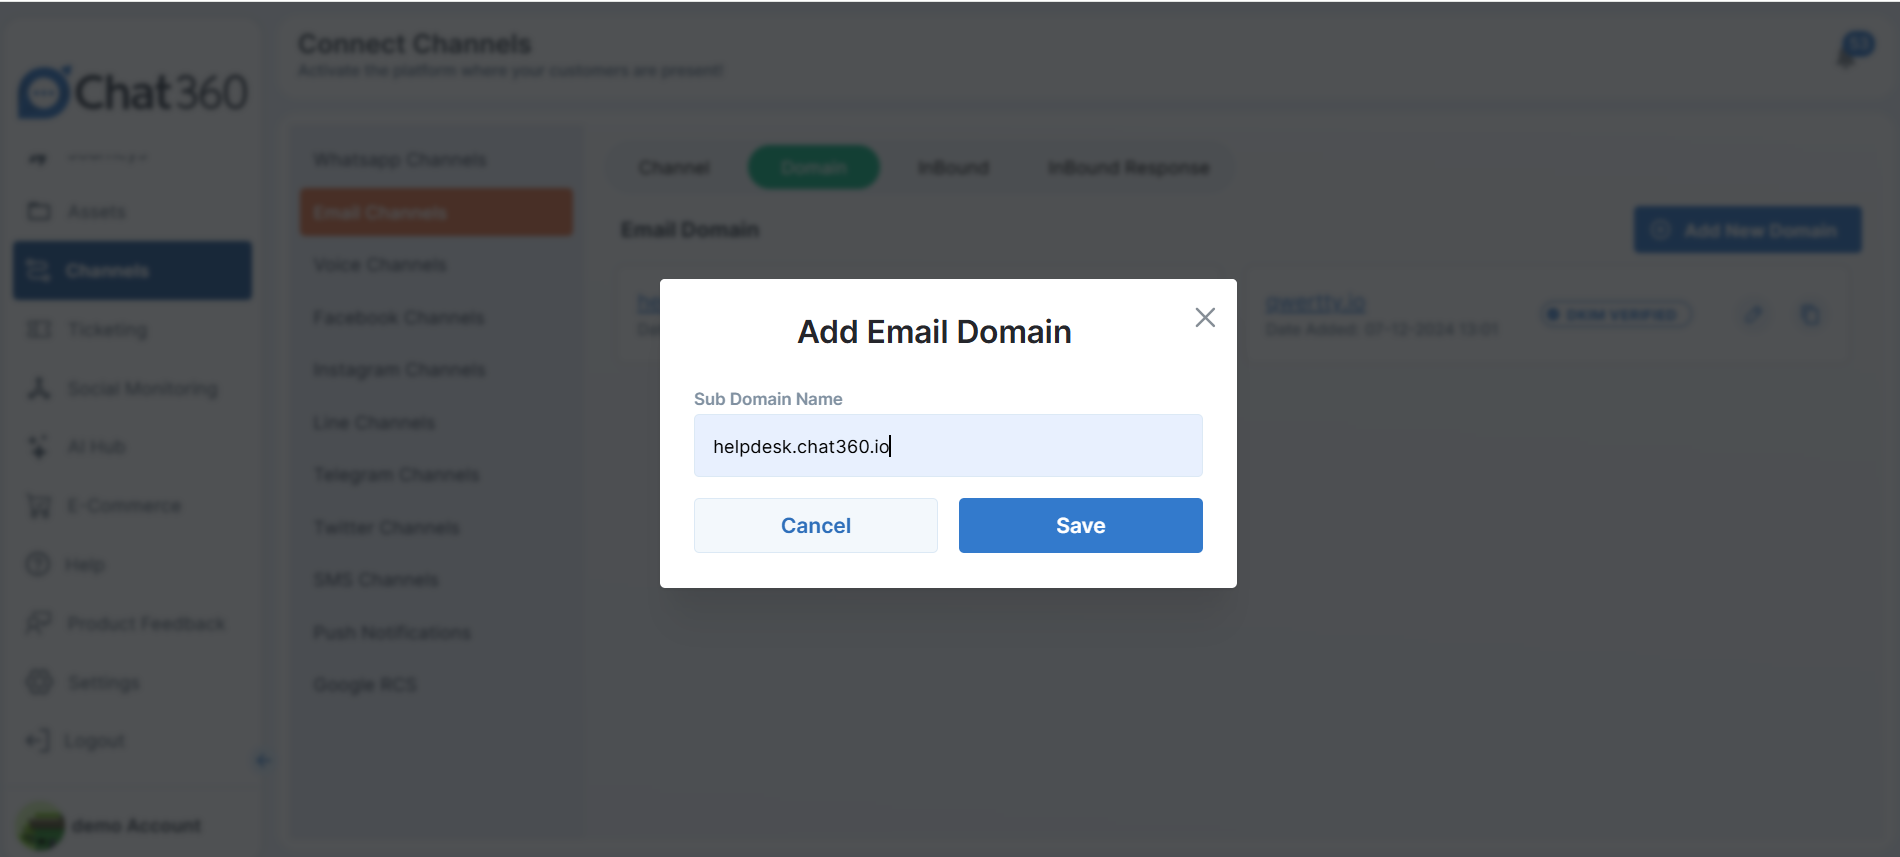
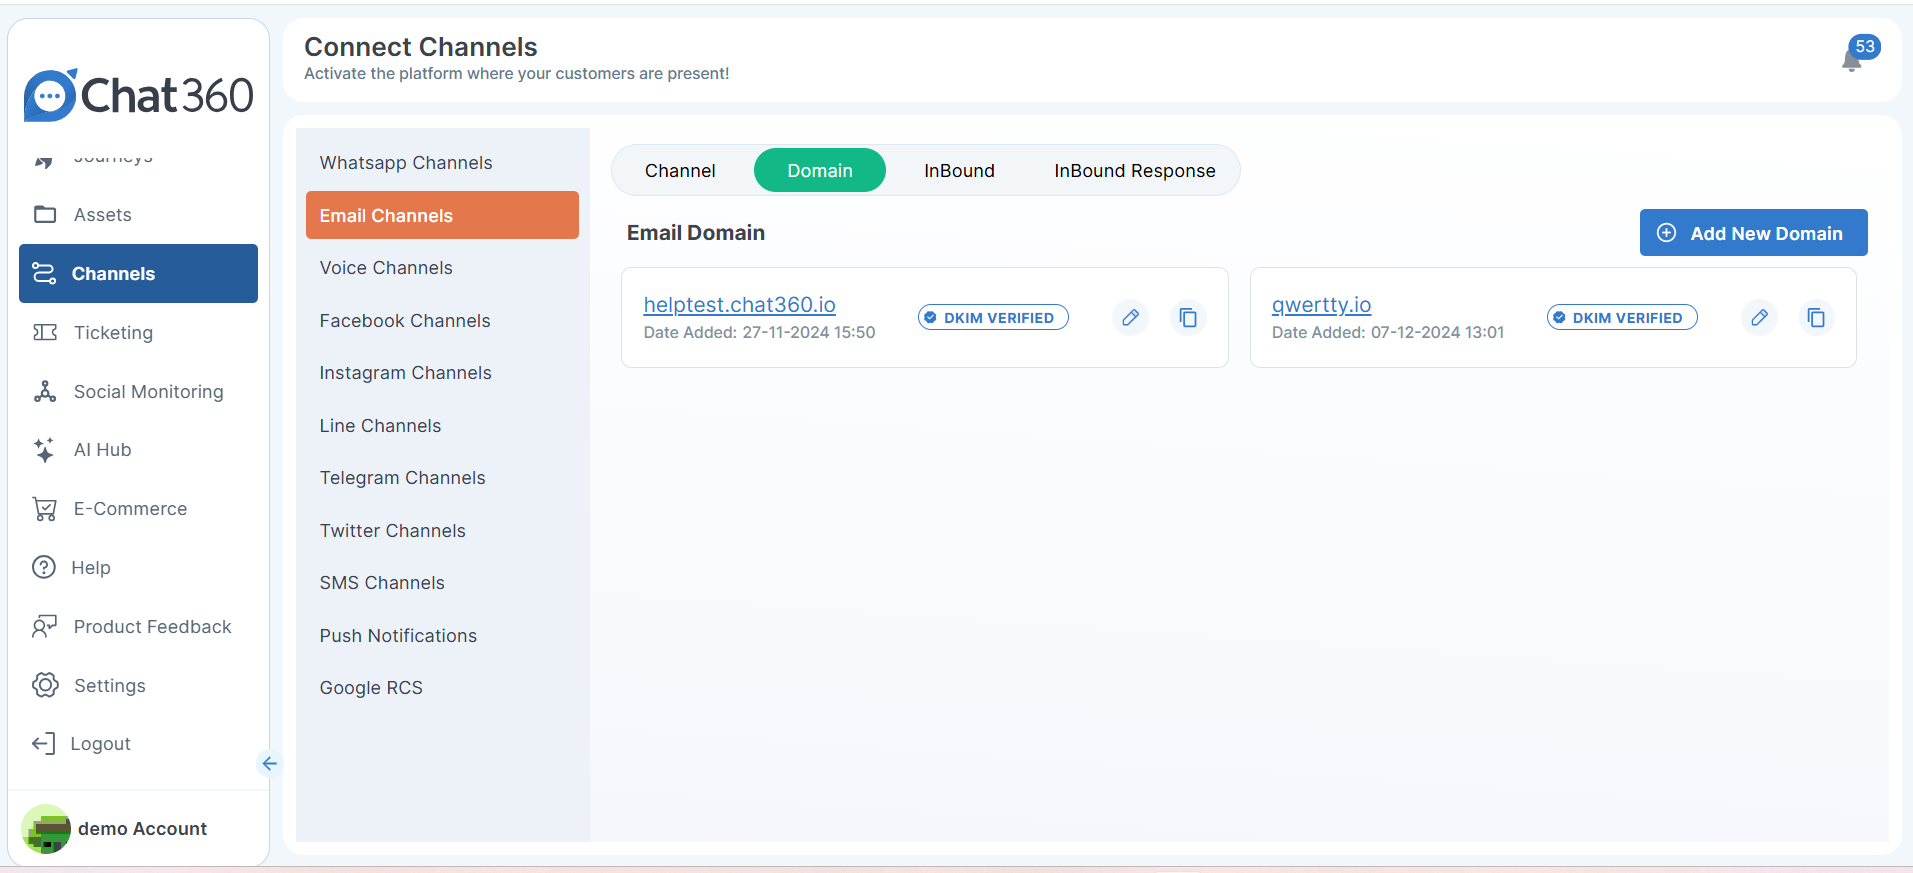
- Navigate: Channels → Email Channels
- Action: Click Add New Domain, enter your sending domain, and verify ownership to ensure deliverability and sender reputation.
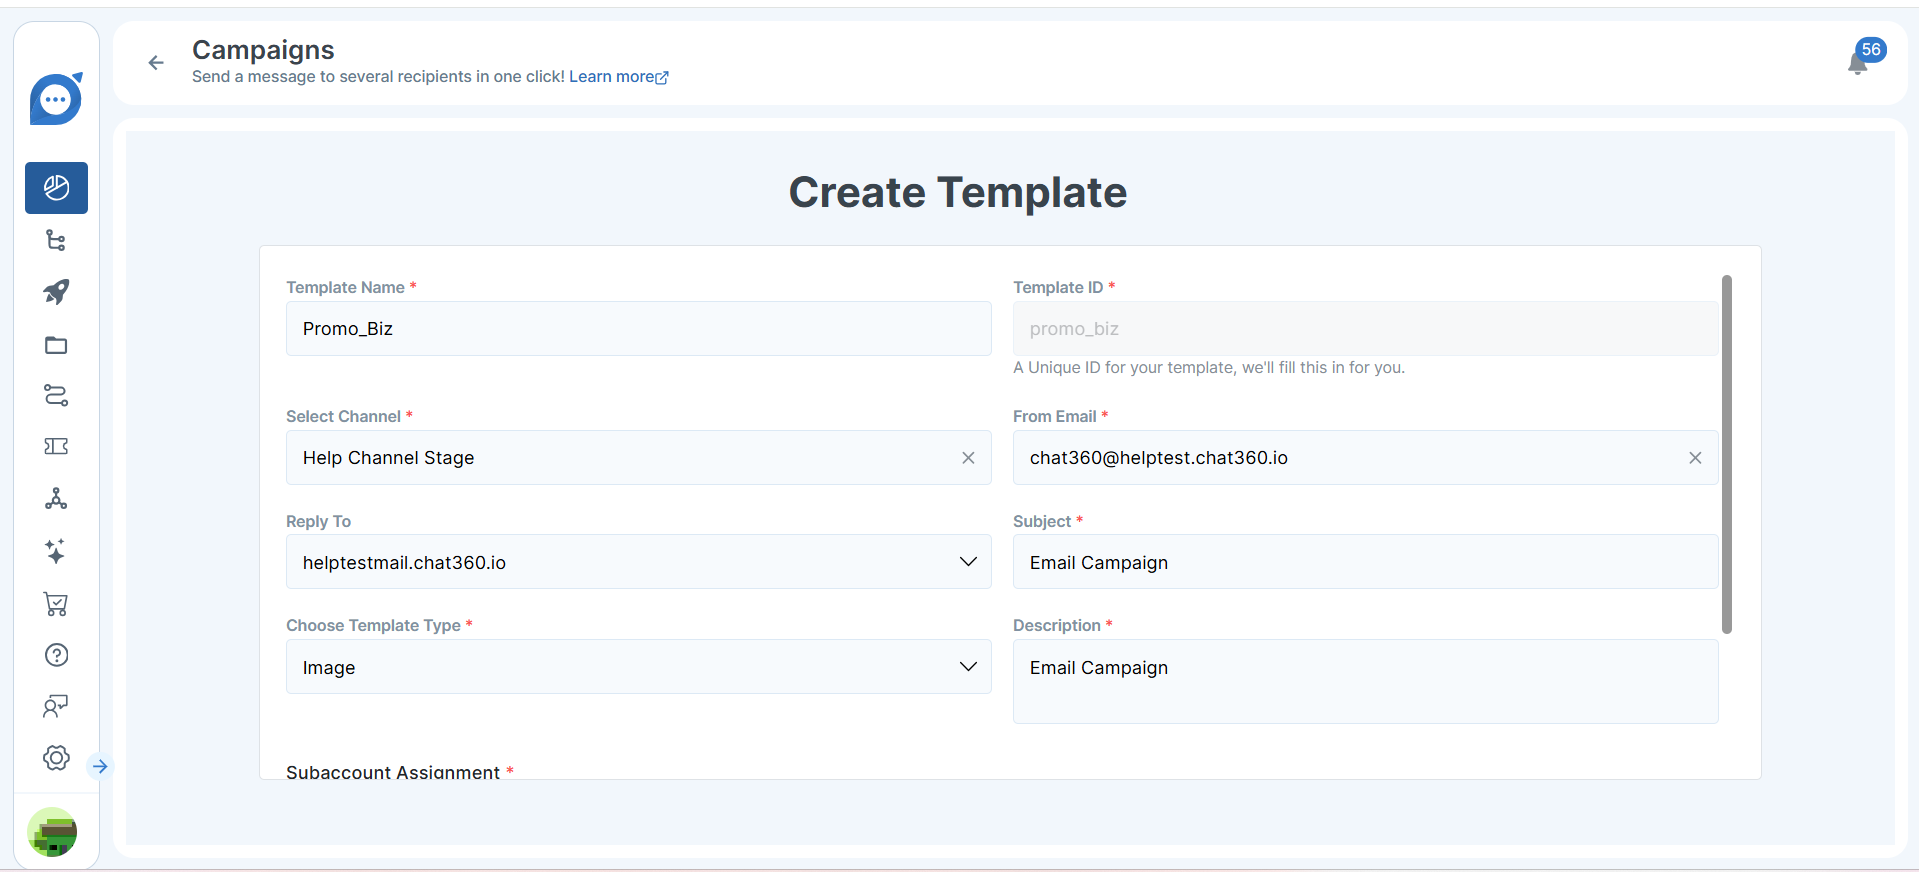
- Navigate: Campaign → Email → Template
- Action: Click Create New Template
- Template Name: Unique, descriptive title
- Select Channel: Choose your verified email channel
- From/To Addresses: Configure sender and default reply-to
- Subject & Description: Craft an engaging subject line and brief overview
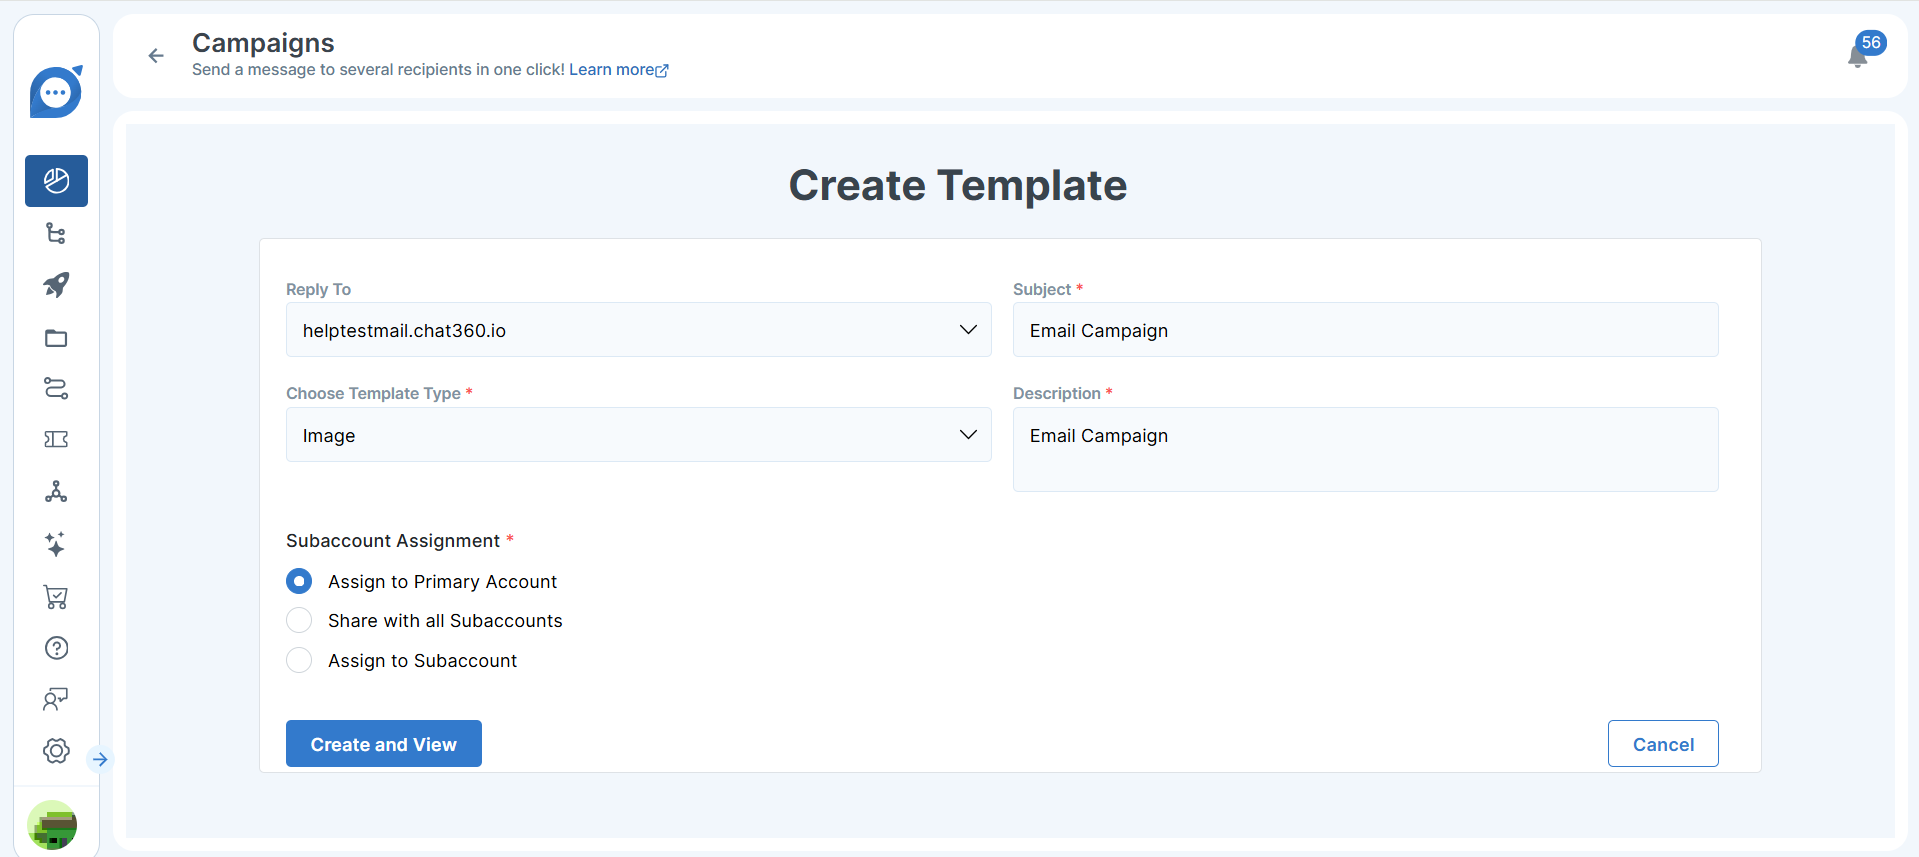
- Design: After “Create and View,” assemble your email using layout blocks (text, images, buttons, carousels, accordions, hero wrappers, dividers, etc.) to match your branding and content goals.
- Approval: Click Get Template Approval Status. Once Meta-compliant approval is received, your template is ready for campaigns.
- Navigate: Campaign → Email → Scheduled Campaign
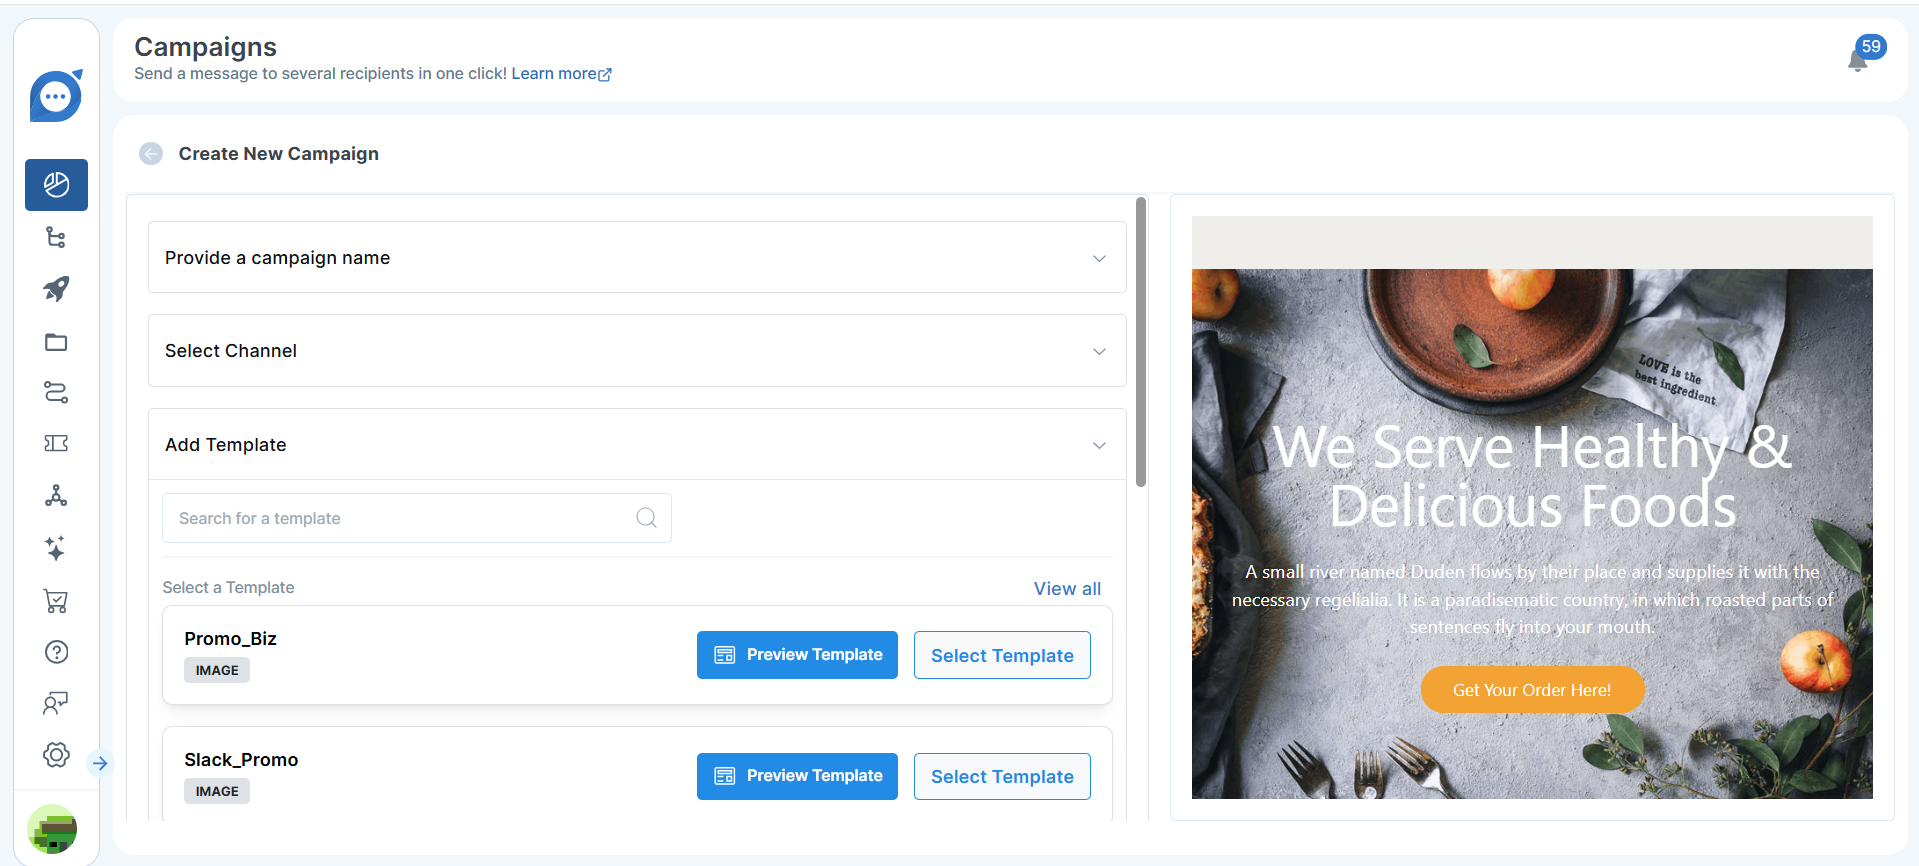
- Action: Click Create New Campaign and follow four steps:
- Details: Name campaign, select channel, choose approved template
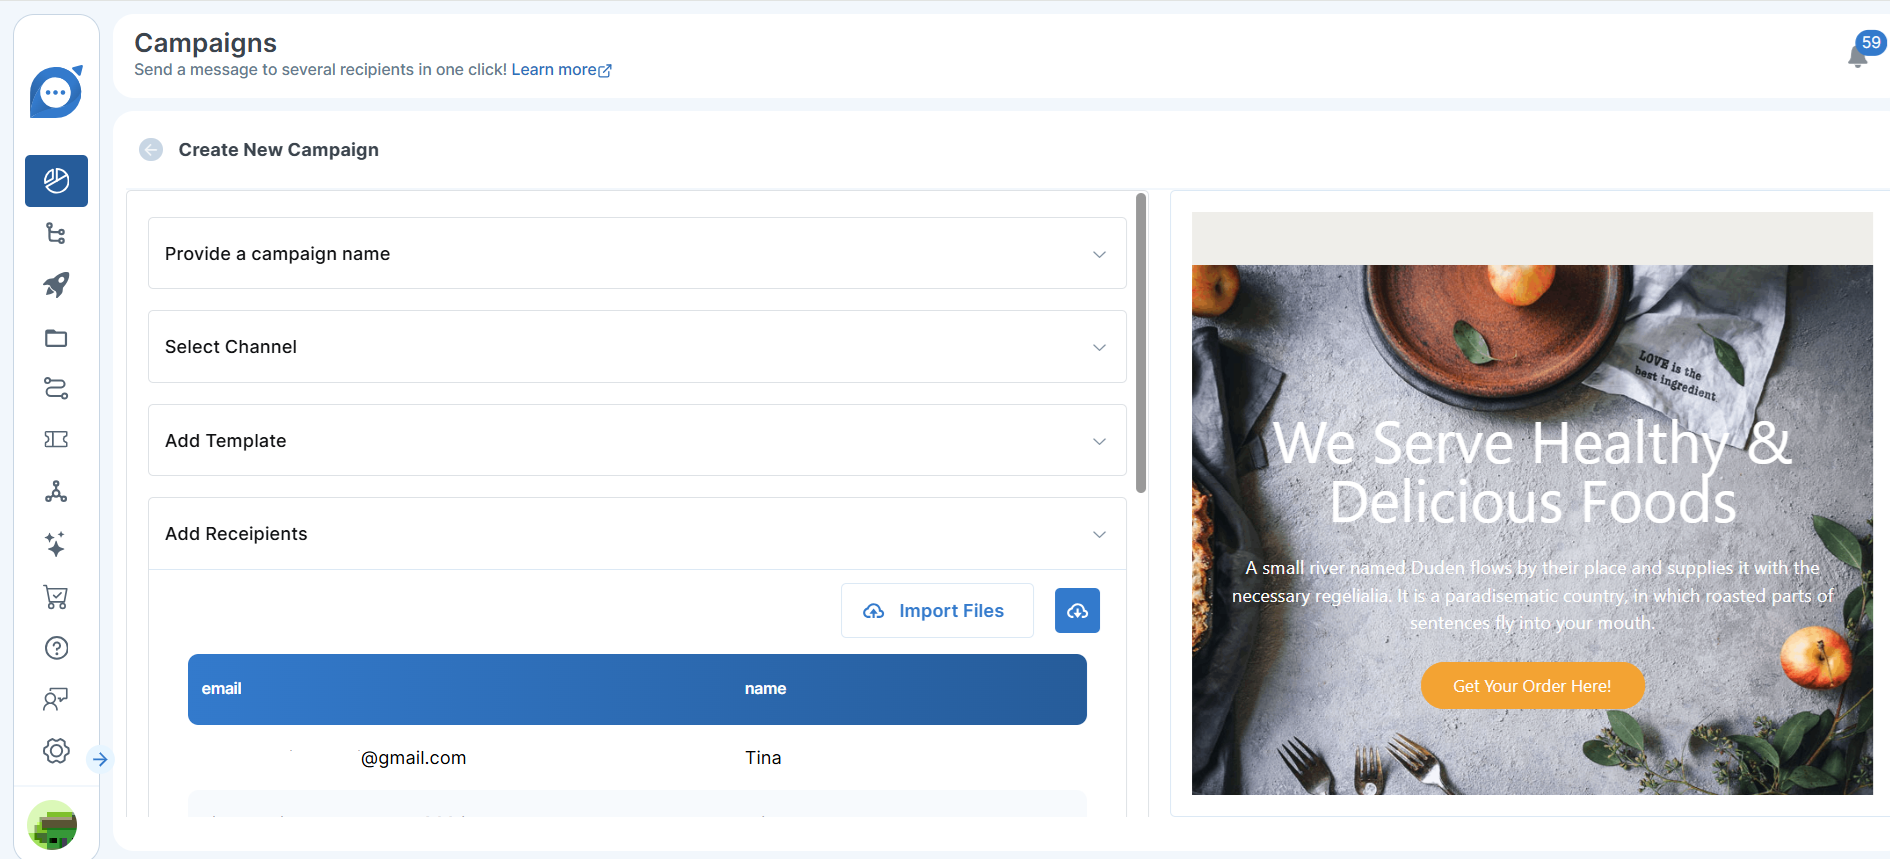
- Recipients: Import contacts via CRM tags or upload CSV/Google Sheet, map template variables
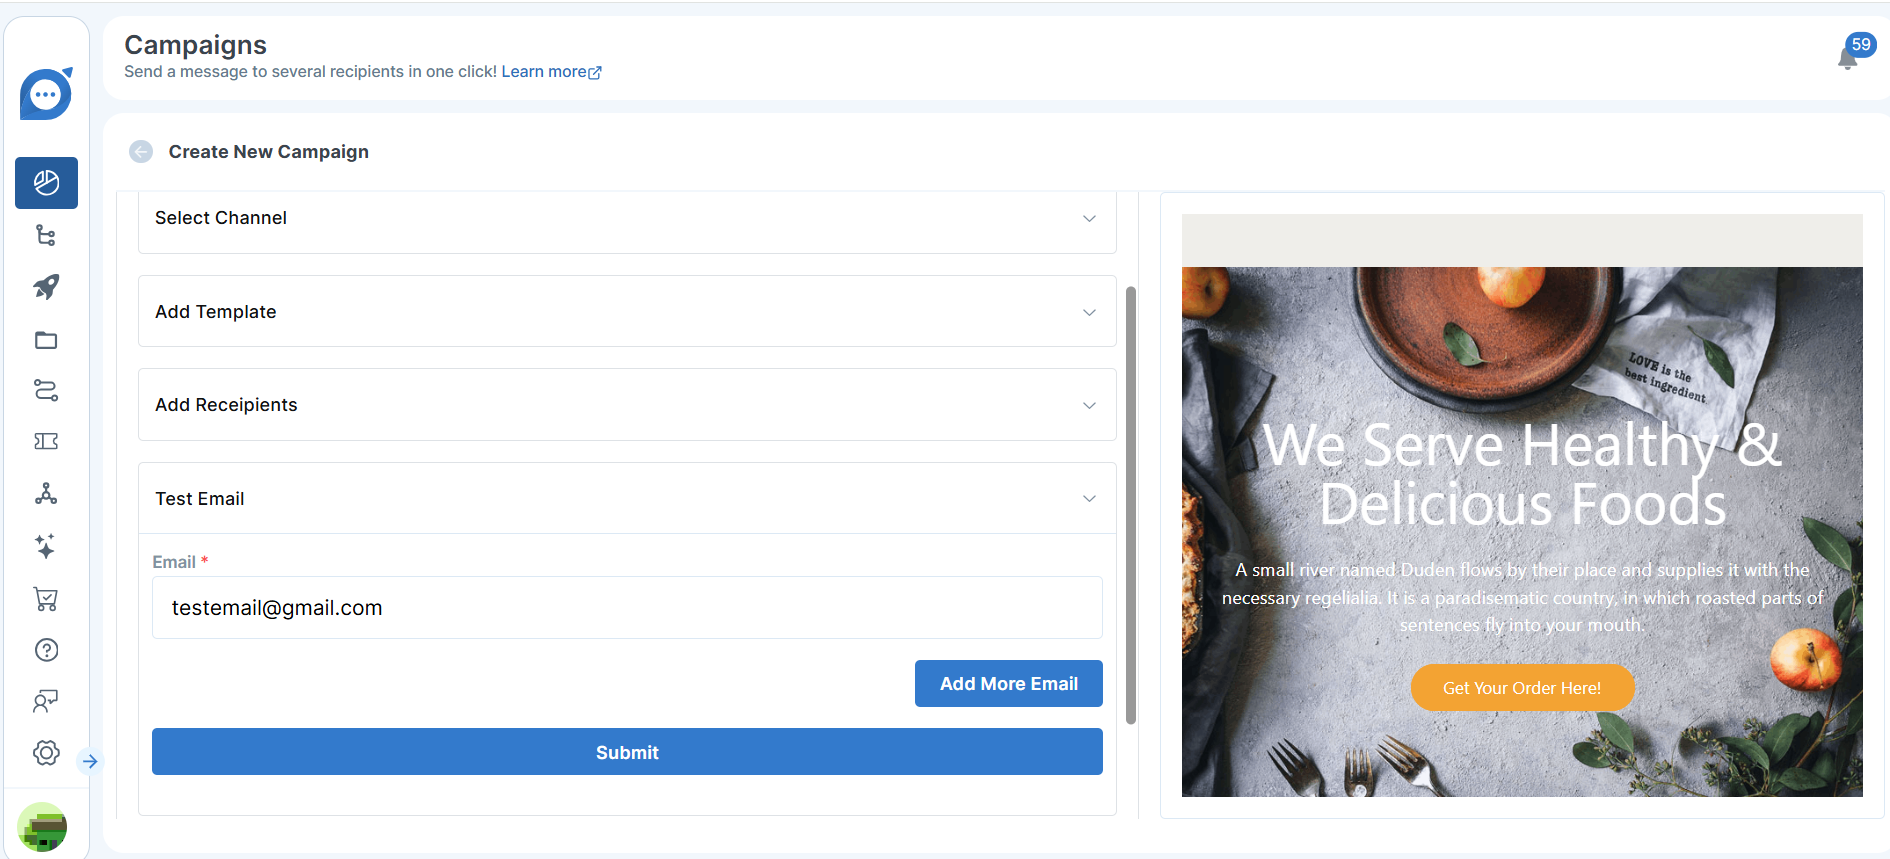
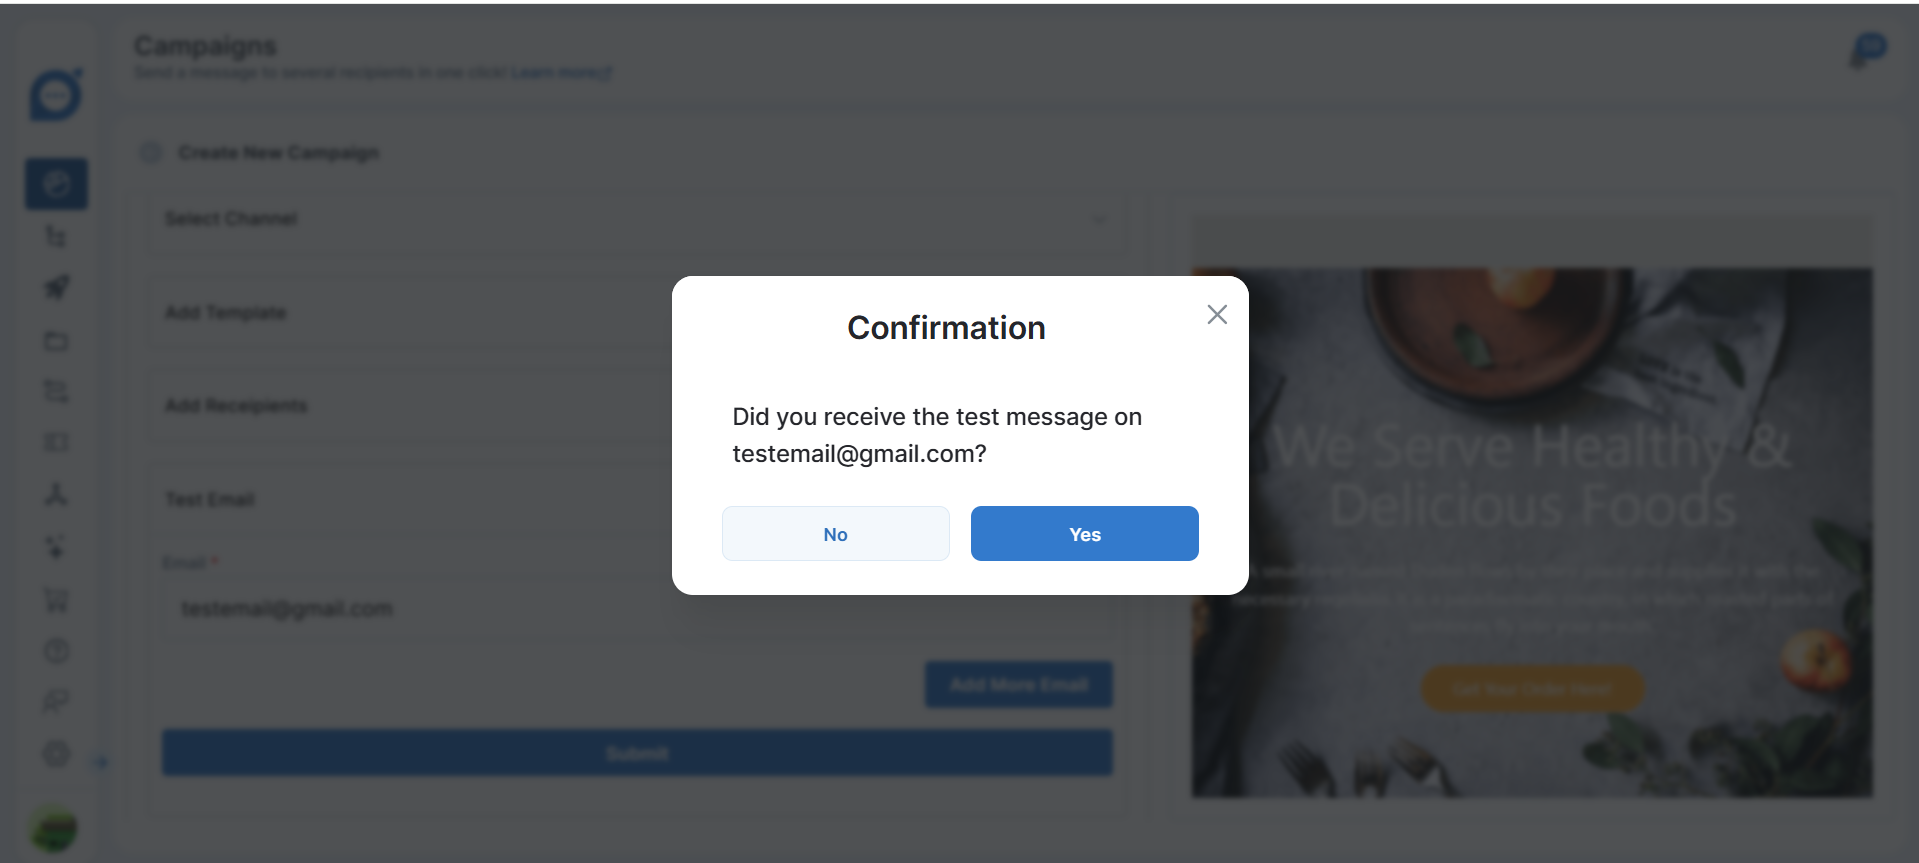
- Test: Send a preview to an internal address to verify content and variable population
- Schedule & Launch: Set send date/time, configure recurrence or “send now,” review settings, and hit Launch
-
Use Case Example
- Step 1: Uses a verified domain for high deliverability.
- Step 2: Designs a dynamic, two-column template with product carousels.
- Step 3: Imports segmented contacts via CRM tags (VIP customers).
- Step 4: Tests the email internally, then schedules it for peak engagement time.
- Result: 35% open rate and 8% click-through, outperforming previous campaigns by 20%.
-
Key Benefits
- Brand Consistency: Ensures every email aligns with your visual identity through rich-block templates.
- Efficiency & Compliance: Domain verification and approval workflows guarantee deliverability and adherence to provider policies.
- Targeted Engagement: Segment recipients via CRM tags or custom uploads for highly relevant messaging.
- Automated Workflows: Schedule and repeat campaigns on your cadence—daily, weekly, or one-off—without manual intervention.
- Actionable Insights: Measure opens, clicks, bounces, and unsubscribes to refine future email strategies.
Chat360’s Email Campaign feature empowers you to design, approve, and dispatch high-impact email blasts—directly from the platform—while maintaining brand consistency and compliance. It streamlines domain setup, template creation, approval workflows, and campaign scheduling, ensuring targeted outreach and measurable results.
-
1. Domain Whitelisting
-
2. Template Creation
-
3. Campaign Launch
A retail brand schedules a “Summer Sale” email to 50,000 subscribers:
-
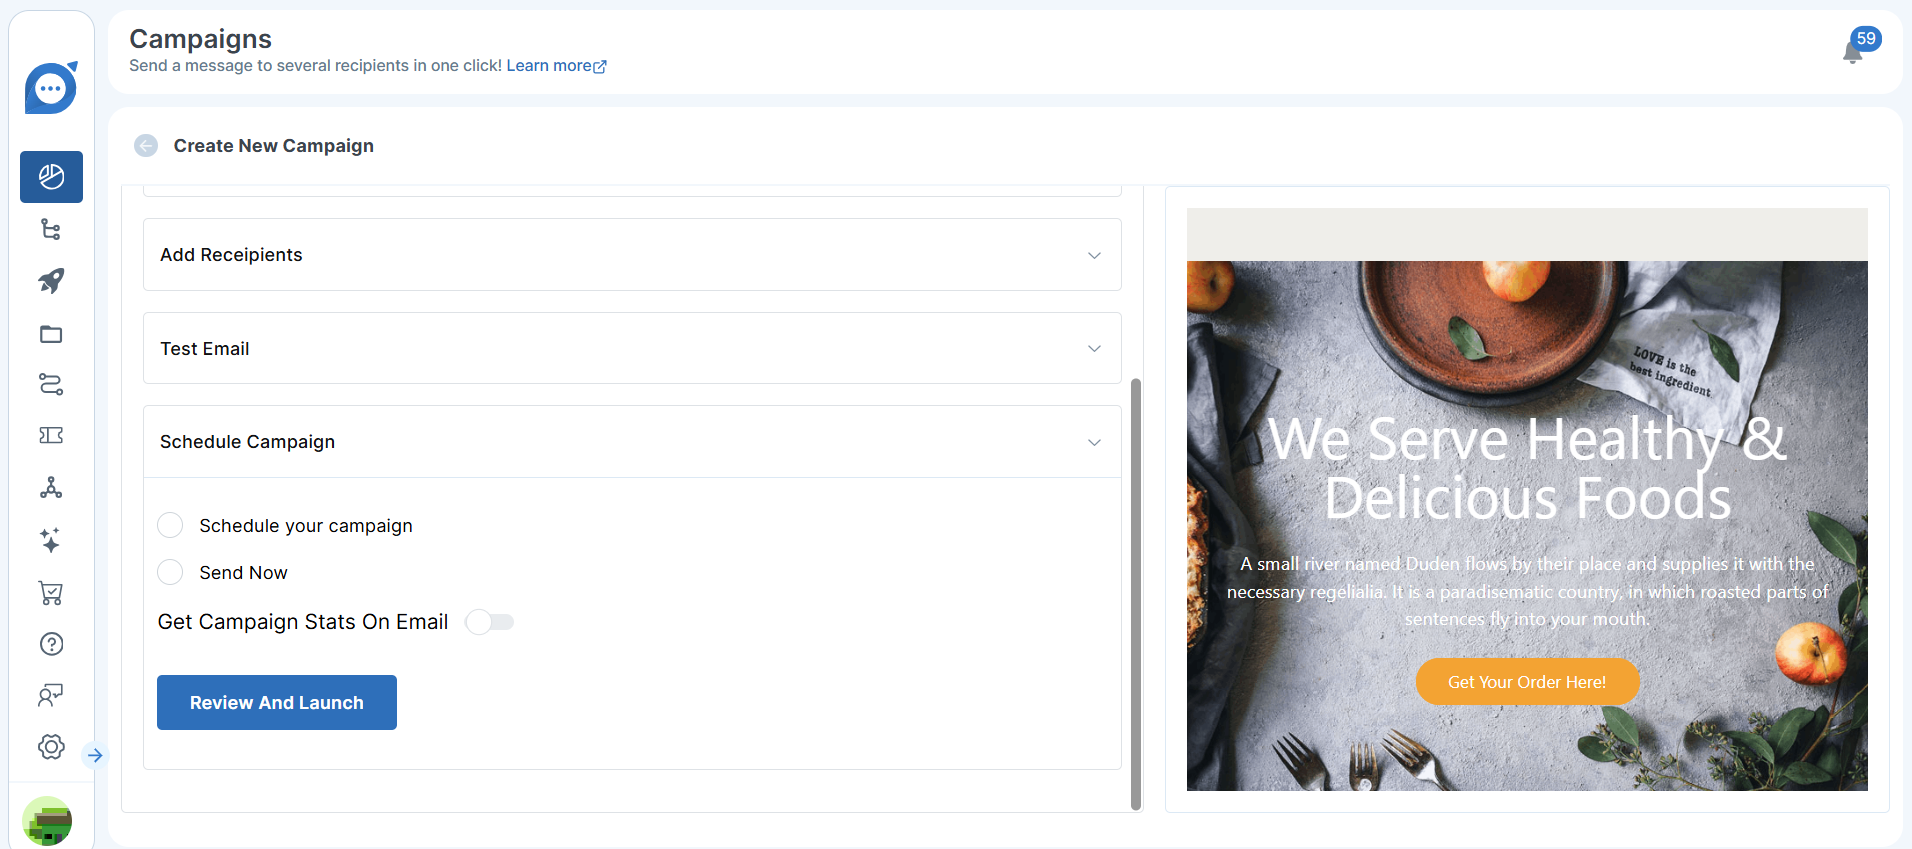
Schedule Email Campaign
Overview:
-
How to Schedule
- Navigate to Campaign → Email → Schedule Campaign.
- Click Create New Campaign.
- Campaign Name: Enter a clear, descriptive title (e.g., “June Newsletter”).
- Select Channel: Choose your verified email domain.
- Add Template: Attach the pre-approved email template.
- Use Import File to upload your contact list (CSV or Google Sheet).
- Ensure columns match the template variables (e.g., {{first_name}}, {{order_id}}).
- Under Test Email, enter one or more internal email addresses.
- Send a preview to validate layout, links, and personalization tokens.
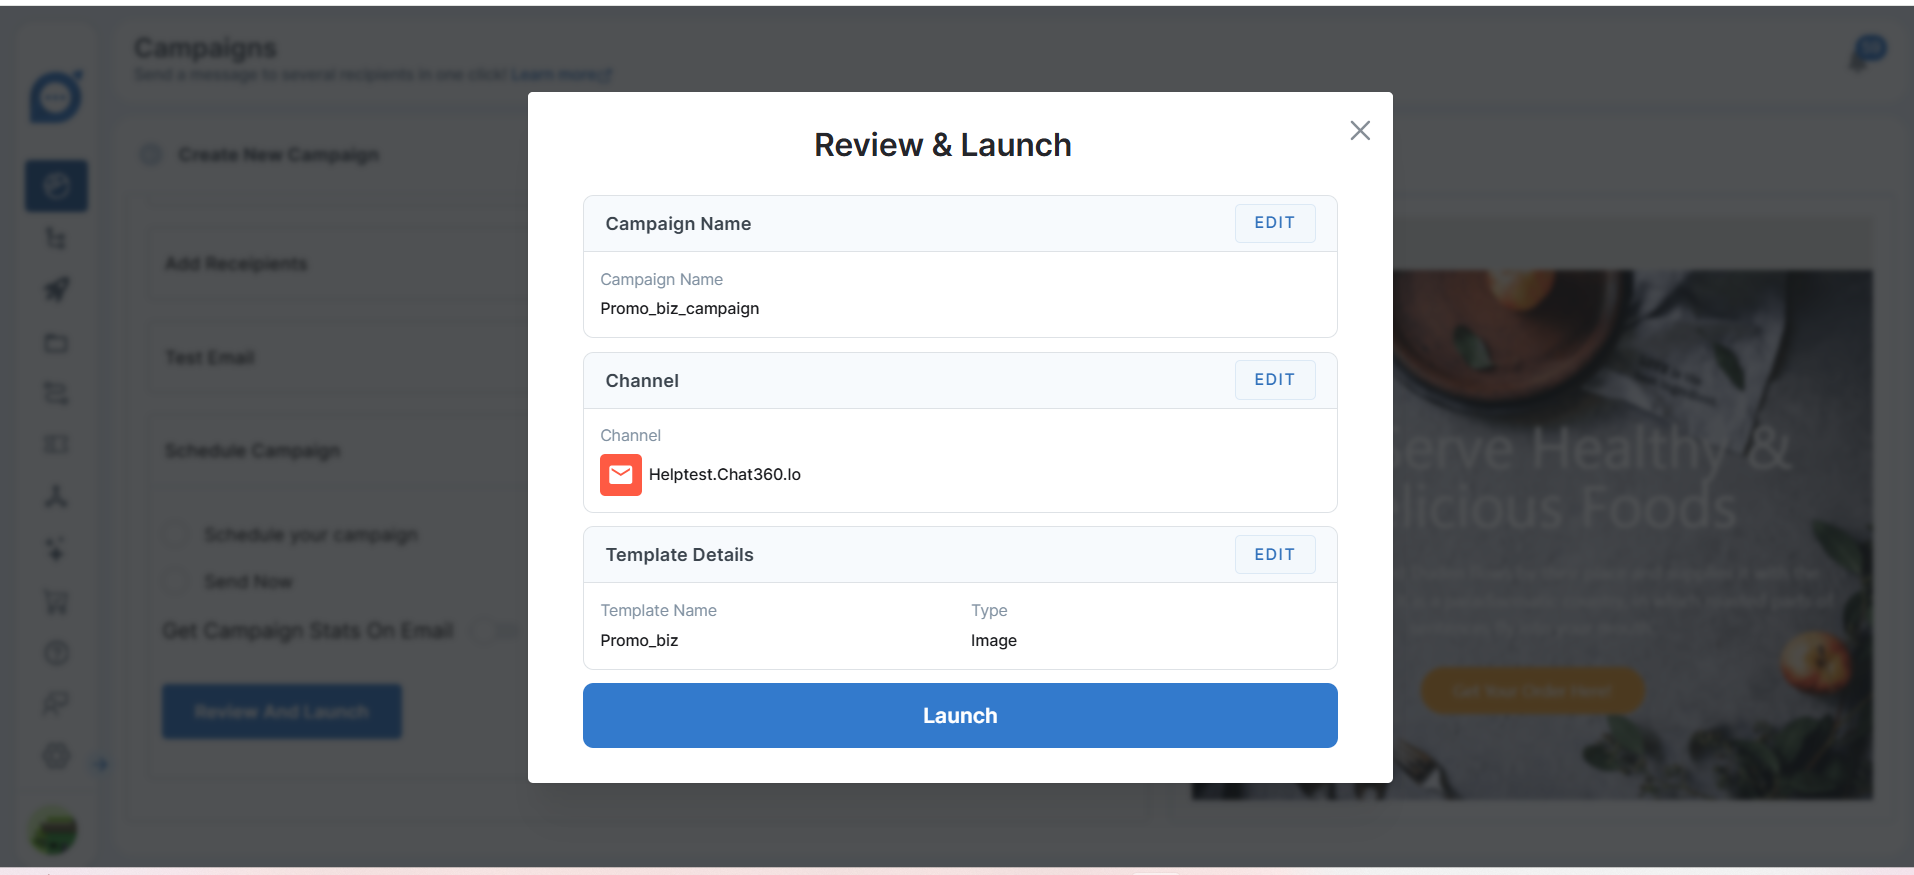
- Verify all settings—name, channel, template, recipients, and test results.
- Click Launch Campaign to schedule or send immediately.
-
Use Case Example
- Step 1: Chooses “May Product Update” as the campaign name.
- Step 2: Selects their corporate email domain.
- Step 3: Attaches an approved two-column template.
- Step 4: Imports a CSV of active users with mapped name and plan variables.
- Step 5: Sends a preview to marketing leads, confirms layout, and launches at 9 AM IST.
-
Key Benefits
- Timely Delivery: Automate sends at peak engagement times.
- Error Prevention: Test emails ensure template accuracy before launch.
- Operational Efficiency: Eliminate manual campaign coordination.
- Scalable Outreach: Handle large recipient lists with a single upload.
- Data-Driven Improvement: Compare test results and post-send analytics to refine future campaigns.
The Schedule Email Campaign feature lets you plan and automate your email outreach—ensuring timely delivery without manual intervention. Define your audience, attach approved templates, test designs, and launch campaigns at the optimal moment to maximize engagement.
-
1. Open Scheduler:
3. Import Recipients:
4. Add Test Addresses:
5. Review & Launch:
A SaaS company schedules a monthly update to 10,000 subscribers:
Result: 42% open rate and 12% click-through, driving a 15% increase in trial sign-ups.
-
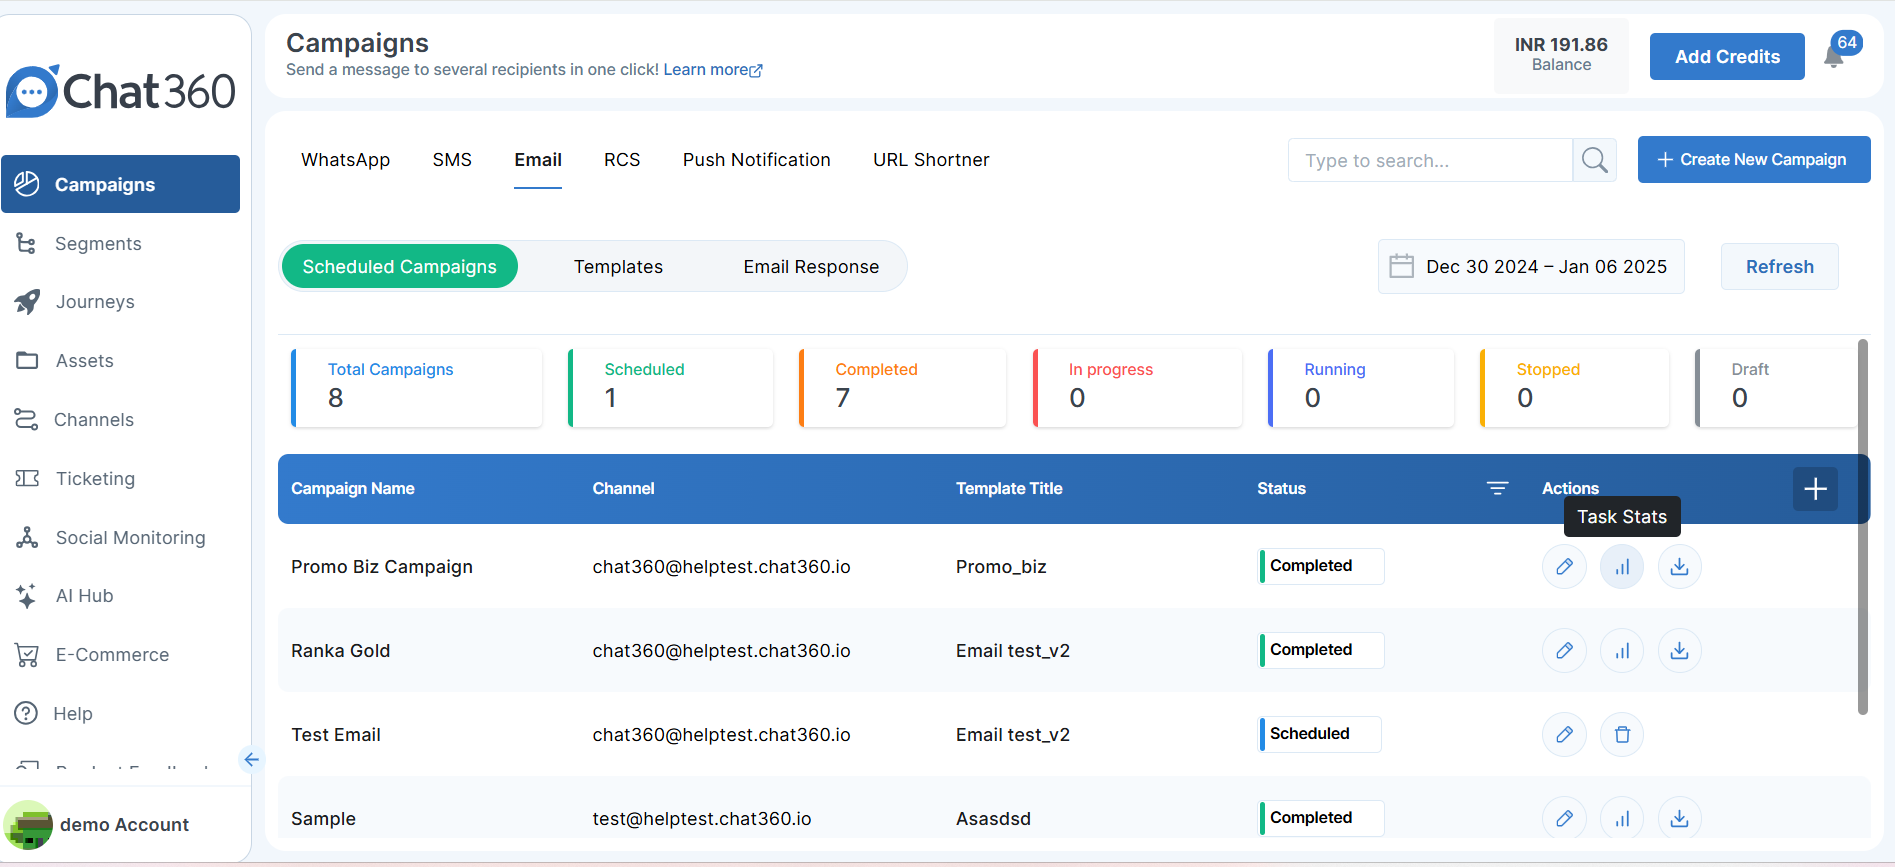
Email Campaign Analytics
-
For a Specific Template
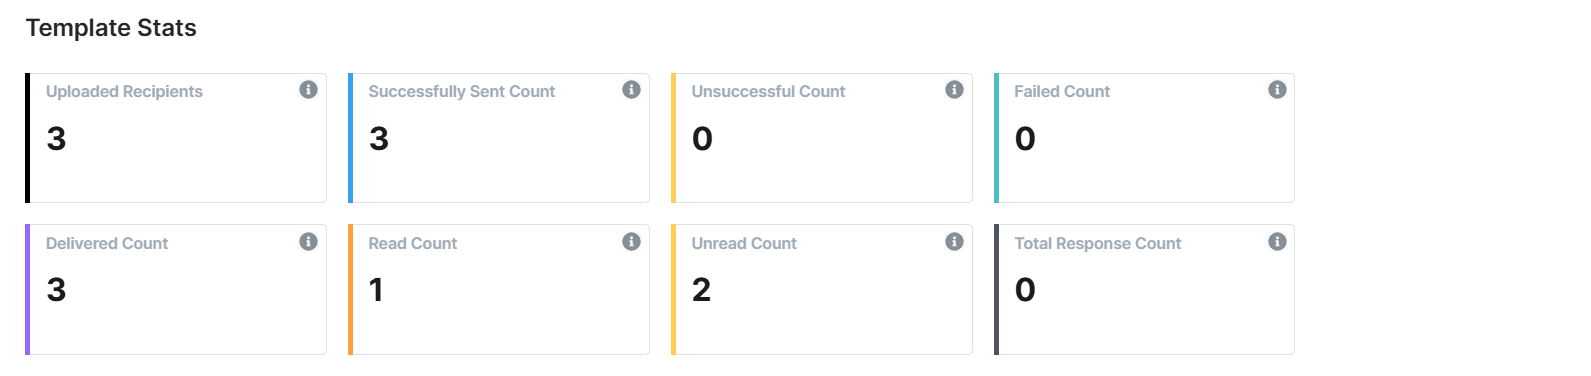
- Go to → Email → Templates, select your template, then click Actions → Task Stats.
- Recipient Count: Total contacts targeted.
- Successful Sent Count: Emails successfully sent.
- Failed Count: Emails that encountered delivery errors.
- Delivered Count: Messages that reached inboxes.
- Opened Count: Recipients who opened the email.
- Clicked Count: Link clicks within the email.
- Replied Count: Responses received.
- Unsubscribed Count: Contacts who opted out after receiving the email.
-
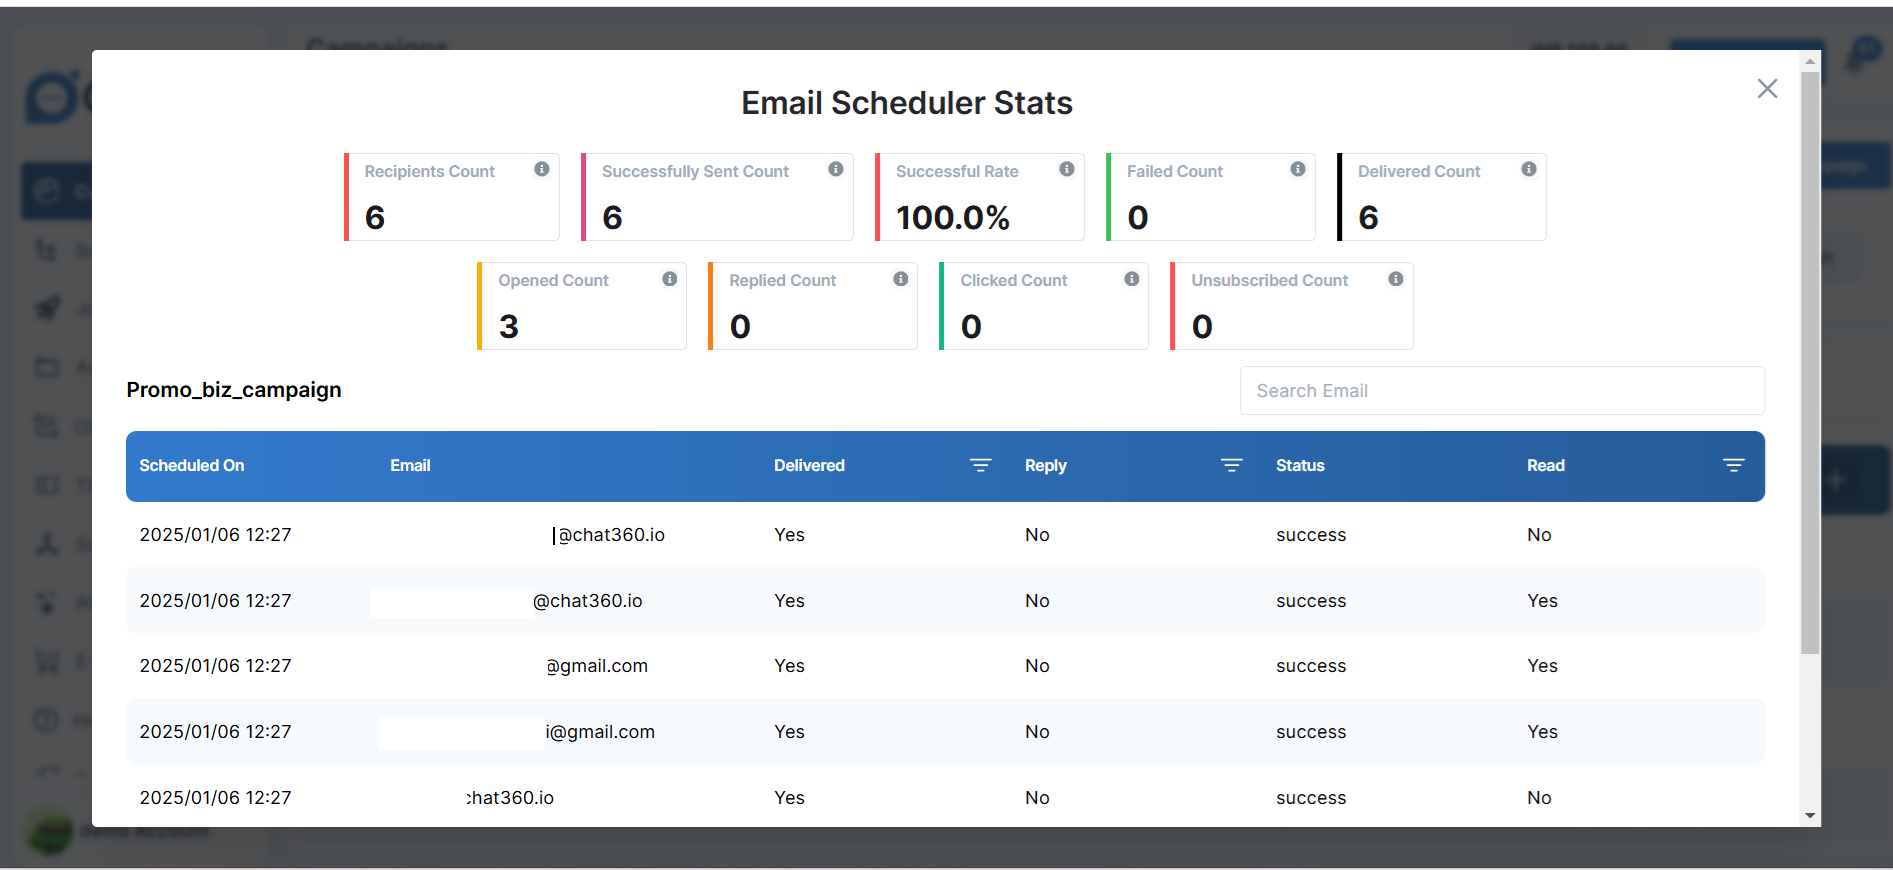
For a Specific Campaign
- Click Campaign → Email → Scheduled Campaign, find your campaign, then select Actions → Task Stats.
- Failed Count: Messages that failed to send.
- Unsubscribed Count: Recipients who opted out.
- Delivered Count: Messages delivered to inboxes.
- Read Count: Delivered messages that were opened.
- Unread Count: Delivered messages still unopened.
- Total Response Count: Sum of replies and link clicks.
Monitor the performance of individual email templates to understand their effectiveness and refine your messaging.
-
1. Navigate to Template Stats:
Evaluate the overall impact of a scheduled email campaign—from delivery to recipient engagement.
-
1. Navigate to Campaign Stats:
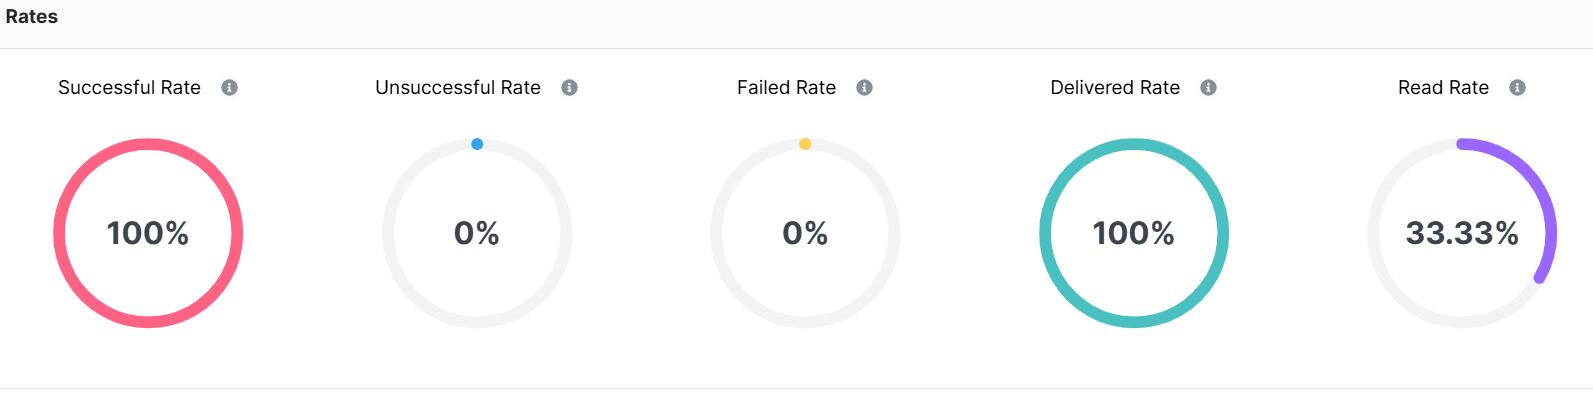

By regularly reviewing these analytics, you can identify underperforming templates, optimize send times, and tailor content to boost opens, clicks, and conversions.