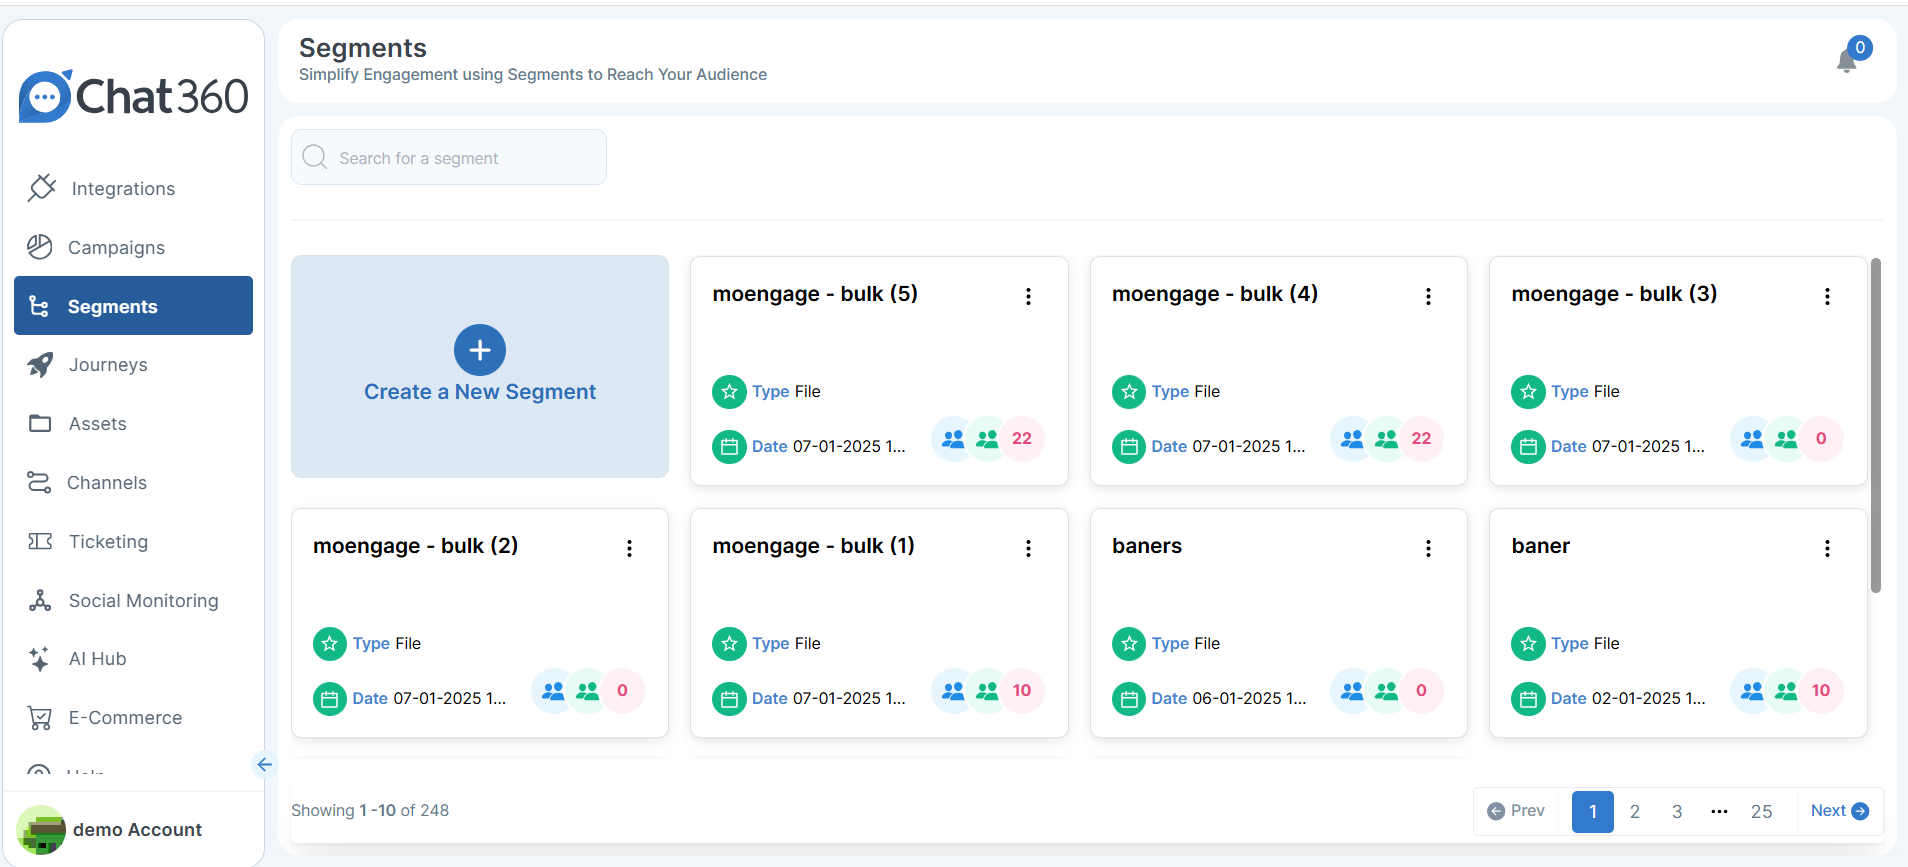
Segments
Overview
Segments in Chat360 are dynamic groups of users defined by shared attributes or behaviors. By organizing users into segments, businesses can target communications, analyze performance, and automate workflows more effectively—whether for marketing campaigns, customer support prioritization, or detailed analytics.
-
Types of Segments
- Uploaded Segments: Bulk-create segments by uploading a CSV file of user data.
- Custom Segments: Build segments from scratch using attribute-based rules, date ranges, and behavioral filters.
- Derived Segments: Refine or combine existing segments to create new, targeted groups.
-
Key Features in Segment Creation
- Attribute-Based Rules: Filter users by any user property—such as city, phone number, subscription tier, or product category.
- Logical Operators: Use IS, IS NOT, CONTAINS, DOES NOT CONTAIN, and more to precisely include or exclude users.
- Custom Date Ranges: Restrict segments to users whose activity (e.g., last login, last purchase) falls within a specific timeframe.
- Preview Functionality: Instantly view matching contacts before saving a segment.
- Multi Condition Logic: Combine multiple rules with AND/OR groups to craft complex targeting criteria.
-
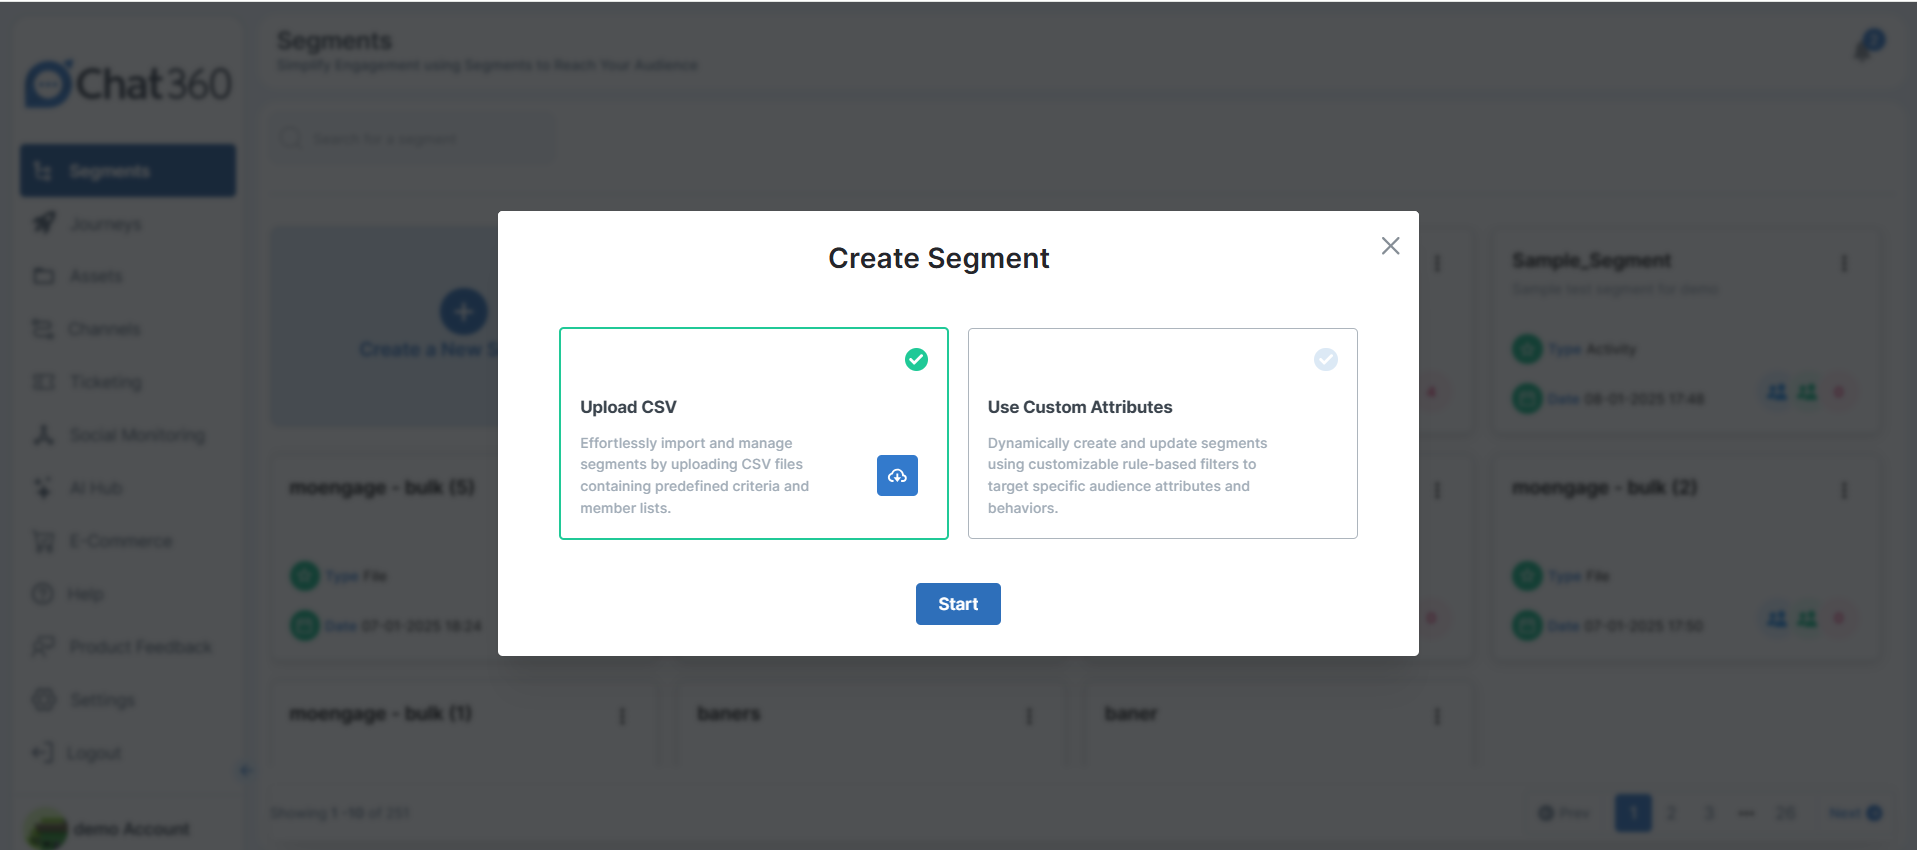
Creating Segments by Uploading CSV
- Click Create New Segment and choose Upload CSV.
- Select your file; Chat360 names the segment after the file.
1. Open Segments From the side panel, click Segment.
2. Create New Segment → Upload CSV
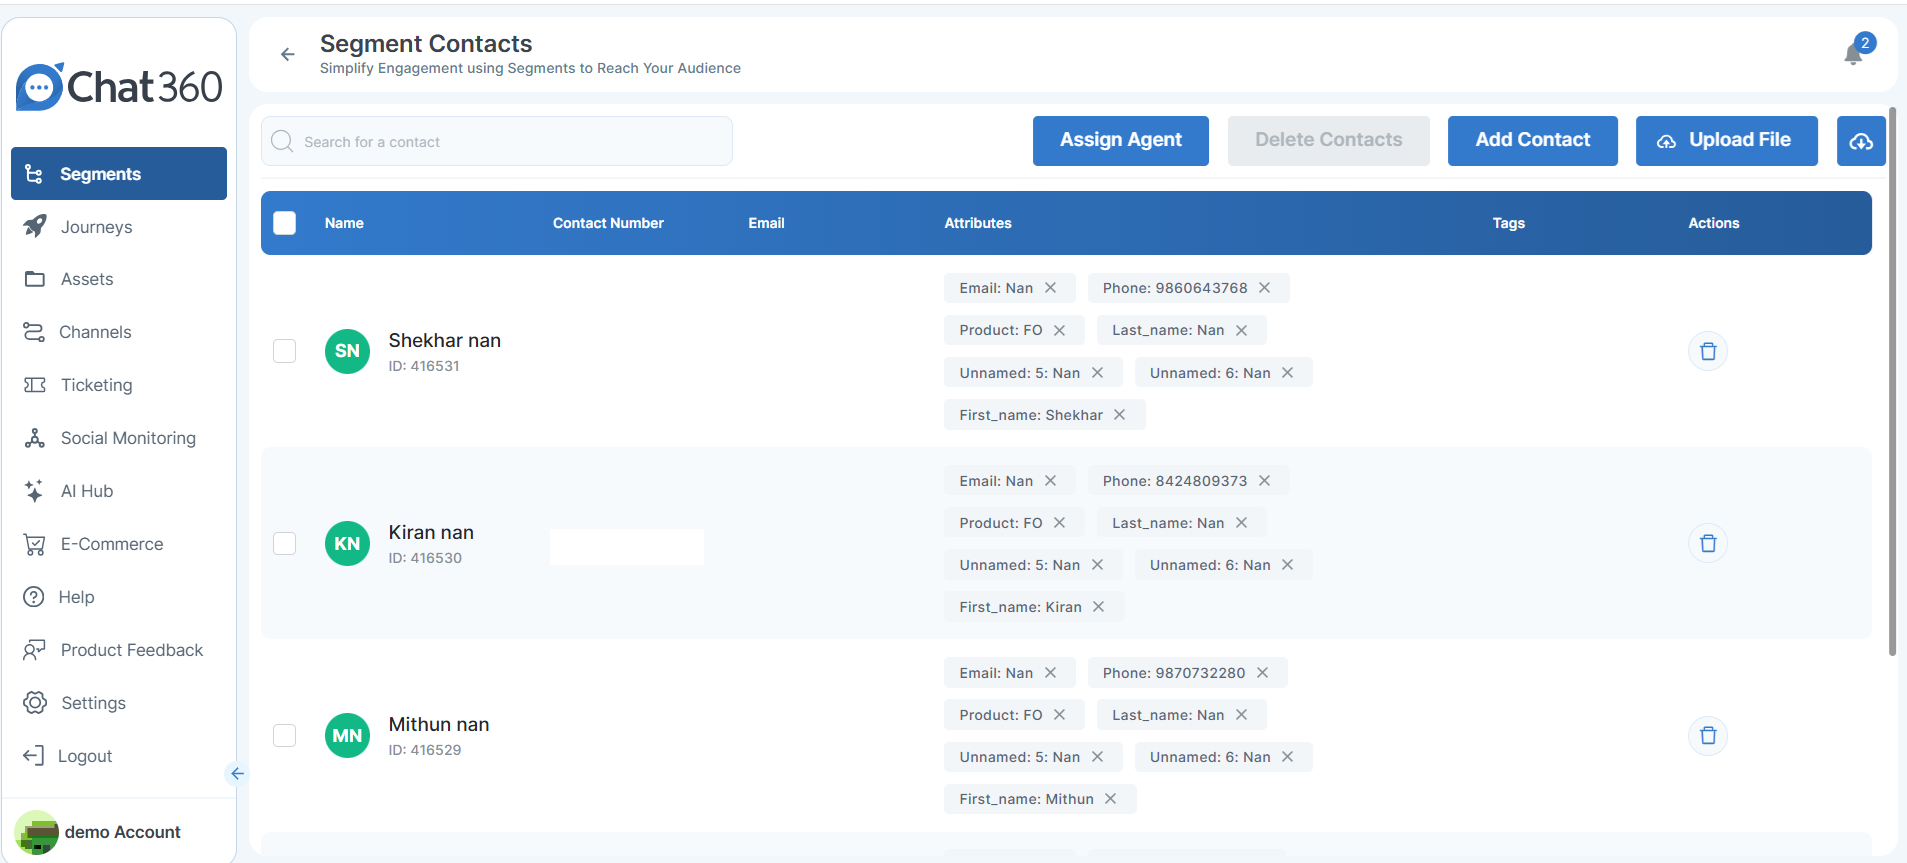
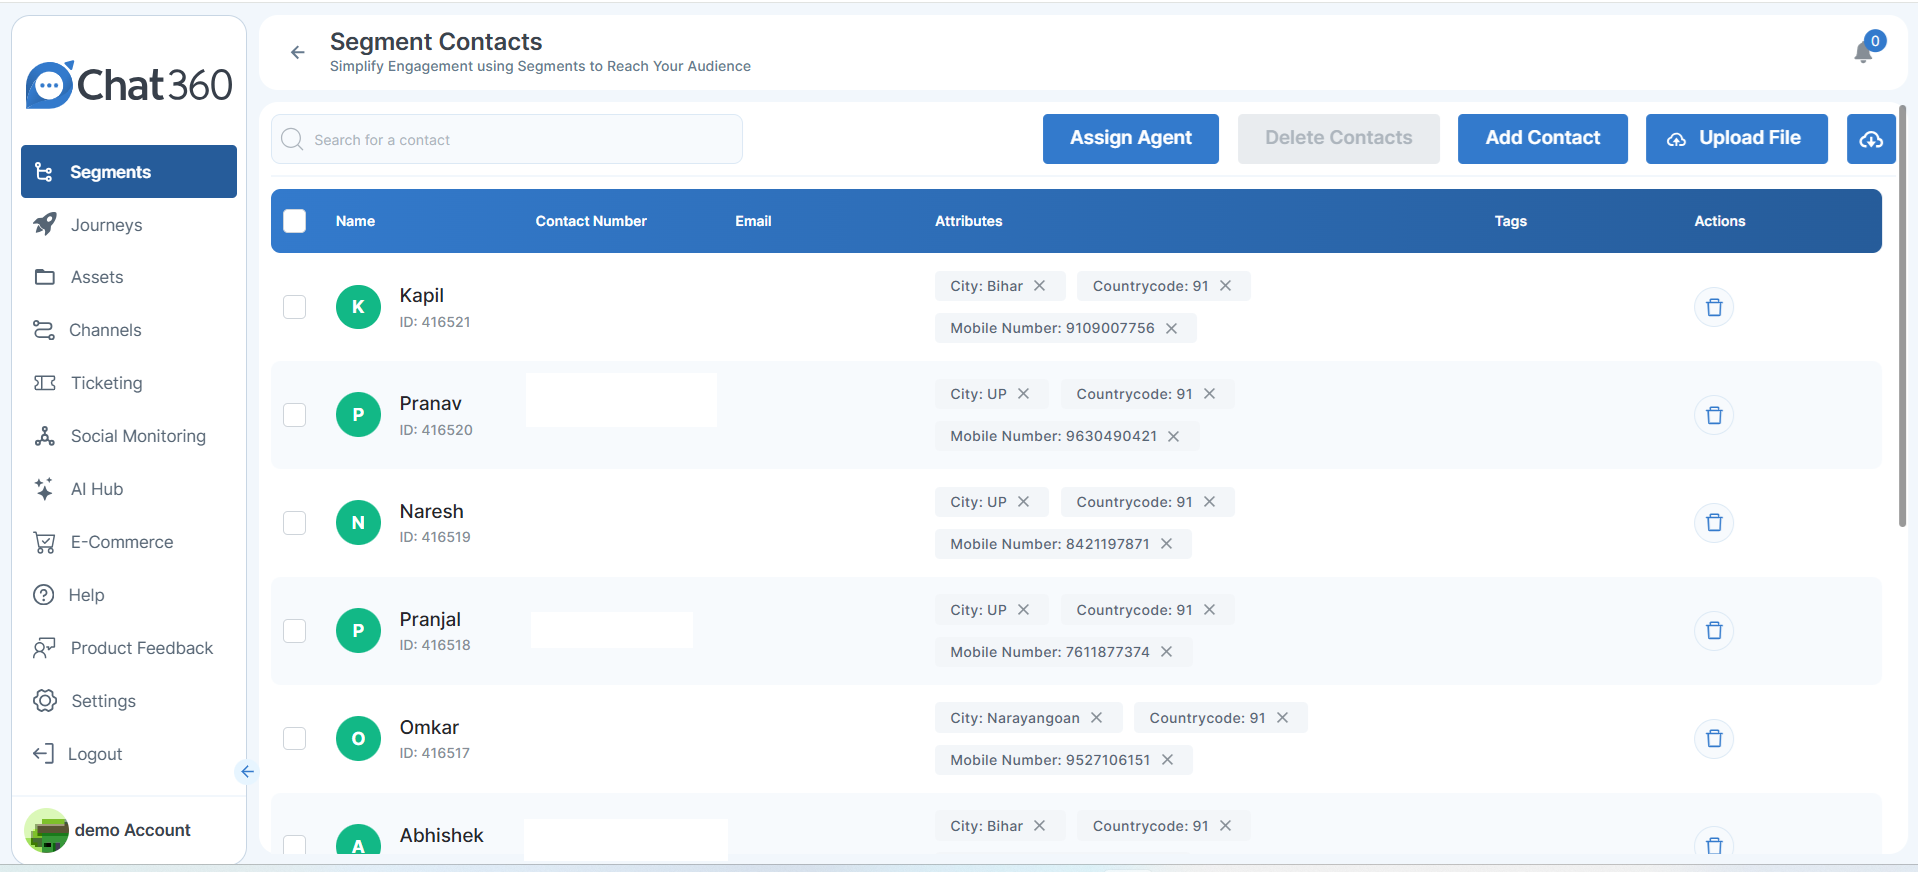
- Click the new segment to view imported contacts.
- Add Contacts:
- Bulk-upload additional files via Upload File.
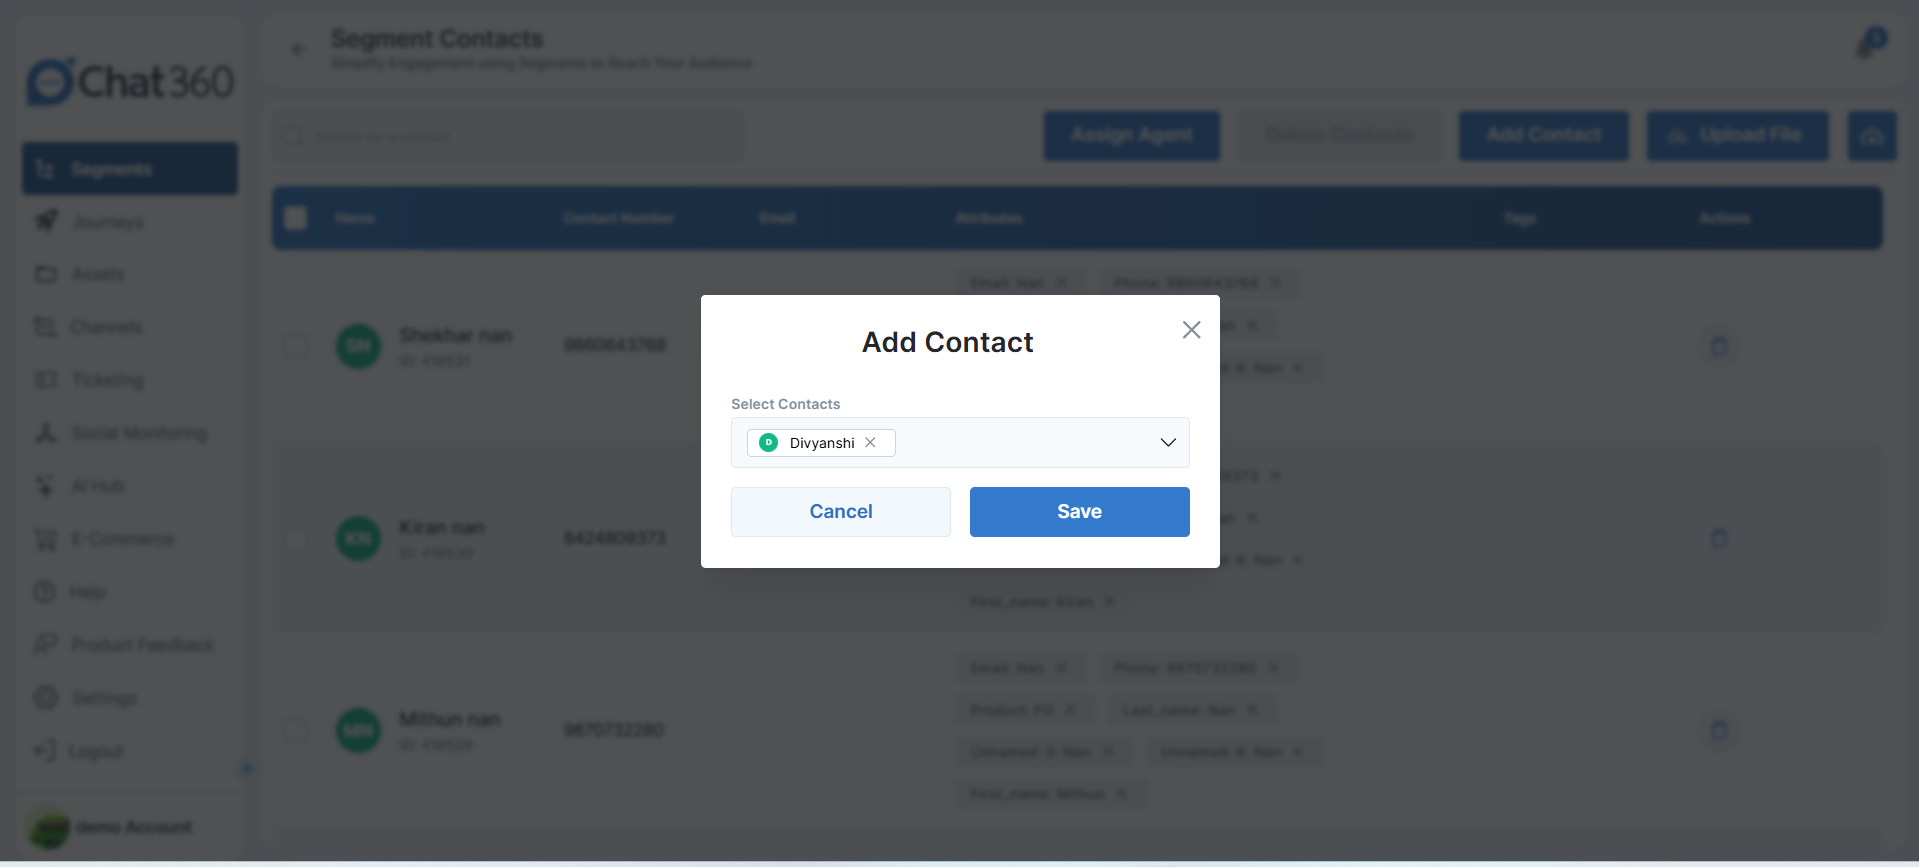
- Manually add individuals with Add Contact.
3. Review & Enrich
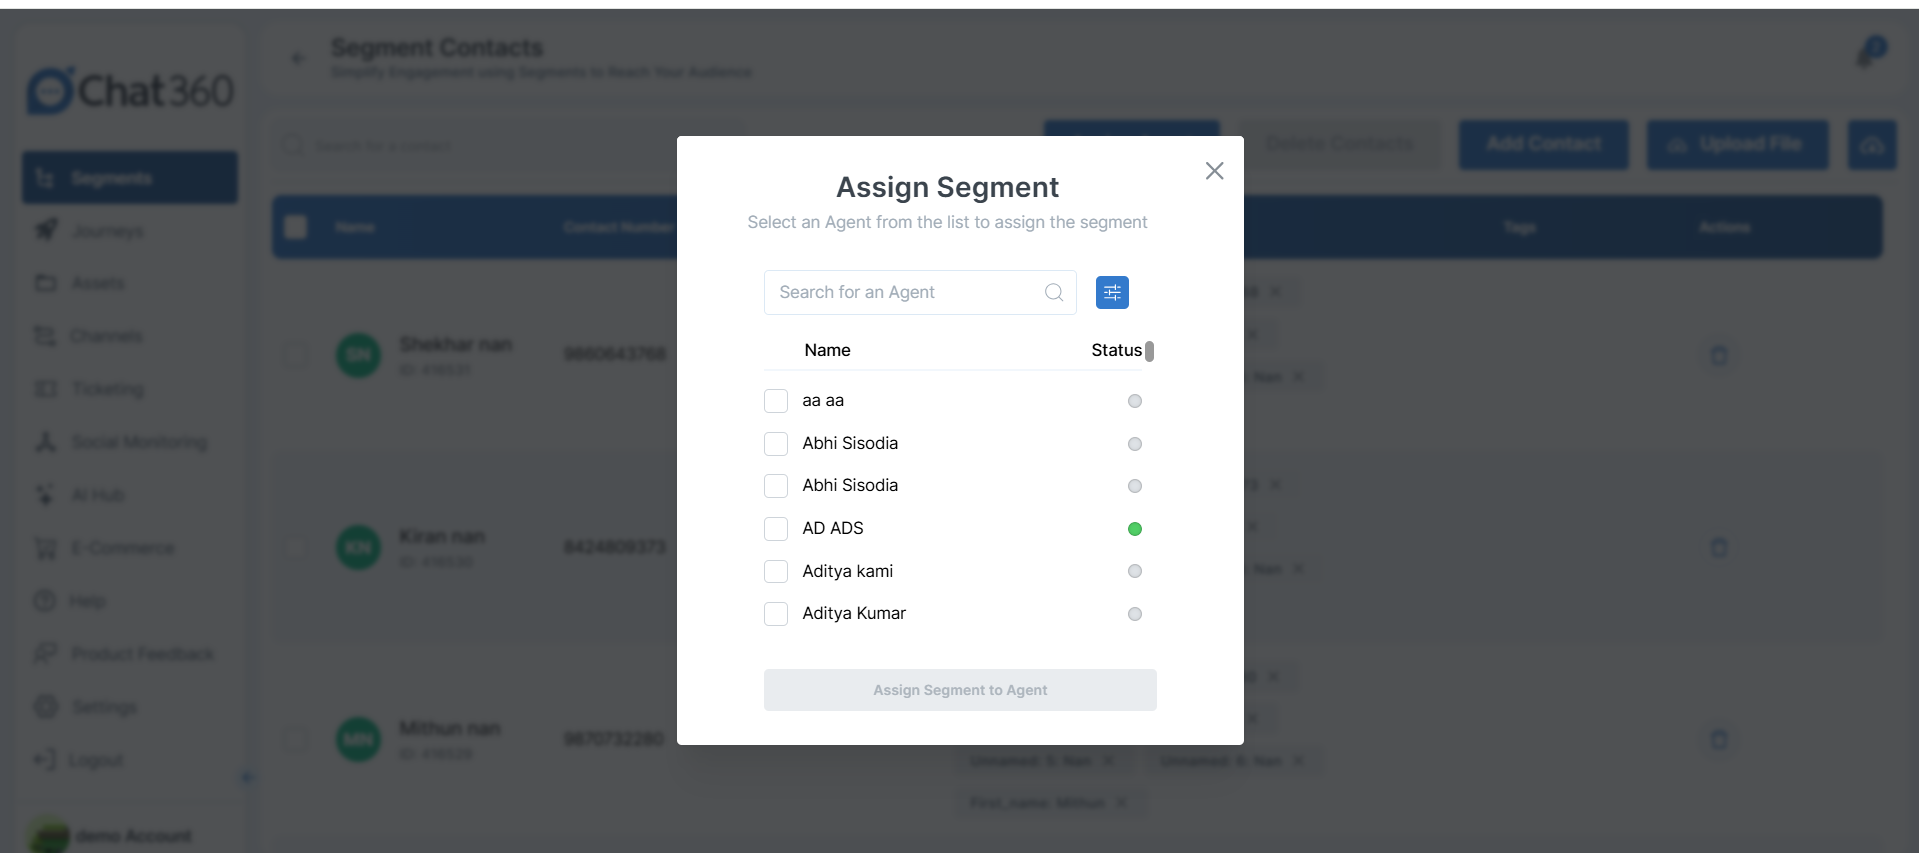
- Within the segment settings, designate an agent owner to manage outreach or support.
4. Assign an agent:
- Creating a Segment from an Existing Segment
- Enter Name and Description.
1.Segment Basics
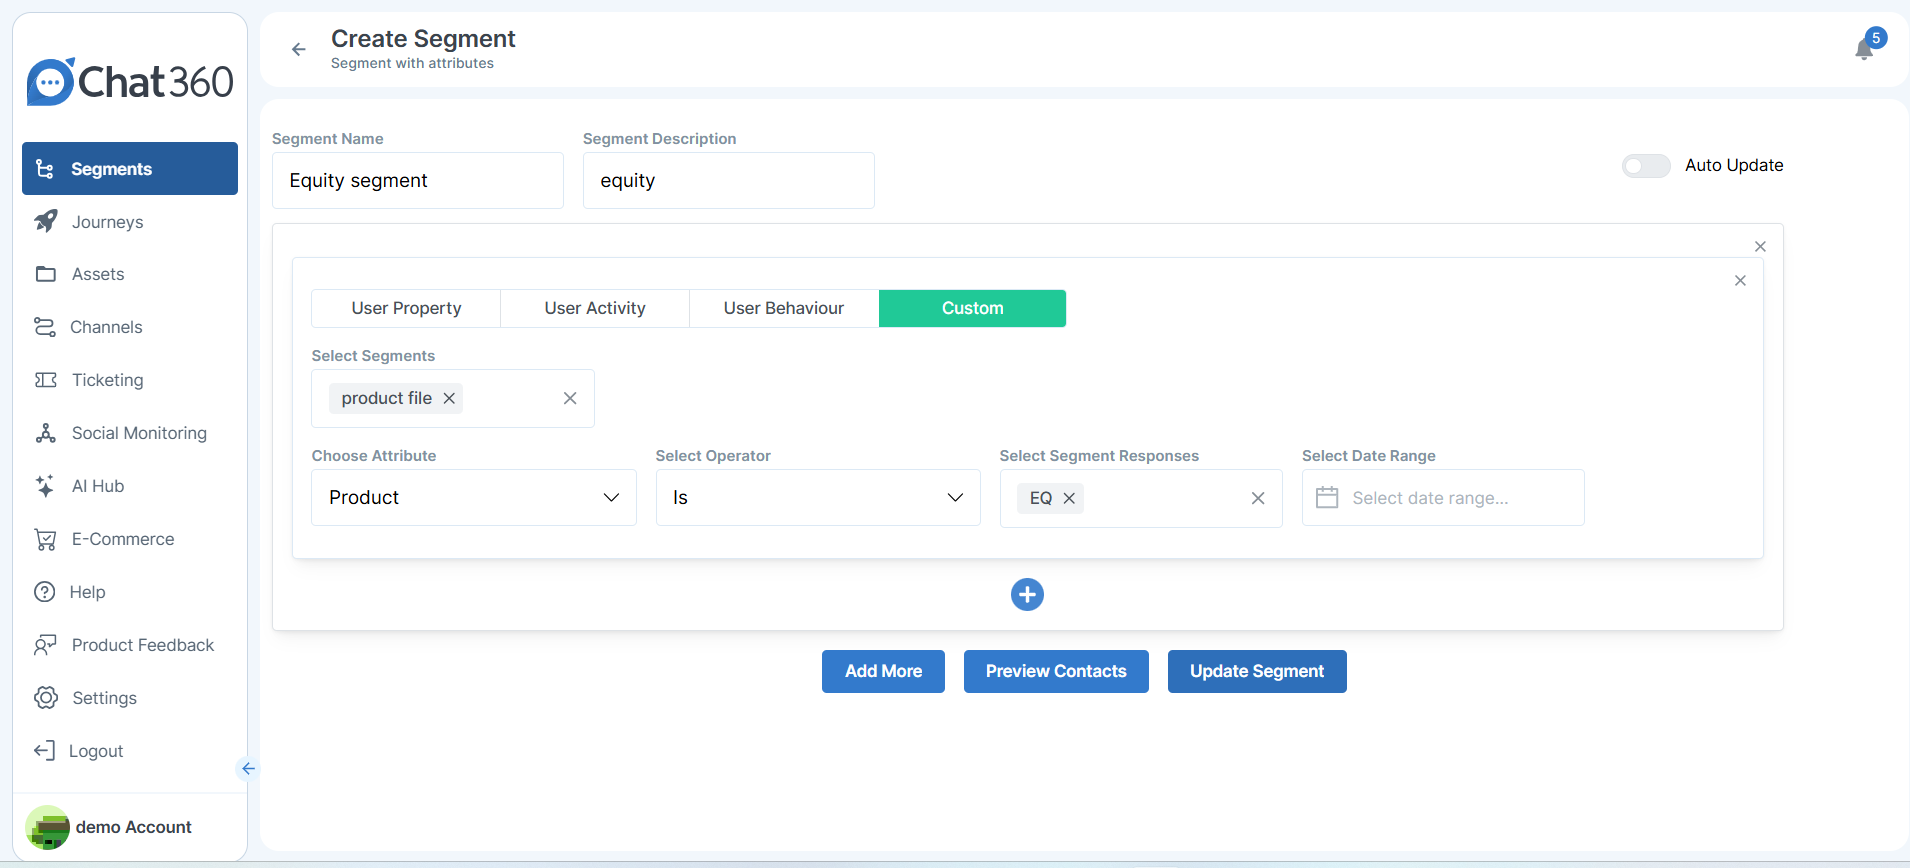
- Under Custom, select the Existing Segment(e.g., “Product File”).
- Define a rule:
- Attribute (e.g., “Product”)
- Operator (IS, IS NOT, etc.)
- Value (e.g., “EQ”).
2. Reference Existing
-
Creating a Custom Segment
- Select Use Custom Attribute and click Start.
- Provide Name and Description.
- User Property (static attributes)
- User Activity(events logged)
- User Behaviour(e.g., message response patterns)
- Custom(combine multiple data sources)
- Select Operator (IS, CONTAINS, etc.)
- Enter Value (e.g., “City IS Pune”)
- Specify a Date Range if filtering by time-based activity.
1. Start from Scratch
2. Define Segment
3. Choose Filter Type
4. Add Conditions

- Use Add More to append additional rules.
- Click Preview Contacts to validate your criteria.
5. Enhance & Preview
- Once satisfied, click Save to make this segment available for campaigns and automations.
6. Save Segment
-
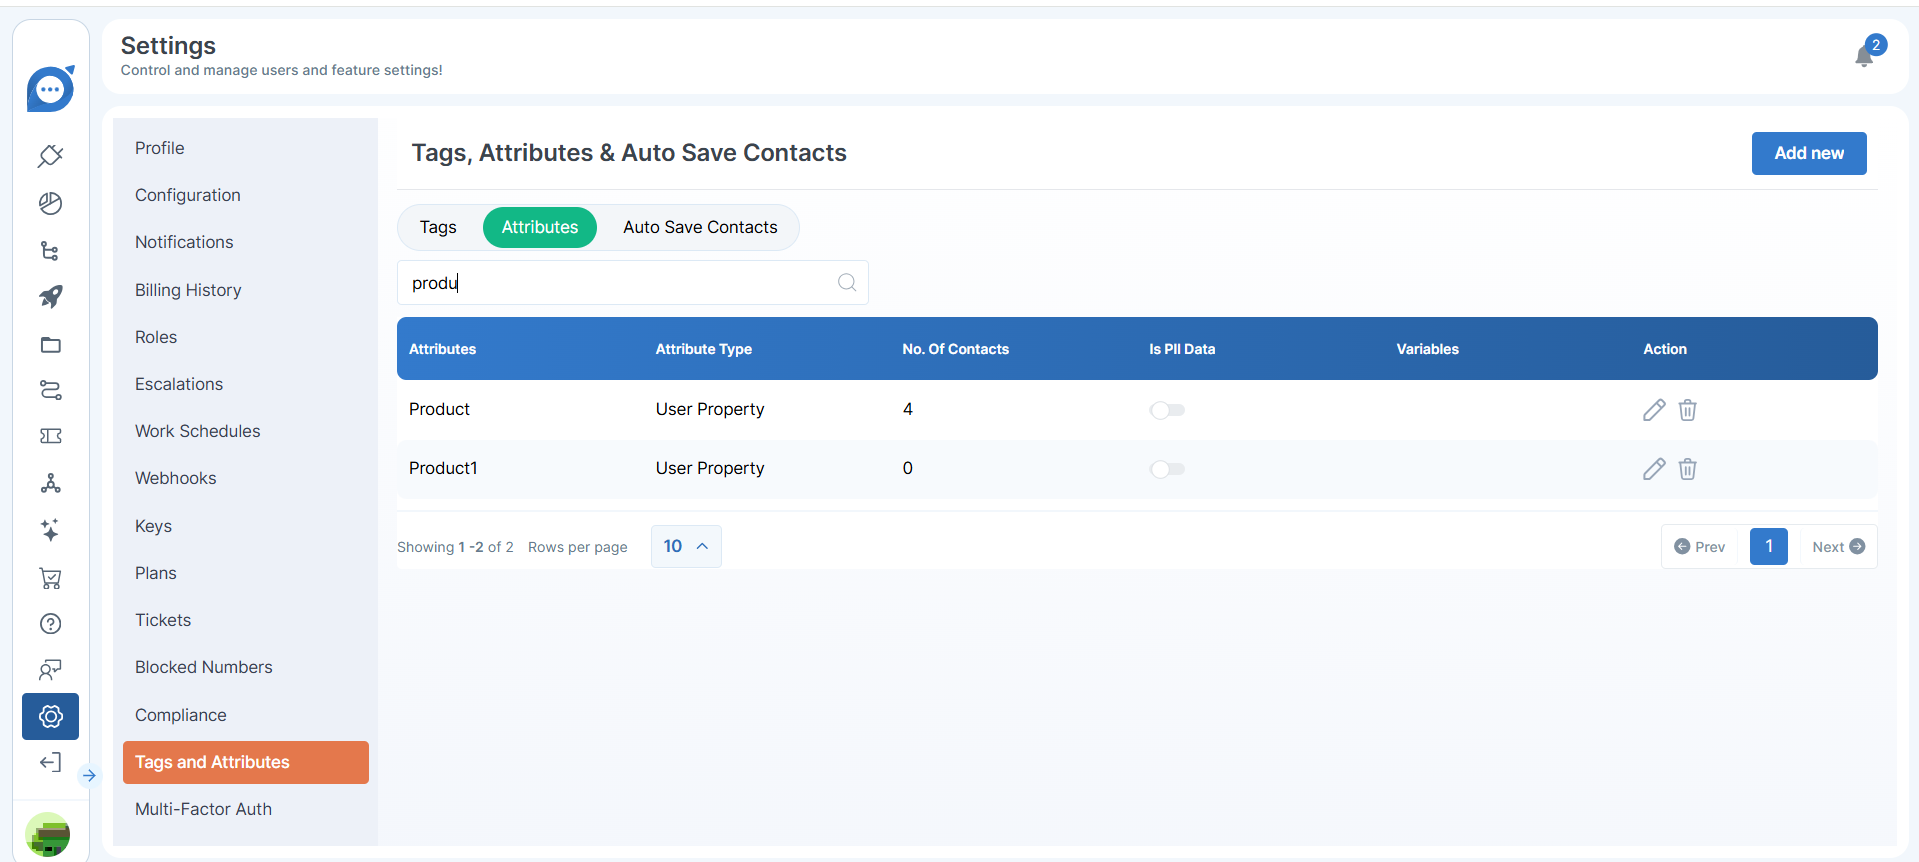
Creating Custom Attributes
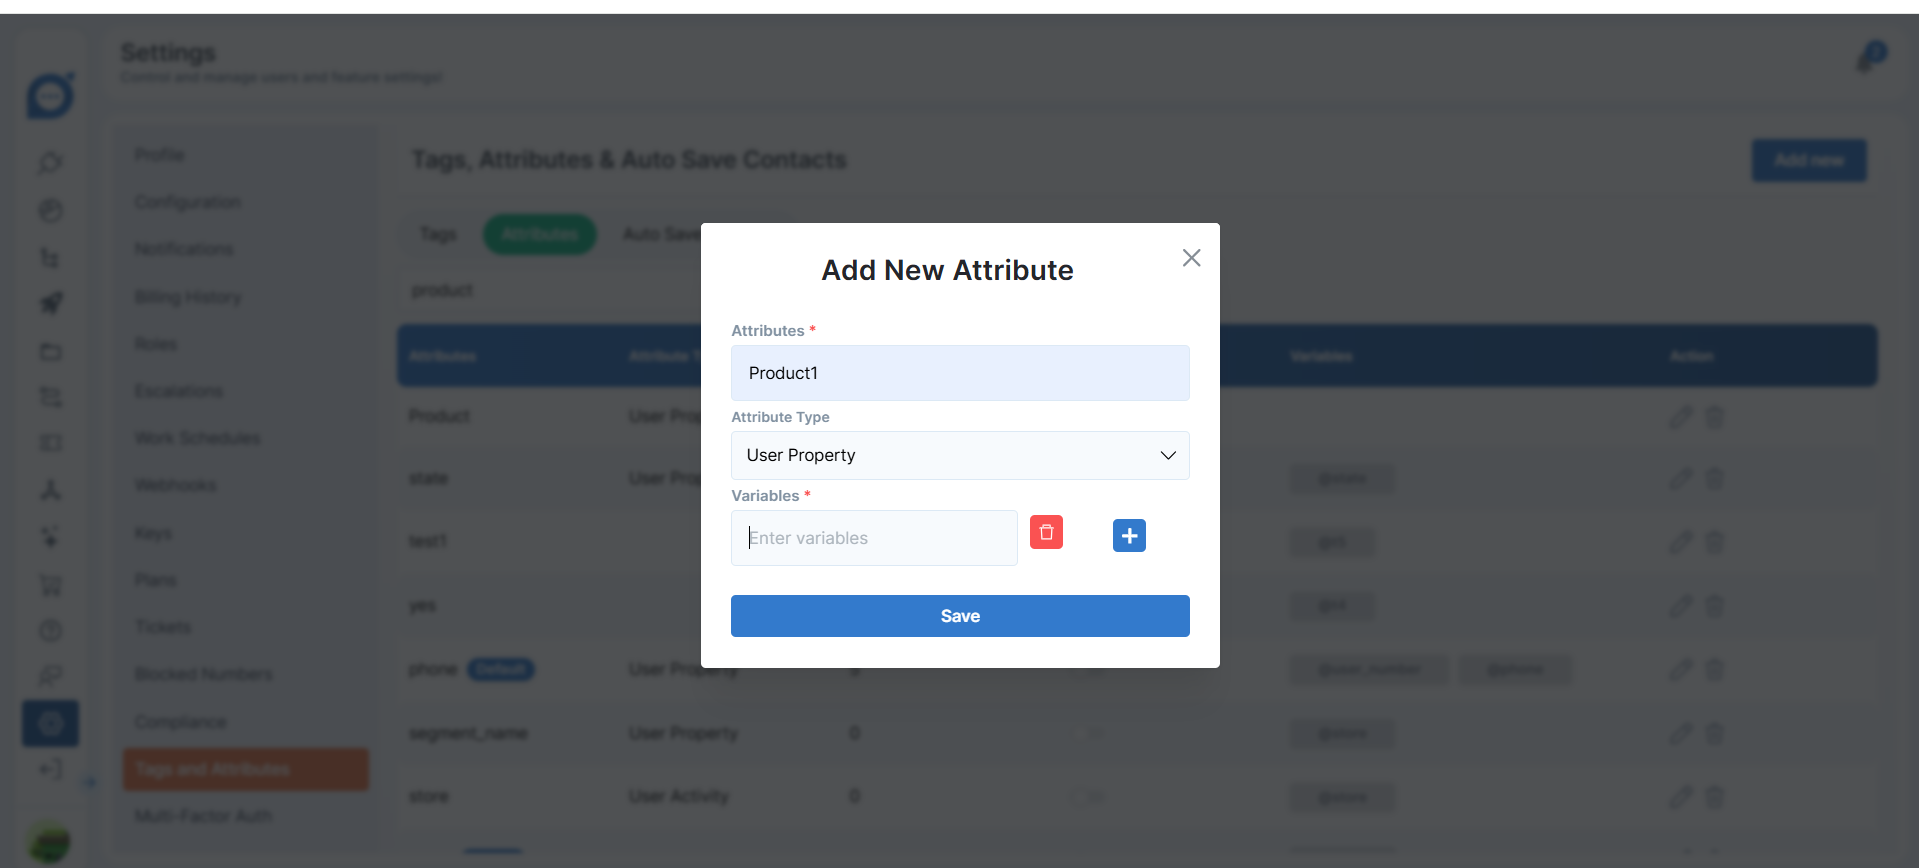
- Navigate to Settings → Tags & Attributes.
1. Access Attributes

- Click Attributes → Add New.
- Name: e.g., “Product”
- Type: Select User Property (or other relevant type).
- Variable (optional): Store the attribute value in a custom variable for use in templates or flows.
- Click Save to register this new attribute, making it available in segment rules.
2. Add New Attribute
3. Save.
-
Segment Feature – Use Case Examples
-
1. Welcome Journey for New Sign-Ups
- Use Case Objective: Trigger an onboarding message series for all new users who signed up in the past 7 days.
- Segment Type: Custom Segment
- Configuration:
- User Property: Signup Date
- Operator: IS AFTER
- Value: NOW - 7 days
- Action: Add to WhatsApp Welcome Campaign with helpful tips and CTAs.
-
Key Benefit :
Ensures timely engagement with new users, improves first-day retention, and guides users toward first conversion events.
-
2. Abandoned Cart Reminder
- Use Case Objective: Identify users who added items to cart but didn’t complete the purchase within 48 hours.
- Segment Type: Custom Segment
- Configuration:
- User Activity: Cart Abandoned
- Operator: IS TRUE
- Date Range: Last 48 hours
- Action: Trigger WhatsApp template with a cart recovery message and checkout link.
-
Key Benefit :
Boosts revenue recovery by re-engaging high-intent users through personalized nudges.
-
3. Regional Festival Offers
- Use Case Objective: Promote a Diwali campaign only to users located in Maharashtra.
- Segment Type: Attribute-Based Segment
- Configuration:
- User Property: City
- Operator: IS
- Value: Mumbai, Pune, Nagpur
- Action: Send custom promotional WhatsApp template with Diwali offers.
-
Key Benefit :
Drives hyper-local relevance and increases conversion by targeting region-specific audiences.
-
4. High-Intent Leads for Sales Outreach
- Use Case Objective: Identify users who’ve interacted with the pricing page and requested a demo.
- Segment Type: Custom Segment
- Configuration:
- User Activity: Visited Pricing Page
- Operator: AND
- Value: Demo Request Form Submitted
- Action: Assign directly to a sales agent using agent assignment feature.
-
Key Benefit :
Helps prioritize pipeline leads and reduces response latency, increasing close rates.
-
5. Non-Responsive User Re-Engagement
- Use Case Objective: Reconnect with users who haven't responded to messages for over 15 days.
- Segment Type: Custom Segment
- Configuration:
- User Behavior: Last WhatsApp Response
- Operator: IS BEFORE
- Value: NOW - 15 days
- Action: Send a “We Miss You” template with options to continue or unsubscribe.
-
Key Benefit :
Improves user retention and helps clean out inactive contacts for better campaign ROI.