MoEngage Integration
-
Overview
-
Step 1: Integrating MoEngage Platform with Chat360 Dashboard
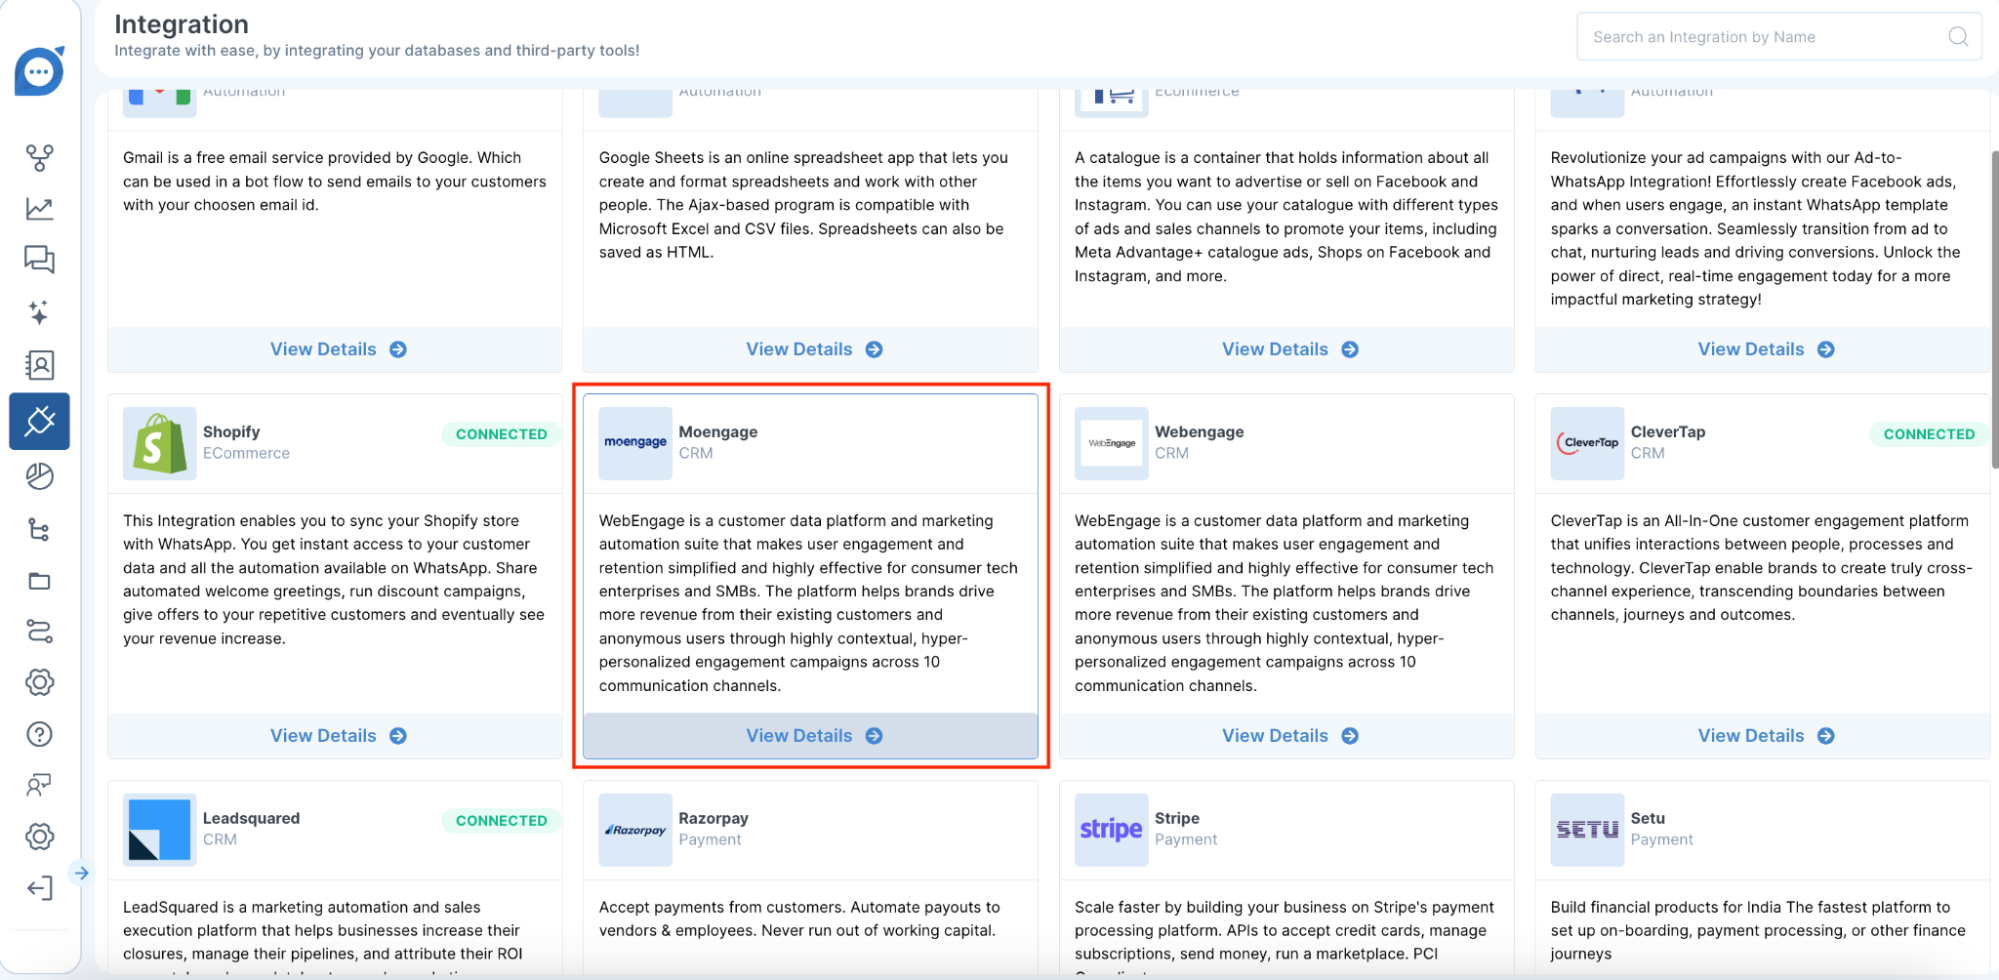
- Log in to Chat360 and navigate to Integrations in the main menu.
- Select MoEngage from the list of available integrations.
- Click Add Account to open the credential form.
- Enter your API Key and other required details (retrievable from your MoEngage developer portal).
- Click Save to link the account.
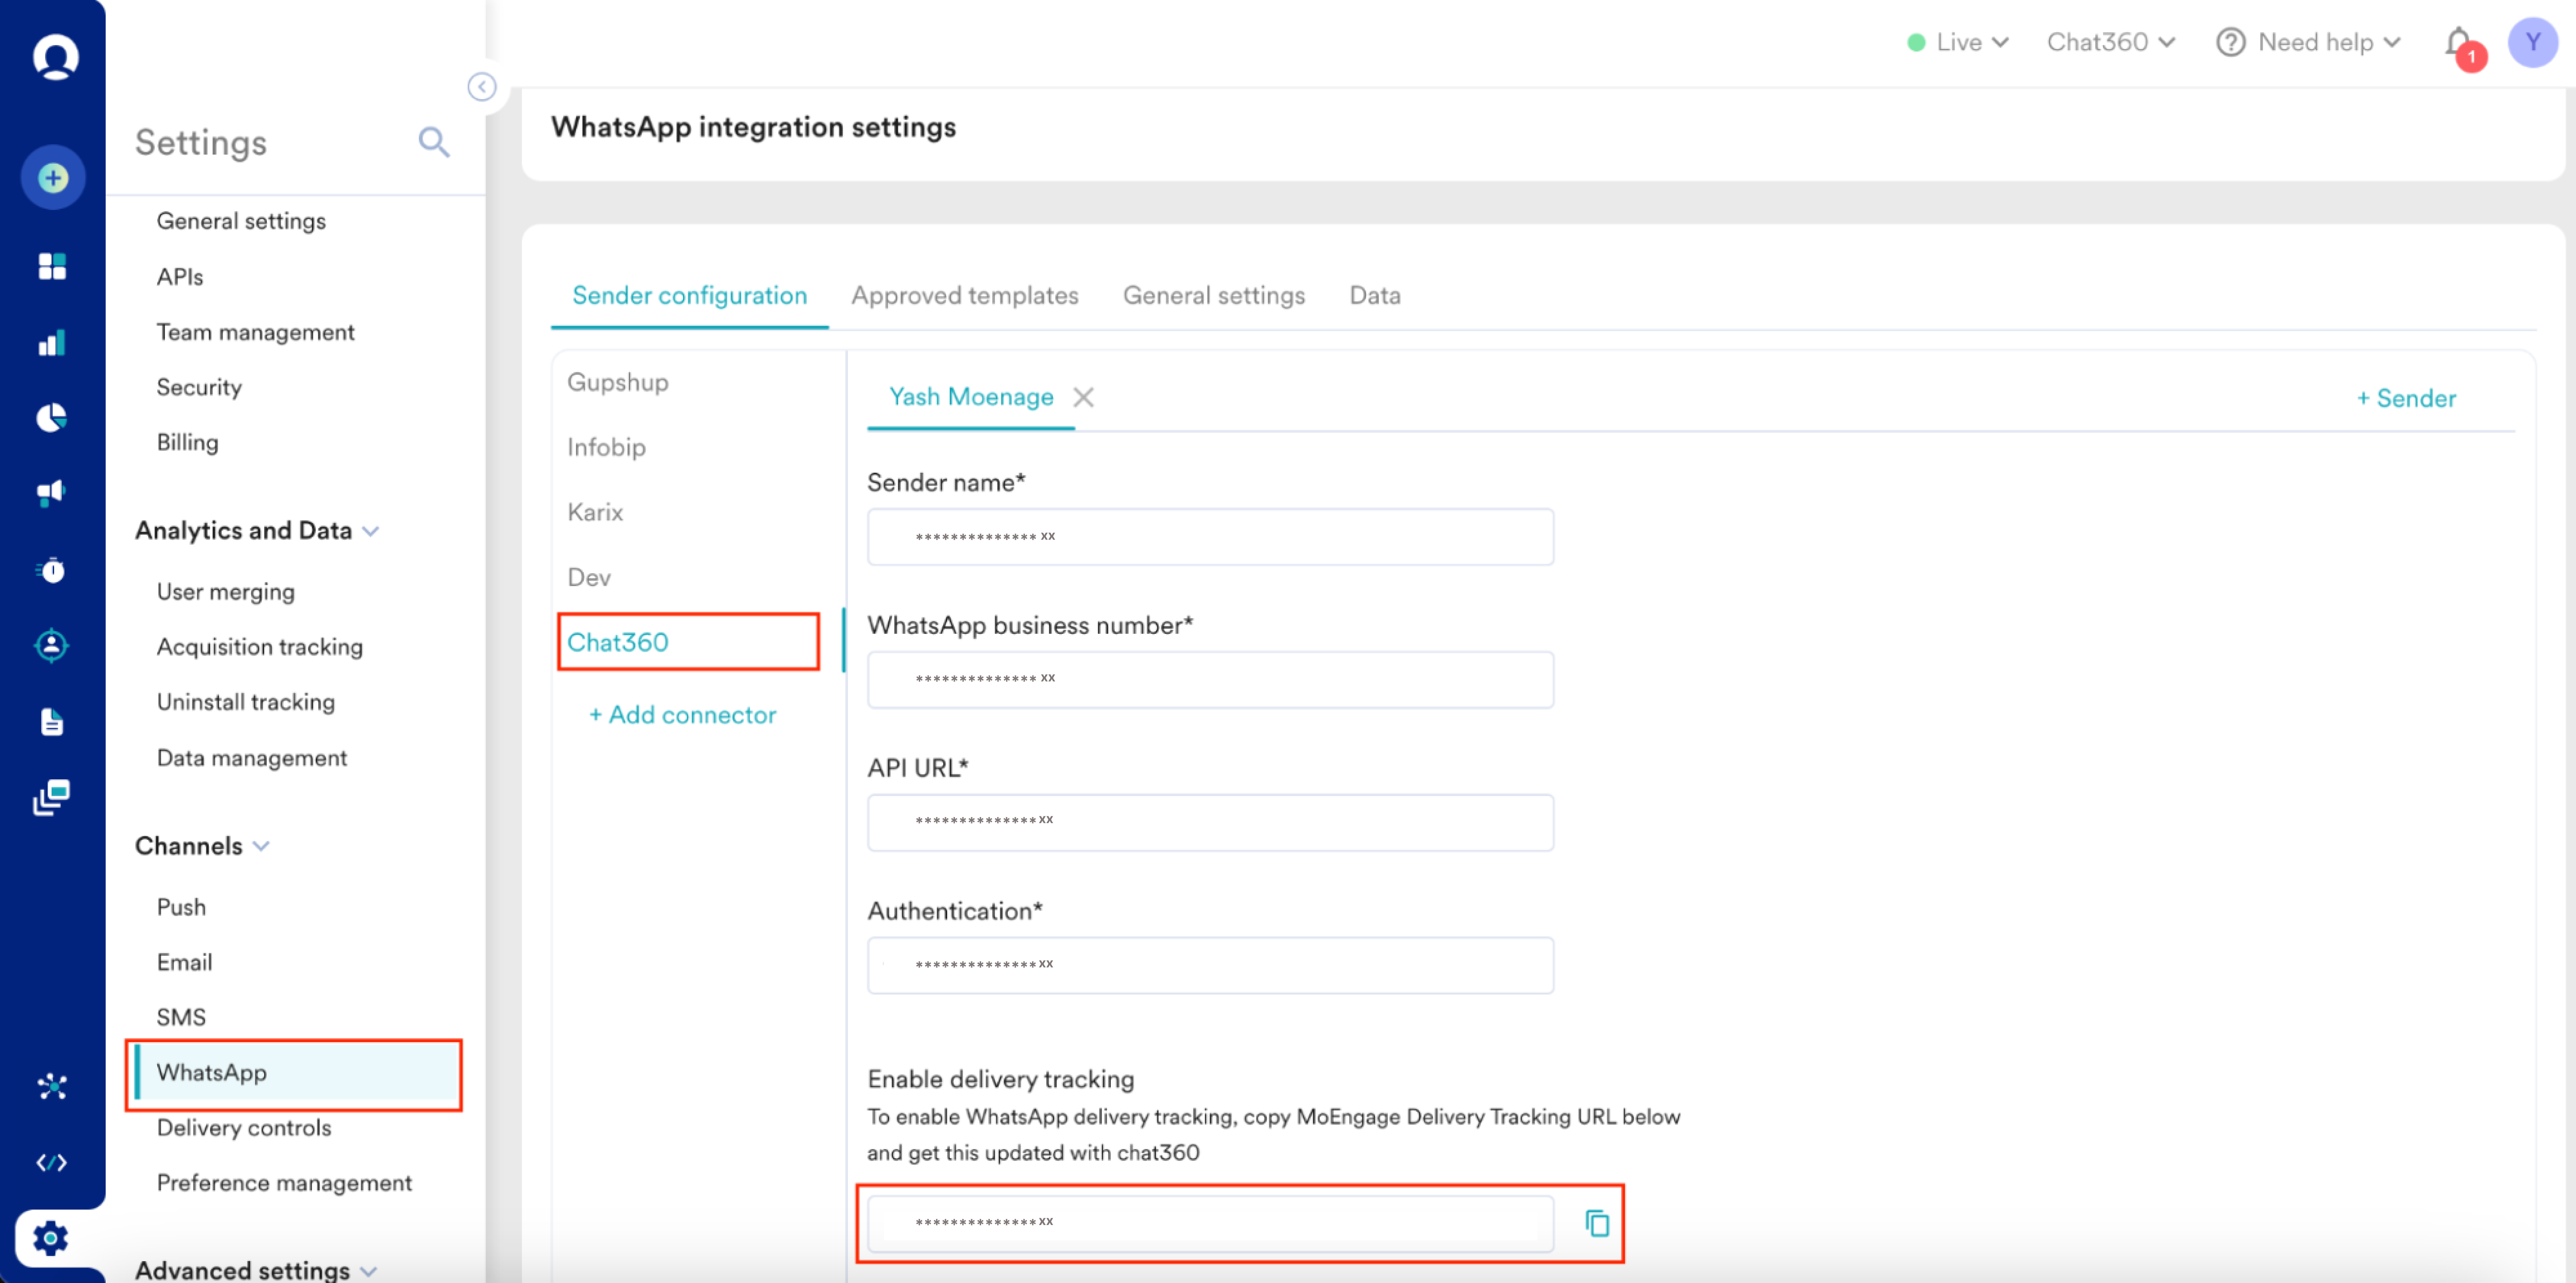
- In your MoEngage dashboard, go to the Integration section.
- Locate Chat360 Setup and select Configure.
- Paste the Chat360 webhook URL and verify authentication settings.
- Finalize by clicking Enable Integration.
- After configuration, Chat360 displays a confirmation banner.
- MoEngage shows Chat360 under active integrations, confirming two-way connectivity.
-
Key Benefits
- Unified Audience Sync: Automatically import and update MoEngage segments within Chat360 for precise campaign targeting.
- Trigger Campa//.\igns from MoEngage: Launch WhatsApp and voice-bot journeys directly from MoEngage workflows using Chat360’s messaging engine.
- Centralized Analytics: Consolidate MoEngage engagement metrics with Chat360 delivery and response data for end-to-end performance insights.
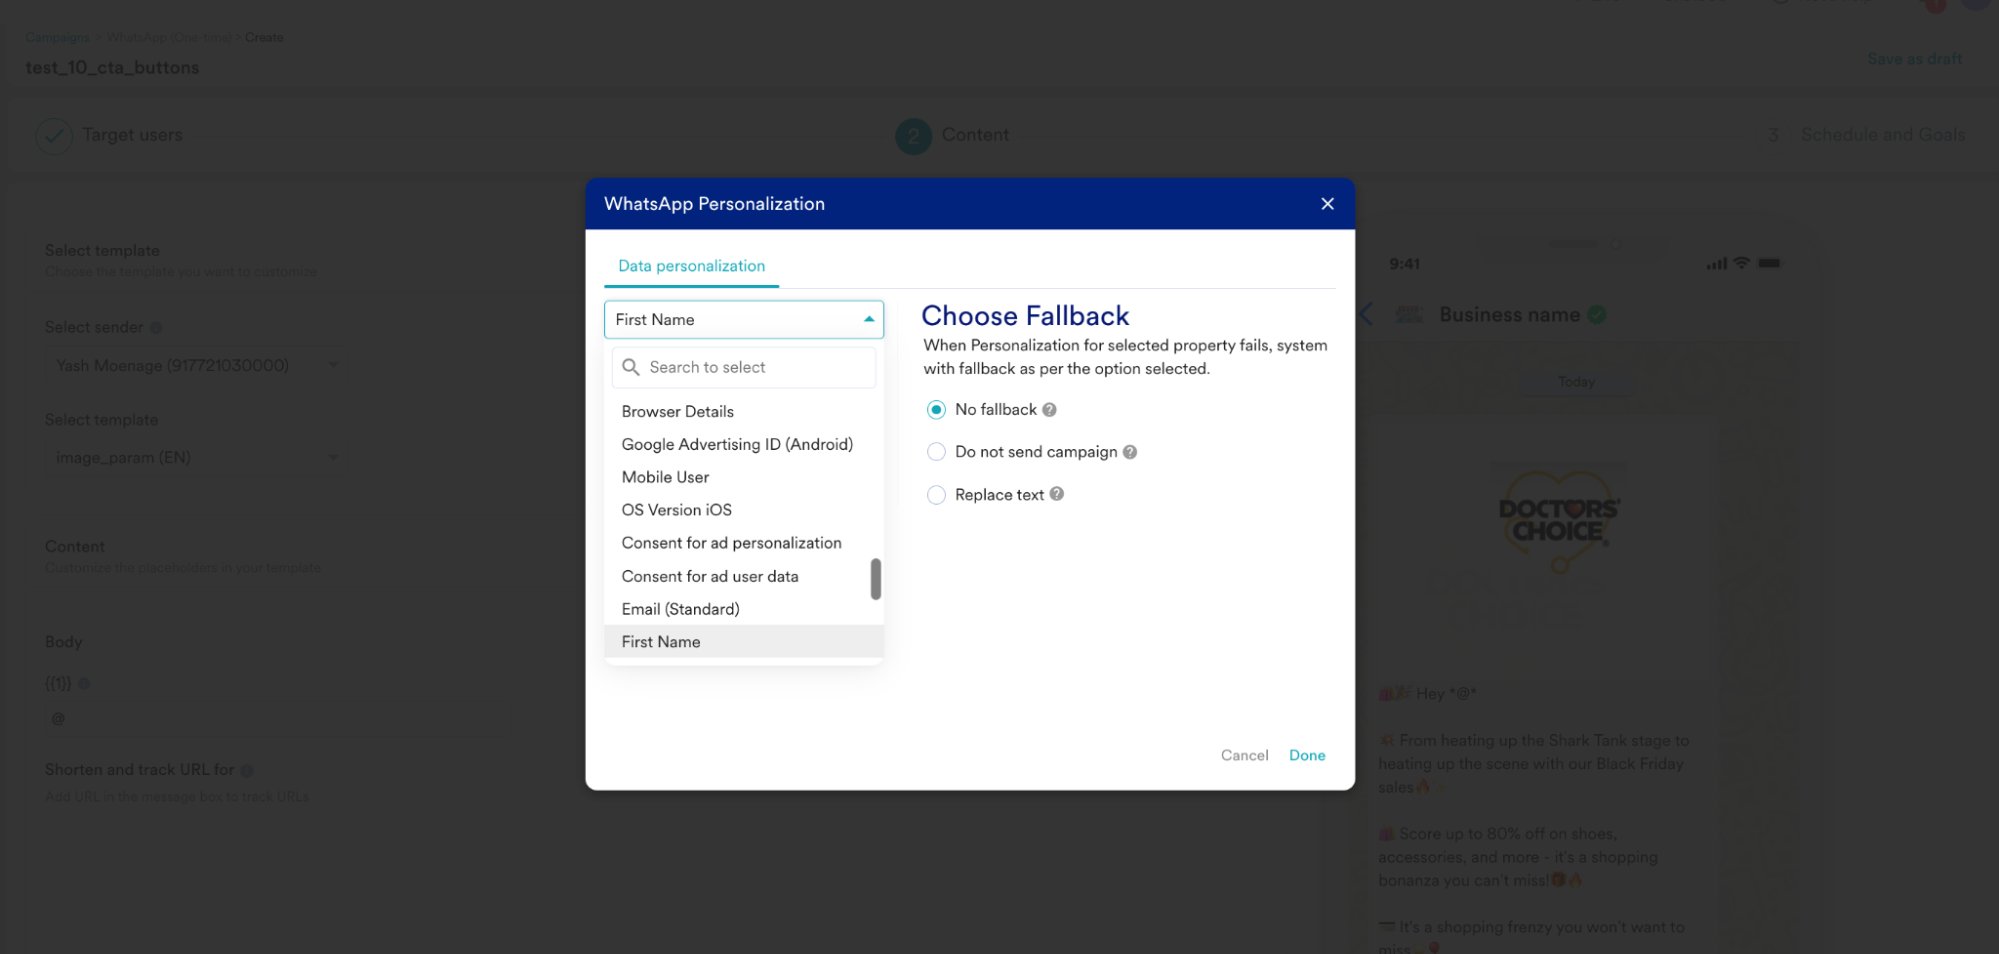
- Improved Personalization: Leverage MoEngage behavioral attributes to populate Chat360 templates dynamically, boosting relevance and conversion.
- Reduced Setup Time: One-click account linking and standardized webhook configuration eliminate manual coding and accelerate go-live.
Seamlessly connect your Chat360 account with MoEngage to synchronize user segments, trigger WhatsApp campaigns, and leverage unified analytics. This integration empowers marketing and engagement teams to harness MoEngage’s customer insights alongside Chat360’s rich conversational channels.
-
1. Access Integration Settings
2. Add MoEngage Account
3. Configure on MoEngage
-
Step 2: Creating a Campaign Template in MoEngage via Chat360 Dashboard
Overview
-
Configuration Steps
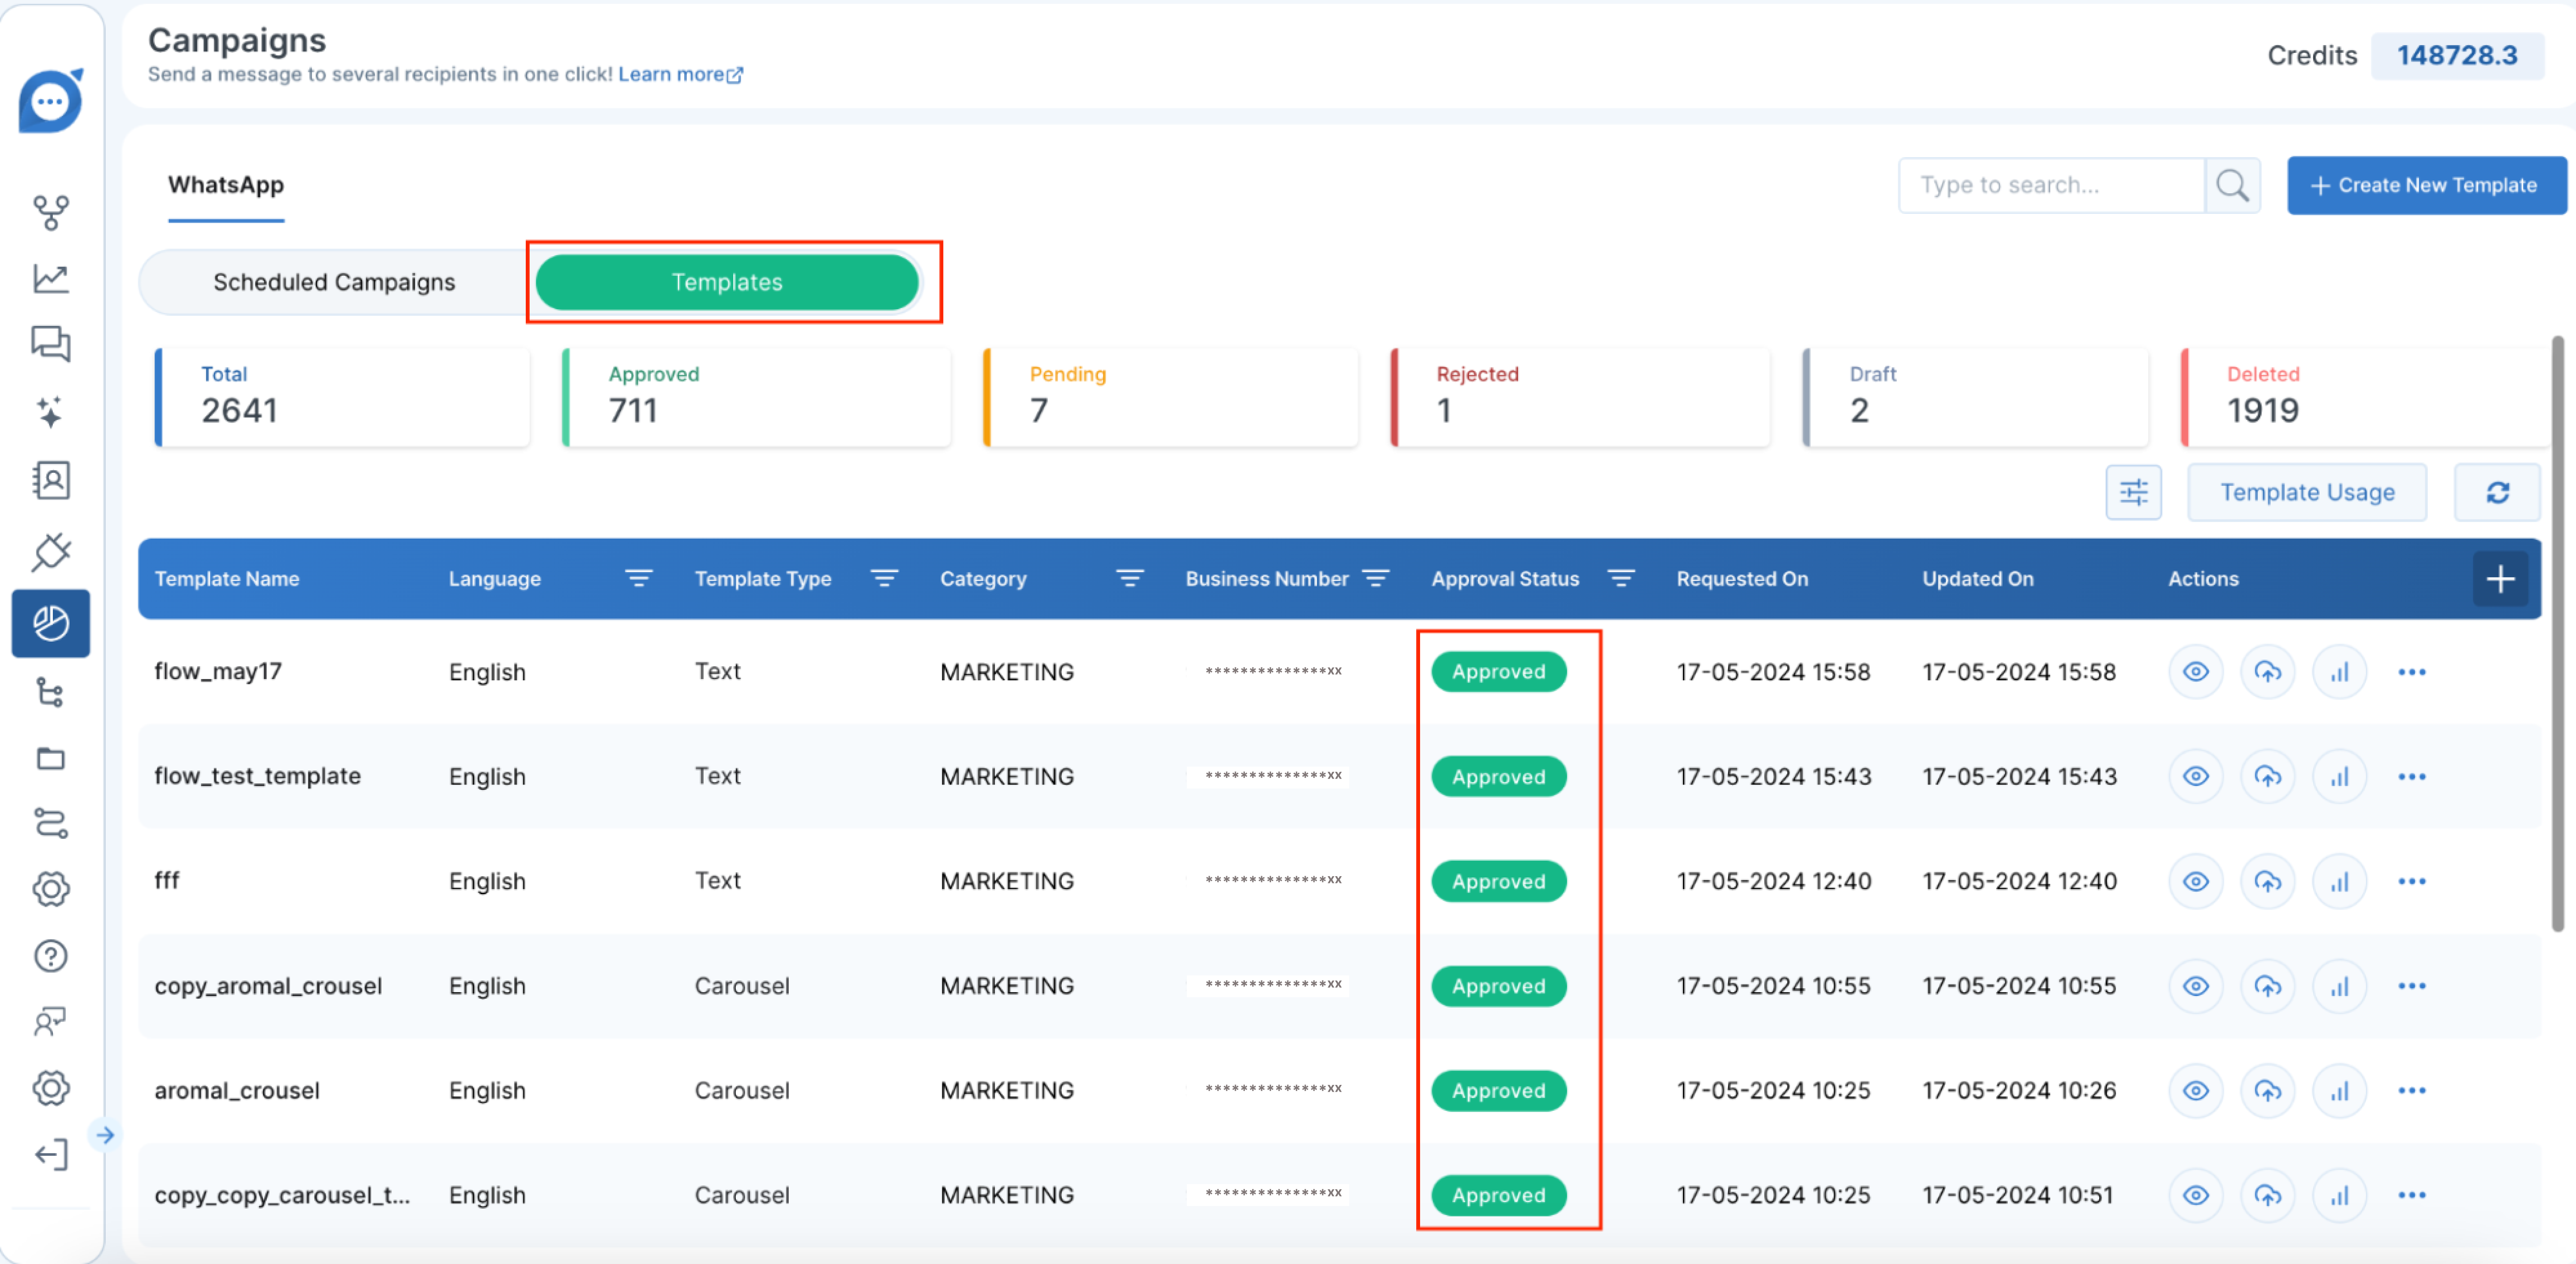
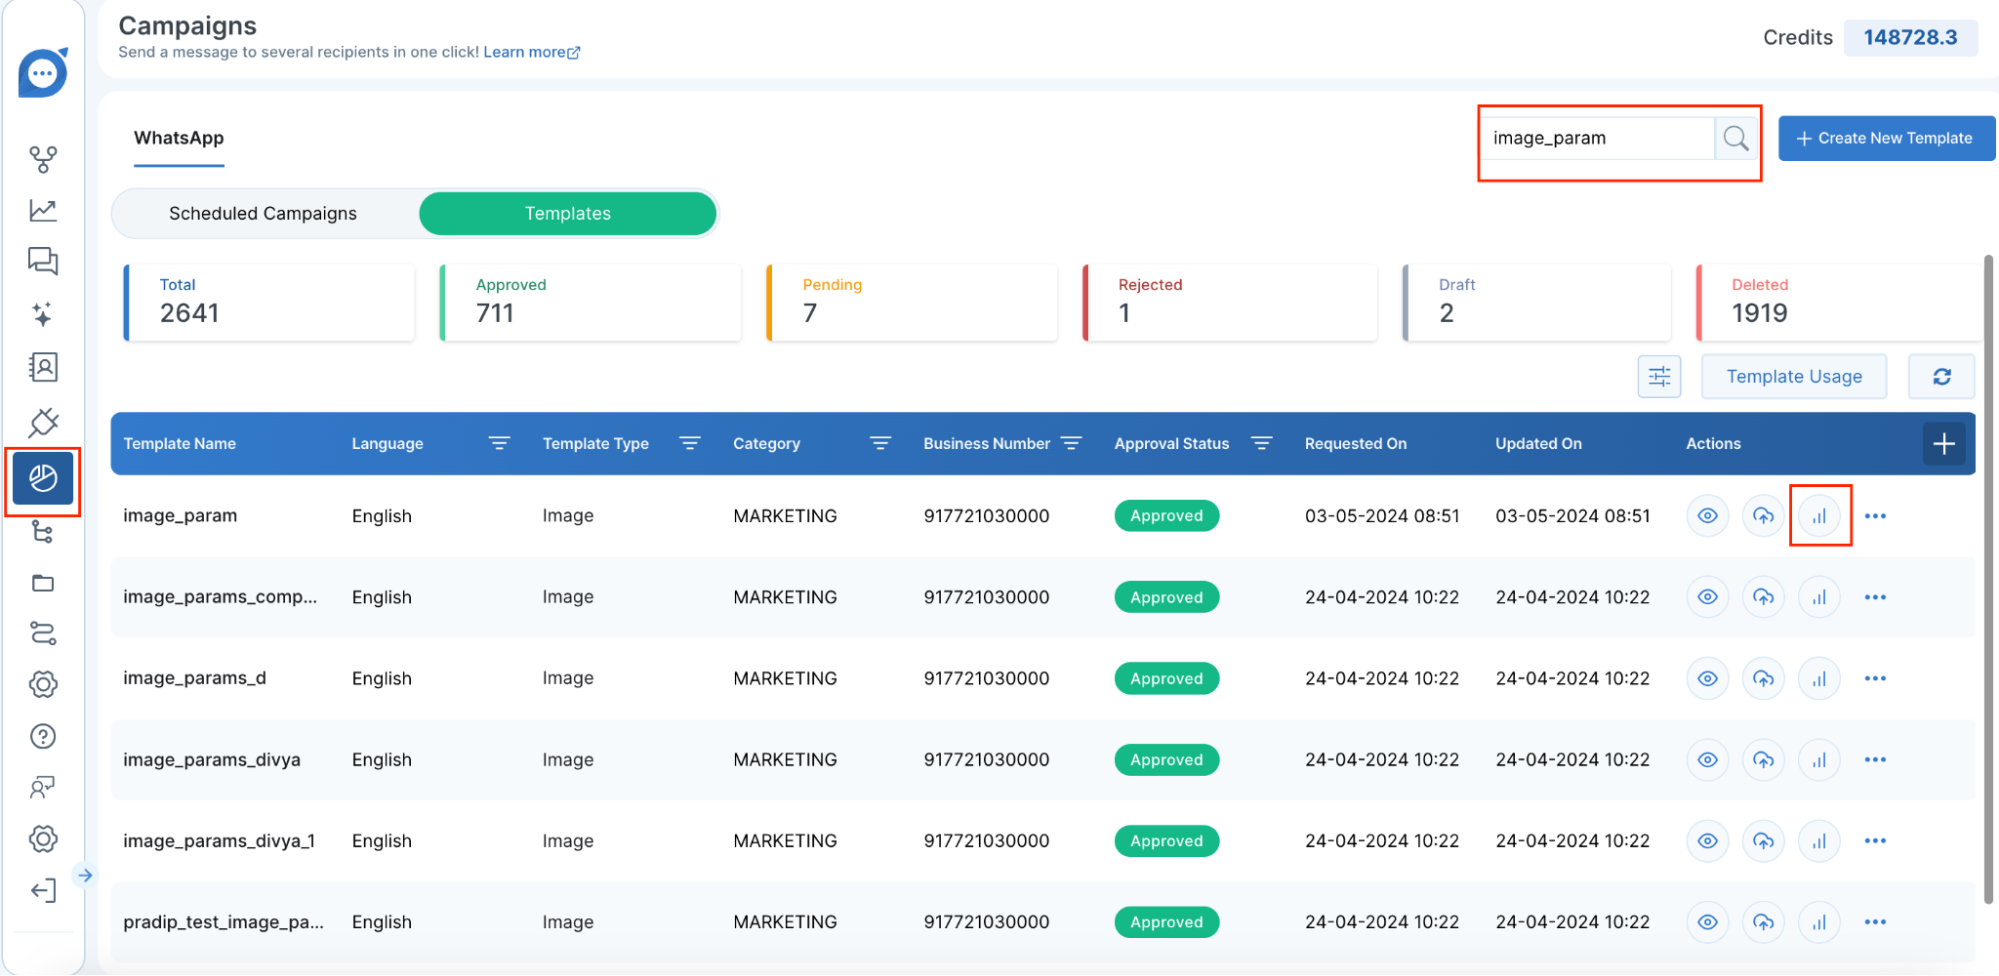
- Log in to the Chat360 Dashboard and go to Campaigns → Templates.
- Review the list of saved templates; confirm the one you need is Approved (only approved templates can be used for official messaging).
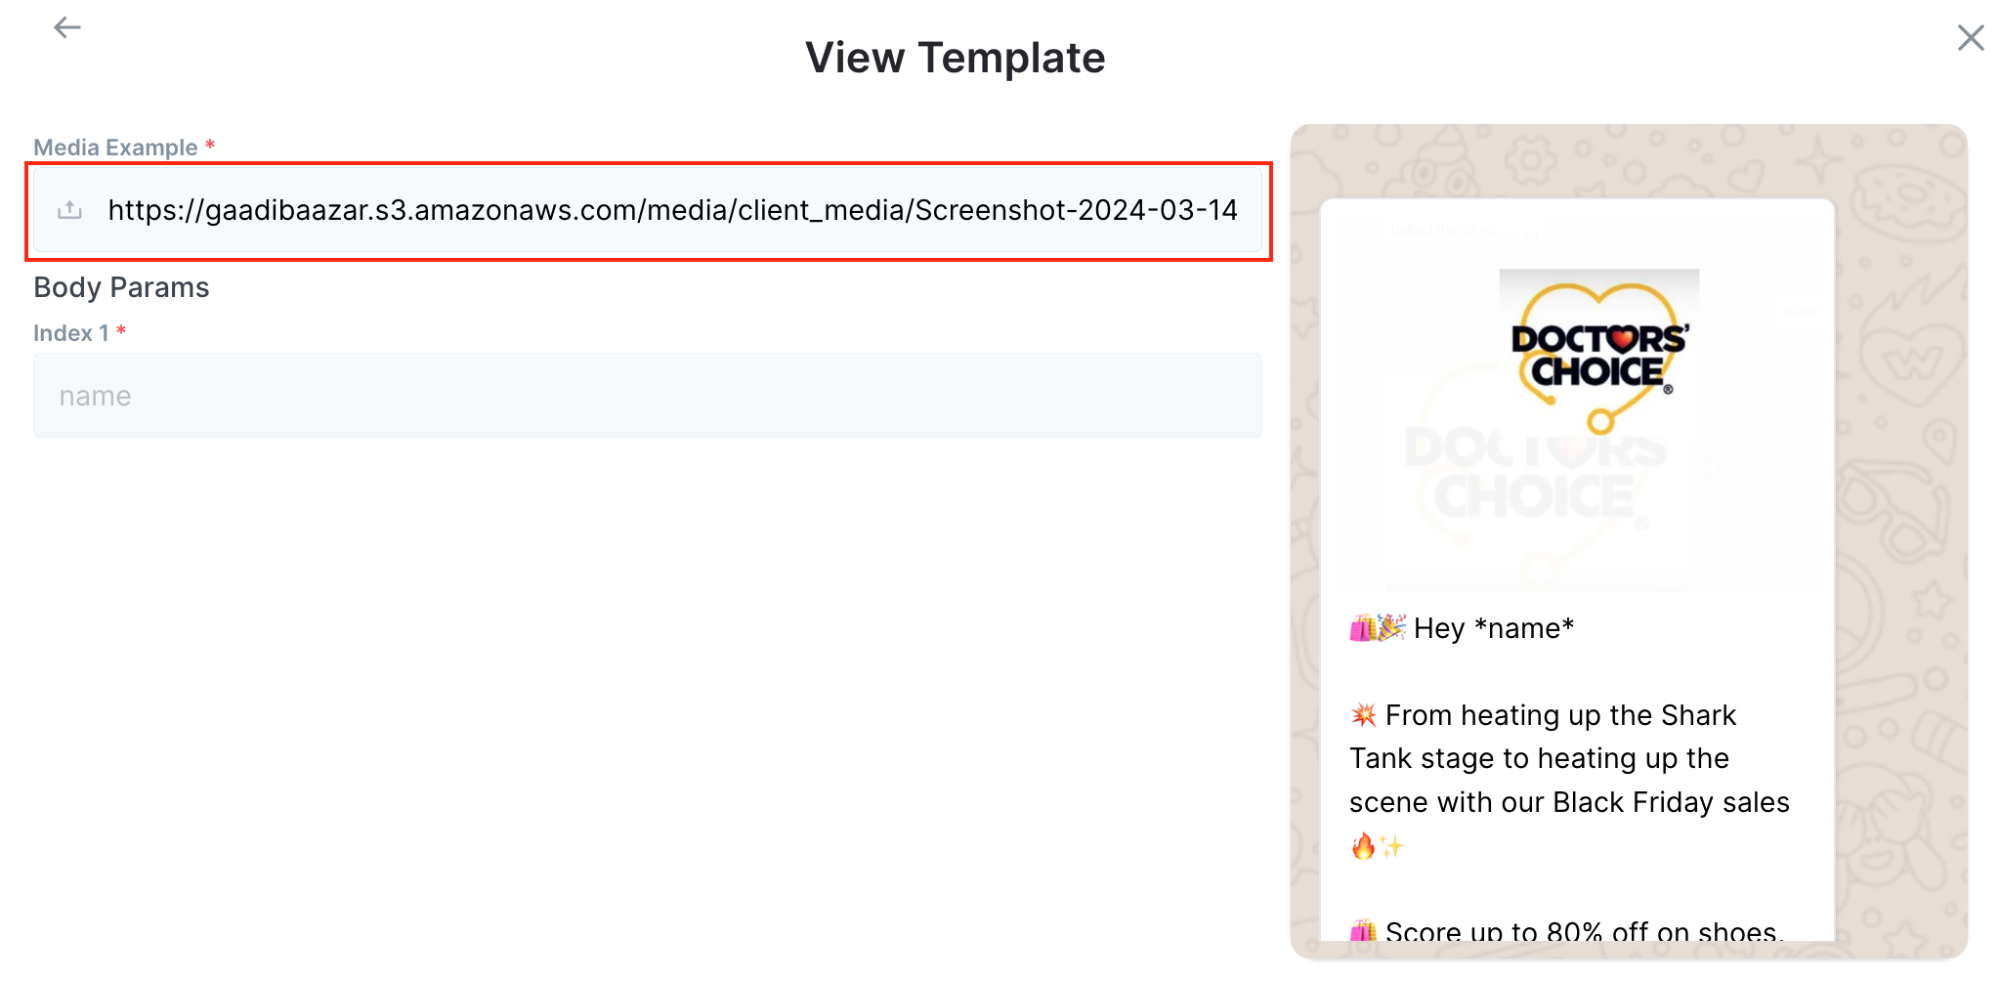
- Click on the template name to view its details.
- Verify category, parameters, and media attachments align with campaign requirements.
- Log in to your MoEngage dashboard and navigate to Campaigns → Templates.
- Choose Add Template and enter the Template ID or details from Chat360 for exact matching.
- Ensure the template’s message format, media, and buttons mirror Chat360’s configuration.
- Save and activate the template; it should now appear as Active in MoEngage.
-
Key Benefits
- Cross-Platform Consistency: Maintain a single source of truth for templates, eliminating discrepancies between Chat360 and MoEngage.
- Reduced Errors: Compatibility checks prevent unsupported media or parameter mismatches, ensuring reliable delivery.
- Faster Campaign Launch: Quickly onboard existing Chat360 templates into MoEngage without rebuilding from scratch.
- Brand Integrity: Uniform template styling and messaging uphold brand standards across all customer touchpoints.
Define and synchronize your approved Chat360 message templates within MoEngage to ensure consistency across both platforms. This process guarantees that every campaign uses a standardized template, avoiding mismatches and delivery failures.
-
1. Access Template Management in Chat360
3. Switch to MoEngage
4. Finalize Template Integration
-
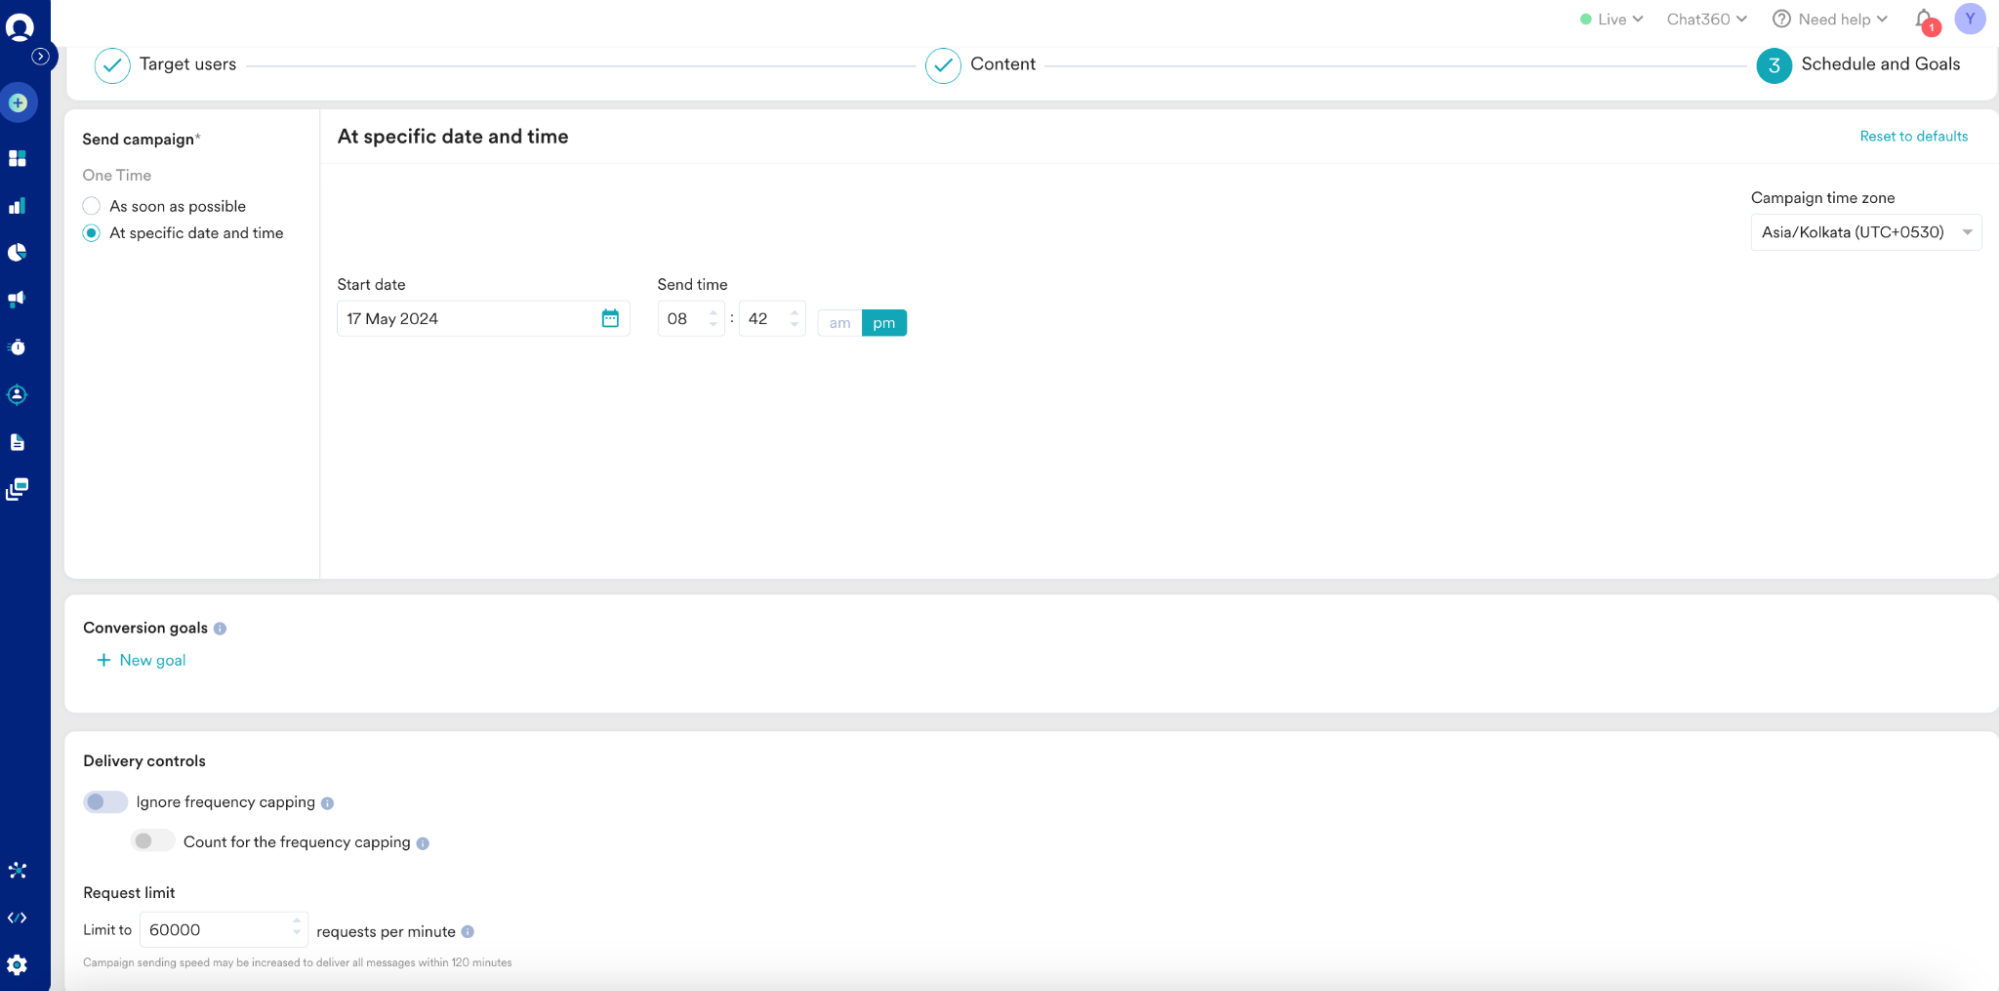
Step 3: Launching a Campaign in MoEngage
Overview
-
Configuration Steps
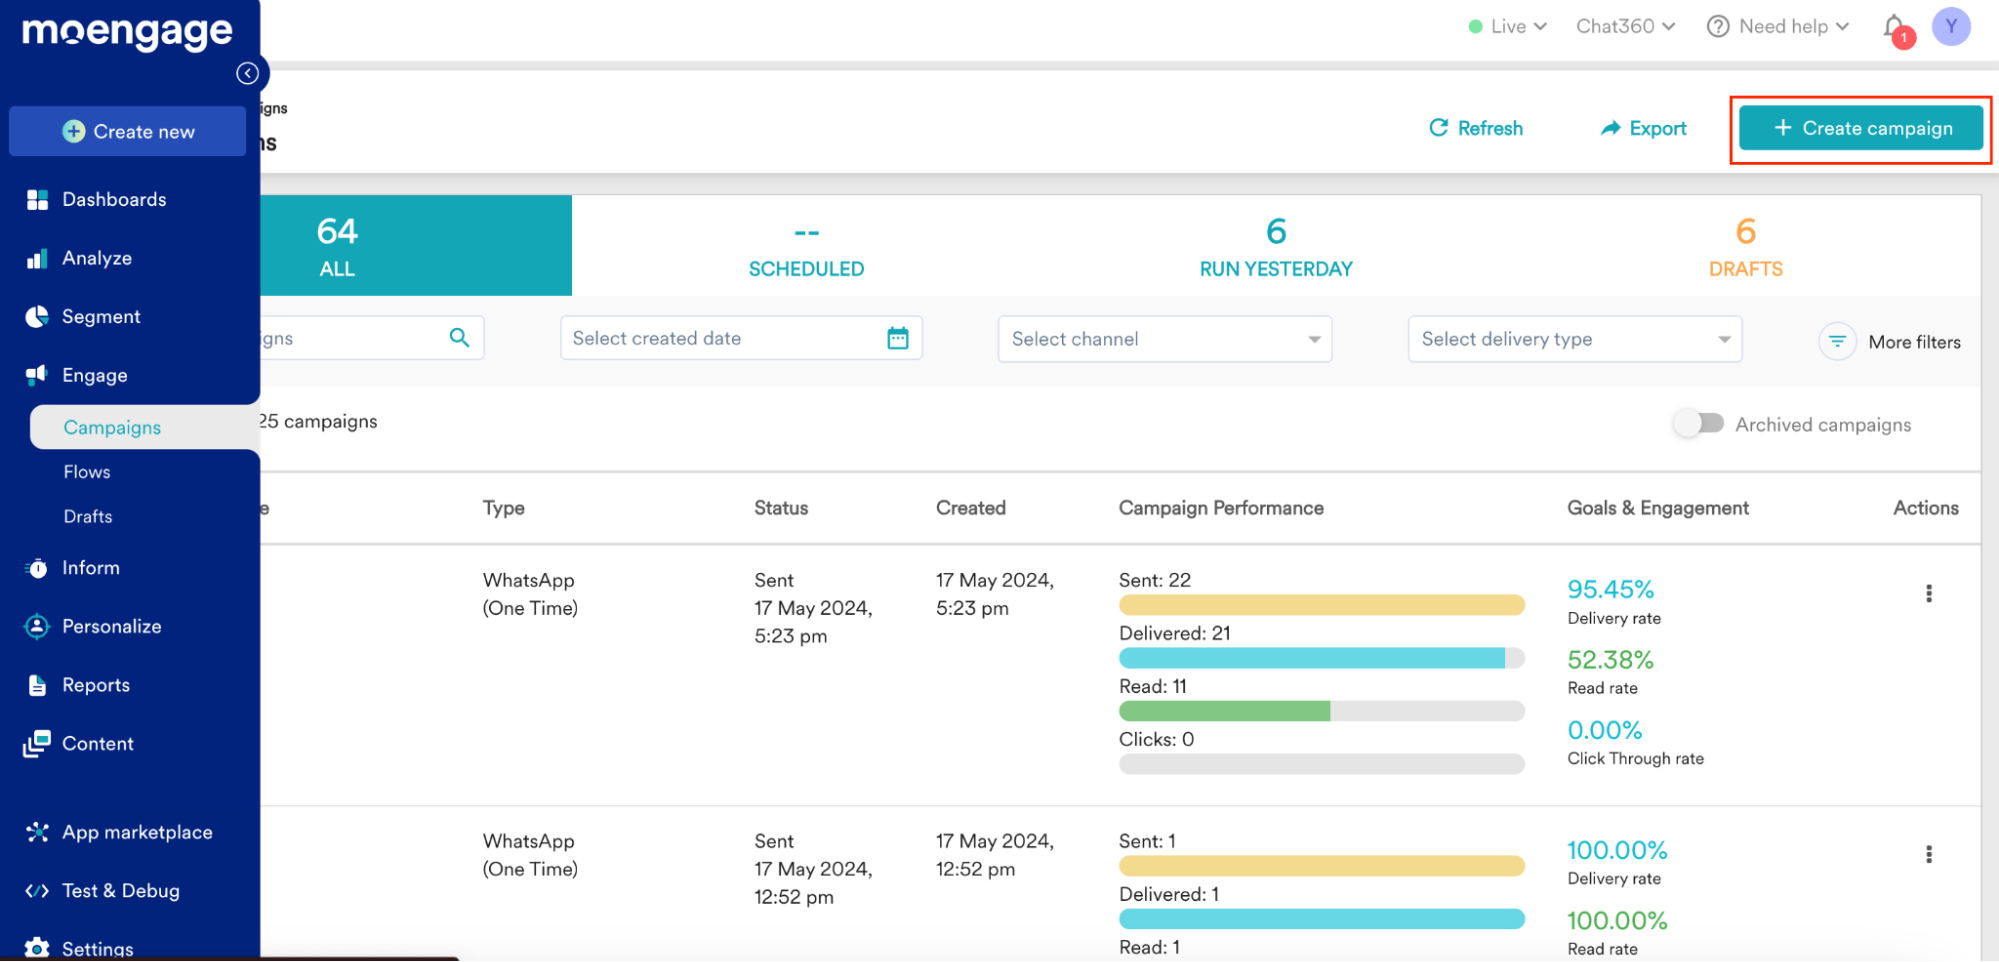
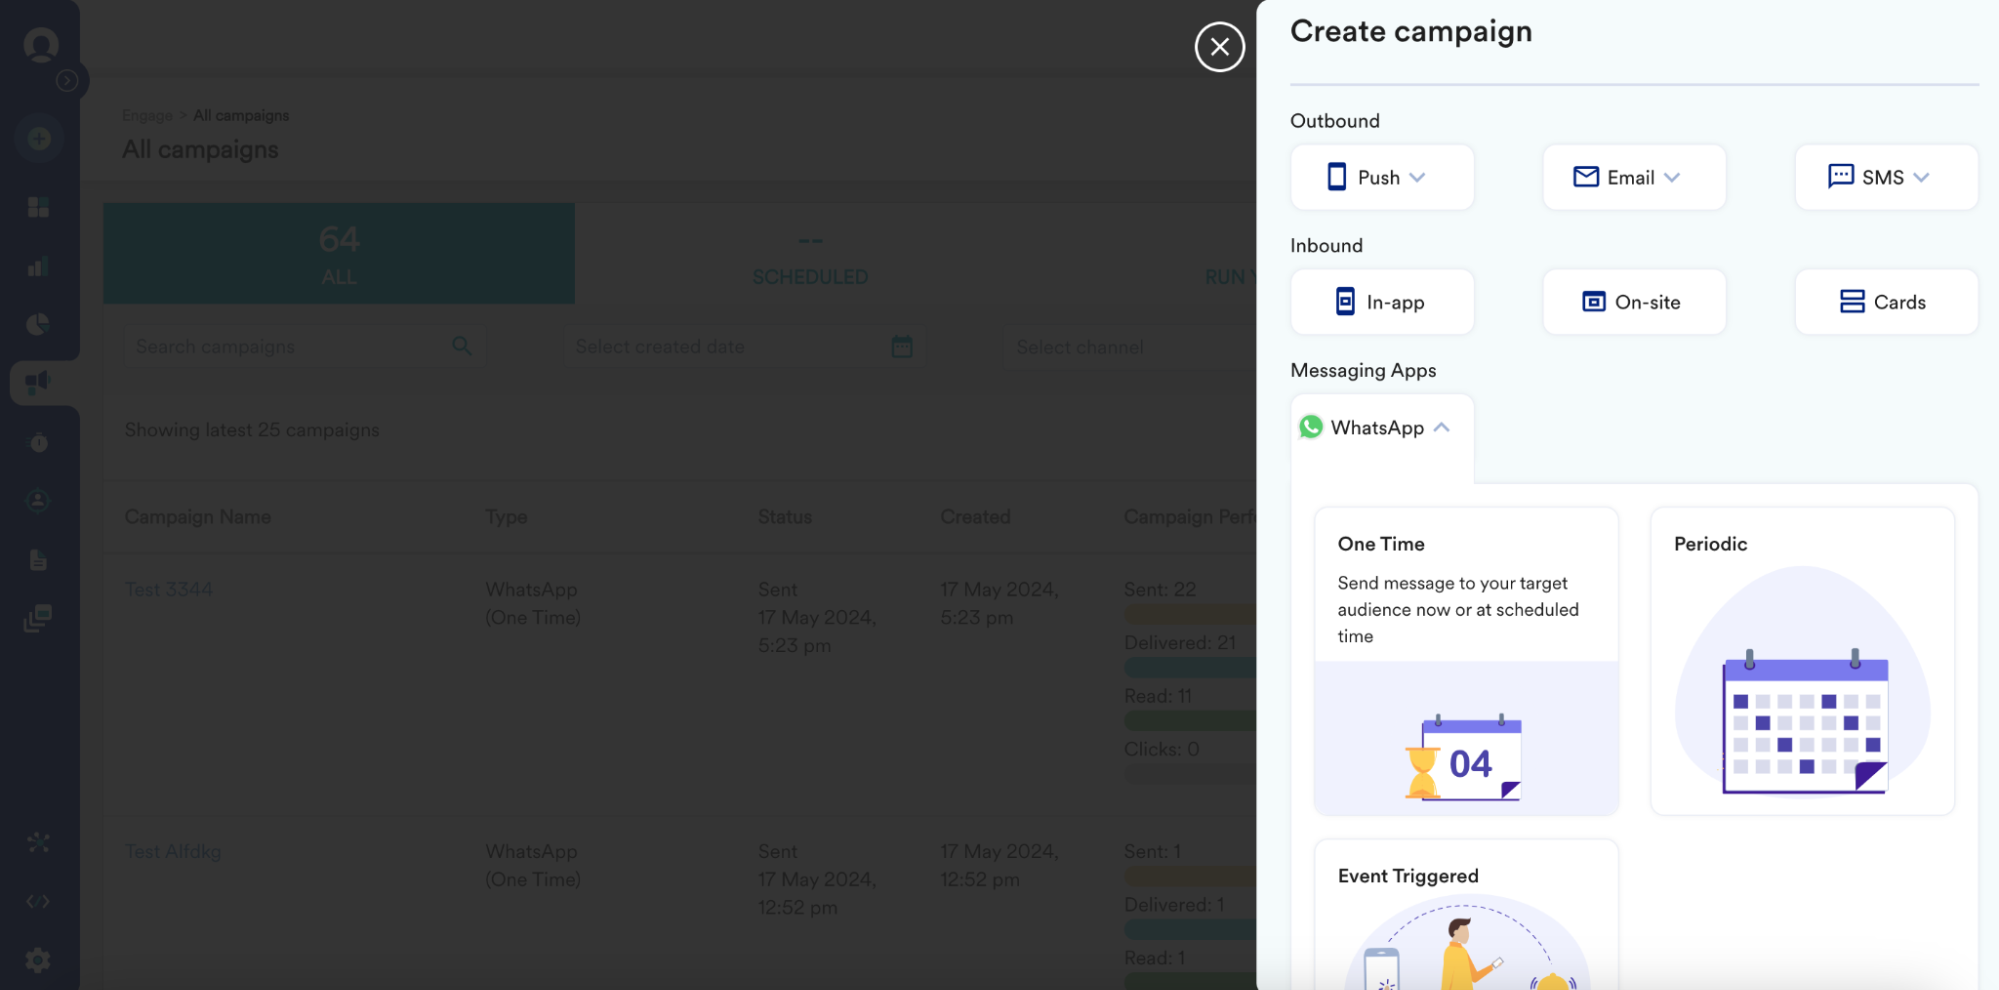
- In MoEngage, go to Campaigns → Campaign Manager.
- Click the + icon beside your desired channel (e.g., WhatsApp) to create a new campaign.
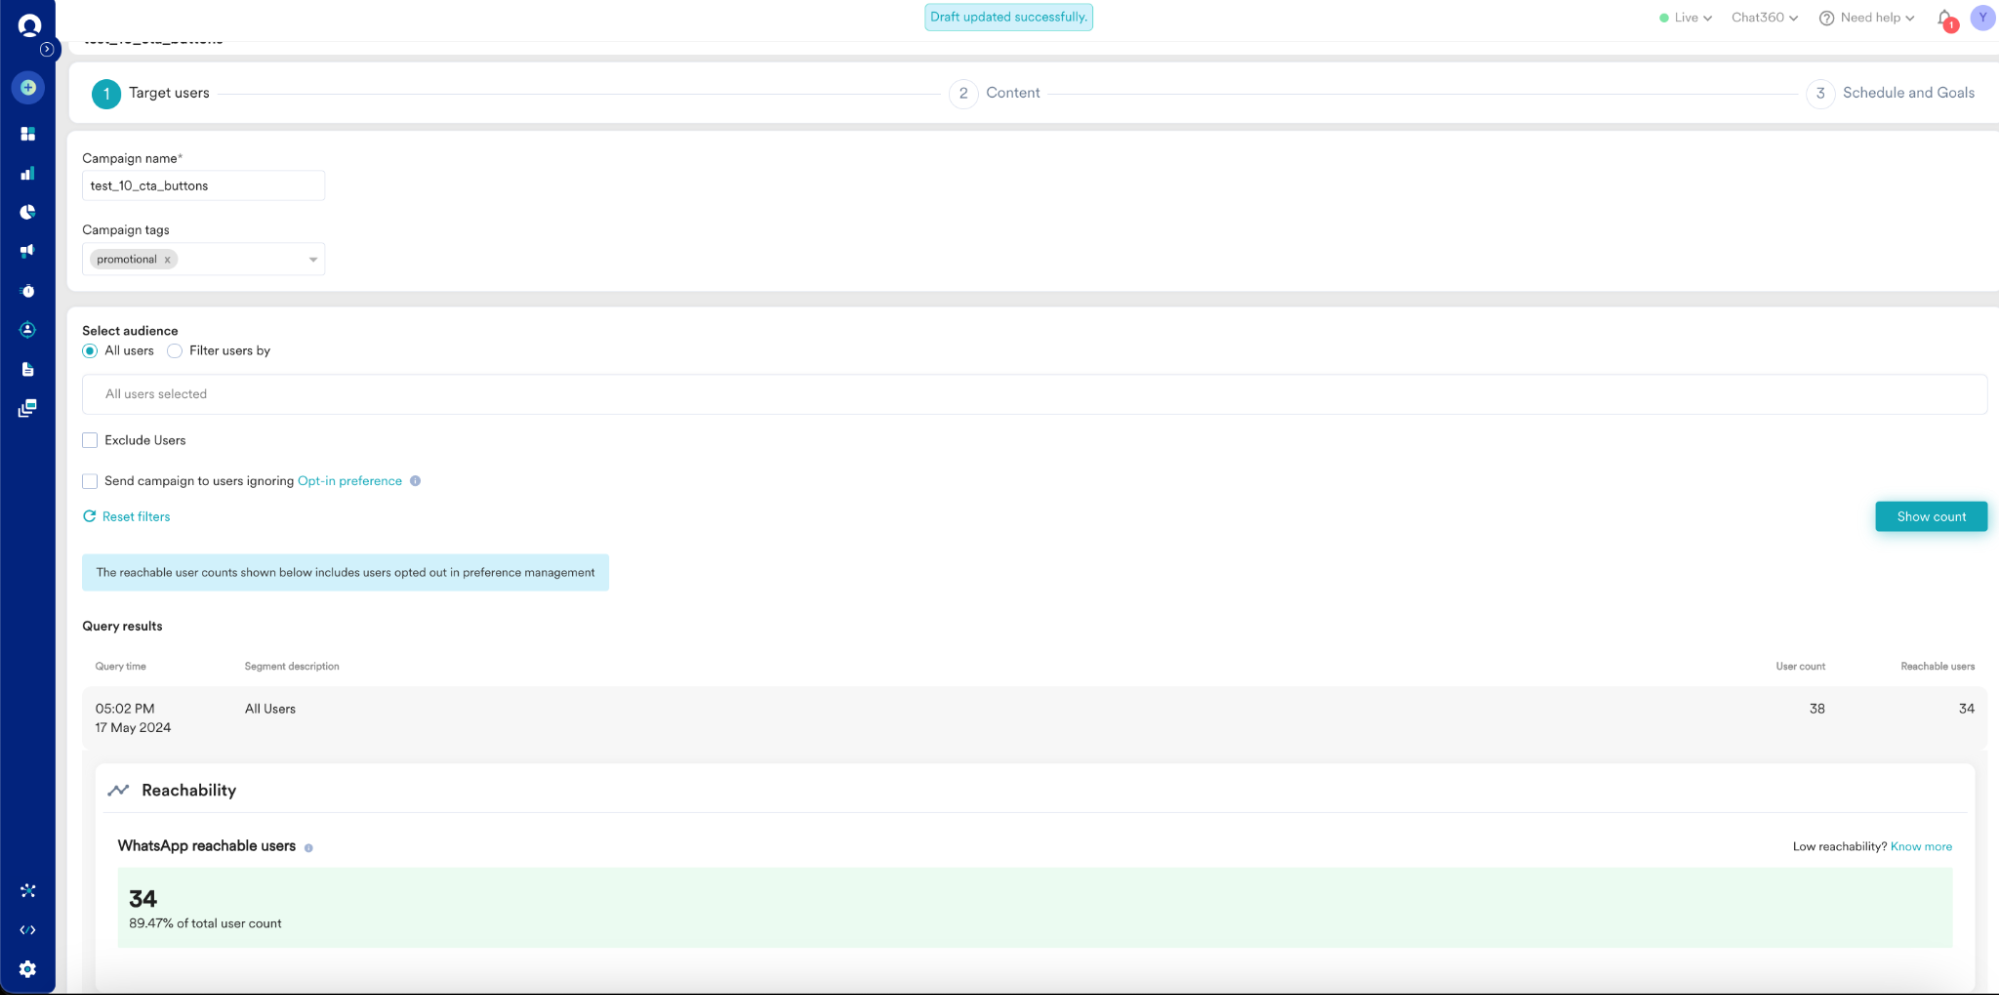
- Campaign Name: Enter a unique, descriptive name for easy tracking.
- Select Audience: Choose from MoEngage segments synced from Chat360 to define your target users.
- Preview User Count: Review the total number of recipients before proceeding.
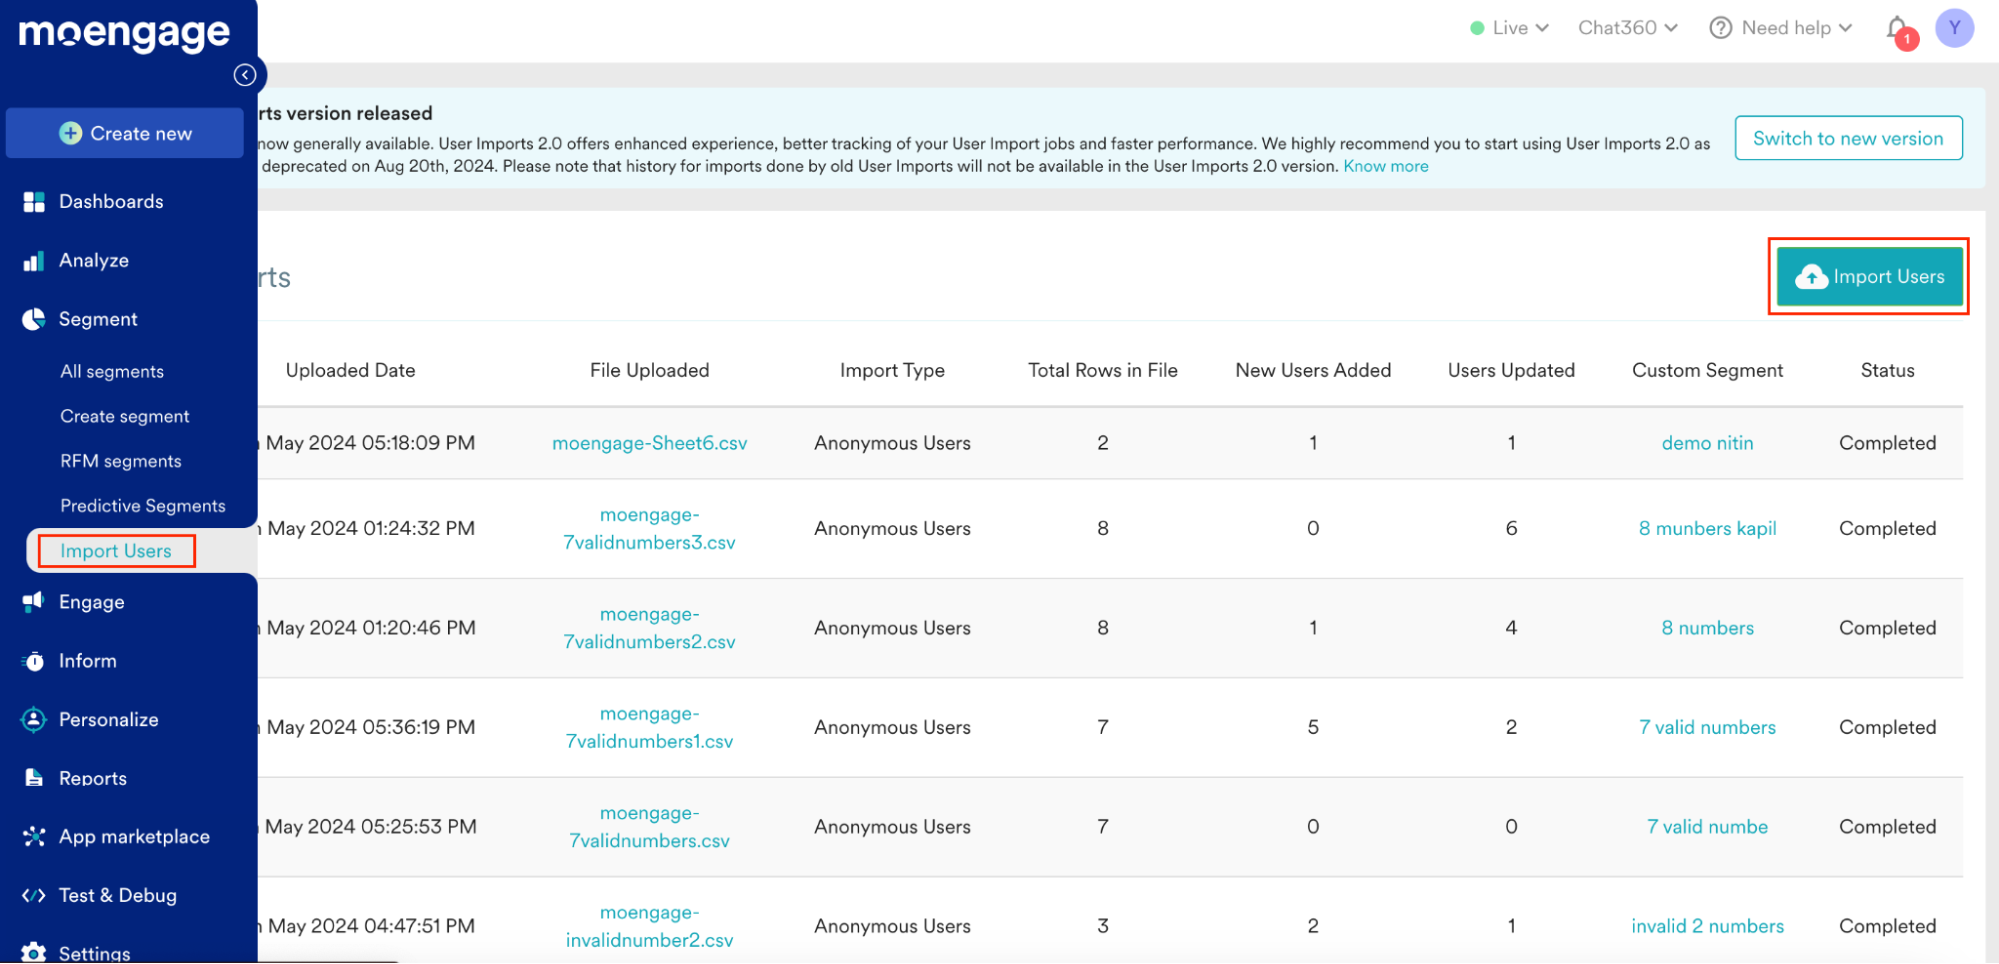
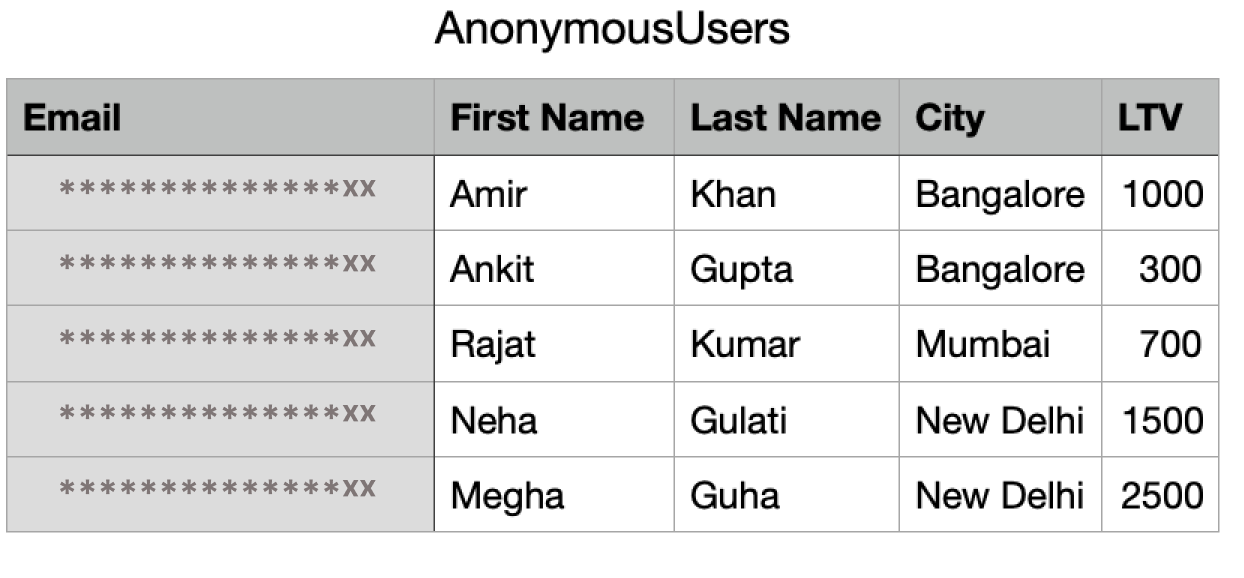
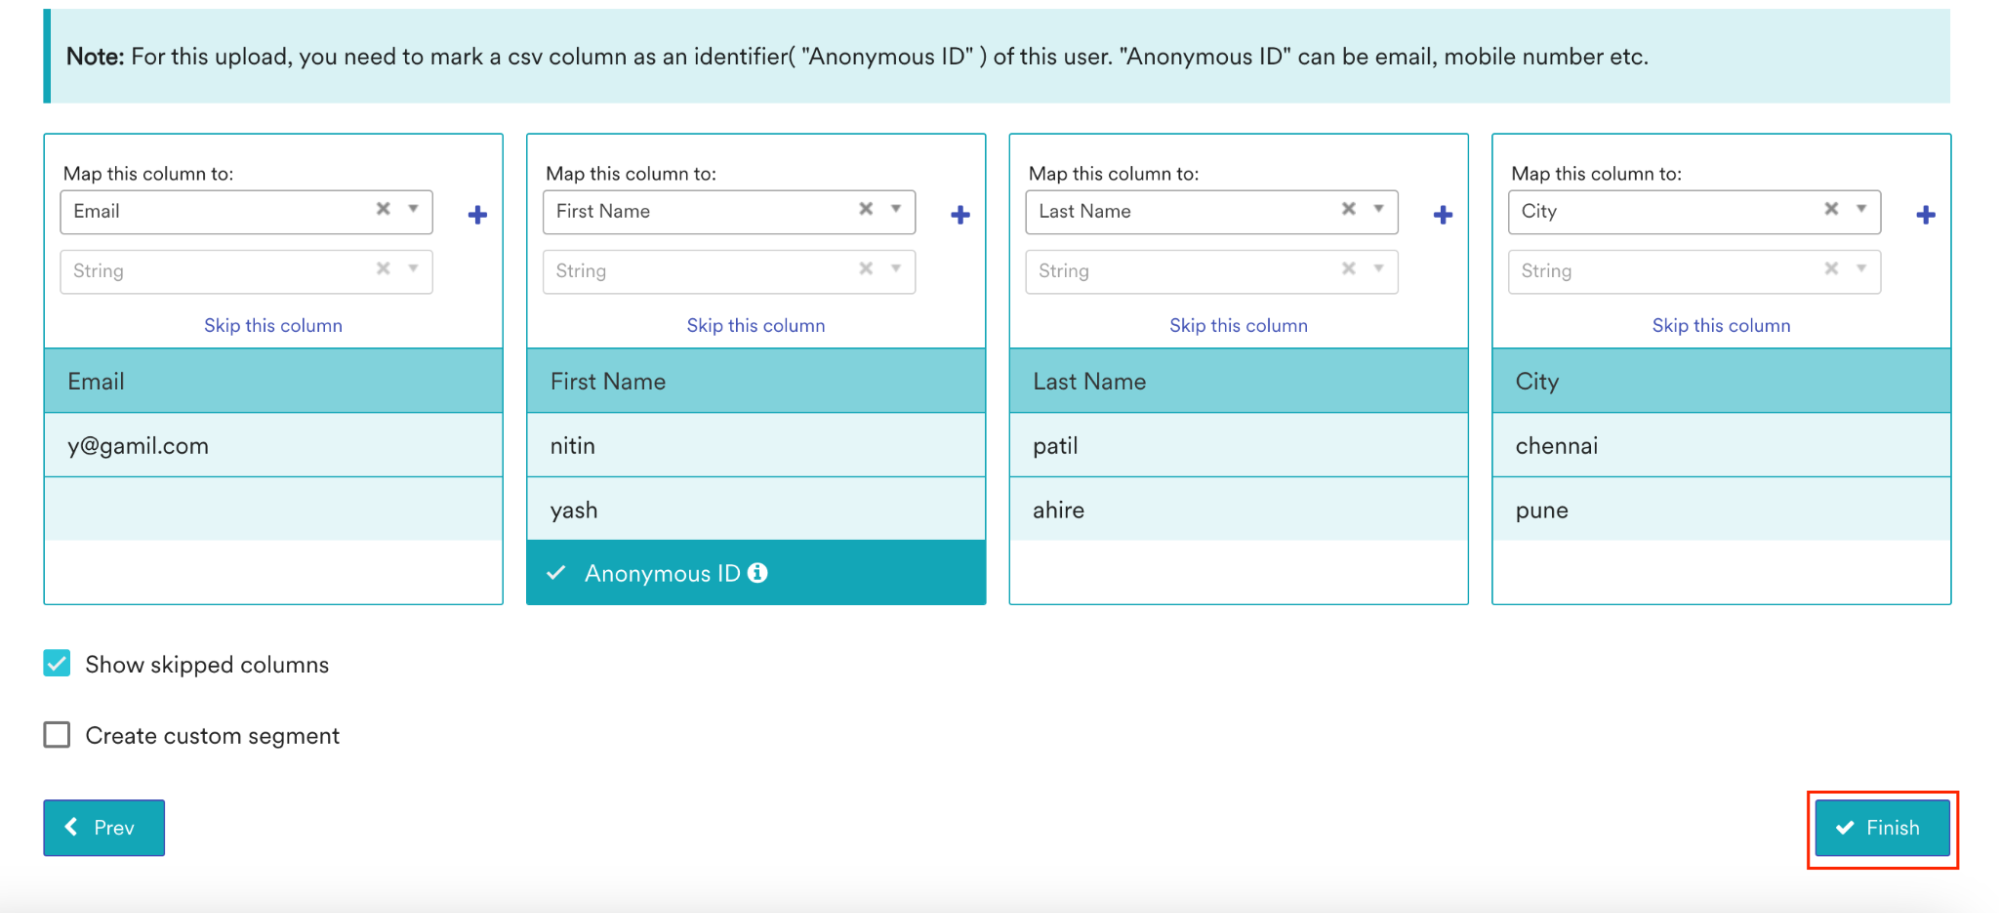
- Navigate to Data Manager → Upload Data if you need to import contacts via CSV.
- Download the sample CSV template, populate it with user IDs, and re-upload.
- Return to Segments to confirm the imported data is ready for use.
- In Campaign Manager, verify that the selected Chat360 template and audience are correct.
- Use the Test Send function—enter a phone number to validate formatting, media rendering, and parameter substitution.
- Click Send Now or schedule for later; confirm deployment.
- Monitor status updates and delivery in both MoEngage’s analytics and Chat360’s Template Analytics dashboard.
-
Key Benefits
- Precision Targeting Use MoEngage’s rich segmentation combined with Chat360 templates to reach the most relevant users.
- Seamless Testing Built-in test sends prevent errors and ensure message integrity before full launch.
- Real-Time Monitoring Track deliveries, opens, and responses across both MoEngage and Chat360 for comprehensive insights.
- Scalable Execution Launch large-scale campaigns or drip sequences with minimal manual intervention.
- Cross-Platform Reporting Consolidate MoEngage campaign metrics with Chat360 delivery and engagement data for end-to-end visibility.
Execute targeted campaigns in MoEngage using synchronized Chat360 templates and audience segments. This step ensures the right message reaches the right users at the right time, with full testing and analytics support.
-
1. Access Campaign Manager
2. Set Up Campaign Details
3. Upload & Map User Data
4. Review & Test

5. Launch & Monitor

-
Use Case Examples for MoEngage Integration with Chat360
- The marketing team creates an abandoned cart reminder template in Chat360 with dynamic placeholders (e.g., {{user_name}}, {{product_name}}, {{cart_value}}).
- The template is approved in Chat360 and synced with MoEngage.
- In MoEngage, the team creates a user segment based on cart abandonment behavior and uploads the user list.
- The synced WhatsApp template is mapped to the campaign in MoEngage, tested, and launched.
- Improves recovery rates with automated and personalized nudges, leveraging Chat360 for messaging compliance and MoEngage for behavioral targeting.
- The brand designs a media-rich WhatsApp template in Chat360 including an image, description, and "Buy Now" CTA.
- The template is integrated into MoEngage via the Chat360 template ID.
- The marketing team segments users in MoEngage by loyalty score and past purchase history.
- After testing the campaign with sample numbers, the campaign is launched to the selected segment.
- Accelerates product adoption by sending hyper-relevant, visually engaging messages to loyal users via a trusted channel.
- A dynamic template is created in Chat360 with placeholders for {{destination}}, {{discount}}, and {{expiry_date}}.
- The CSV with user-specific data is uploaded into MoEngage and mapped to the template parameters.
- The campaign is configured and launched via MoEngage Campaign Manager.
- Drives urgency and boosts conversions by delivering real-time, user-specific travel offers directly on WhatsApp.
- Chat360-approved re-engagement template: “Hi {{name}}, we’ve missed you! Here's a new course you might like.”
- User inactivity data is uploaded into MoEngage and filtered via segmentation rules.
- Campaign is scheduled and monitored post-launch through Chat360's Template Analytics.
- Re-activates dormant users using personalized reminders without additional engineering effort.
-
1. Personalized Abandoned Cart Recovery via WhatsApp
Scenario
A retail e-commerce brand wants to reduce cart abandonment rates by sending personalized reminders to users who added items to their cart but didn’t complete the purchase within 24 hours.
Workflow:A D2C skincare brand wants to notify VIP customers about a new product launch through an engaging WhatsApp message with product image and CTA buttons.
Workflow:A travel booking platform is running a flash sale and wants to alert users with a WhatsApp campaign that includes destination-specific offers.
Workflow:An EdTech platform wants to re-engage users who haven’t logged in for the last 60 days.
Workflow: