Agent Assignment
-
Overview:
Chat360’s Agent Assignment feature lets you direct incoming chats to specific agents or teams. You can manually assign chats at any time or automate assignment within your bot flow to streamline handoffs and reduce response delays.
-
1. Manual Agent Assignment
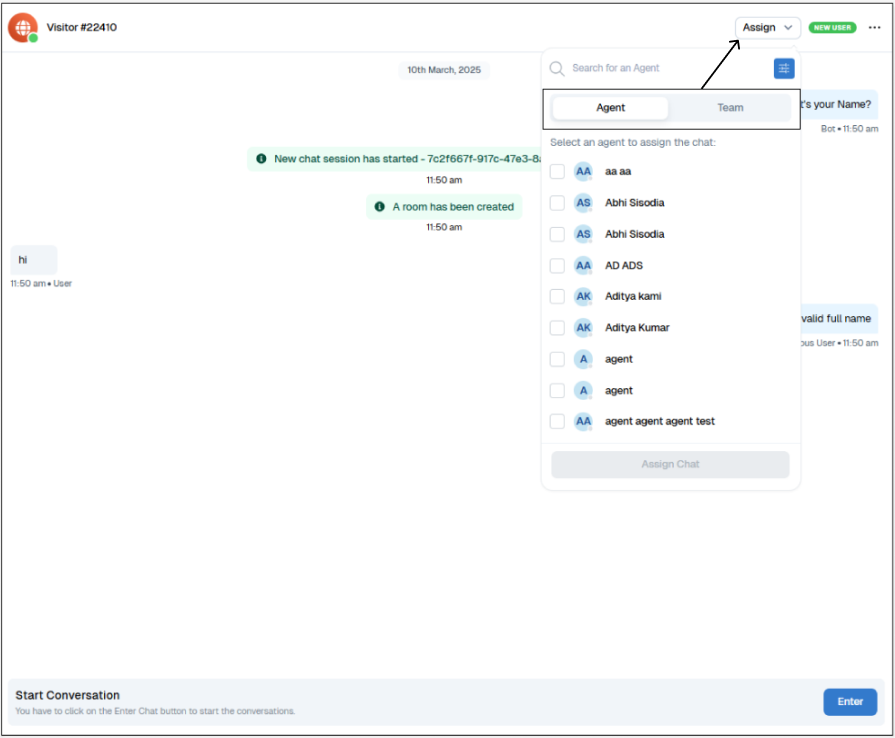
- Assign to an Individual Agent:
- Open the active chat room.
- Click Assign in the top-right corner.
- Choose Agent from the menu.
- Select the desired agent’s name.
- Click Assign Chat.
- Assign to a Team:
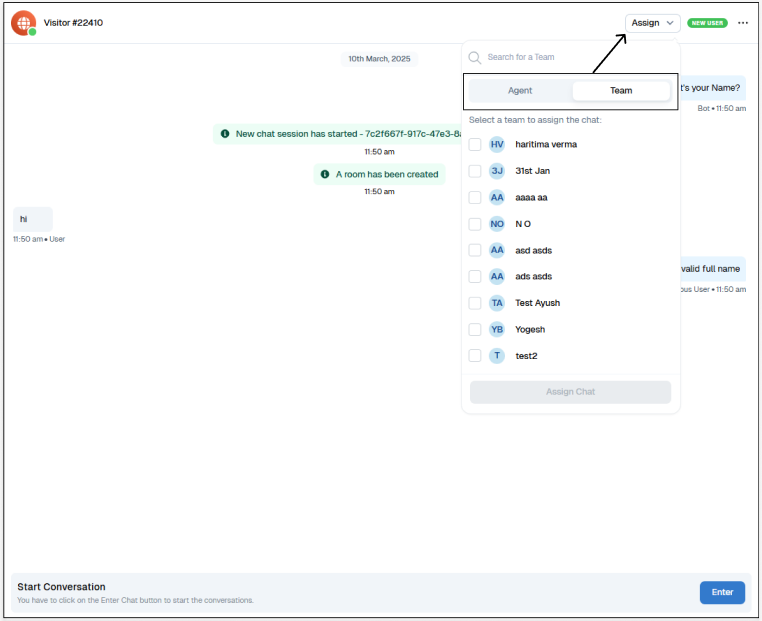
- Click Assign in the chat room header.
- Select Team from the dropdown.
- Choose the target team.
- The Team Manager can then allocate the chat to any team member as needed.
-
2. Automated Assignment in Bot Flows
- Agent Live Chat Component:
- In the Bot Builder canvas, drag the Agent Live Chat component into your flow.
- Click the component’s ⋮ menu and select the specific agent.
- Save your changes—any chat that reaches this component will auto-assign to that agent.
- Team Live Chat Component:
- Drag the Team Live Chat component into your conversation path.
- Use the ⋮ menu to pick the desired team.
- Once the flow reaches this block, Chat360 automatically routes the chat to that team for further manual or automated distribution.
-
Use Case Examples
- High-Priority Support: Automatically route billing inquiries to your Finance team at 5 PM off-hours via the Team Live Chat component.
- Dedicated Account Reps: Assign VIP customer chats directly to their account manager using the Agent Live Chat component for a personalized experience.
By combining manual control with flow-based automation, Chat360 ensures every customer message lands in the right inbox—fast.
Thank you for your feedback!
We appreciate your feedback!