WhatsApp Bot
Overview
A WhatsApp Bot in Chat360 automates customer interactions on the world’s most popular messaging platform—handling inquiries, lead capture, and notifications with rich media support.
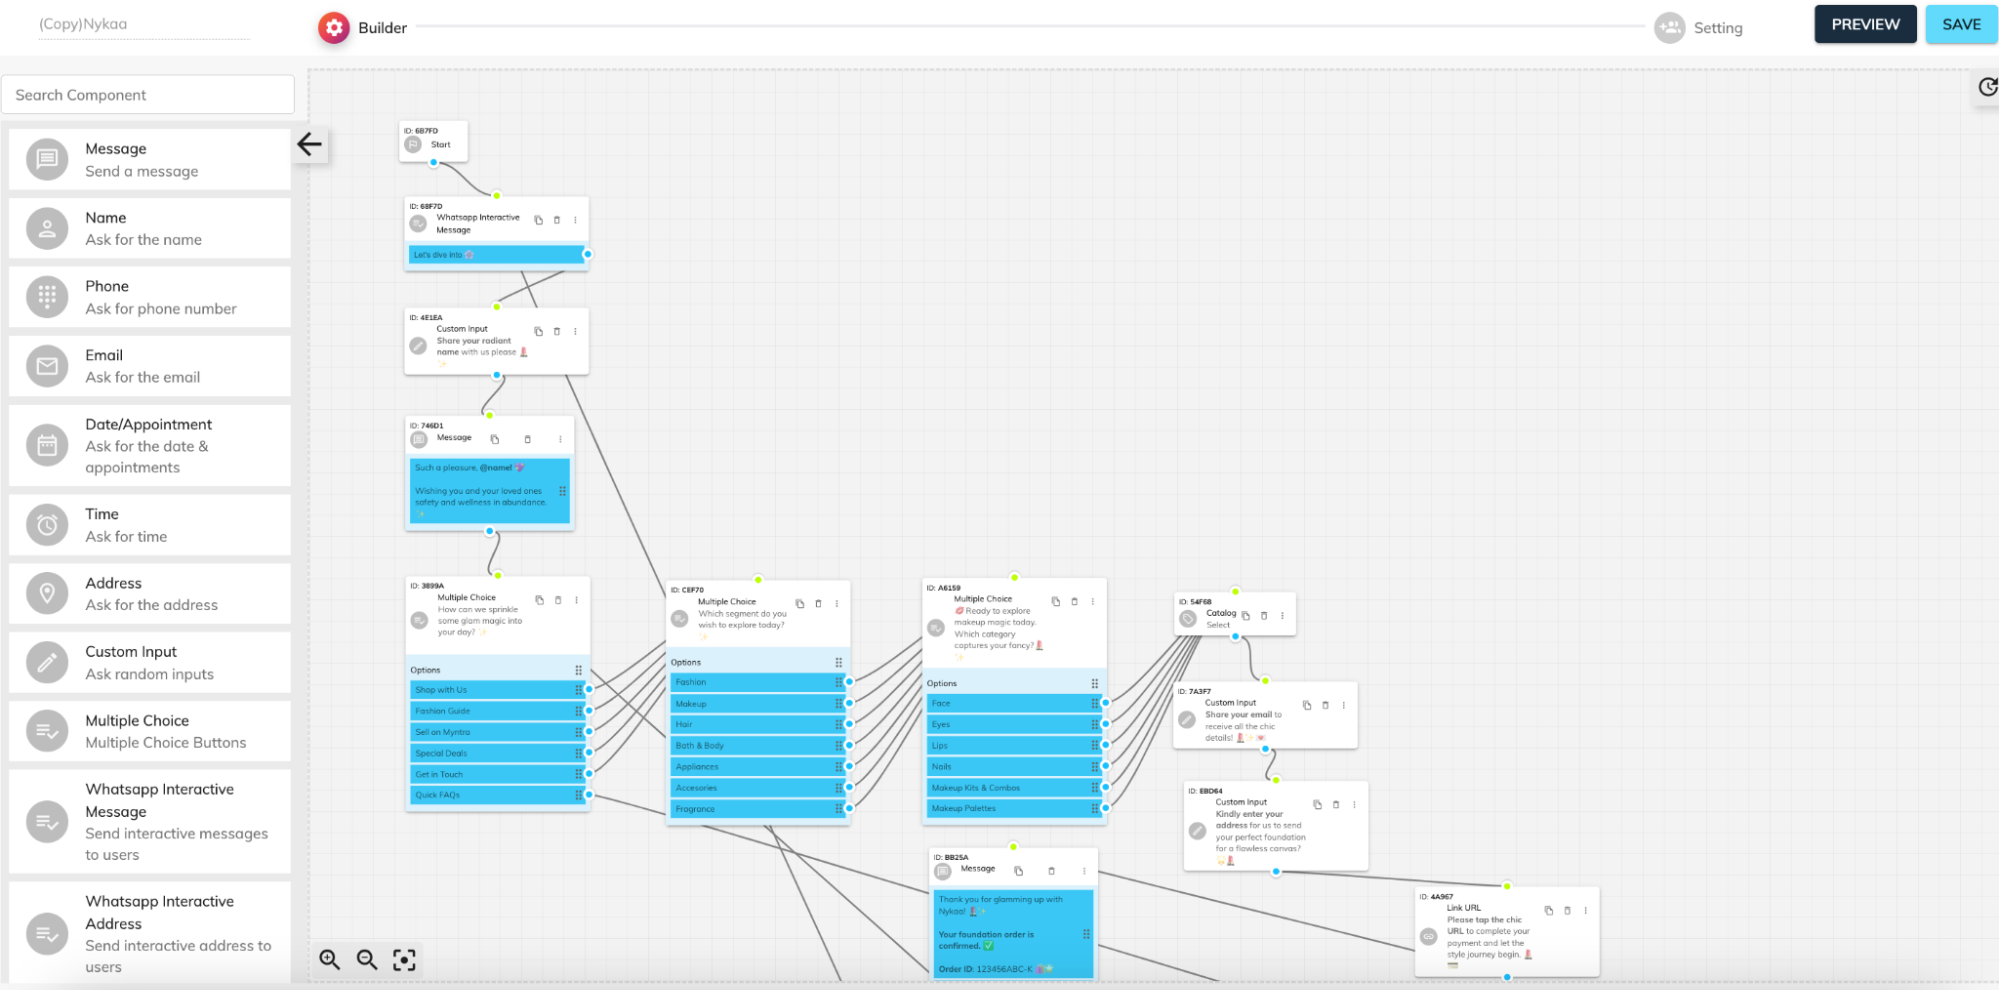
Step 1: Build Your Flow
- Open Bot Builder → Create New Bot, choose WhatsApp channel.
- Drag in a Start Node, then add components (Message, Name, Phone, Multiple Choice, etc.).
- Connect nodes by linking blue output dots to green input dots—defining your conversation path.
-
Step 2: Configure Channel Settings
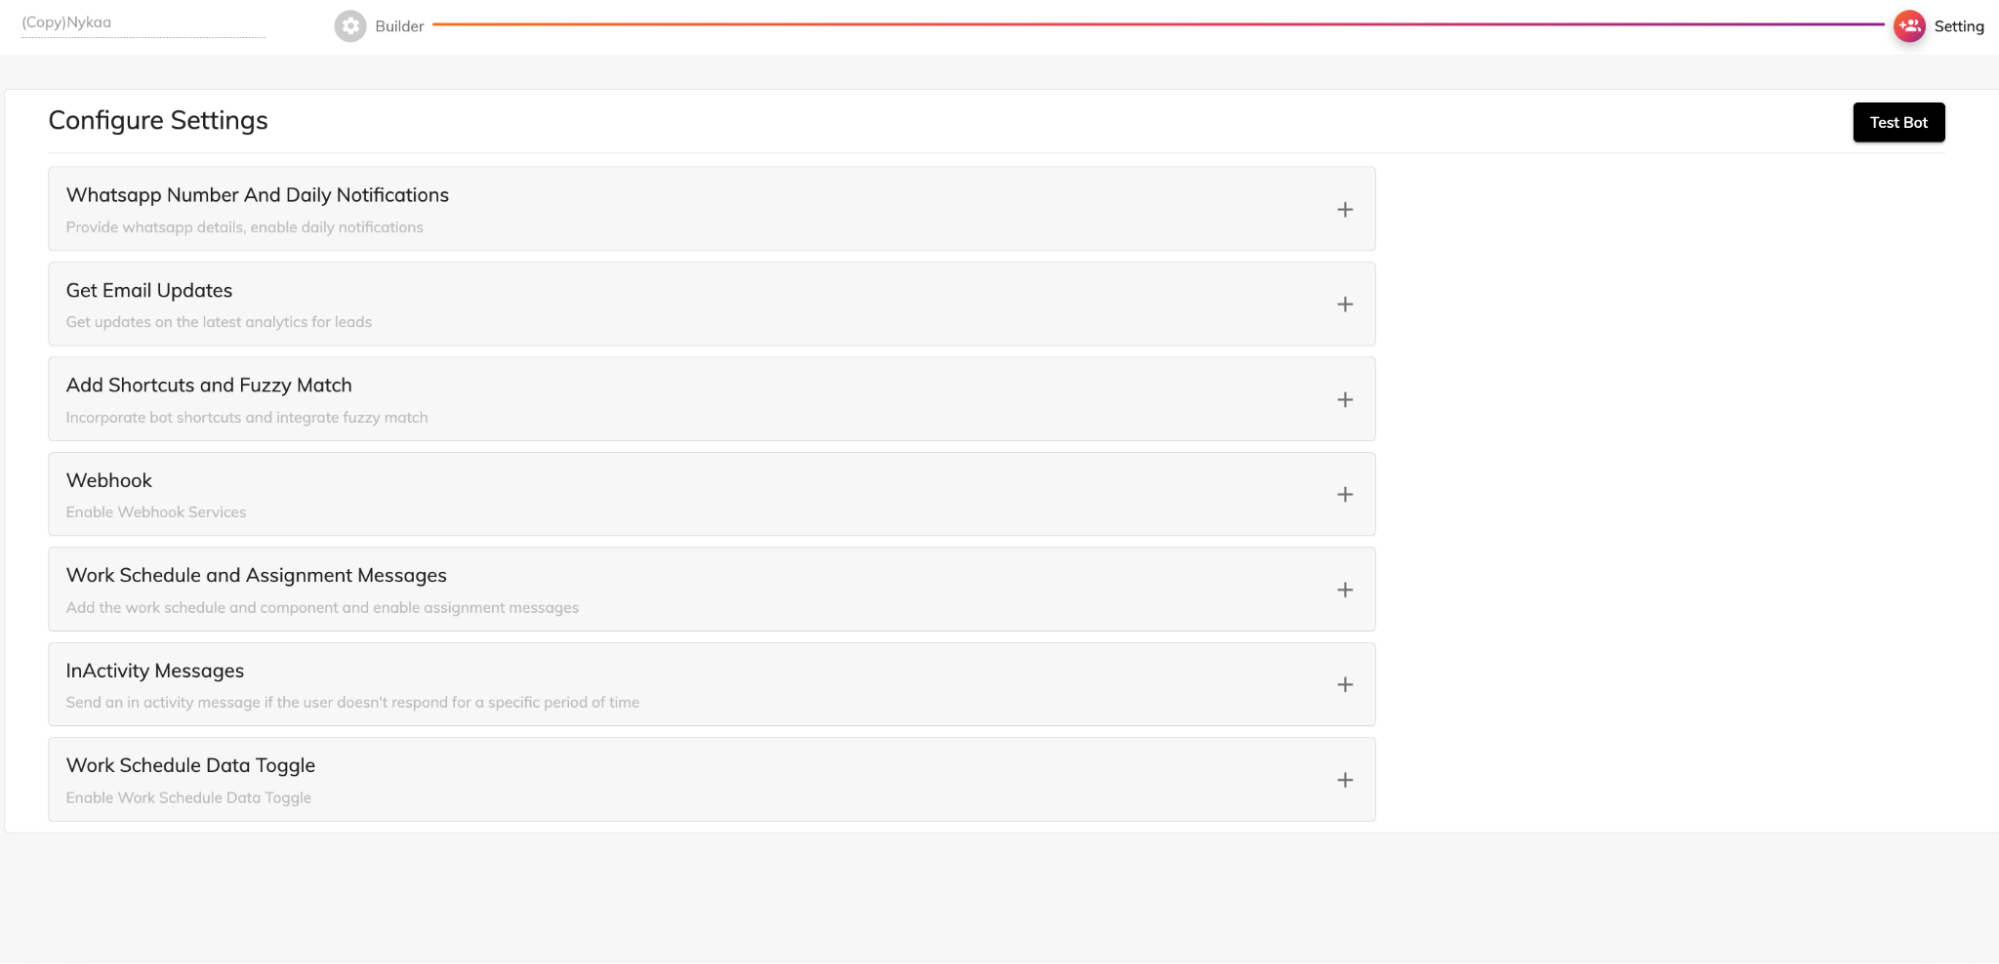
1. Click the Settings icon in the builder.
2 WhatsApp Number: Enter your business number.
3. Notifications & Emails: Enable daily summary emails and push notifications.
4. Shortcuts & Fuzzy Match: Add common command shortcuts (e.g., “help”) and enable fuzzy matching to handle typos.
5. Webhook Integration: Provide your external webhook URL for real-time data exchange (e.g., CRM sync).
6. Work Schedule & Inactivity Messages: Define business hours and set auto-responses for off-hours or no-response scenarios.
-
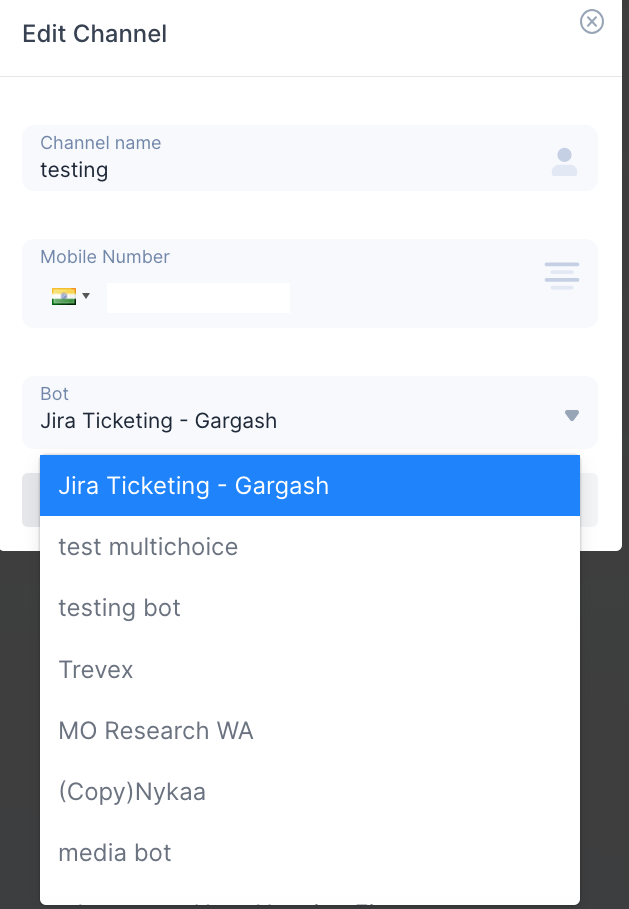
Step 3: Connect Your WhatsApp Account

- Phone Number (with country code)
- Bot Selection (choose your flow)
1. In the dashboard, go to Channels → WhatsApp Channels.
2. Click Add New Channel, then enter:
3. Save to finalize the link between Chat360 and WhatsApp Business.
Use Case & Scenario
- Appointment Reminders:Automatically message patients 24 hrs before appointments and allow “Reschedule” via quick replies.
- Scenario: A clinic’s bot sends “Your appointment is tomorrow at 10 AM—reply ‘1’ to reschedule.” User replies “1,” and the bot offers new time slots.