Telegram Bot
Overview
Integrate a Telegram Bot to interact with users on Telegram—capturing inputs, delivering notifications, and providing 24/7 support directly within their messenger app.
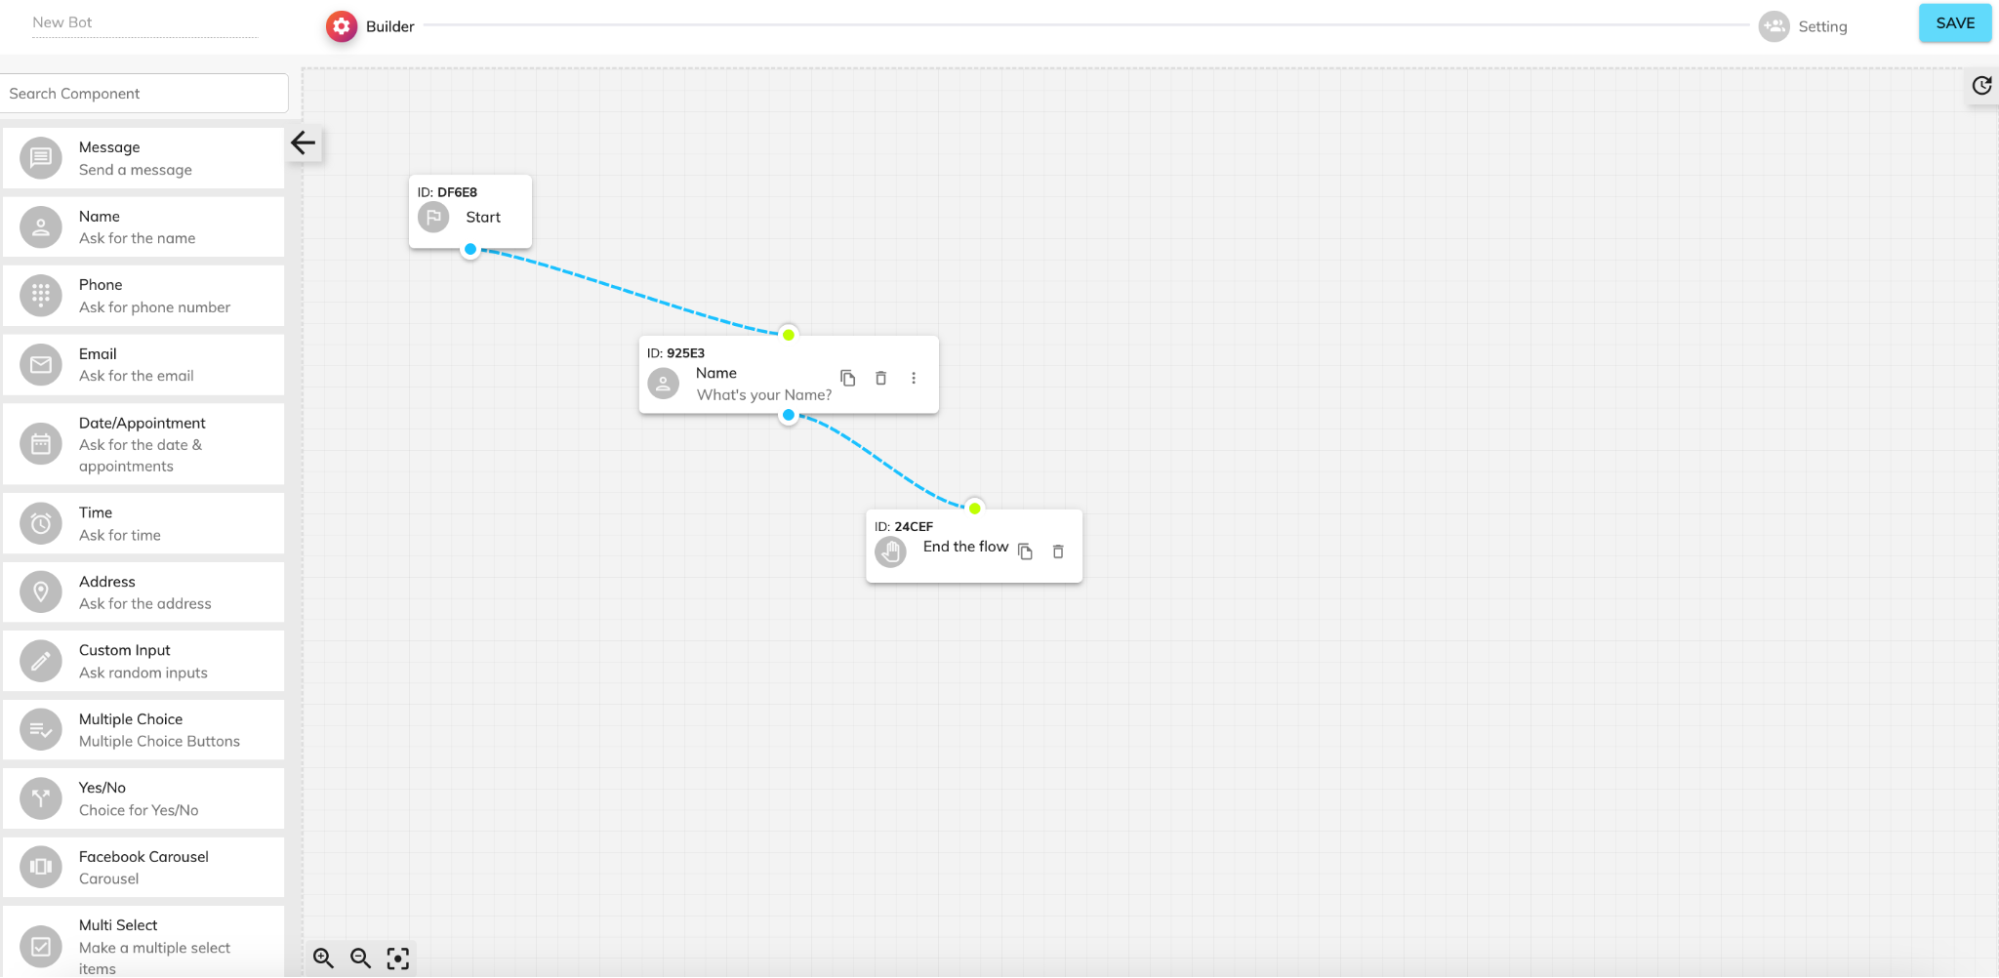
Step 1: Build Your Flow
- Create a New Bot in Bot Builder and select Telegram channel.
- Drag in a Start Node then add and connect: Name, Message, End Flow, and any other components as required.
- Ensure every branch ends with a terminal node (e.g., End Flow, Send Email).
-
Step 2: Configure & Test
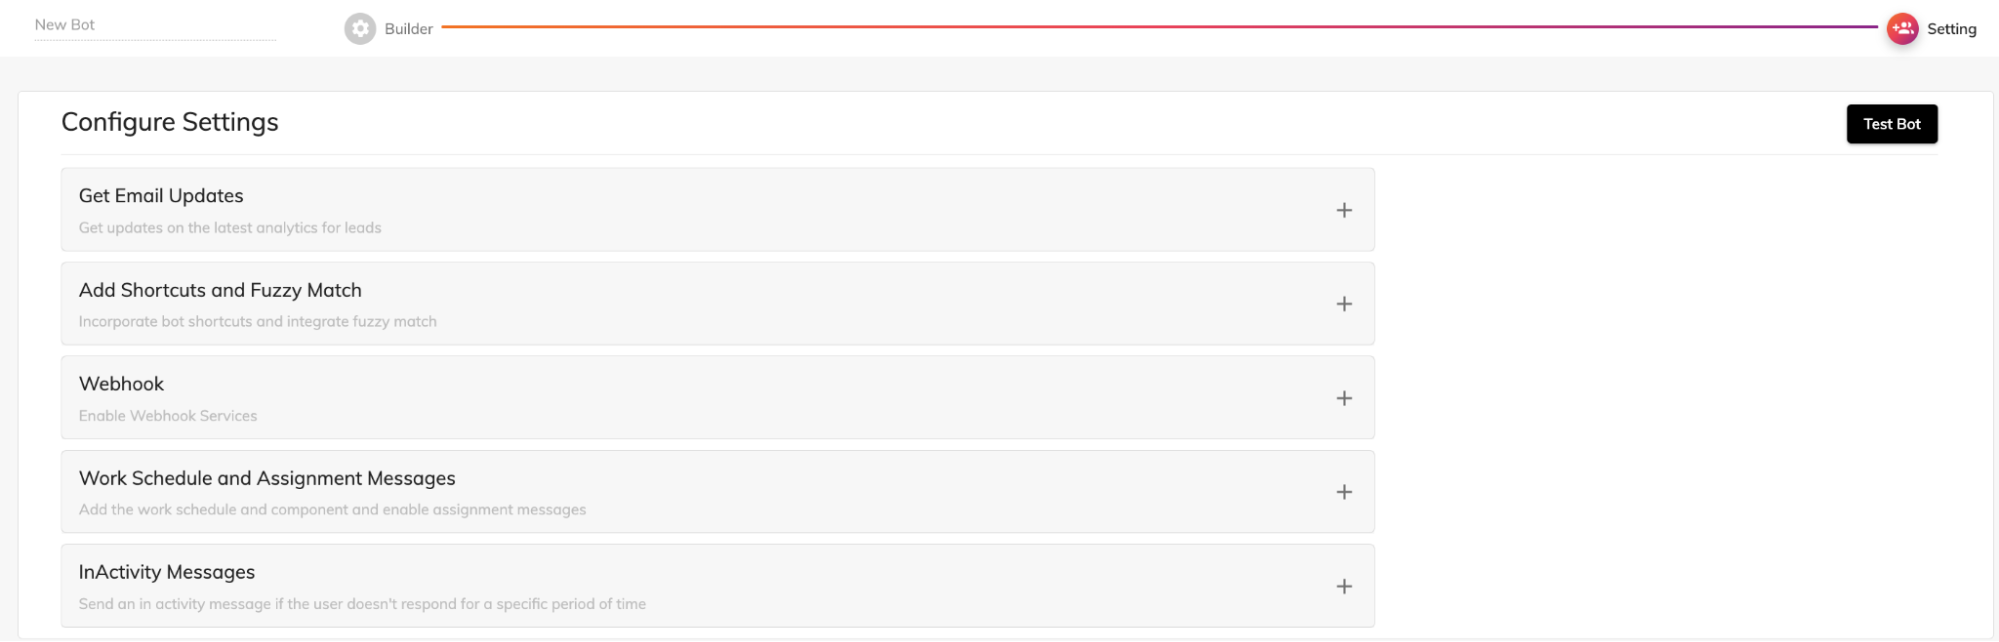
- Email Updates, Shortcuts, Webhook URL, Work Schedule, Inactivity Prompts.
1. Click Settings in the builder:
2 Save and hit Test Bot to simulate Telegram interactions and verify each branch.
-
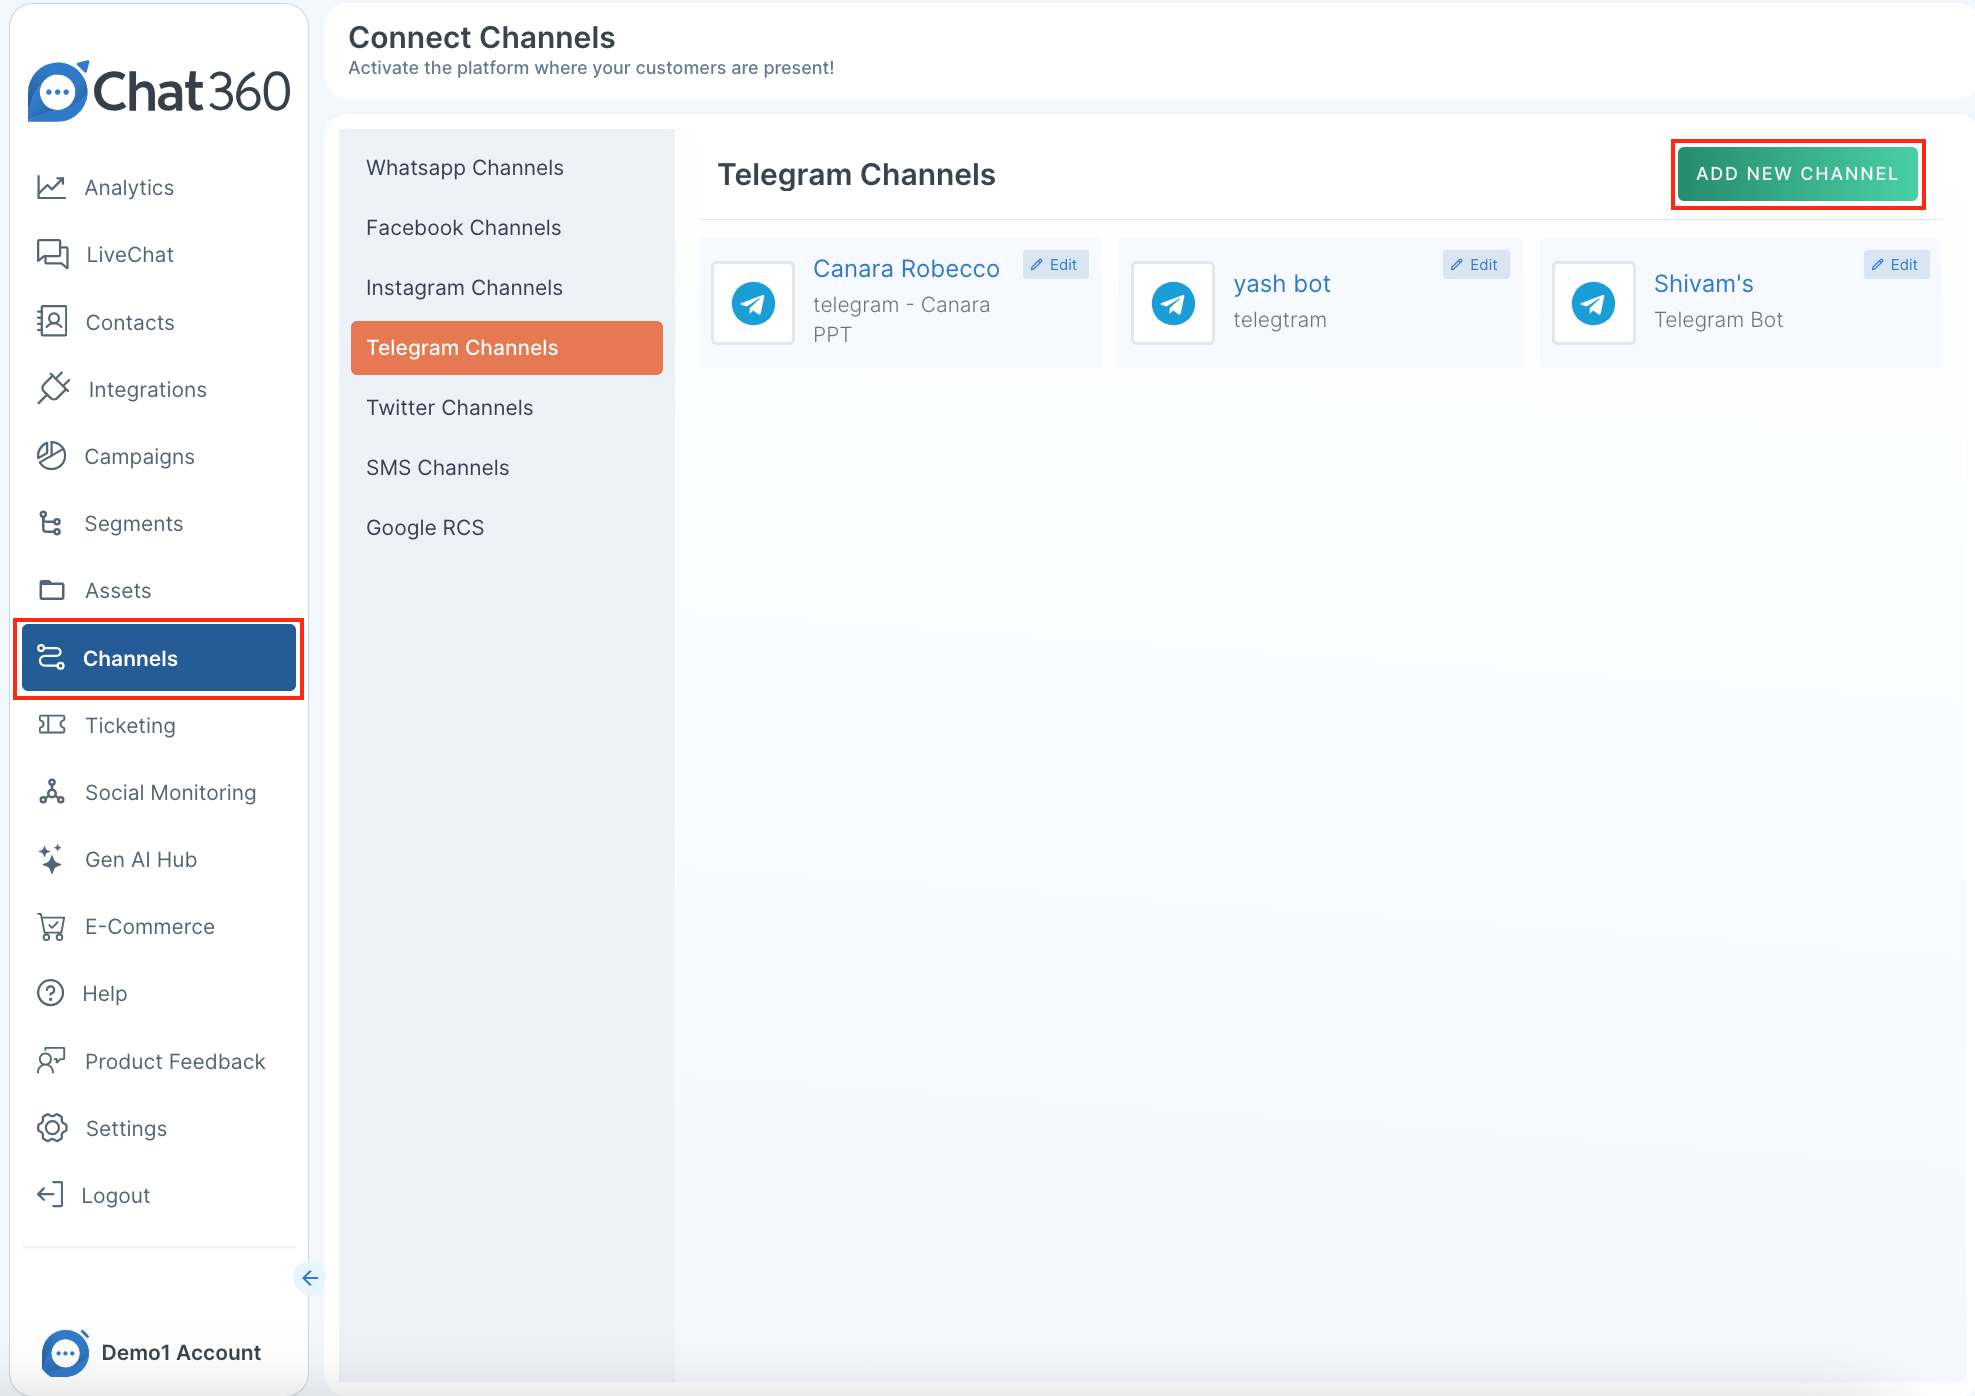
Step 3: Connect Your Telegram Account
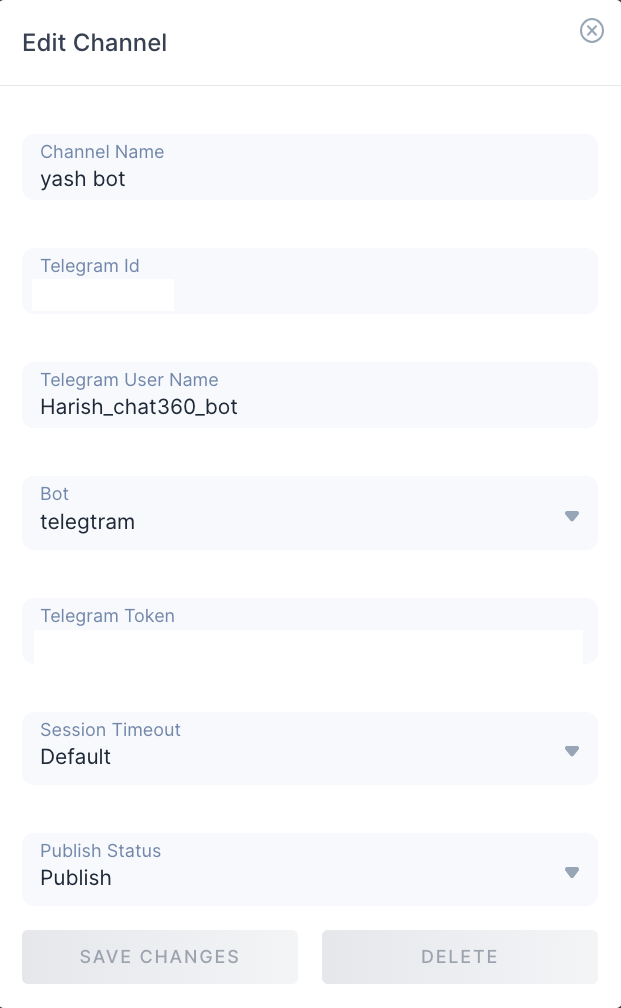
- Channel Name(e.g., “SupportBot”)
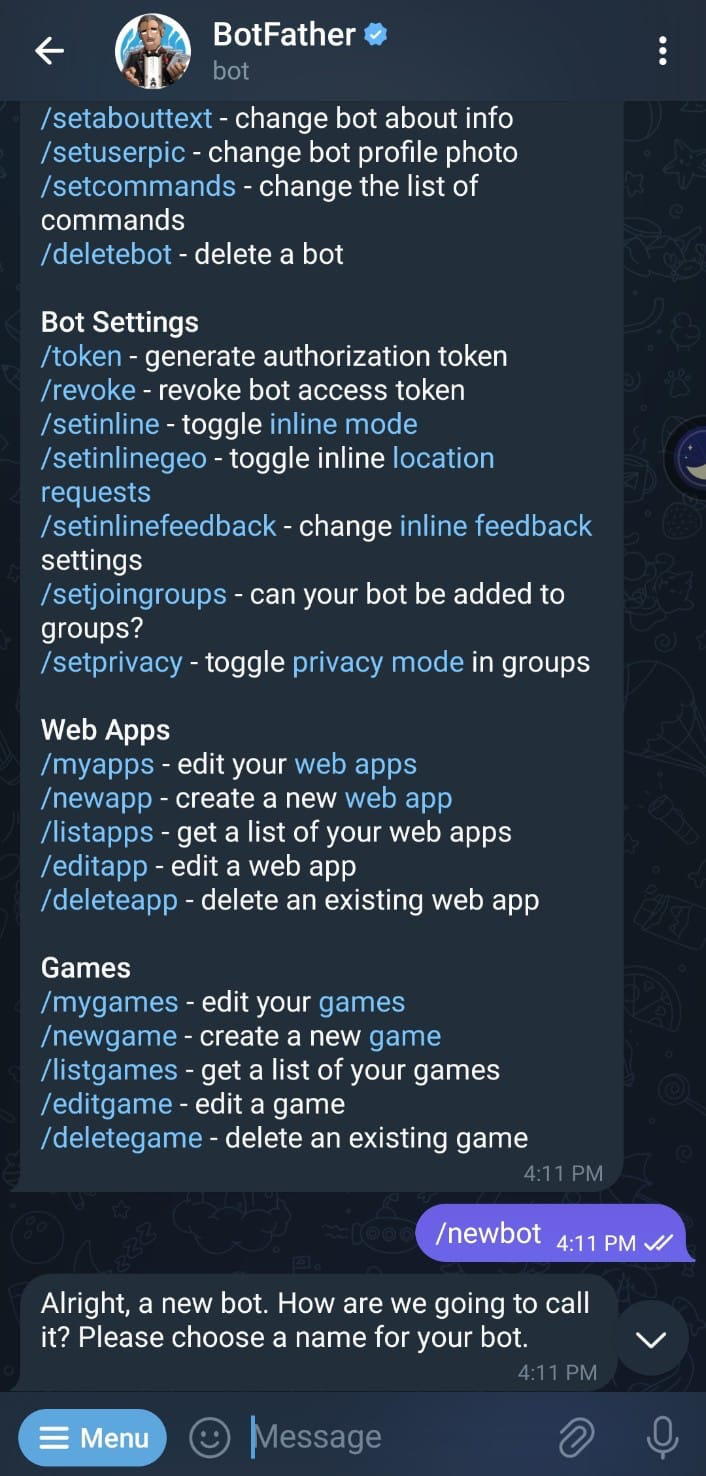
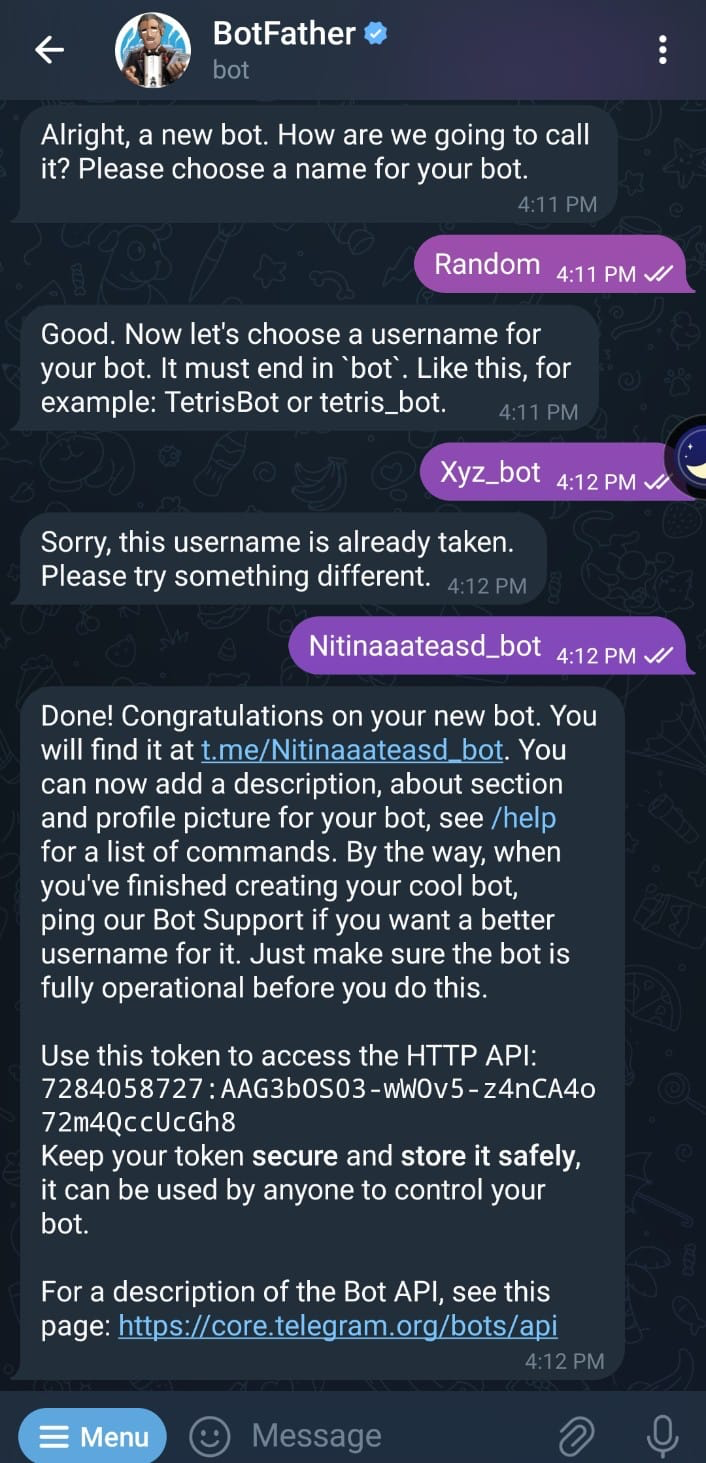
- Telegram Bot Username (from BotFather)
- Telegram Token (generated via BotFather’s /newbot)
- Session Timeoutand Publish Status
1. From the dashboard, navigate to Channels → Telegram.
2. Click Add New Channel, then fill in:
3. Save to complete the integration.
-
Use Case & Scenario
- Appointment Reminders:Automatically message patients 24 hrs before appointments and allow “Reschedule” via quick replies.
- Scenario: A clinic’s bot sends “Your appointment is tomorrow at 10 AM—reply ‘1’ to reschedule.” User replies “1,” and the bot offers new time slots.
Thank you for your feedback!
We appreciate your feedback!