WebEngage Integration
-
Overview
-
Step 1: Integrating WebEngage Platform with Chat360 Dashboard
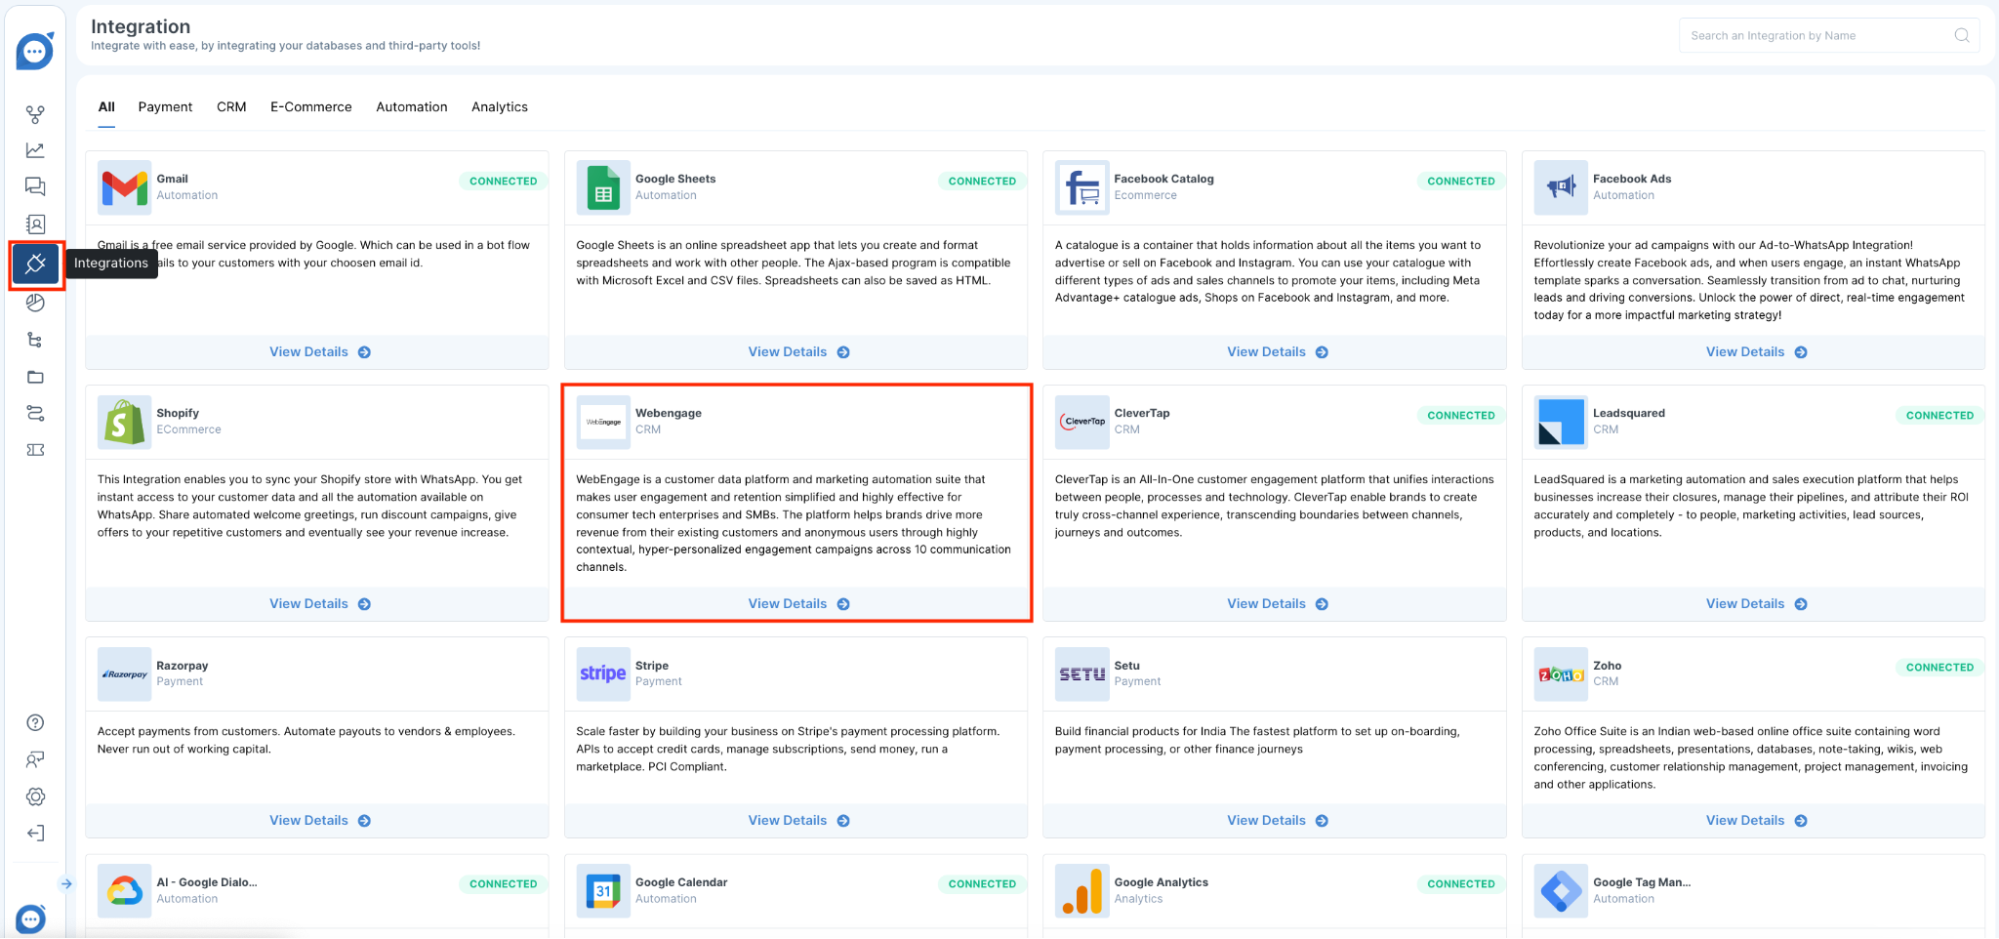
- Log in to Chat360 and navigate to Integrations in the main menu.
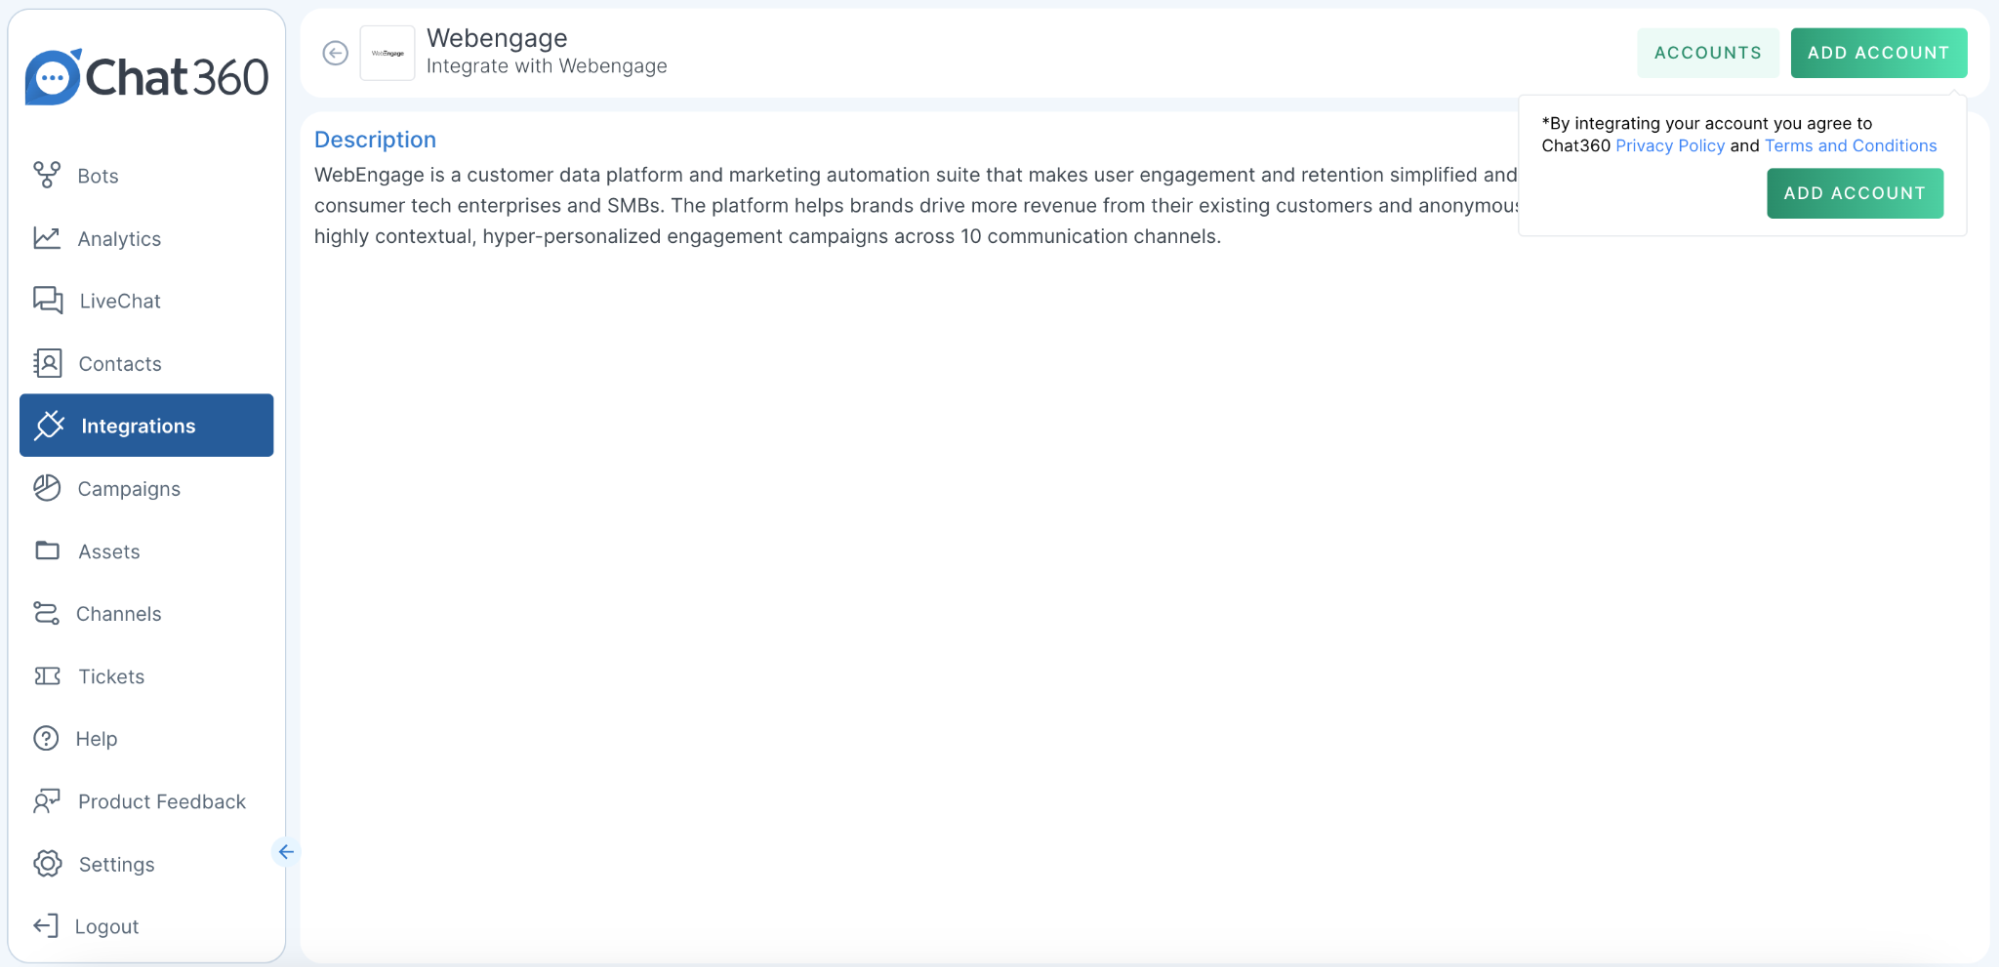
- Select WebEngage to begin the integration process.
- Click Add Account.
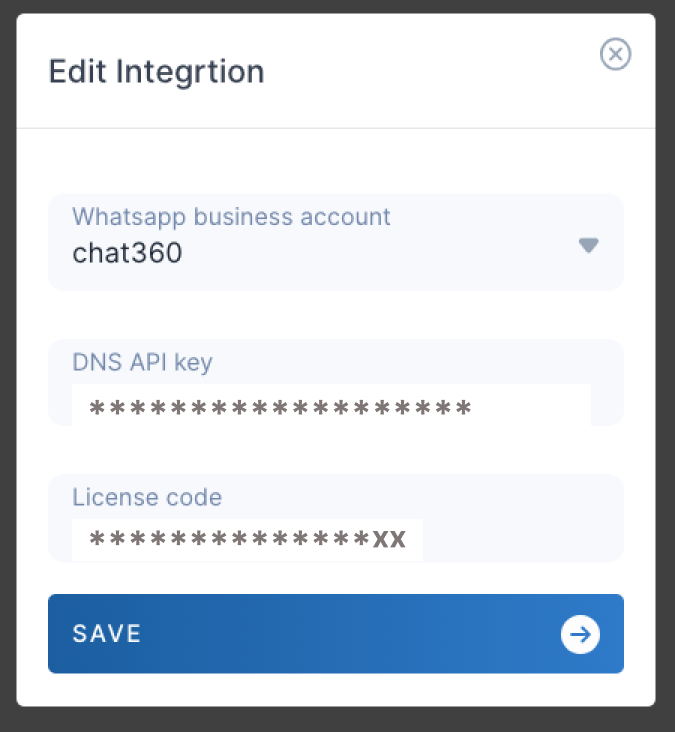
- Enter your DNS API Key and License Code (obtainable from your WebEngage developer portal).
- Submit to link your WebEngage business account to Chat360.
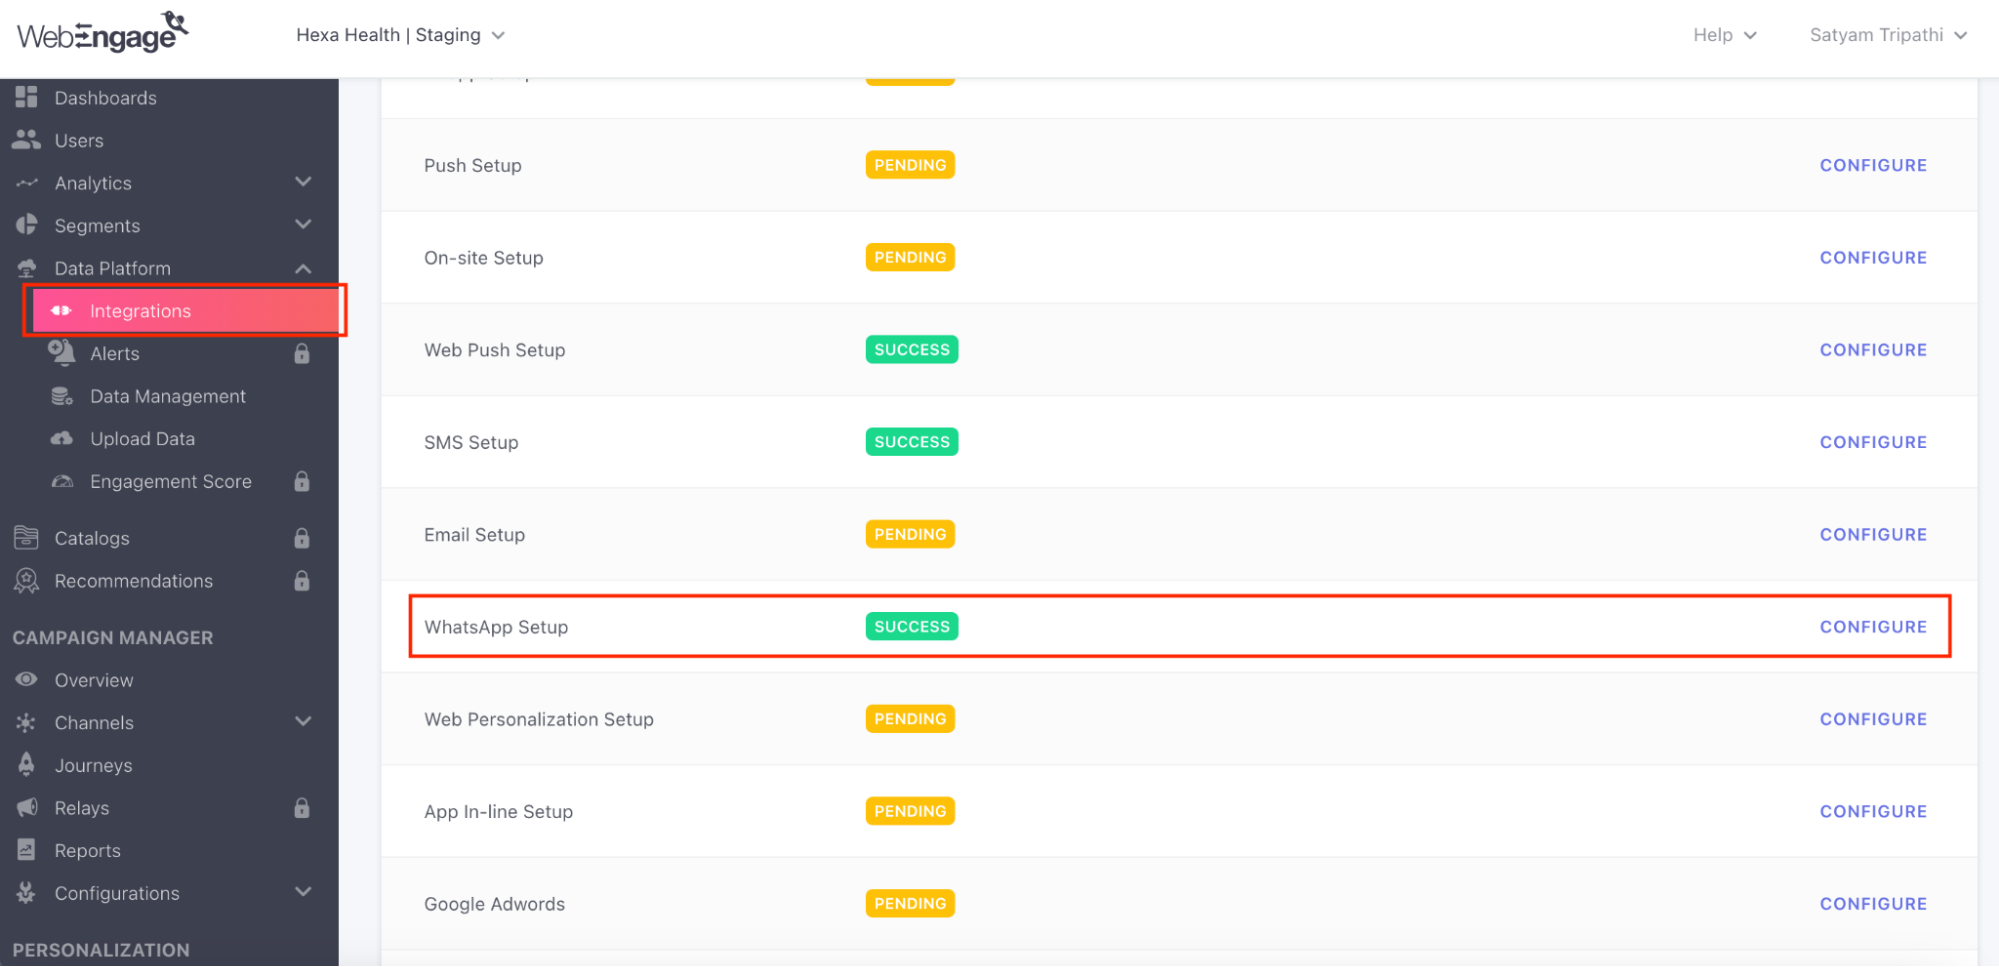
- Switch to the WebEngage dashboard and open the Integration section.
- Locate and select WhatsApp Setup to prepare WebEngage for WhatsApp–based campaigns.
- Back in Chat360, click Configure under the WebEngage entry to complete the linkage.
- Upon success, a confirmation page will display—verifying that Chat360 and WebEngage are fully synchronized.
-
Key Benefits
- Unified Campaign Control: Manage segmentation, messaging, and analytics across both platforms without toggling between systems.
- Advanced Targeting: Leverage WebEngage’s behavioral segments to trigger Chat360 WhatsApp campaigns for on-the-fly personalization.
- Real-Time Analytics: View campaign performance metrics from WebEngage within Chat360’s dashboard to optimize flows and messaging strategies.
- Rapid Deployment: One-click account addition and automated configuration speed up time-to-value for cross-platform campaigns.
Integrating WebEngage with Chat360 enables seamless campaign orchestration and data synchronization between your customer engagement platform and conversational workflows. Once connected, you can leverage WebEngage’s segmentation and analytics directly within Chat360 to trigger personalized WhatsApp campaigns, automate lifecycle messages, and capture real-time user interactions.
-
1. Accessing Integration Settings:
2. Add Your WebEngage Account:
3. Configure in WebEngage:
5. Finalize & Verify:
-
Step 2: Creating a WhatsApp Template in WebEngage via Chat360 Dashboard
Overview
-
Configuration Steps
- Log in to your Chat360 Dashboard and go to Campaigns → Templates.
- Review the list of existing templates and confirm which ones have “Approved” status.
- Click the approved template you wish to use.
- Copy its Template ID, Category, and any dynamic placeholders (e.g., {{user_name}}).
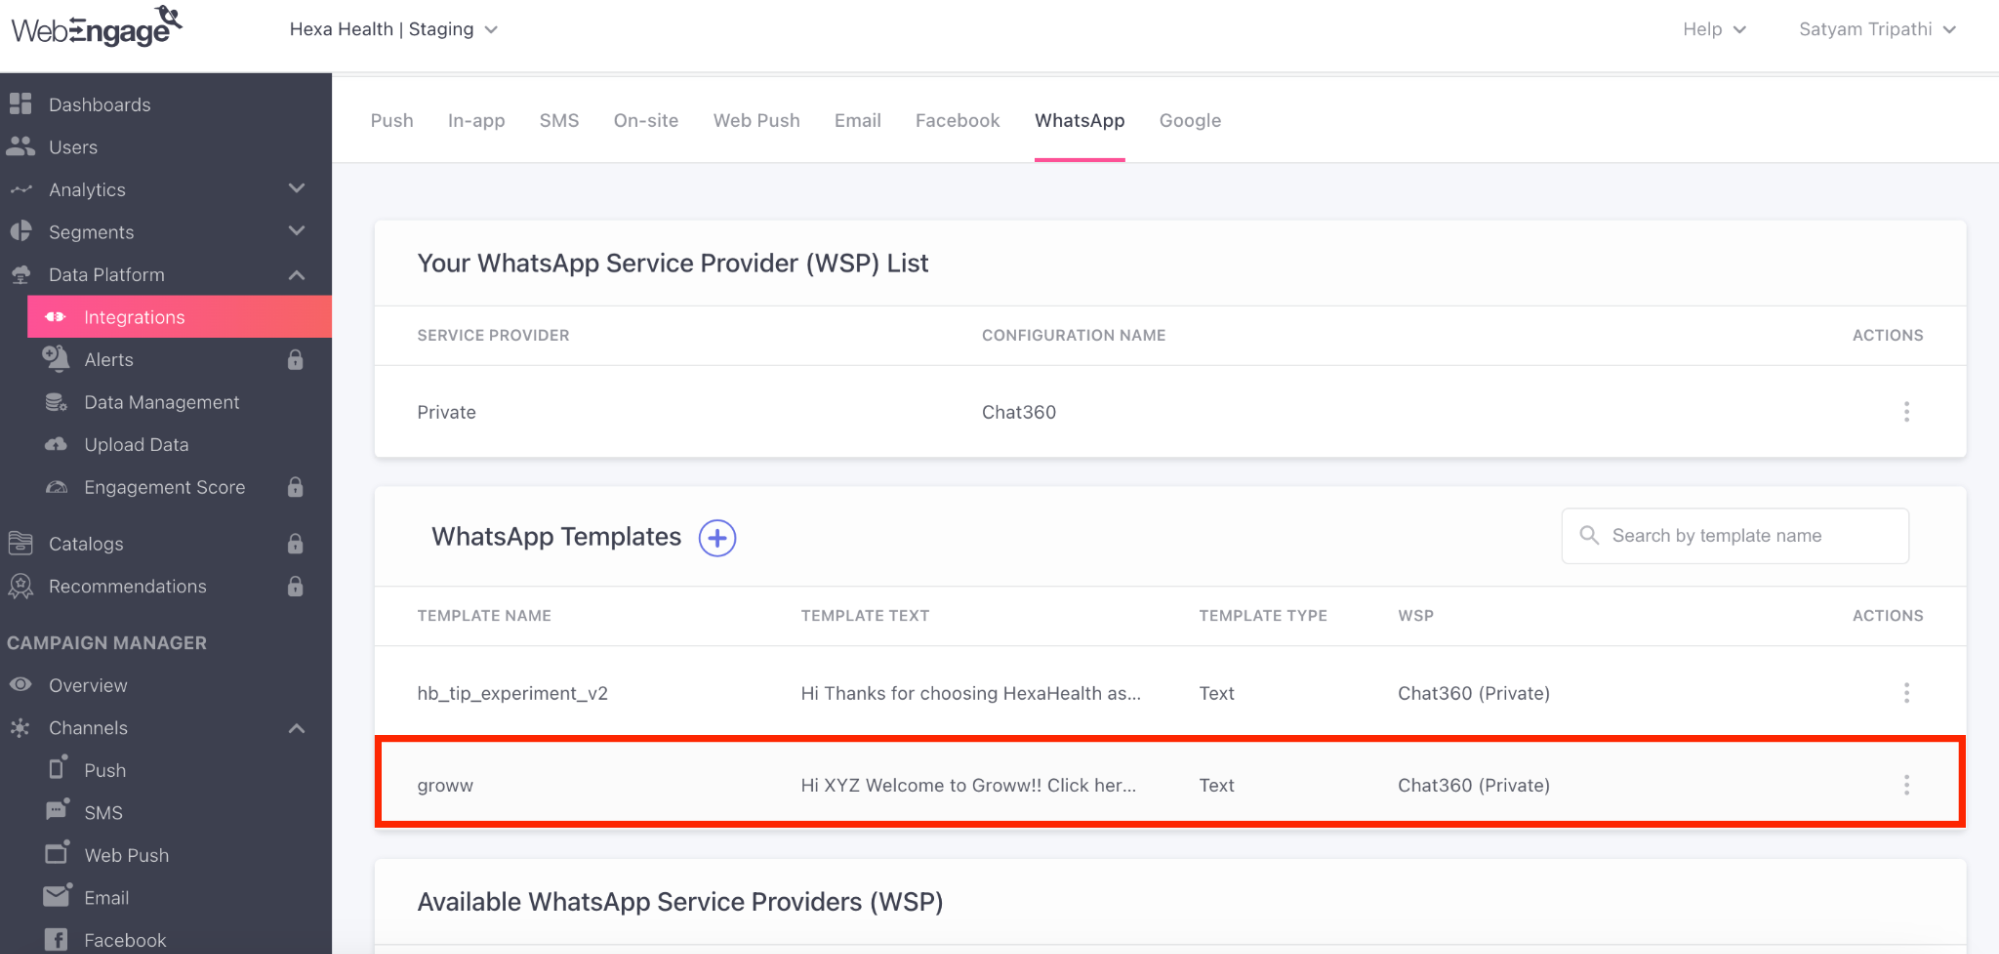
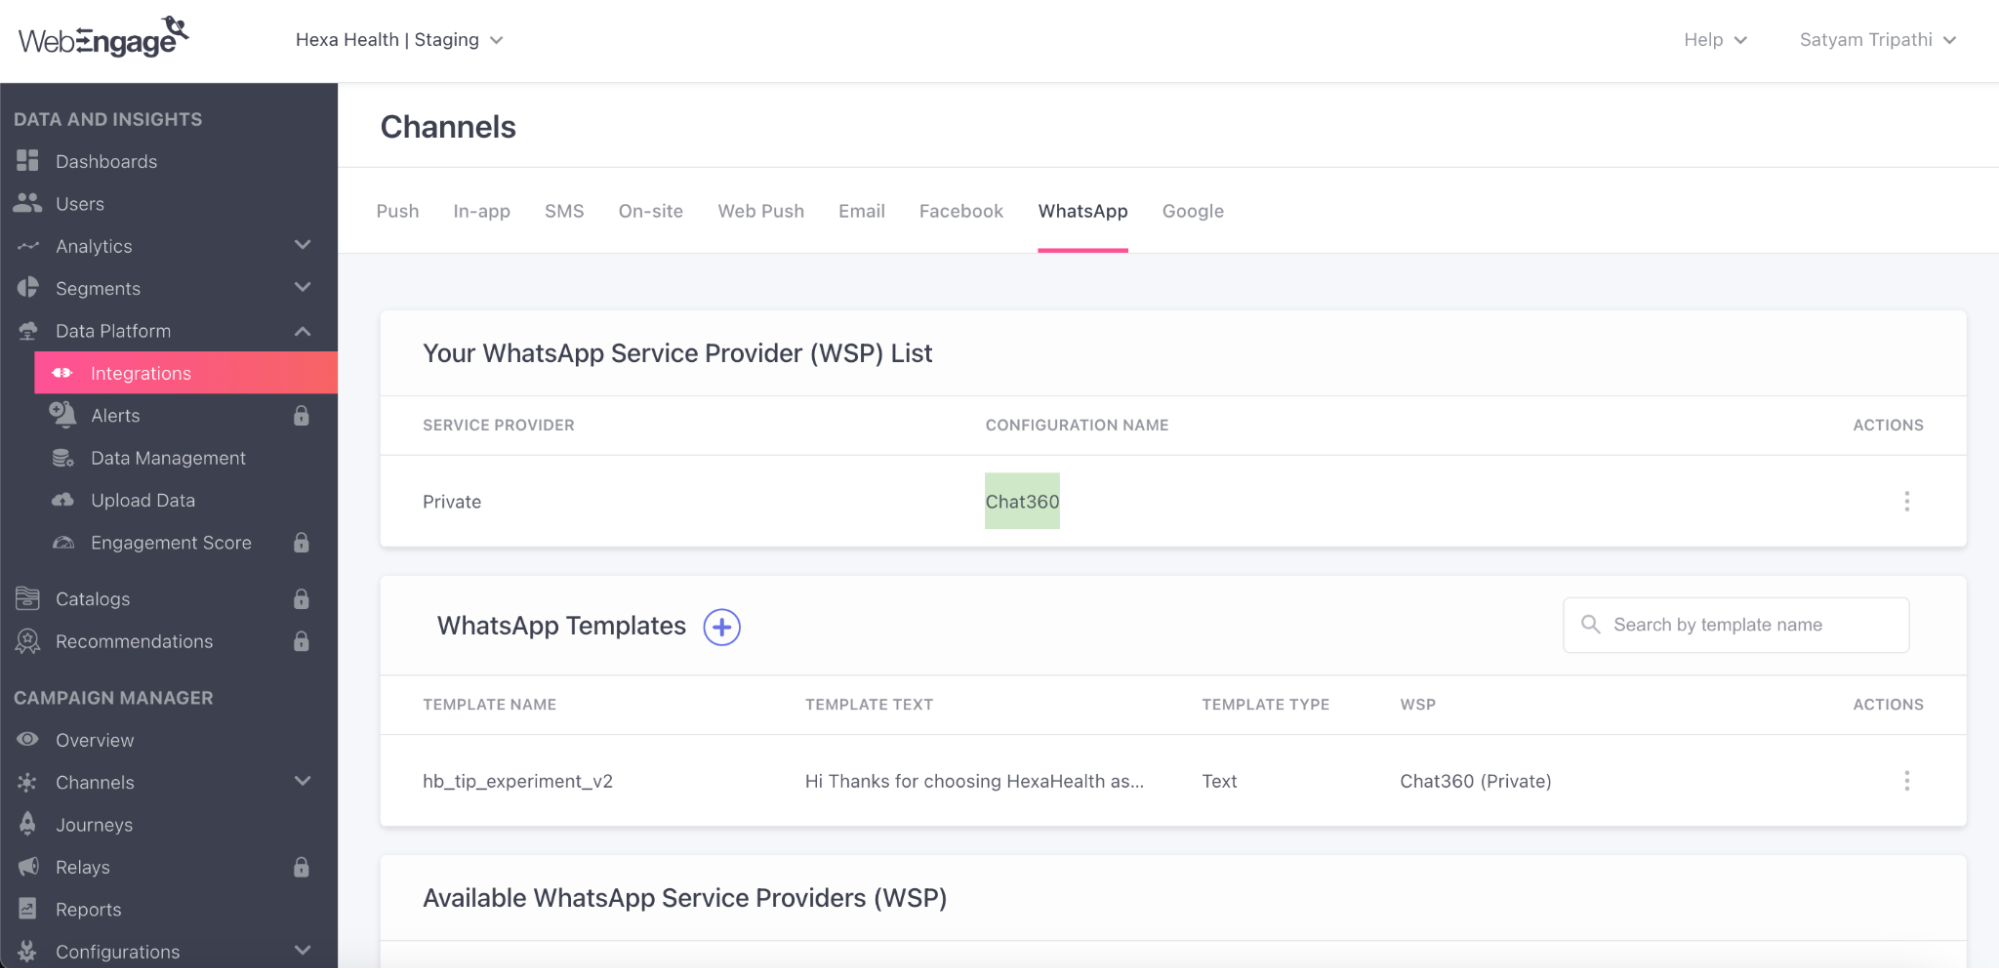
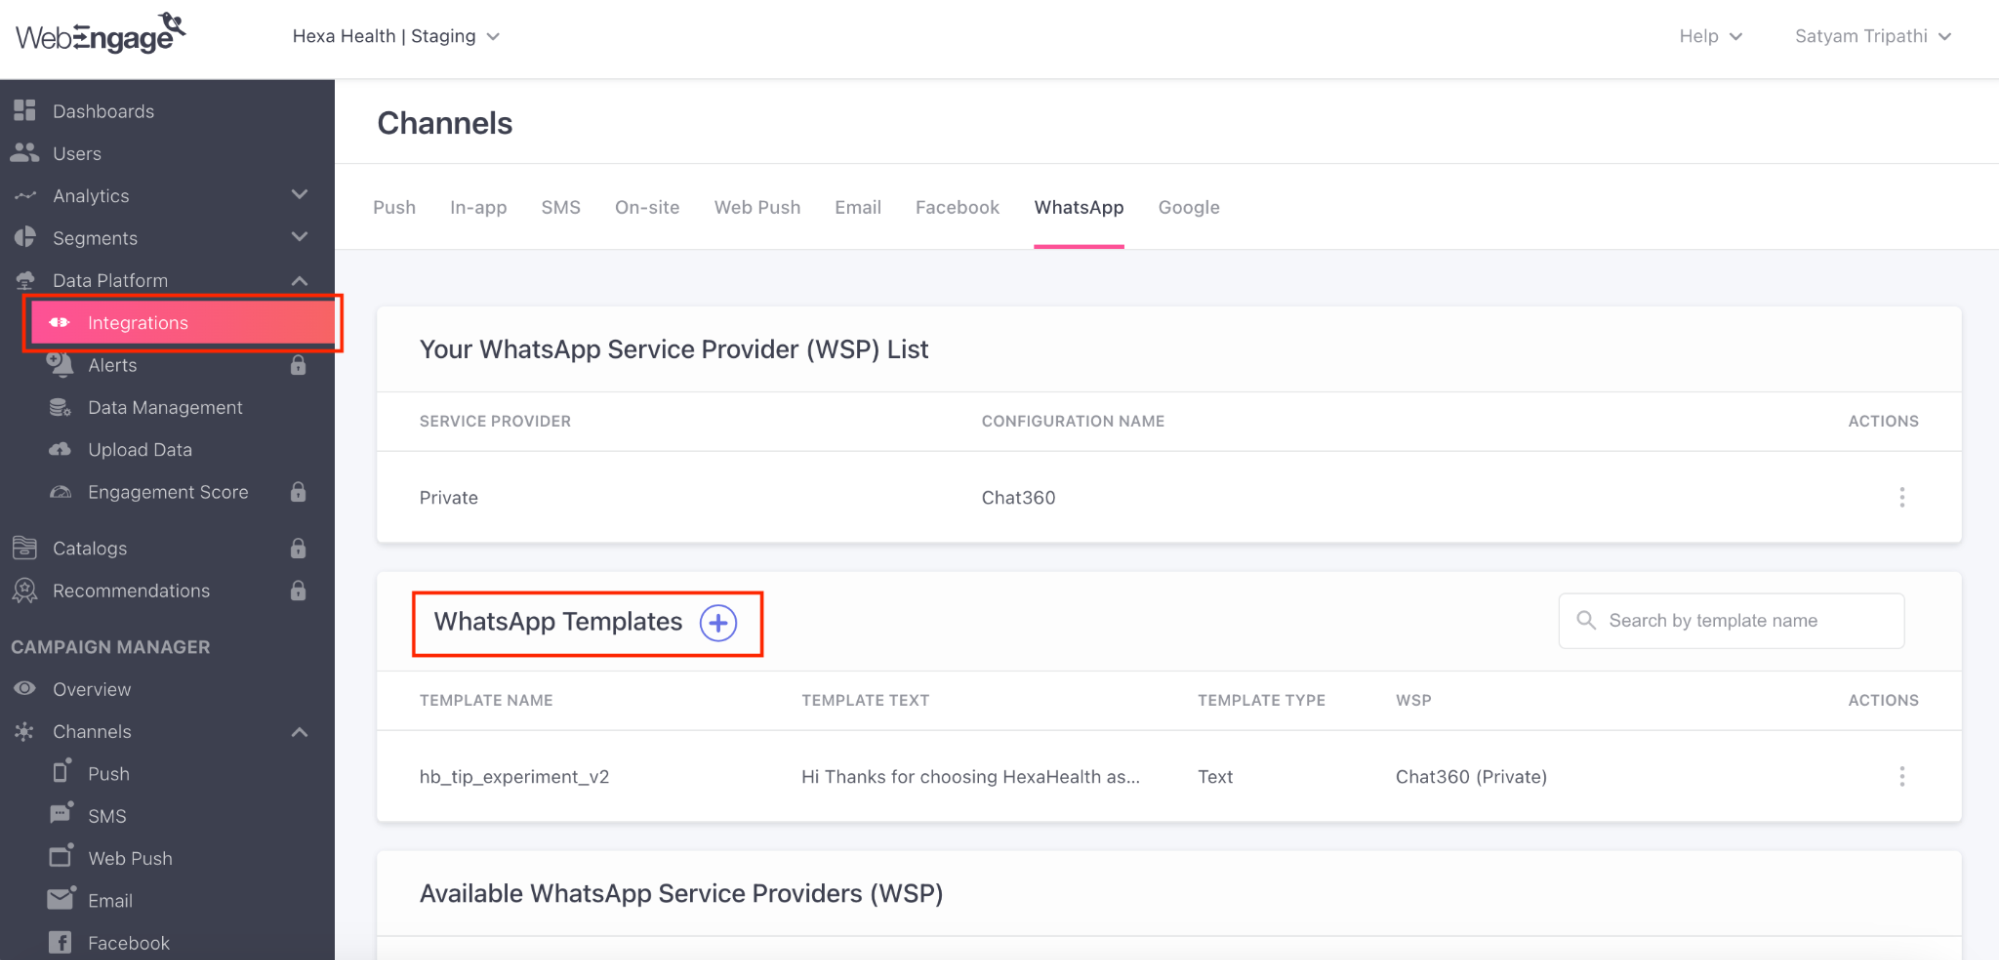
- In your WebEngage dashboard, navigate to Engage → WhatsApp → Templates.
- Click Add New Template (or Import Template if available).
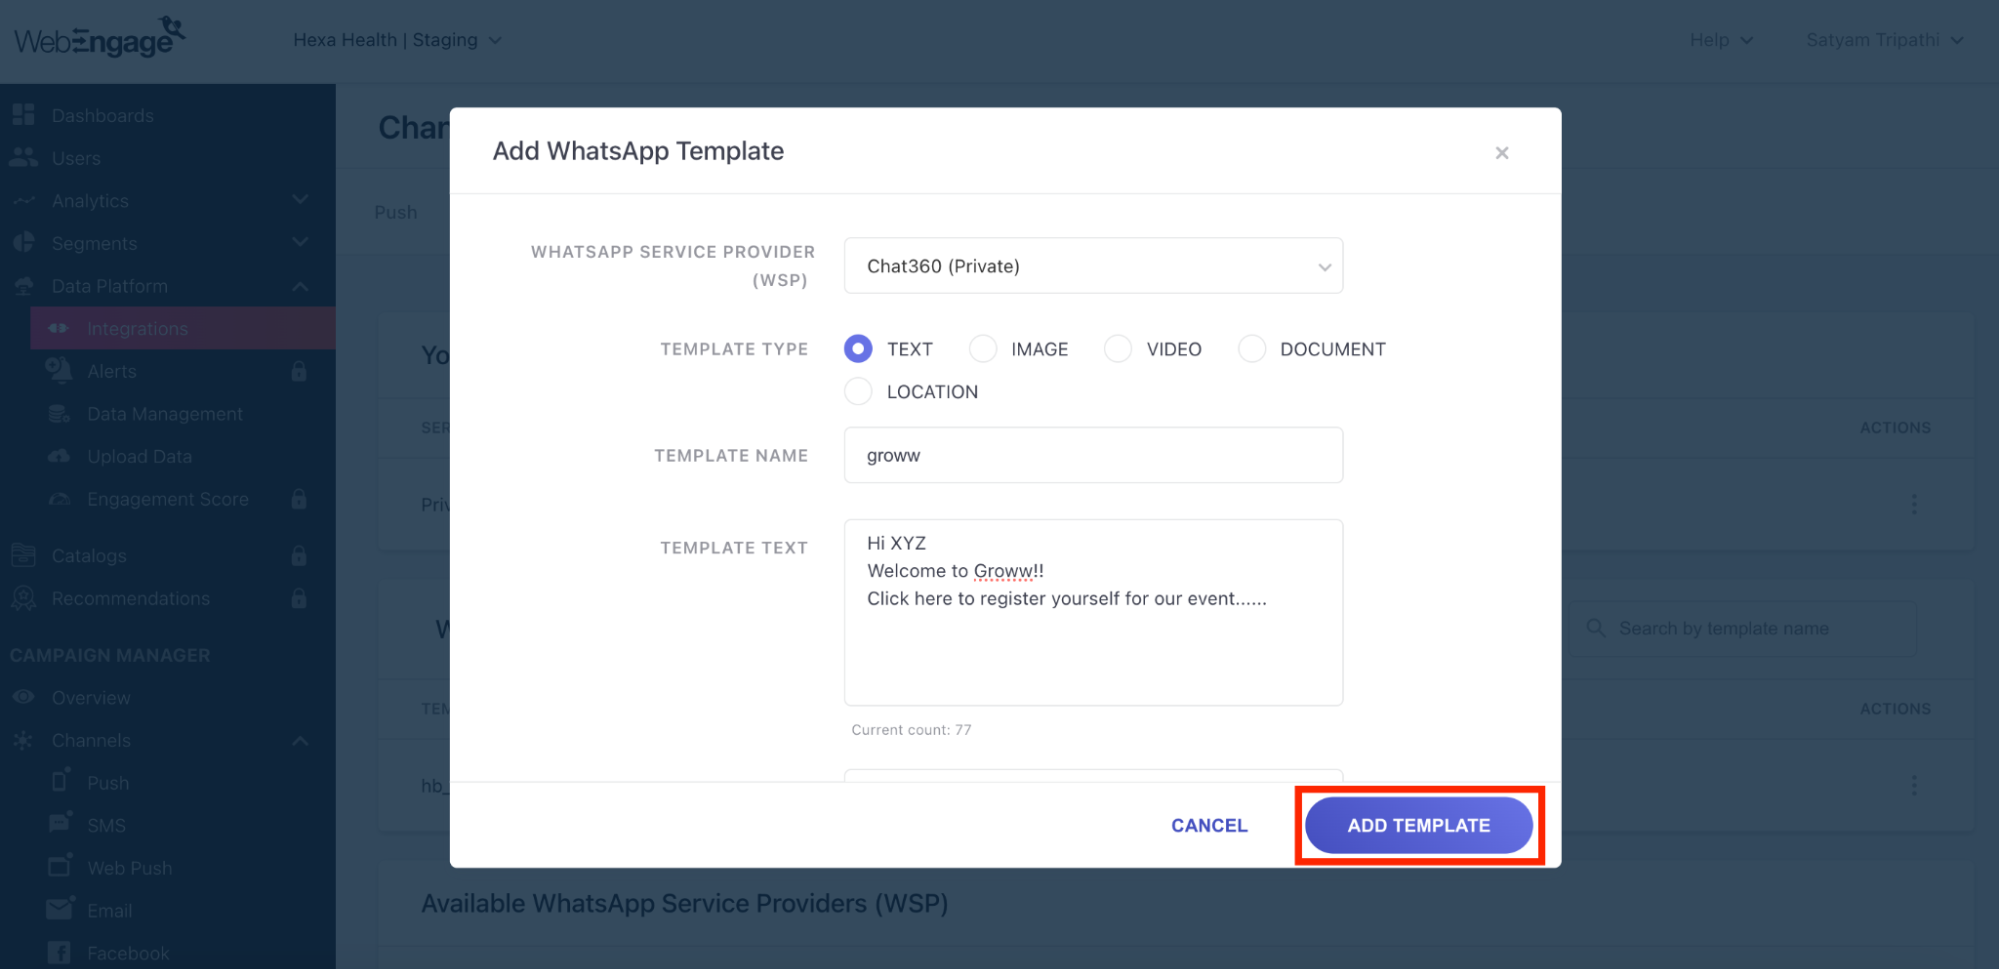
- Paste the Template ID and name exactly as in Chat360.
- Configure the Category (Utility, Marketing, Authentication) to match.
- Recreate any buttons, media attachments, or variable placeholders as per Chat360’s setup.
- Save the template in WebEngage and ensure its status shows Active.
- Send a test message via WebEngage to confirm formatting, dynamic data, and media render correctly.
-
Key Benefits
- Consistent Messaging: Guarantees identical template content and formatting in both Chat360 and WebEngage, avoiding discrepancies.
- Regulatory Compliance: Maintains WhatsApp’s approval status across platforms, preventing campaign failures due to unapproved templates.
- Frictionless Campaign Launch: Eliminates manual re-creation of templates—saving time and reducing human error.
- Seamless Personalization: Ensures dynamic placeholders (e.g., names, order IDs) function correctly in all triggered messages.
This step ensures that your WhatsApp message templates—already approved and managed in Chat360—are synchronized into WebEngage. By mirroring template IDs and configurations across both platforms, you maintain consistency, compliance, and seamless execution of WhatsApp campaigns triggered from WebEngage segments.
-
1. Access Chat360 Templates
2. Select & Note Template Details
3. Switch to WebEngage
4. Map Template from Chat360
-
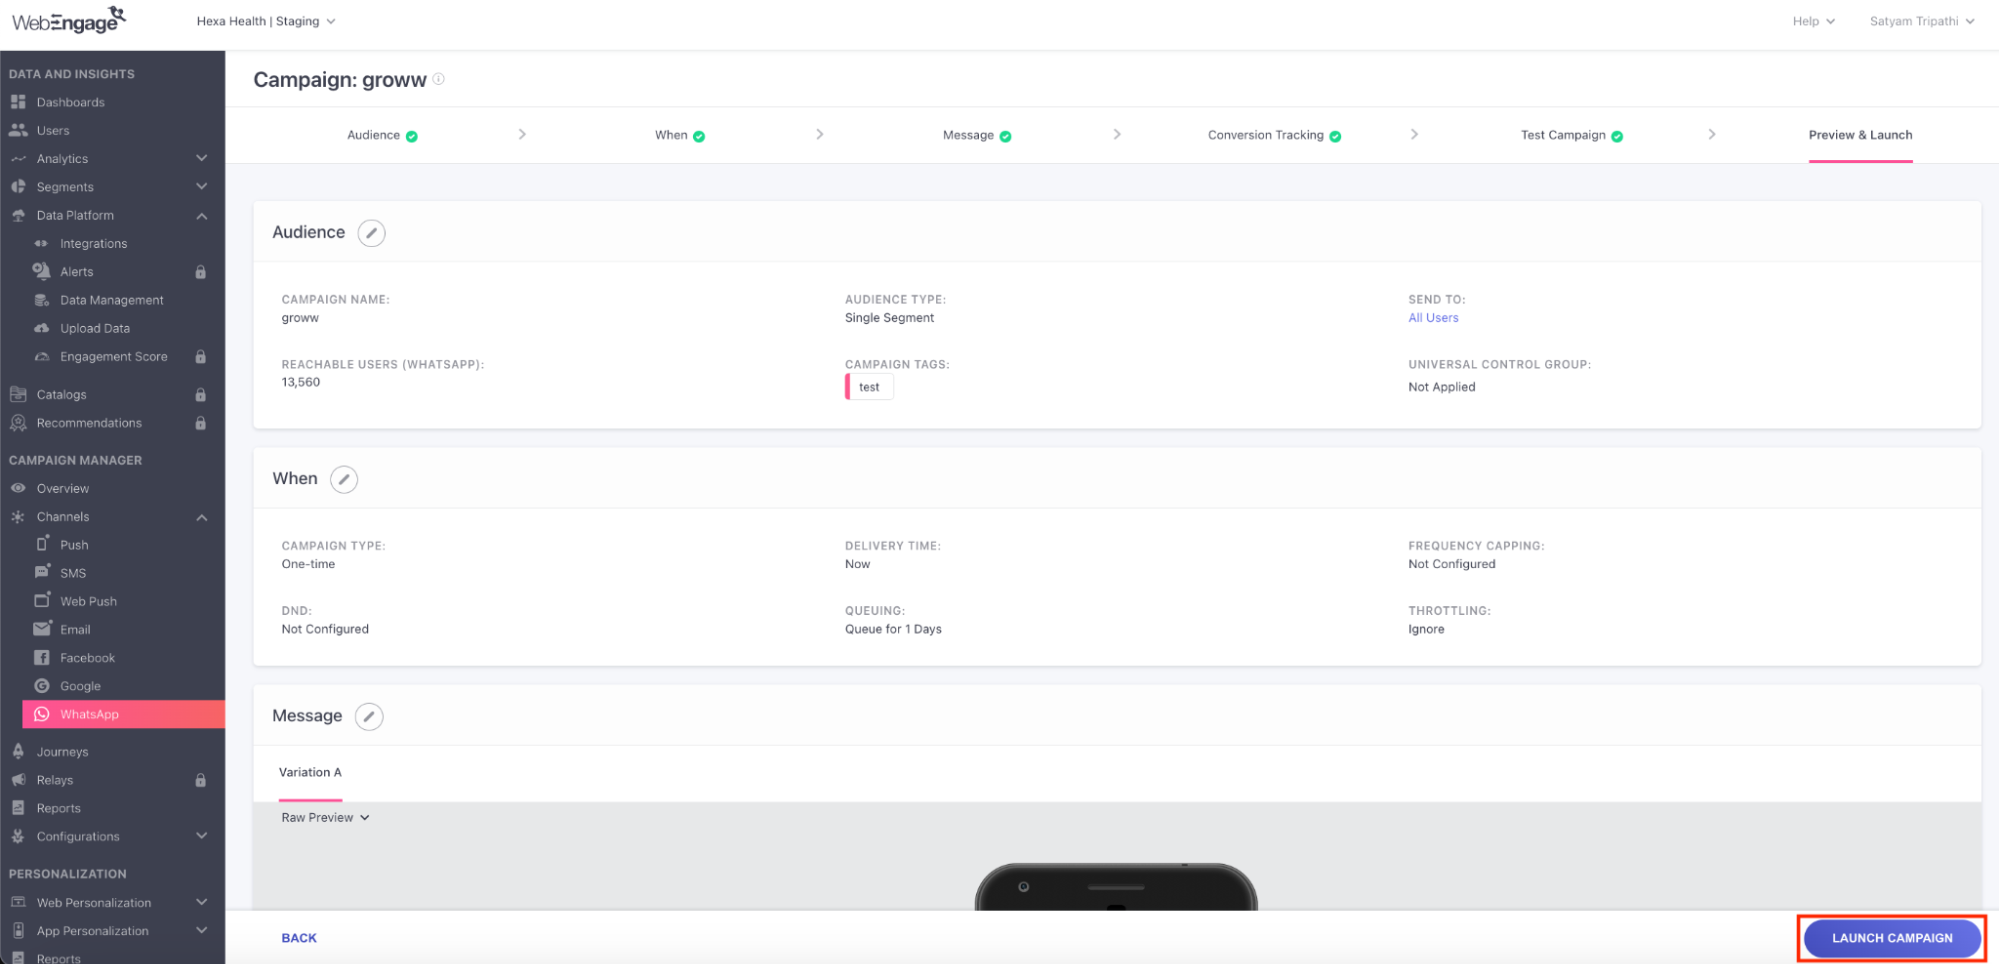
Step 3: Launching a WhatsApp Campaign in WebEngage
Overview
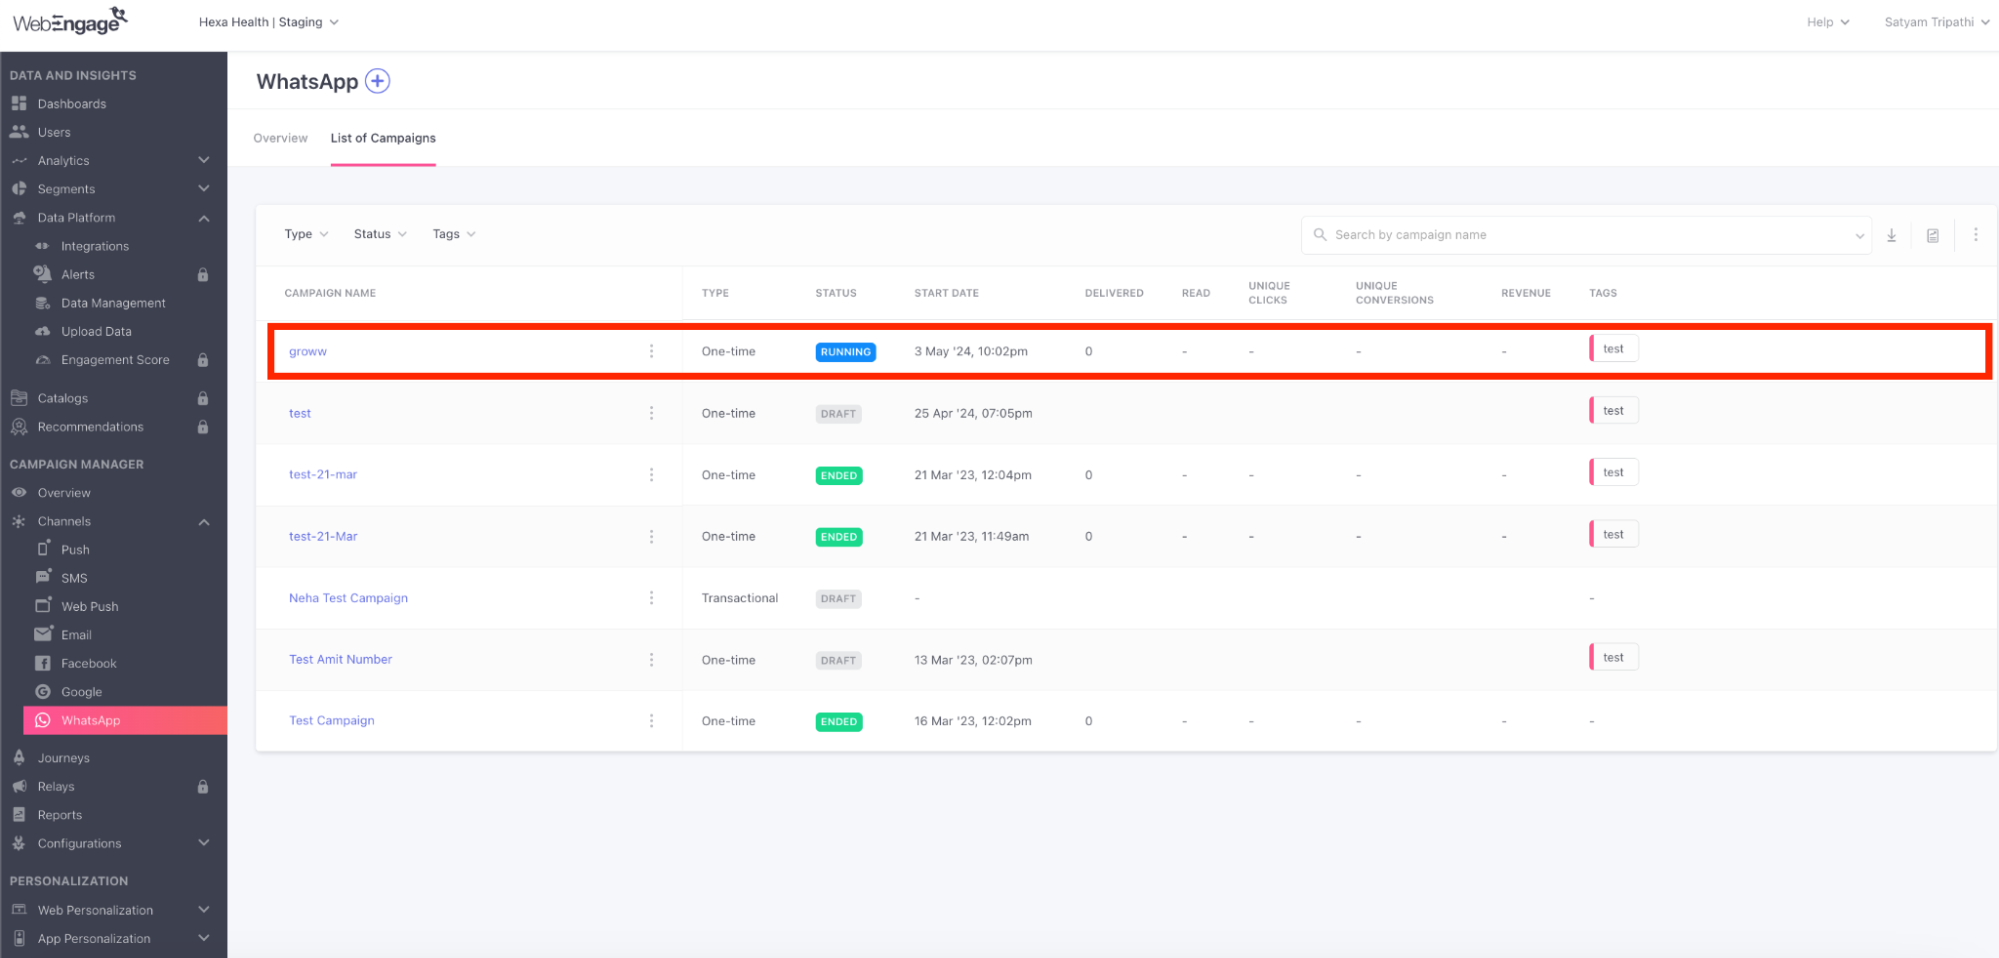
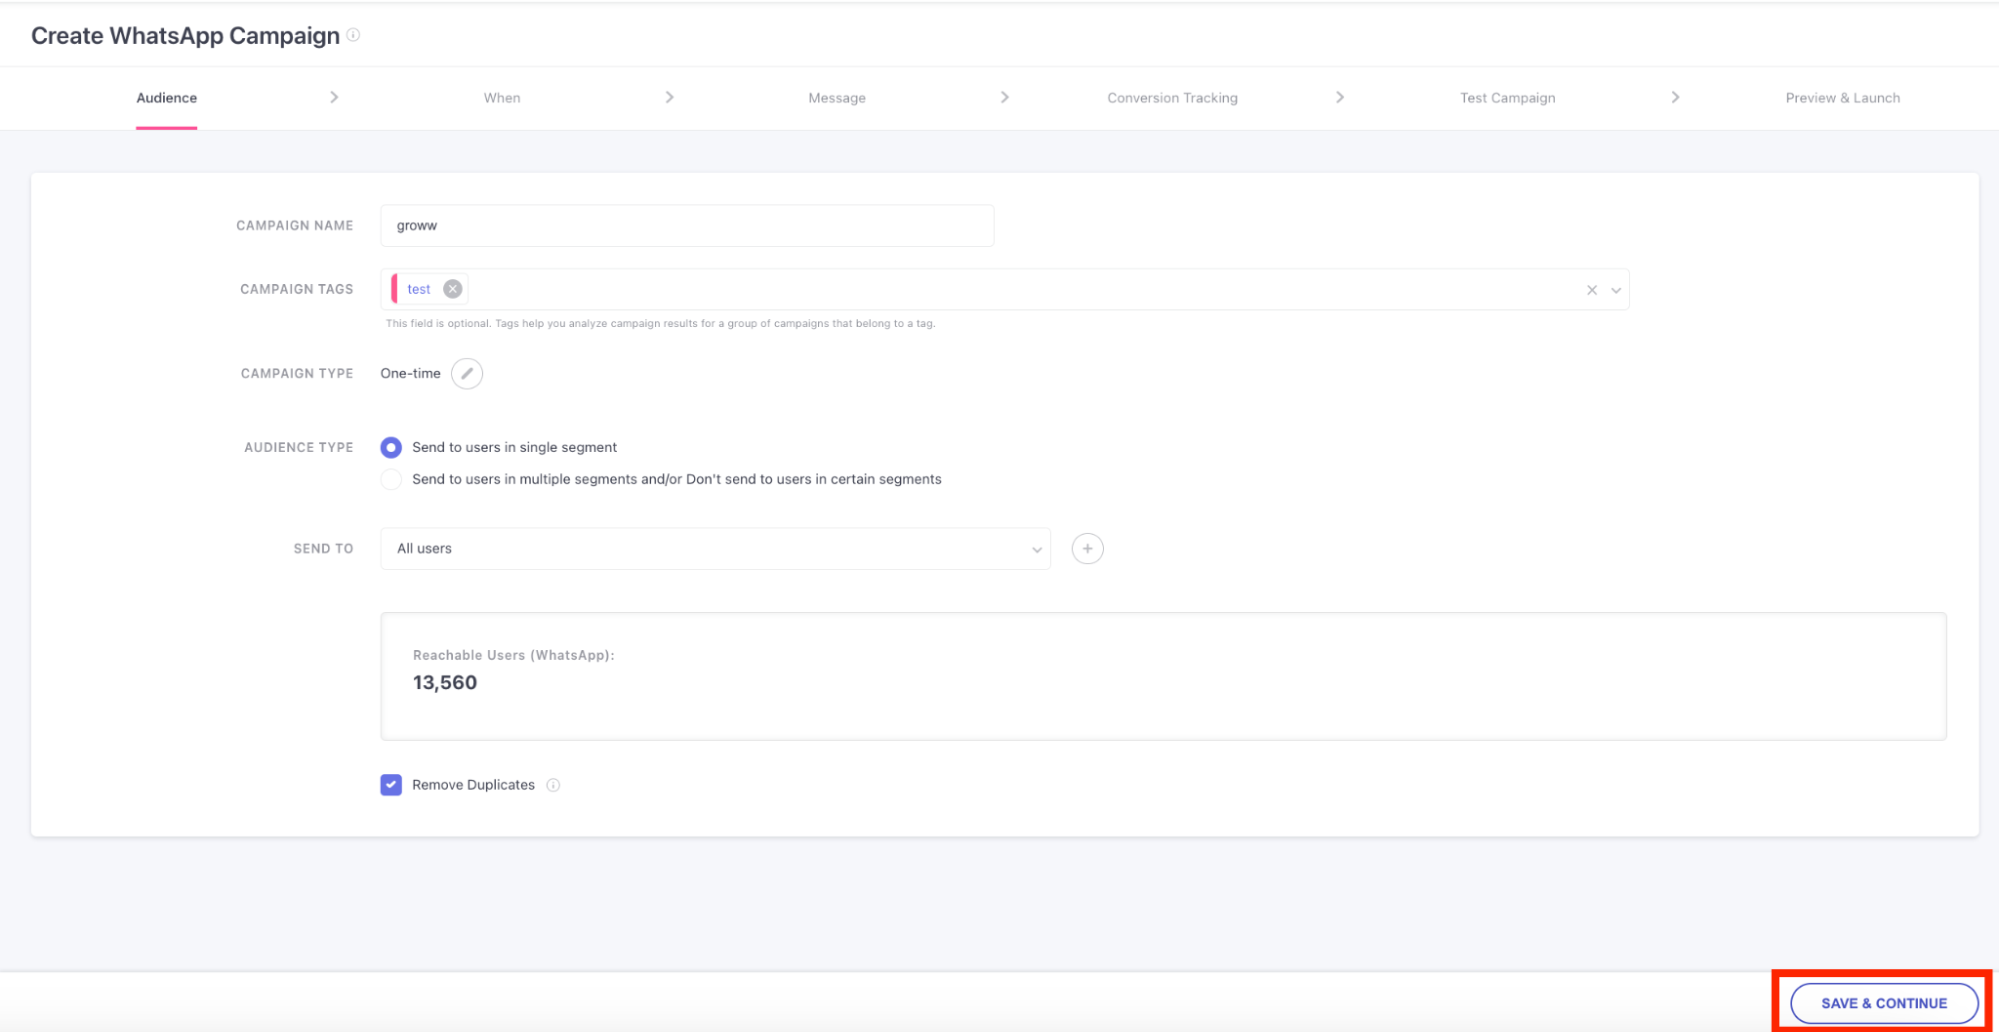
- Log in to WebEngage and navigate to Campaign Manager.
- Select WhatsApp and click the + icon to create a new campaign.
- Campaign Name: Enter a distinctive name for easy tracking.
- Audience Selection: Choose your target segment from previously uploaded or segmented user lists.
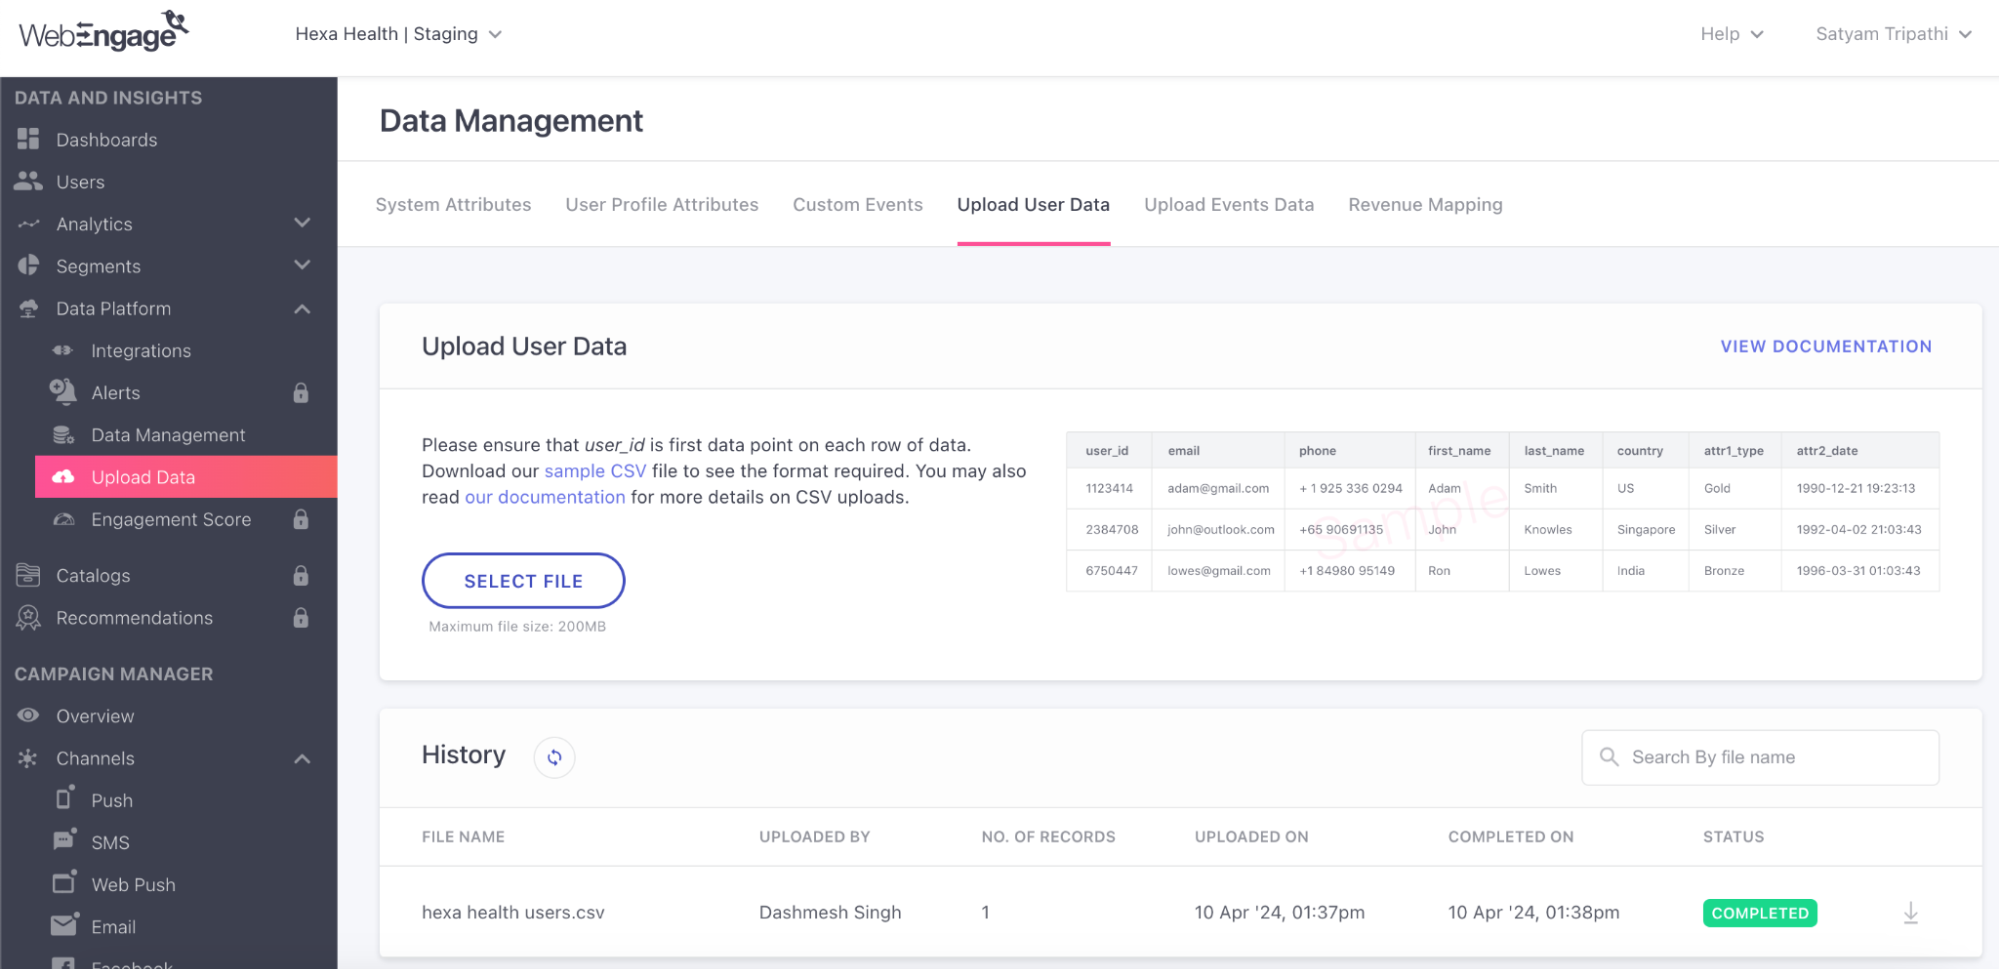
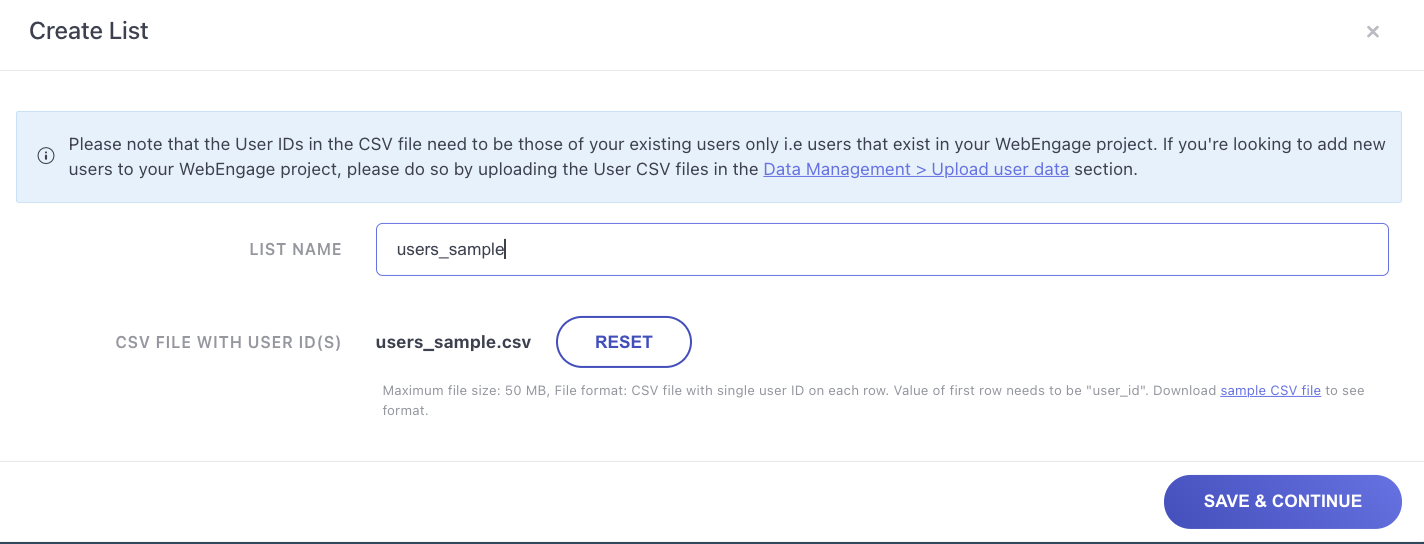
- If needed, upload a CSV via Data Manager → Upload Data, using the provided sample CSV format.
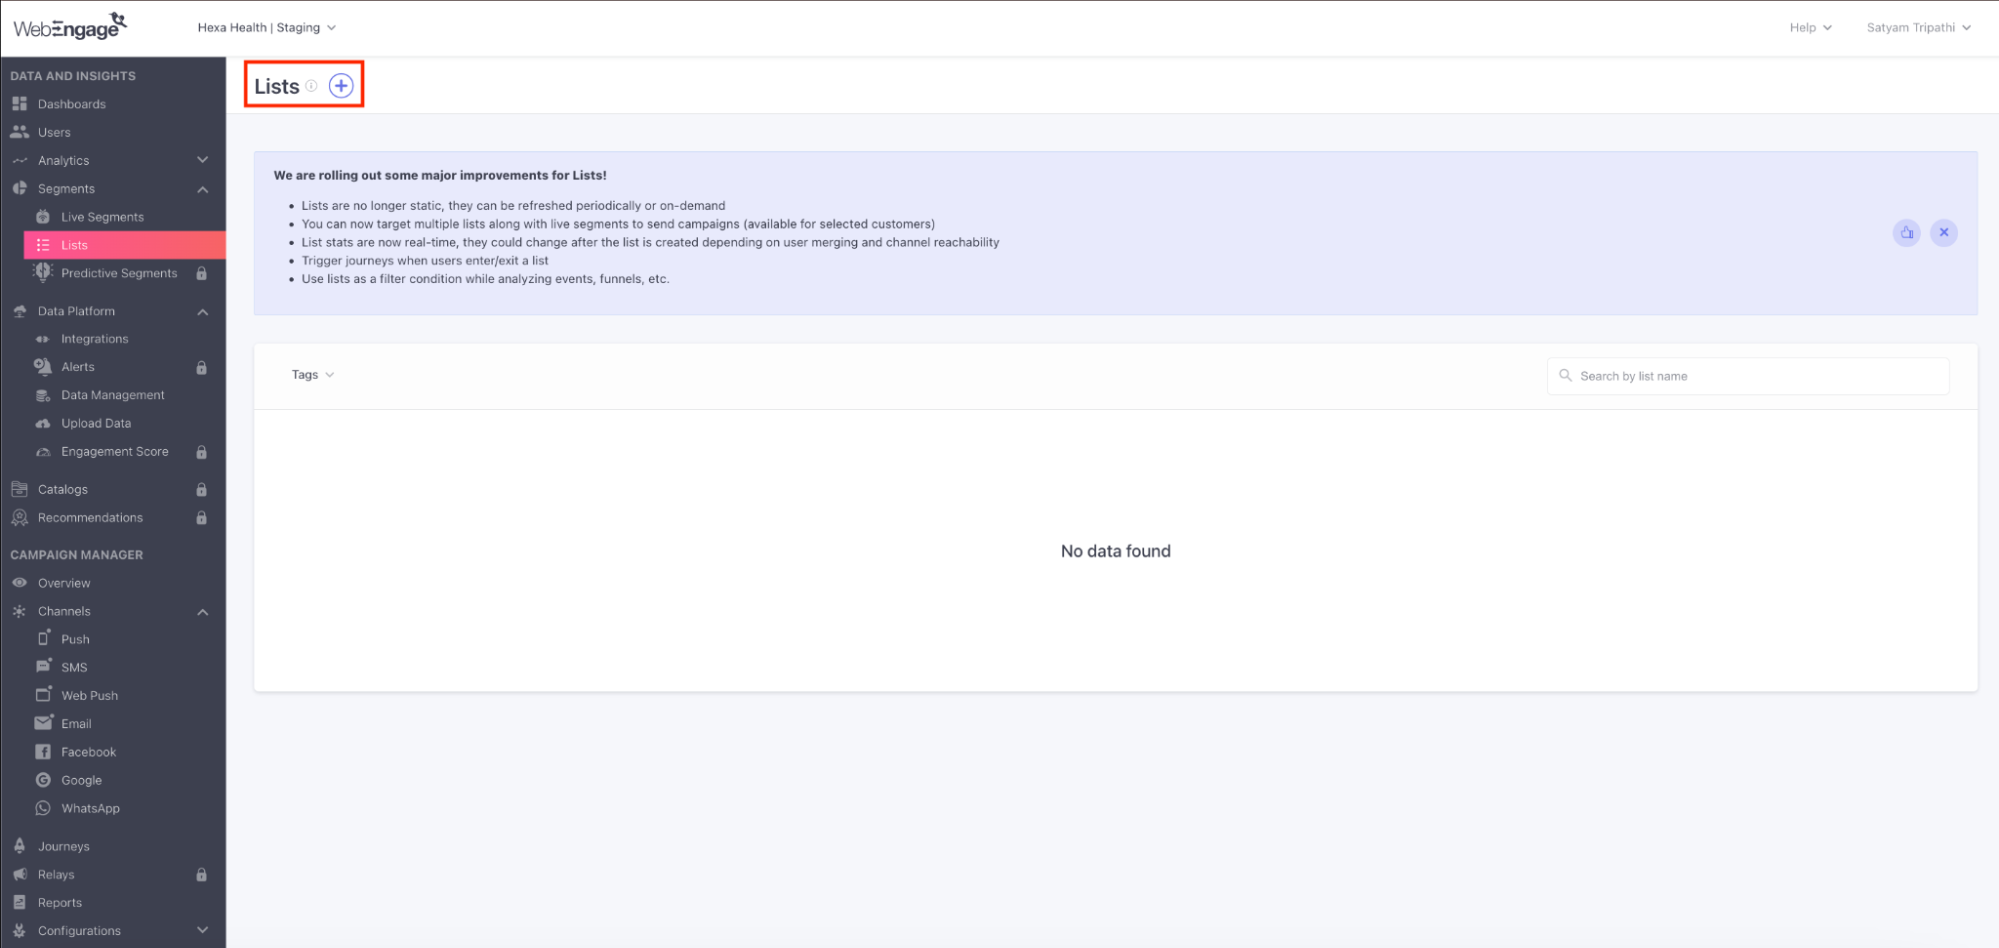
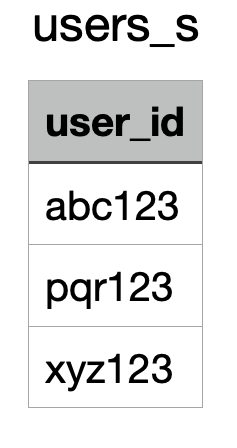
- Return to Segments and select the imported data subset (e.g., user IDs, phone numbers).
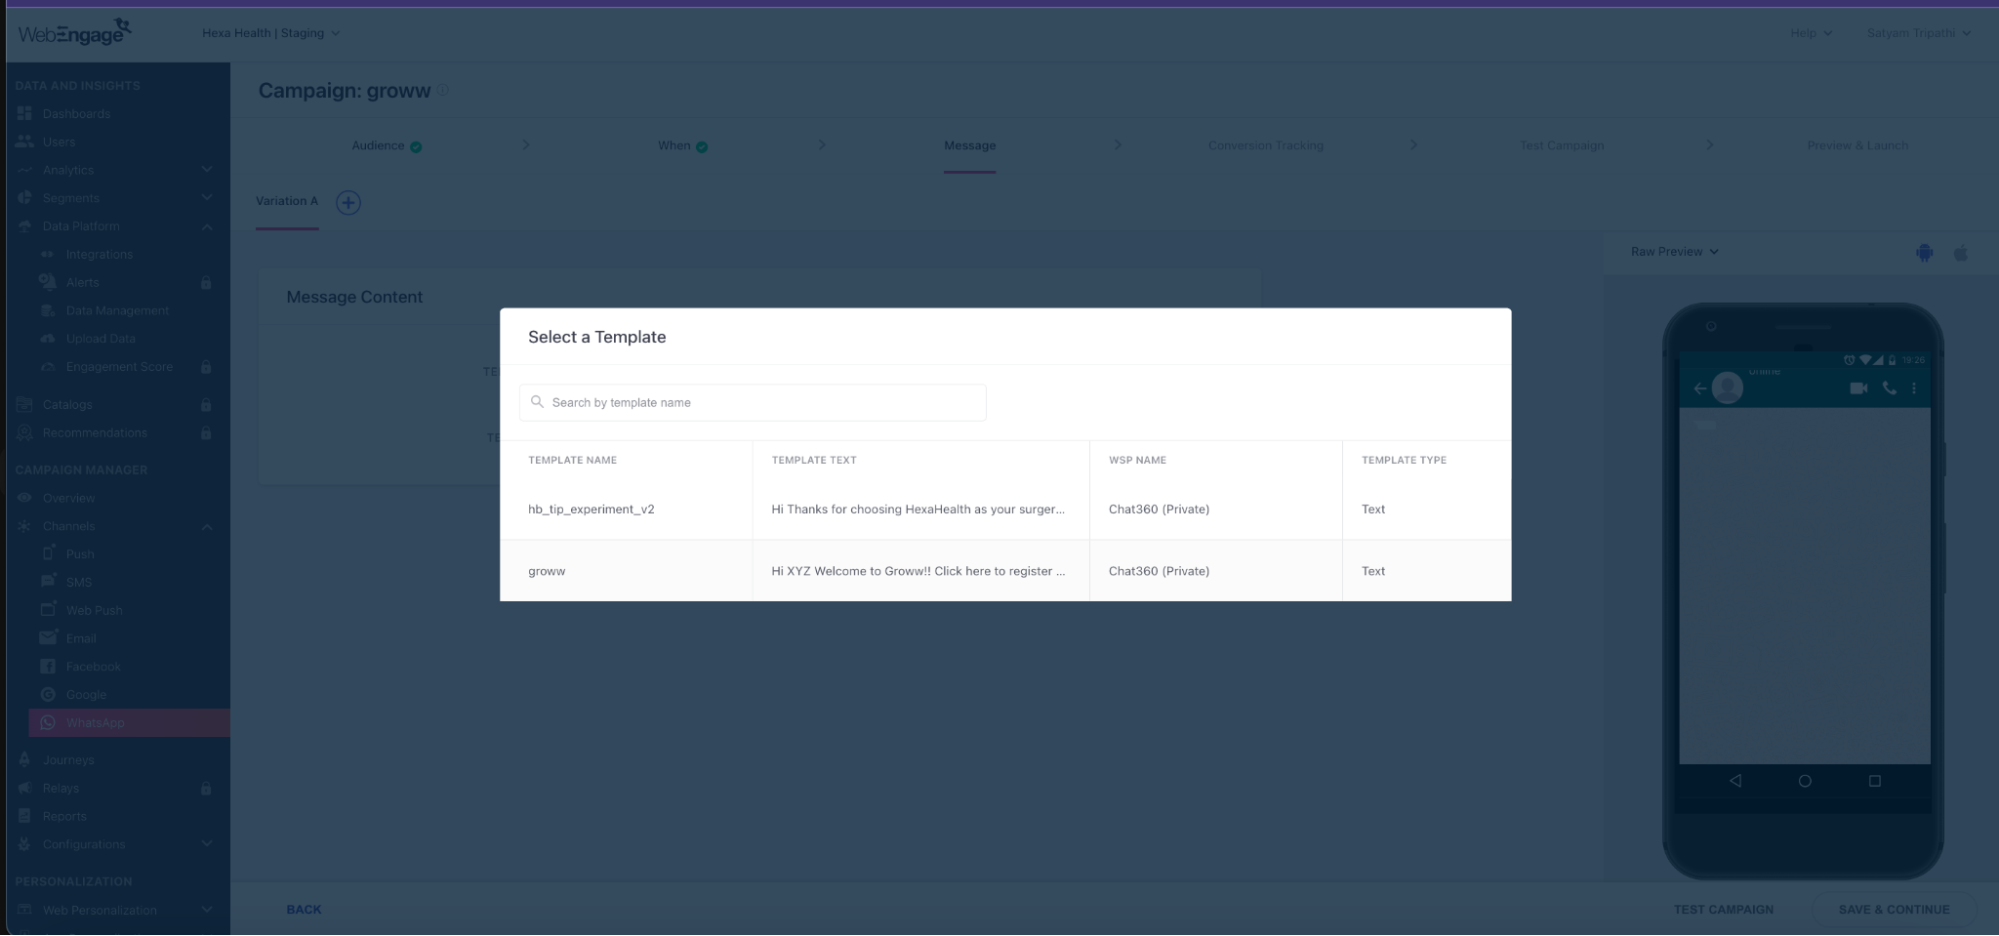
- In Message Settings, pick the Chat360-approved WhatsApp template you synced in Step 2.
- Verify dynamic placeholders (e.g., {{user_name}}) and media render correctly.
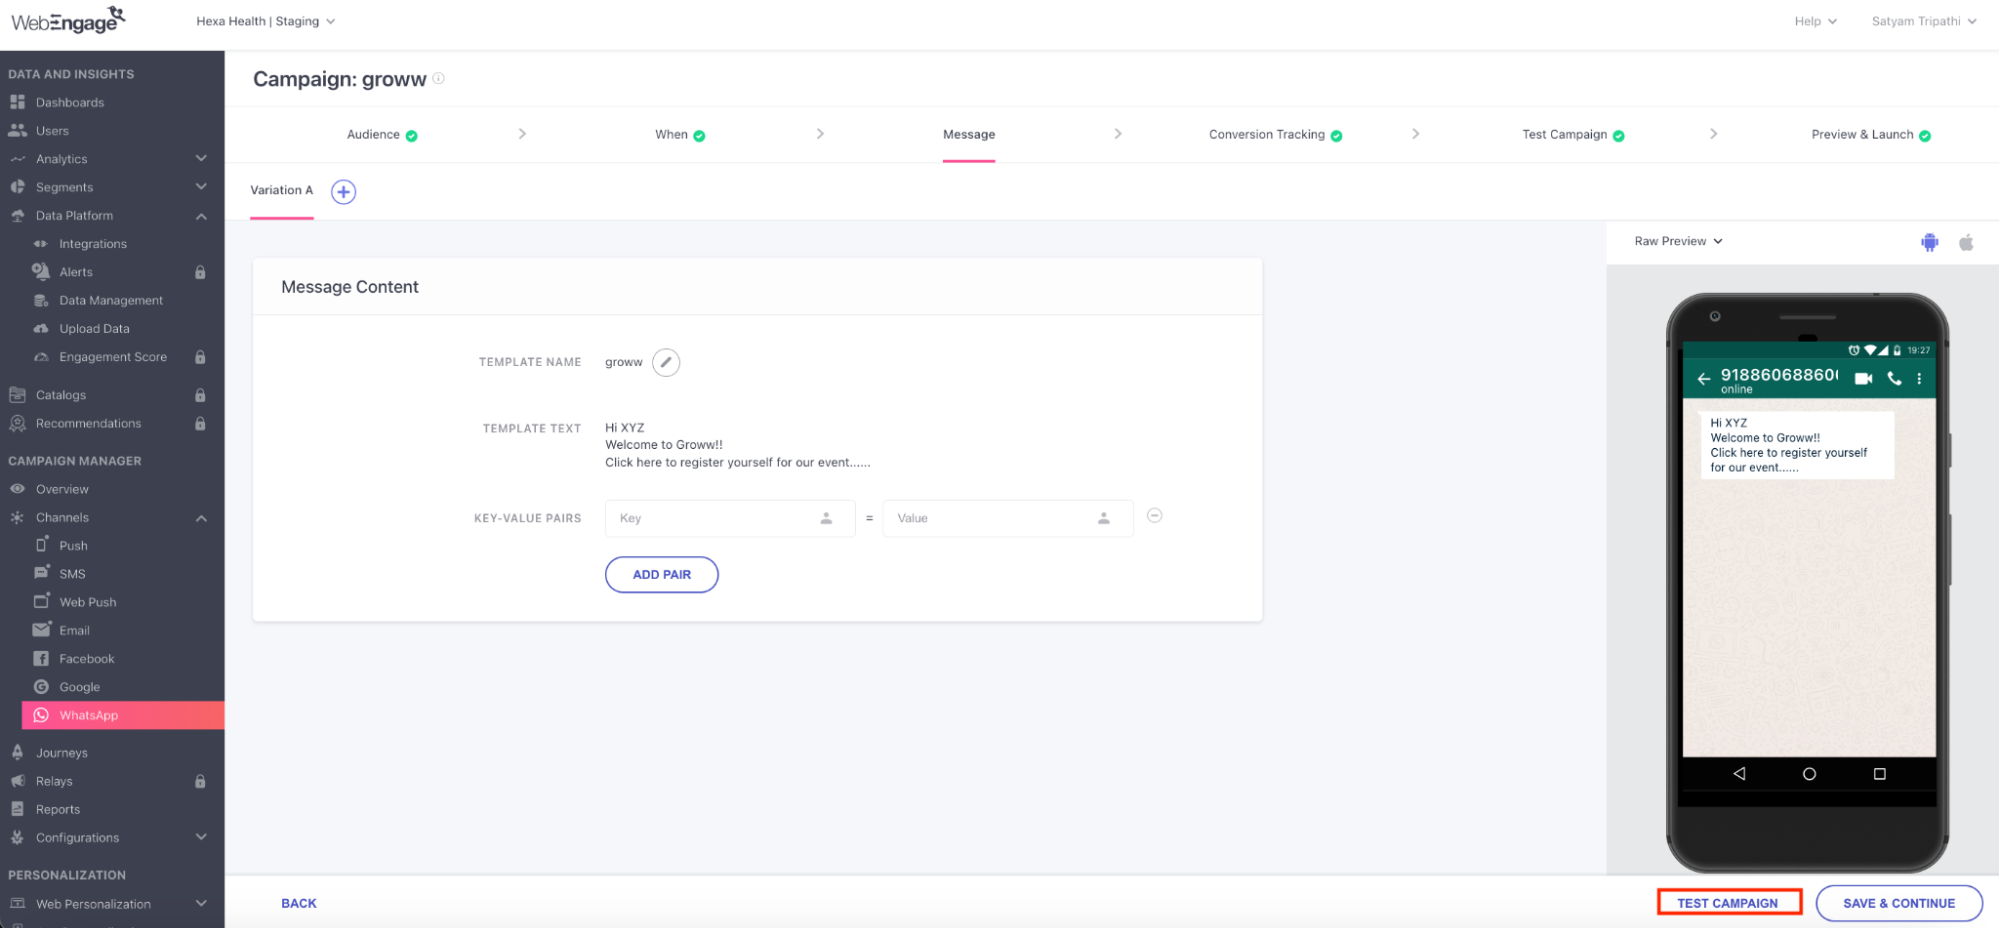
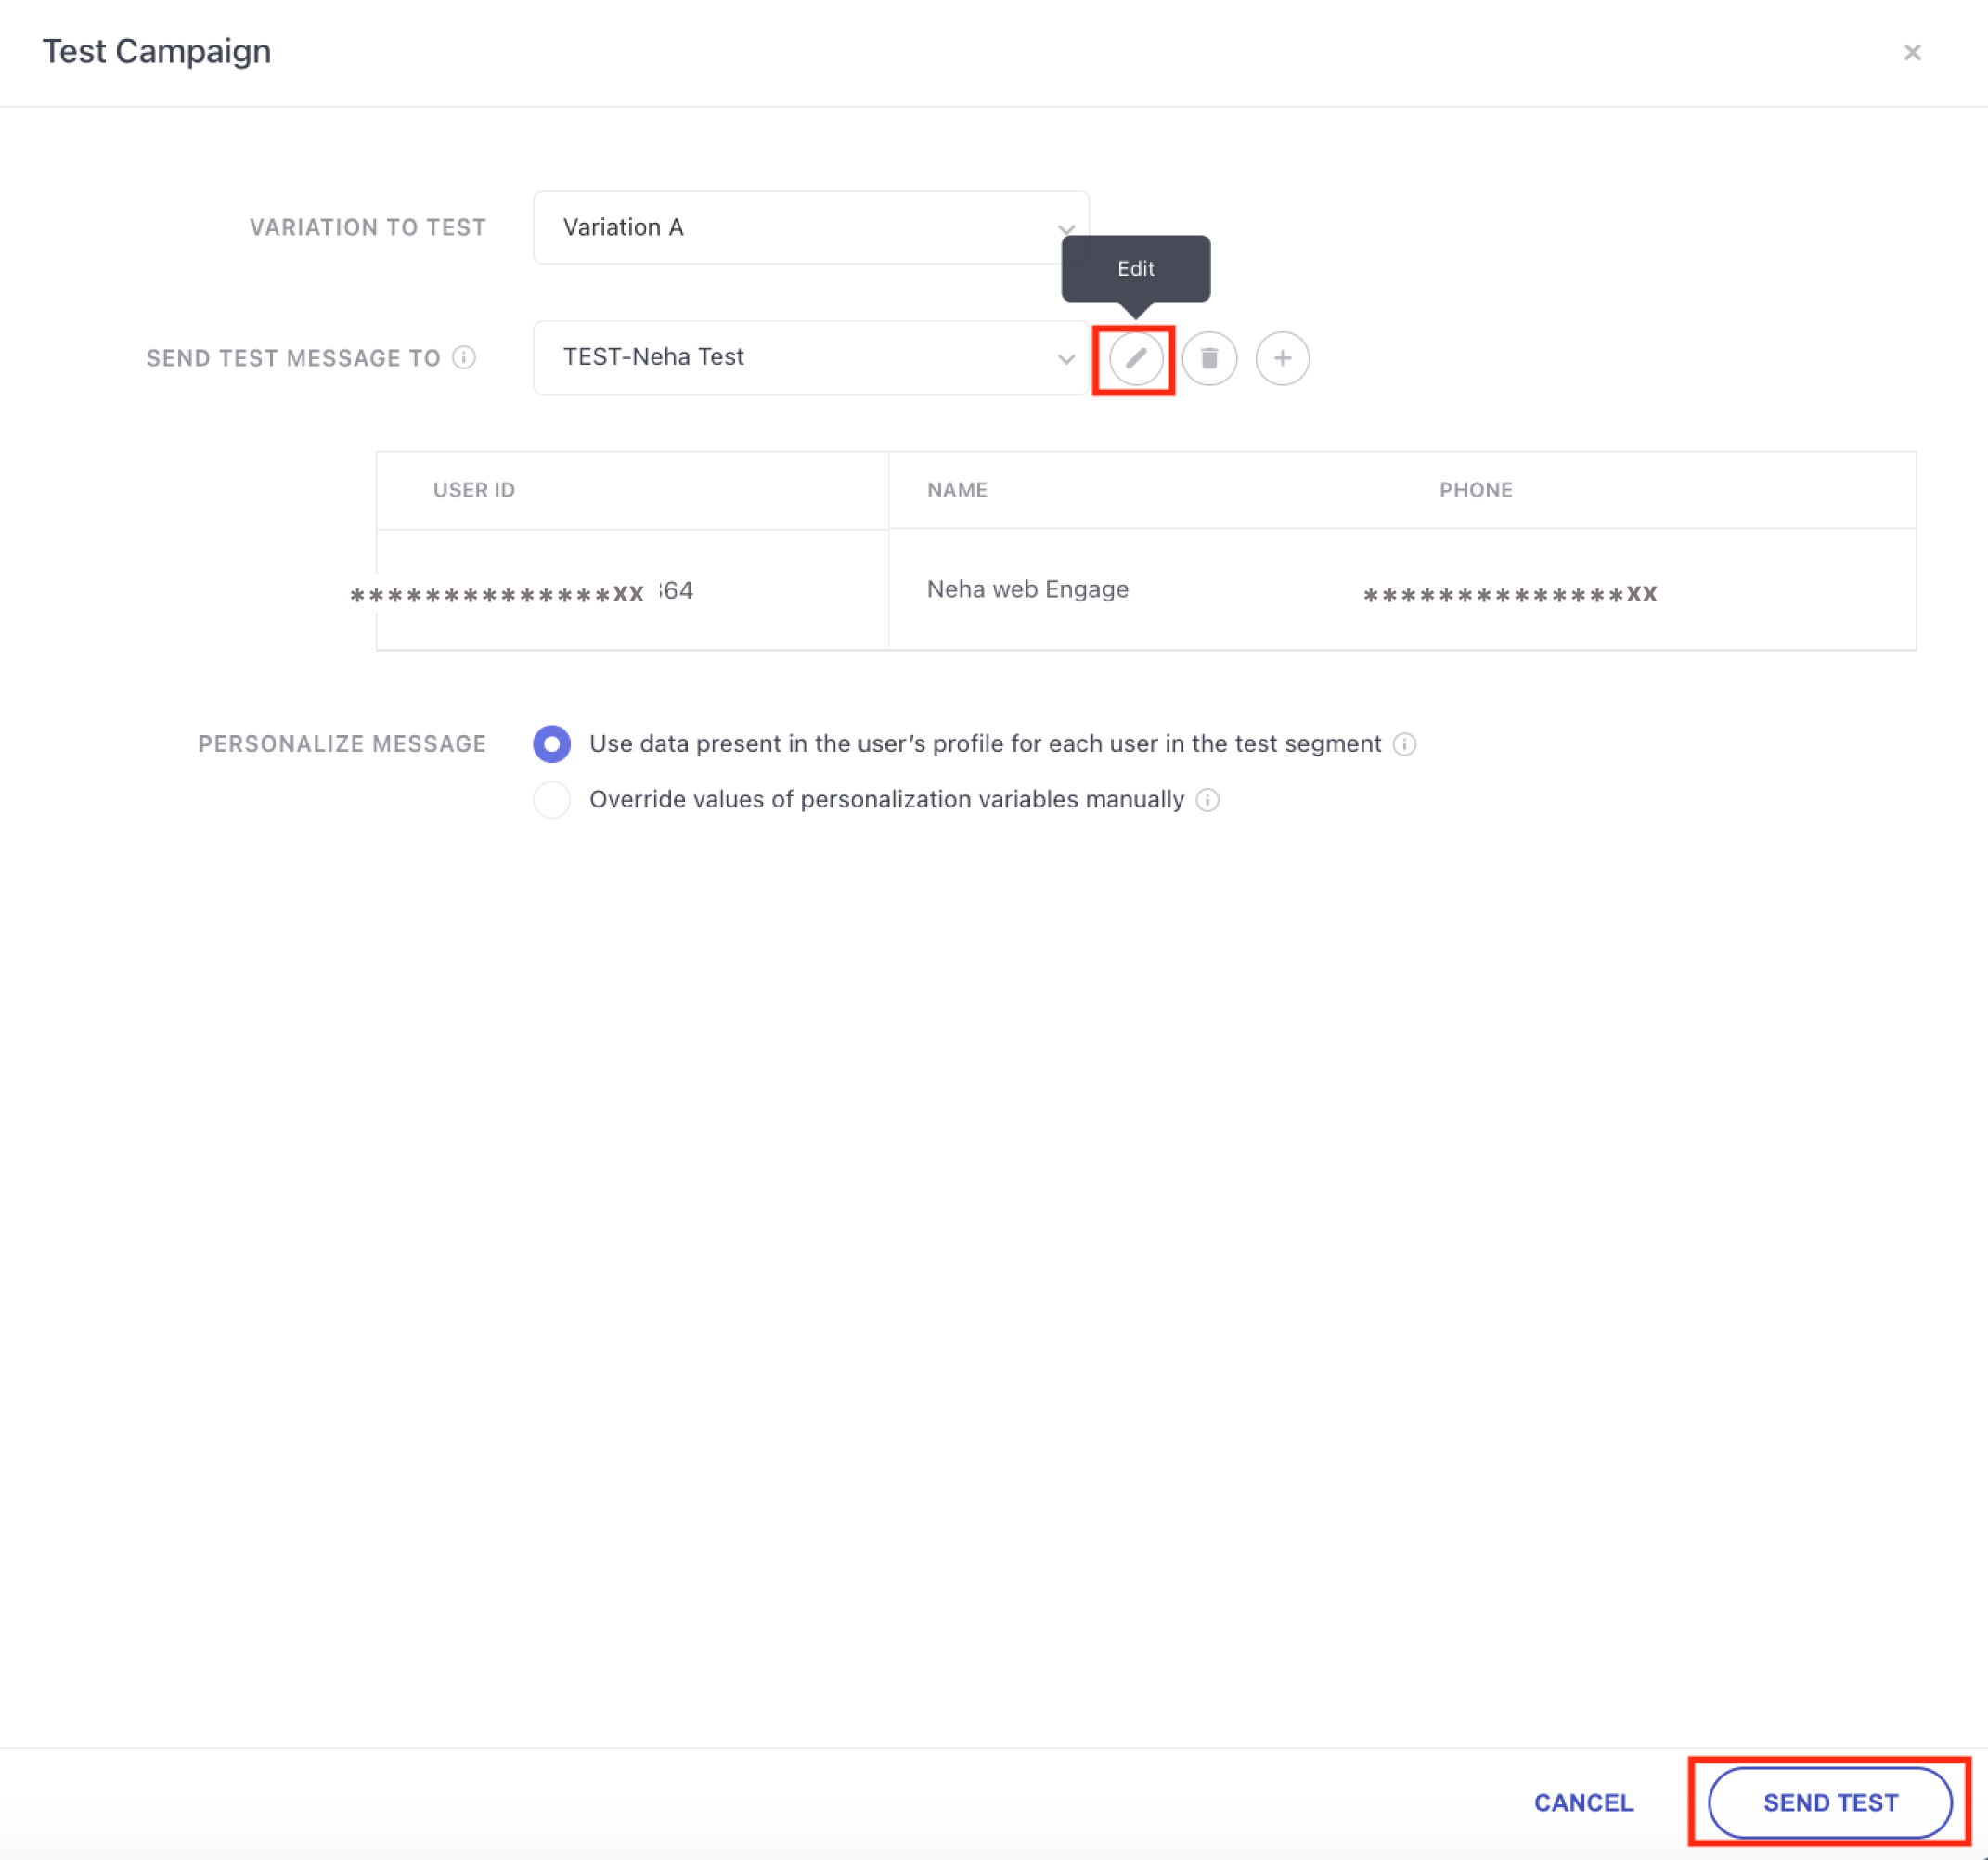
- Send a test message to a designated number to confirm format, personalization, and template functionality.
- Review content on both mobile and desktop WhatsApp clients.
- Once testing passes, click Launch to schedule or start your campaign immediately.
- WebEngage will process messages according to your schedule, leveraging Chat360’s template engine.
- Switch to Chat360 Dashboard → Analytics → Campaign Analytics to view real-time metrics (sent, delivered, read, failed).
- Use these insights for iterative optimization and reporting.
-
Key Benefits
- Seamless Execution: Combines WebEngage’s audience segmentation with Chat360’s template management for one-click campaign launches.
- Consistent Branding: Ensures every message uses the exact approved template, preserving brand voice and compliance.
- Data-Driven Optimization: Real-time analytics in Chat360 help you fine-tune audience segments and messaging strategies on the fly.
- Personalization at Scale: Dynamic placeholders deliver tailored content to thousands of users without additional manual effort.
- Reduced Errors: Pre-launch testing in WebEngage catches formatting or API integration issues before going live.
Once your templates are in place, you can configure and launch targeted WhatsApp campaigns directly from WebEngage. This step walks you through selecting your audience, applying Chat360-synced templates, and executing a live campaign—while maintaining end-to-end visibility in Chat360 Analytics.
-
1. Access Campaign Manager

2. Define Campaign Details
3. Upload or Select User Data:
4.Choose Chat360 Template
-
WebEngage Integration — Use Case Examples
-
Use Case 1: Abandoned Cart Recovery for E-Commerce
- Re-engage users who added products to their cart but didn’t complete the purchase.
- Segment users via WebEngage’s behavioral tracking (e.g., cart abandonment > 30 minutes).
- Use Chat360’s approved marketing WhatsApp template to send a personalized reminder: “Hi {{user_name}}, your cart is waiting! Complete your order now and get 10% off. 🛒”
- Campaign is created in WebEngage and launched through the synced WhatsApp number from Chat360.
- High open and click-through rates.
- Recover lost revenue via personalized nudges.
- Full funnel analytics tracked in Chat360 Analytics.
-
Objective
-
Use Case 2: Post-Purchase Engagement & Cross-Sell
- Nurture users after a successful purchase to drive repeat business.
- WebEngage tracks post-checkout activity and segments “recent buyers.”
- Trigger a WhatsApp message using Chat360 utility template: “Thank you for your purchase, {{user_name}}! Your order #{{order_id}} has been shipped. Want to explore related products?”
- Include CTA buttons for product recommendations or support.
- Builds trust and enhances post-sale experience.
- Drives traffic to complementary products.
- One-click template management and scheduling from WebEngage using Chat360 backend.
-
Objective
-
Use Case 3: User Reactivation Campaign
- Bring back dormant users who haven’t interacted in a while.
- In WebEngage, create a segment for users inactive for 60+ days.
- Sync with a Chat360 template: “We miss you, {{user_name}}! Here’s 15% off your next purchase. Tap to redeem 🎁”
- Launch at scale with media support (e.g., product banners or discount codes).
- Win-back dormant leads via direct, real-time outreach.
- Supports personalization using Chat360 dynamic template variables.
- All metrics (opens, responses, opt-outs) tracked in Chat360.
-
Objective
-
Use Case 4: Automated Onboarding Journey
- Send a guided WhatsApp onboarding flow for new sign-ups.
- WebEngage captures new user sign-ups from website or mobile app.
- Triggers an onboarding journey via Chat360, broken into multiple messages:
- Welcome Message
- Account Verification Instructions
- Feature Highlights with GIFs or carousels
- Eliminates manual onboarding delays.
- Ensures every user receives relevant info in real time.
- Reduces churn during onboarding phase.
-
Objective