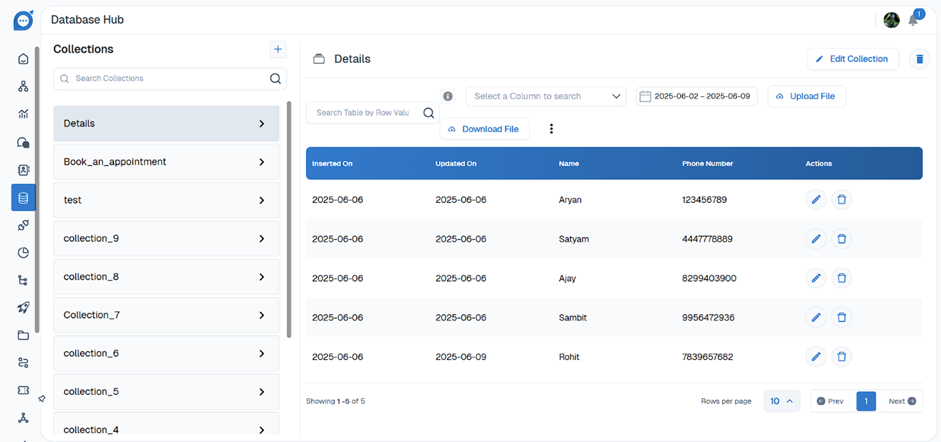
Database Hub
A Database Hub (DB) functionality enables you to create a database table with rows and columns, each with a specific name and data type. The database enables the bot to function effectively and provide personalized, responsive interactions.
- User Details: Profiles, preferences, and credentials.
- Interaction History: Logs of past conversations and user activity.
- Feedback: Ratings, reviews, and survey responses.
- Operational Data: Configuration settings and content like knowledge base articles.
- Transactional Records: Details of transactions and payment information.
- Integration Data: Information from external APIs and systems.
It acts as the bot's memory, holding information such as:
-
Create database table
You can create a table with different columns, each with a specific name and data type.
Database tables should be created in the Development environment. These tables will only become visible in the Production environment after the bot is published from development environment to Staging, and then from Staging to Production.
Supported data types and limitations:
| Data Types | Limitations |
|---|---|
| String |
You can create a maximum of 47 string data type columns per table.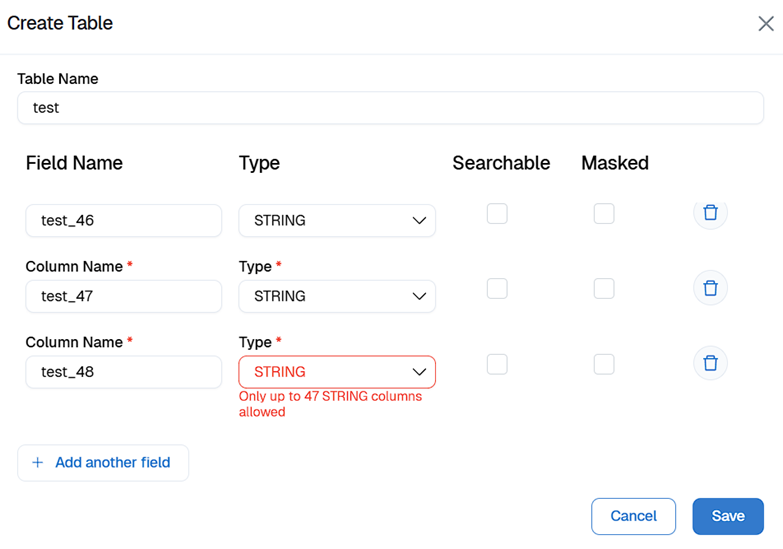
|
| Integer |
You can create a maximum of five integer data type columns per table.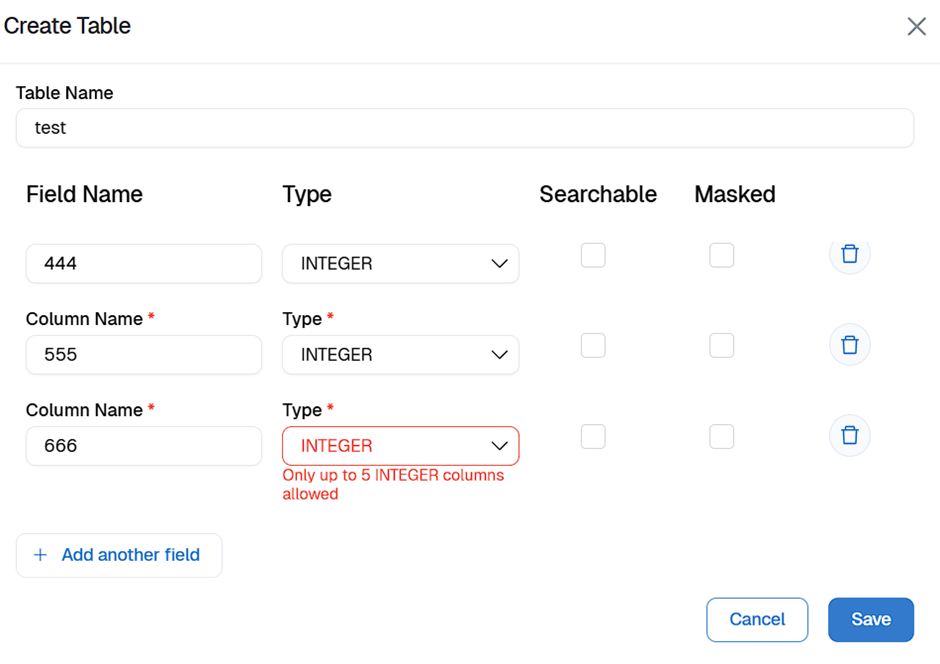
|
| Boolean |
You can create a maximum of two boolean data type columns per table.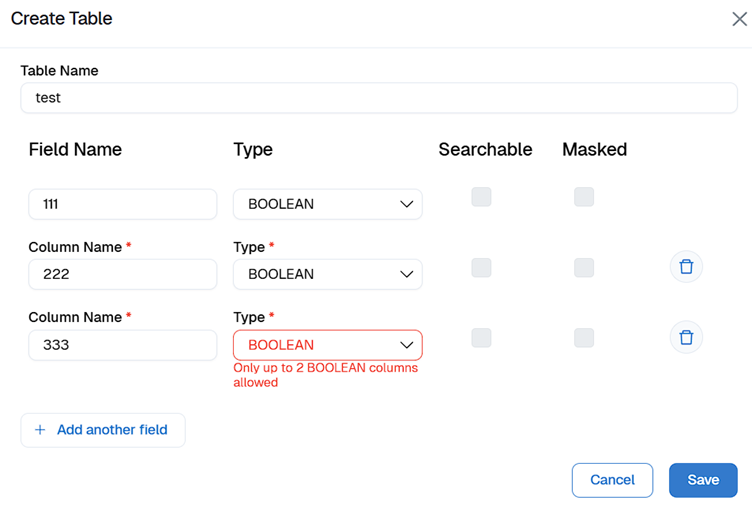
|
| DATE |
You can create a maximum of two date data type columns per table.
|
| JSON |
You can create a maximum of one JSON (object) column in a database table.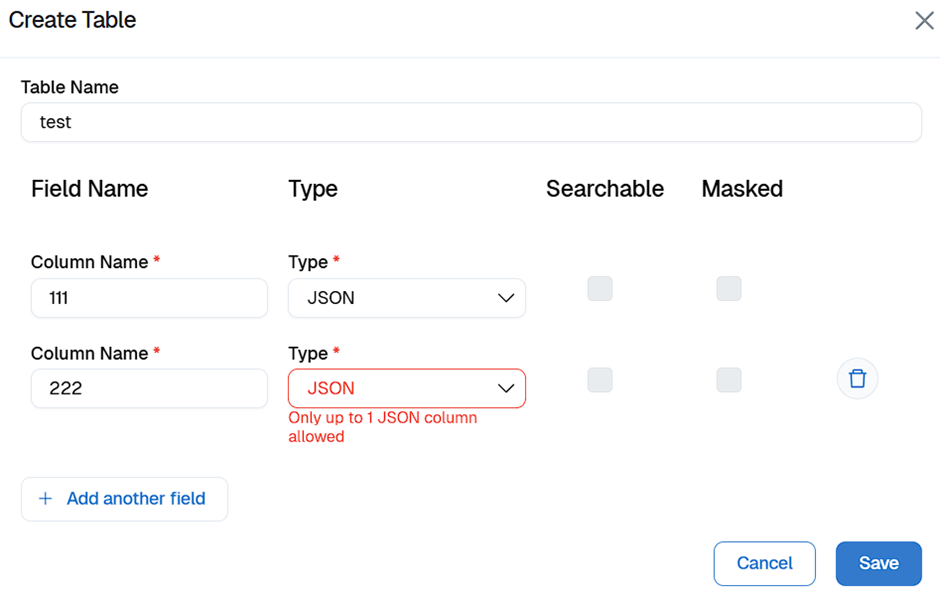
|
-
Creating table
To create a database table, follow these steps:
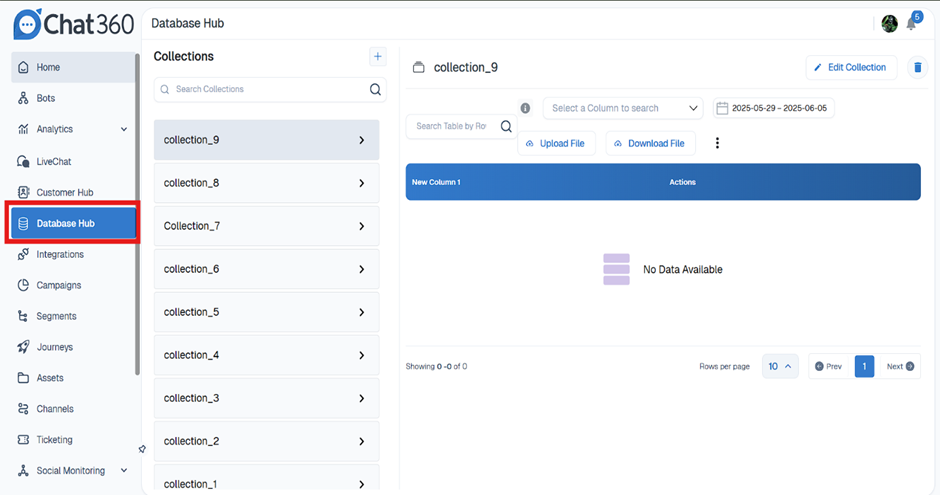
- Navigate to the sidebar
- Select Database > Go To + > Create Collections > Save
3. Define the following fields and click Save.
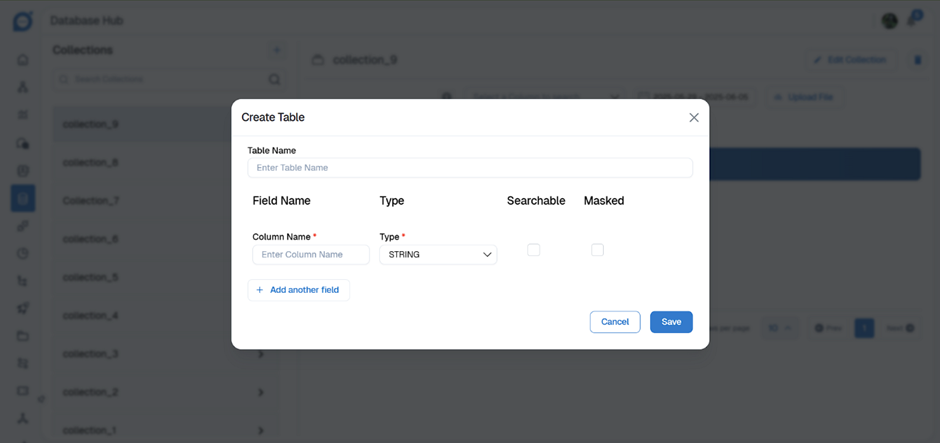
- In Table name, enter a name for your table. The table name must be at least 3 characters long.
- In Field name, enter a unique column name.
- Each Field name (column name) must be unique
- Field name should be at least 3 characters long.
- Currently, there is no limit on the number of columns you can create.
- In Type, choose the datatype of the column. You cannot modify the datatype once the table is created.
- Enable Searchable to make a String datatype field searchable in the database node (in flows).
- You can add up to an unlimited searchable string-type columns.
- When creating columns, you can set them as searchable or non-searchable. Once you save the column name, this setting cannot be changed.
- Enable Masked to make the String datatype masked in the database node.
-
Insert data into a database table
- When publishing the bot, only the database structure (table and column names) is automatically transferred to higher environments.
- To manually transfer the data within those tables, you need to download it from the current environment and upload it to the target environment.
- However, the following are the different ways in which you can add data to your database tables:
-
Add individual records to the Database table manually
To add each record manually, follow these steps:
- Choose the environment where you want to add record.
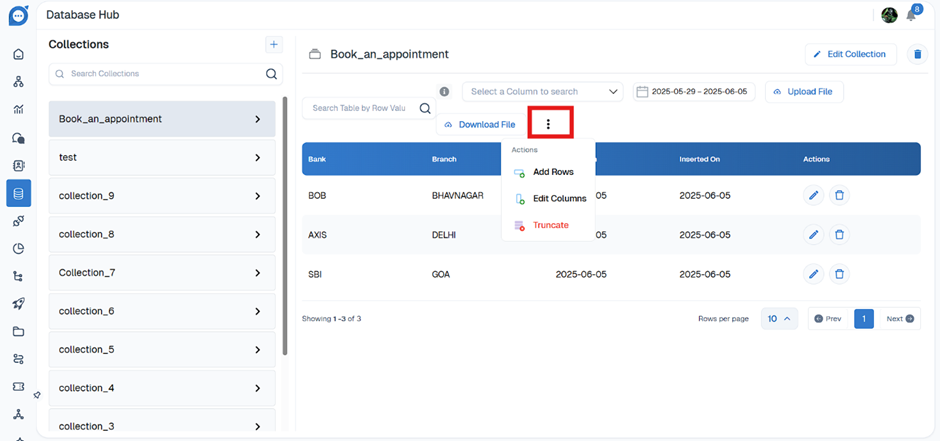
- Go to Navigation Menu > Database, navigate to the table where you want to add a new record.
-
3. Click on three dots and Select Add Rows
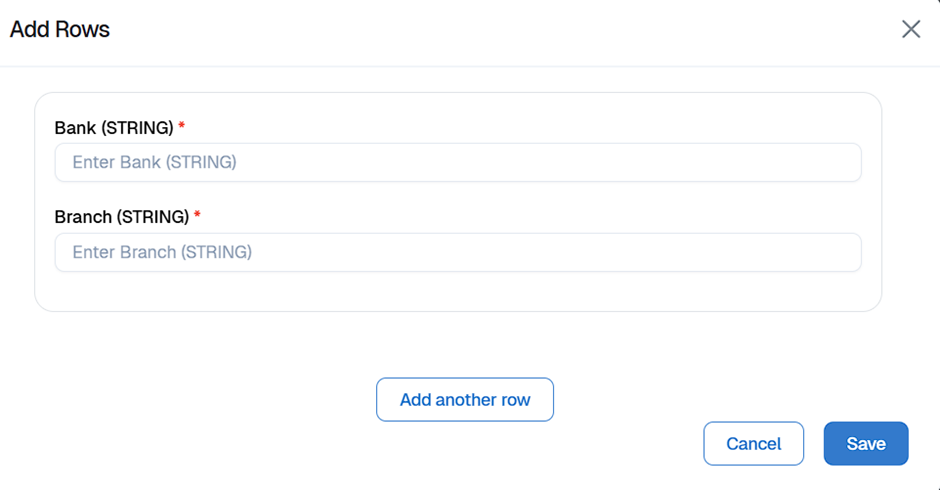
-
4. Enter the values for each field and click Save.
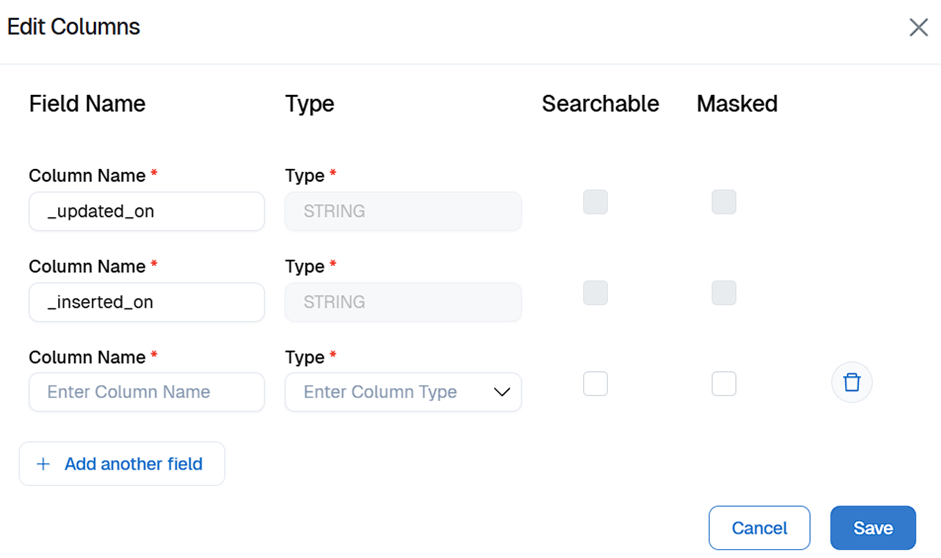
-
5. Same way we can add Columns
-
Import bulk data into a database table
- CSV file upload guidelines
- Column headers: Ensure all column headers are in lowercase.
- Data types: Verify that the data types in the CSV match the database requirements.
- Exponential notation: If the first column appears in exponential notation (e.g., 3.67406E+15), consider converting it to a number or formatting it as a string.
- Formatting tip: To avoid issues, upload the CSV file to a spreadsheet application like Google Sheets or Microsoft Excel, and then download it as a CSV file before re-uploading.
Manually adding multiple records to a table can be tedious. Instead, you can upload multiple entries using a CSV file.
-
Importing CSV file
To import bulk data to Database, follow these steps:
1. Select a Table > Download File to download the existing table structure.

2. Open the downloaded CSV file and add the records you want to upload. Ensure the data is correctly formatted according to the table structure. Here is the screenshot of a sample CSV file:

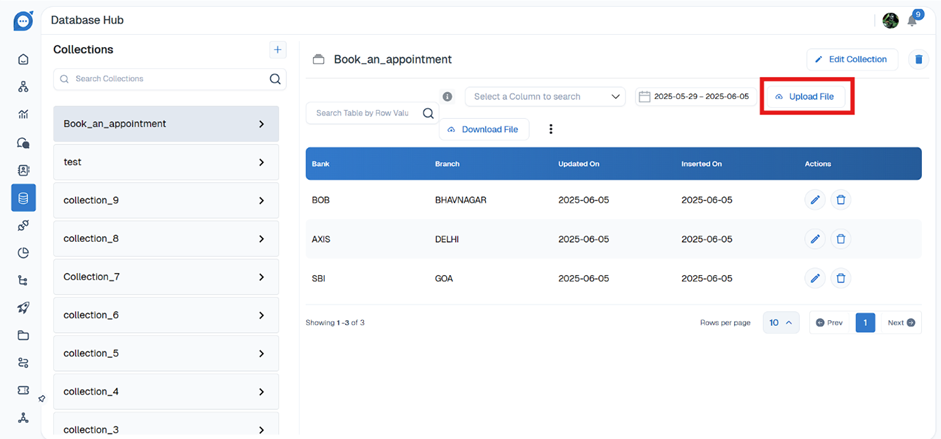
3. Go to > Database Hub. Click the icon Upload File
-
Select the CSV file from your local system and upload it.
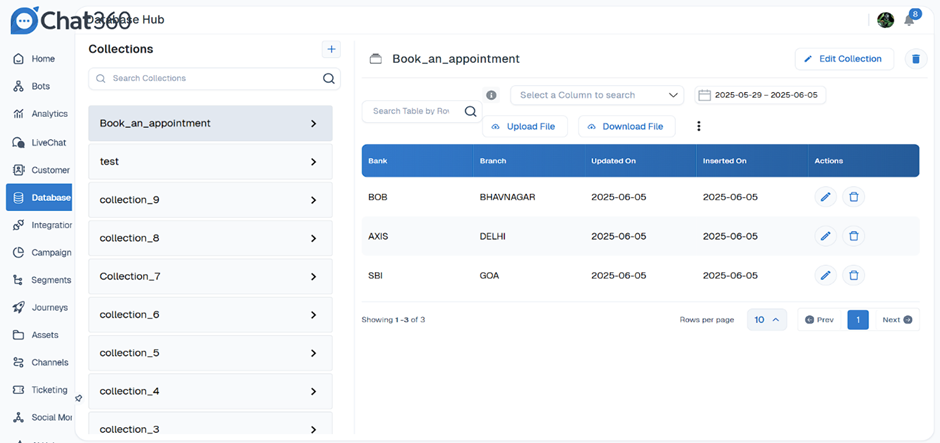
After the upload is complete, you will see the new records created in the table.
-
Manage database records using the Database node
-
To insert data into the table, follow these steps:
- 1. Select the Database node and choose 'Insert' operation.
- 2. In the drop-down, choose the respective table where you want to insert the values
You can directly pass field values to the table from bot flows. For instance, in a lead generation flow, you might need to collect the user's email address, phone number, and the product, and store them in a database table.
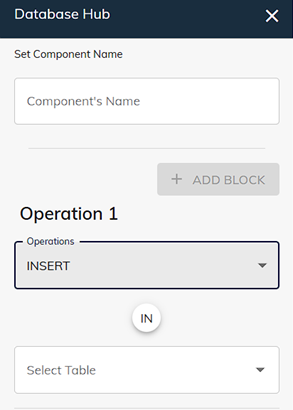
3. Select the required table, then select the required Column, and click on + ADD RECORD to use Operation 2 as well if needed.
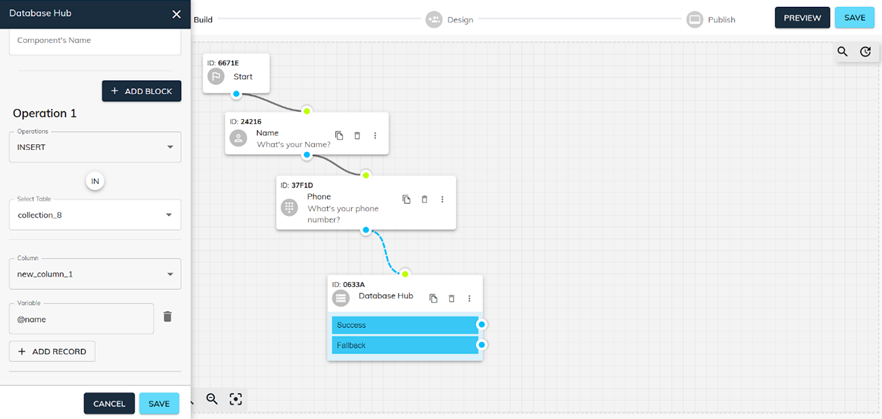
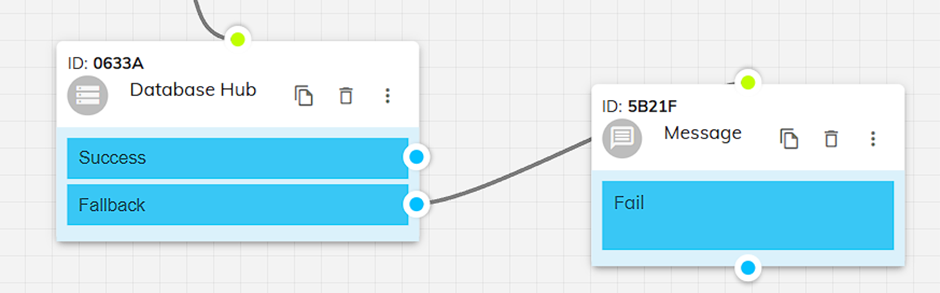
4. If Succeed It will return with message “Done”

5. If it fails, Fallback returns with message “Fail”
-
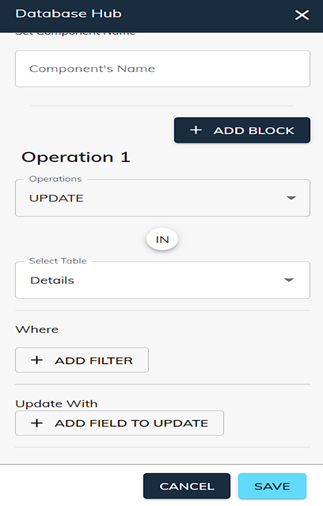
Update the database table records using the database node
To update an existing field value in a table, use the database node and select ' Update ' Operation, along with other necessary configurations.
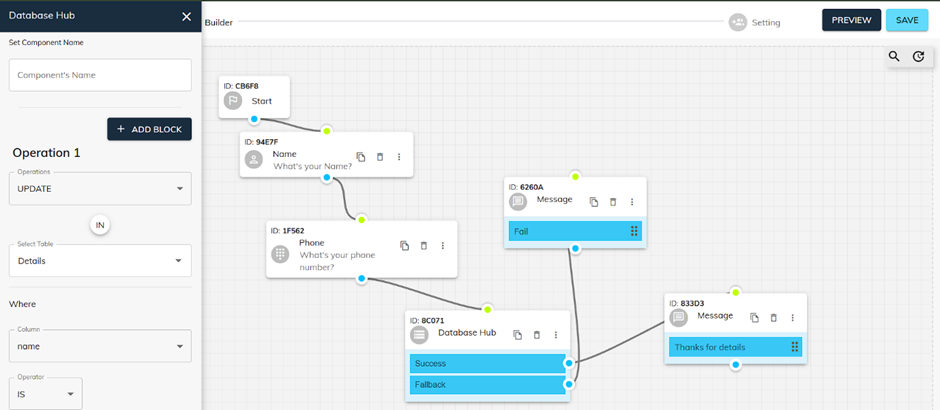
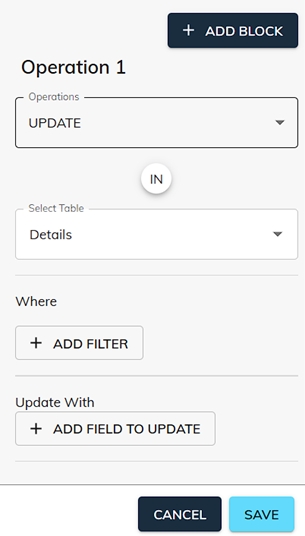
- Select the Database node and choose 'Update' operation.
- In the drop-down, choose the respective table where you want to Update the values as here we selected “Details Table”
- Now Select +ADD FILTER and Enter select required details as per need
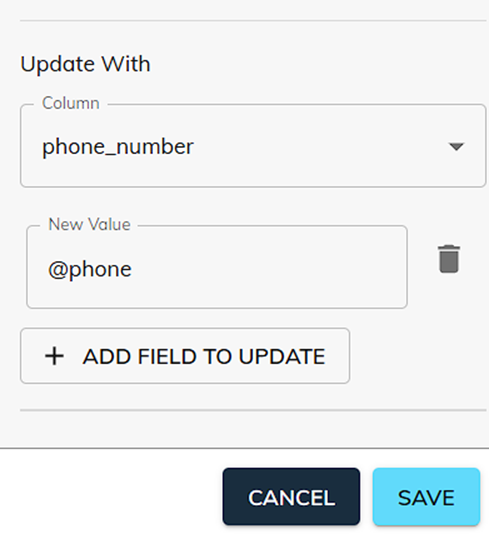
- Select +ADD FIELD TO UPDATE

-
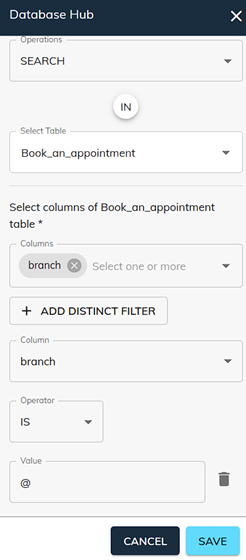
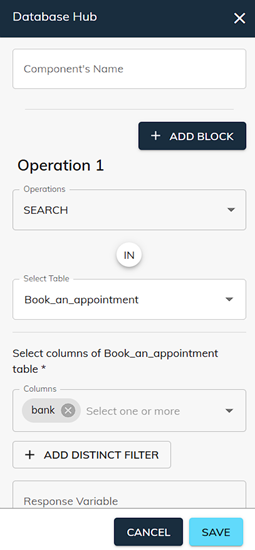
Search the database table records using the database node
To Search an existing field value in a table, use the database node and select ' Search ' Operation, along with other necessary configurations.
-
Manage database tables
-
Delete database table fields or table
-
To delete database table fields or table, follow these steps:
- Go to Database Hub and select the table that you want to delete.
- Click Table and select to drop the table
You can manage individual rows in a database table by editing, updating, truncating and downloading the table data.
You can delete a database table only in the development environment.
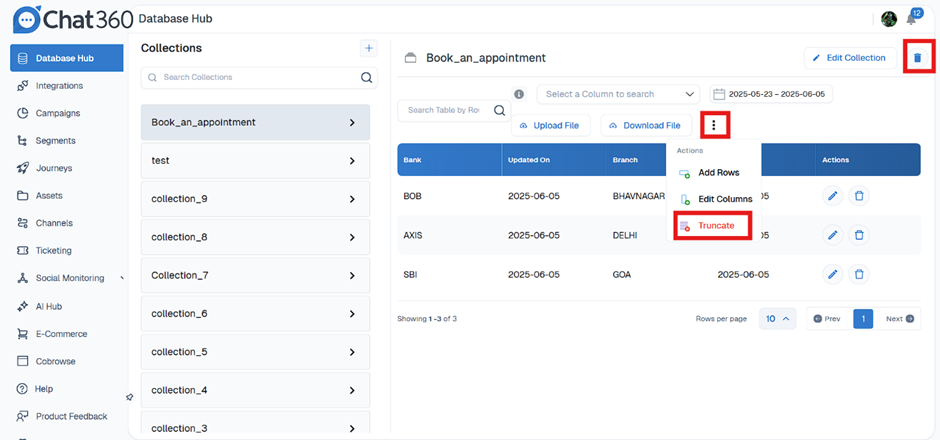
- Truncate: Deletes all the data that exists in a specific table without removing the table structure.
- Drop: Deletes the entire table structure along with all its the records. All the data will be lost (even in production) if you create a new table with the same name. You will also need to update the reference of this table in all the journey nodes where this table was used.
-
Edit database table
- You can add new columns to the current table, rename existing fields, and establish relationships between tables.
- To edit a table, follow these steps:
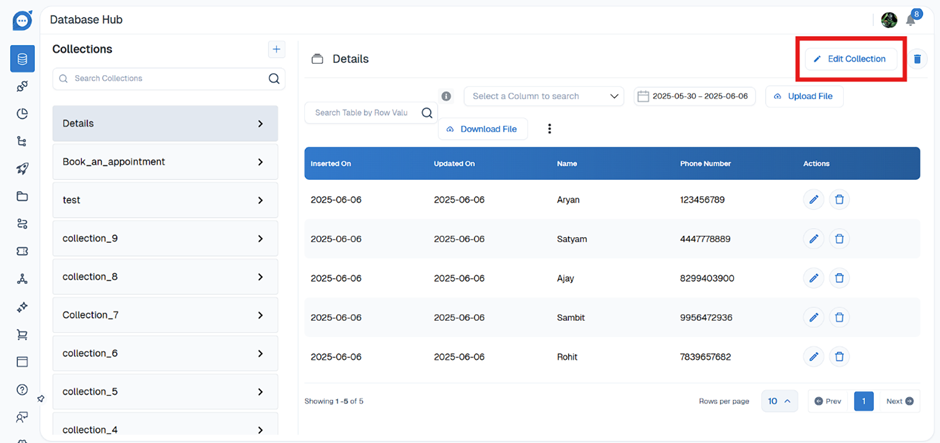
- Go to the Navigation Bar > Database and navigate to the base environment according to your environment hierarchy.
- Select the table you want to edit and click Edit Collections to edit the table.
3. Modify the required columns. You cannot modify the datatype or searchability of a column once it is created.
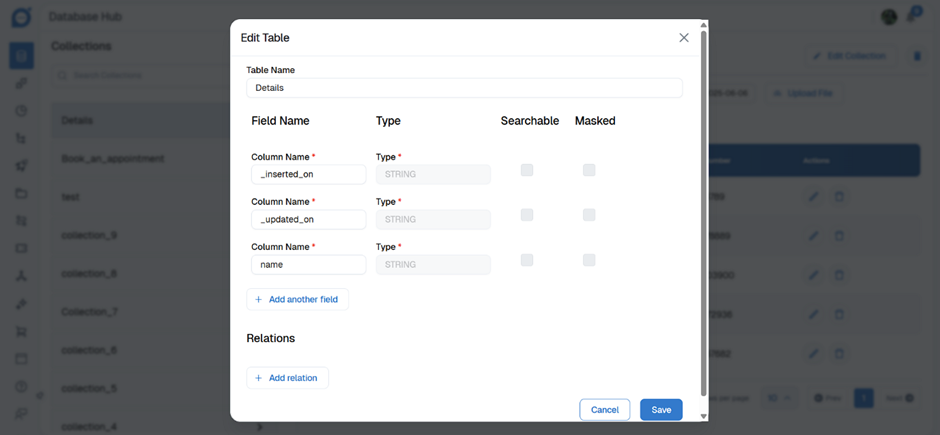
4. To set up relations with other tables, click + Add relations and define the following fields.
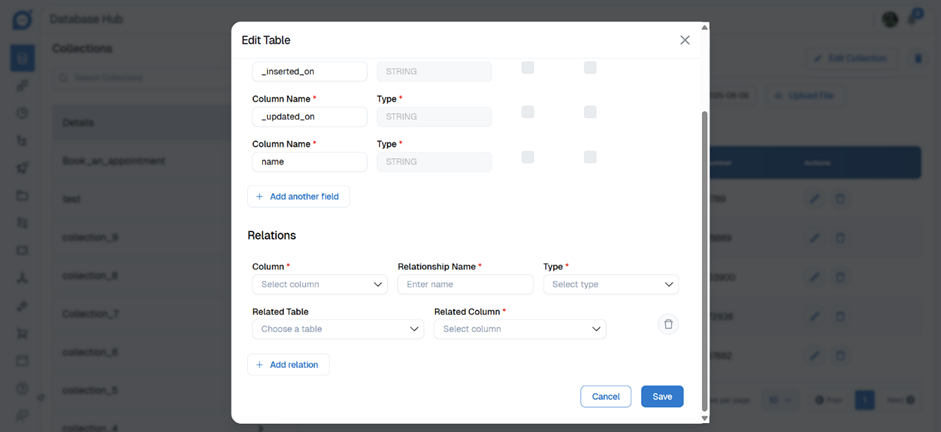
- Column: Choose the column of the current table that you want to map.
- Name: Enter a name for the relation.
- Type: Choose the type of association.
- Related table: Choose the table that you want to associate.
- Related column: Choose the column that you want the current column to associate with.
- Click Save.
- Publish the bot to observe changes in the subsequent environment within the hierarchy. For instance, you can deploy updates from the Development environment to Staging, and then further push changes from Staging to the Production environment.