Shopify Integrations
Chat360’s Shopify Integration empowers merchants to deliver real-time, personalized WhatsApp notifications for key events such as order confirmations, shipping updates, abandoned carts, and more. By leveraging dynamic templates synchronized with Shopify data, businesses can enhance customer engagement, reduce cart abandonment, and streamline post-purchase communication—all directly from the Chat360 dashboard.
-
1. Notification Setup
-
1.1 Accessing Configuration Settings
- Log in to your Chat360 account.
- Navigate to Settings → Integrations → Shopify.
- Click Connect Shopify Store and enter your Shopify store credentials (API key, password, and store URL).
- Once connected, the Shopify Notifications panel becomes available under Settings.
-
1.2 Supported Notification Types
- Order Confirmation
- Order Cancellation
- Shipping Update
- Shipping Confirmation
- Abandoned Cart Reminder
Note: The notification system will only work if the Shopify account is connected to the WhatsApp Business account on Chat360 Portal.
Note: You must configure at least one template per notification type before activating any notification.
-
2. Configuring Notification Templates
-
2.1 Create a New Template
- In the Shopify Notifications panel, click New Template.
- Select the Notification Type (e.g., Order Confirmation).
- Assign a Template Name (e.g., “Order Confirmation – Default”).
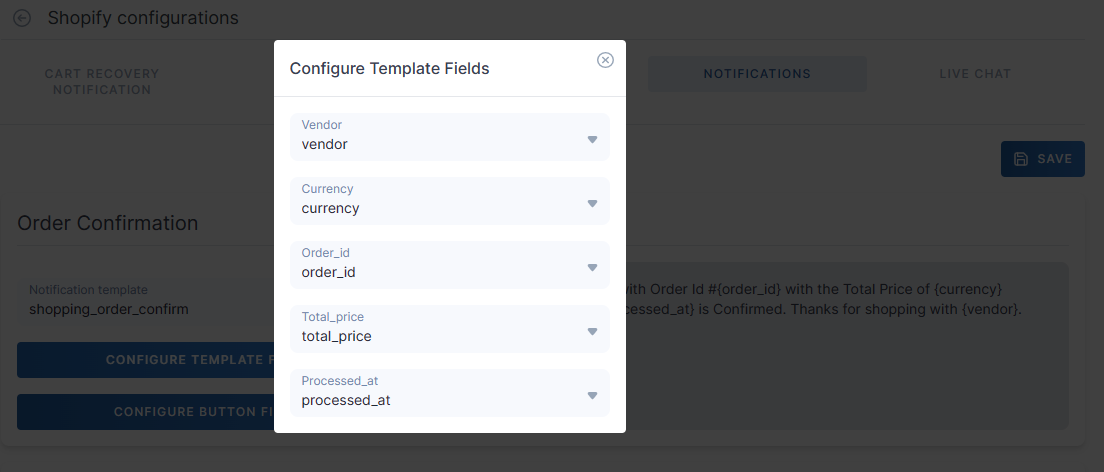
- Use the Template Editor to craft your message. You can insert Shopify dynamic variables such as:
- {{ order_number }}
- {{ customer_name }}
- {{ product_title }}
- {{ shipping_tracking_link }}
- Set the Channel to WhatsApp and select the desired template category (Transactional or Marketing).
- Click Save.
- Pro Tip: Maintain a consistent brand voice by including your store name and a friendly greeting in every template.
-
2.2 Editing an Existing Template
- From Shopify Notifications, locate the template you want to modify.
- Click the Edit (✎) icon next to the template.
- Update the message content or dynamic variables as needed.
- Click Save to apply changes.
-
3. Enabling Specific Notifications
-
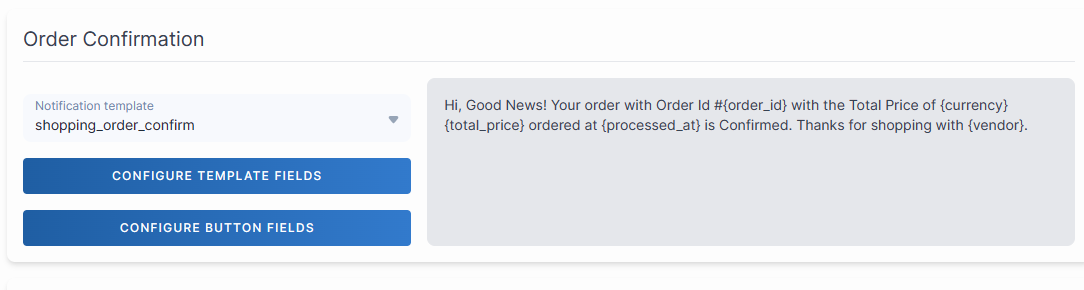
3.1 Order Confirmation & Cancellation
- In Shopify Notifications, toggle Order Confirmation to Enabled.
- From the dropdown, select the Order Confirmation template you created.
- Repeat for Order Cancellation, selecting its corresponding template.
-
3.2 Shipping Updates & Shipping Confirmation
- Toggle Shipping Update to Enabled.
- Choose the Shipping Update template from the list.
- Toggle Shipping Confirmation to Enabled, and select the correct template.
- Click Save to apply changes.
-
3.3 Abandoned Cart Notifications
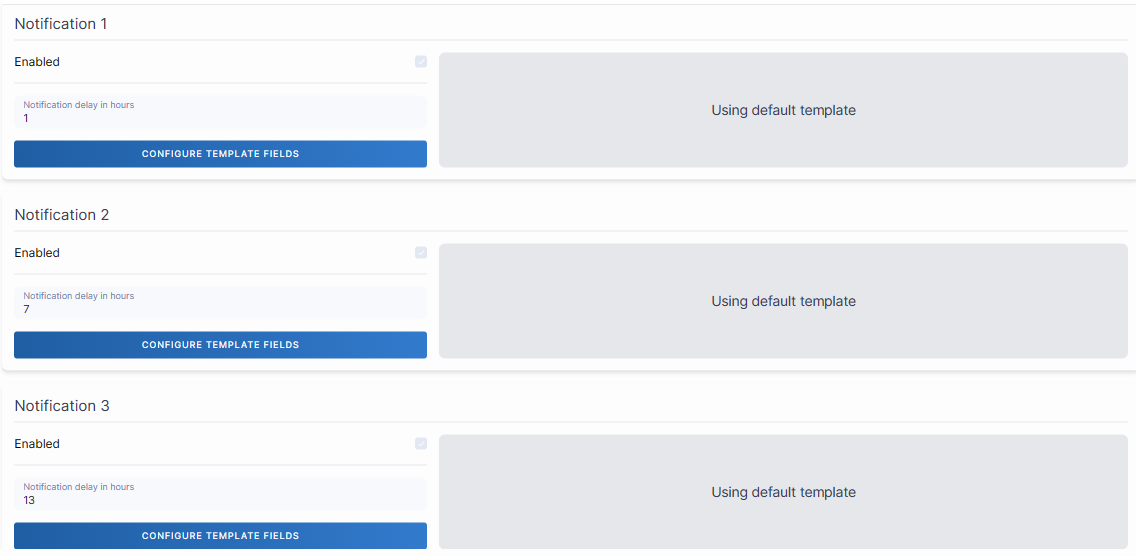
- Toggle Abandoned Cart Reminder to Enabled.
- Select your Abandoned Cart template (e.g., “Cart Reminder – 1st Notice”).
- Set the Frequency (up to 3 reminders per abandoned cart). For example:
- 1st Reminder: 1 hour after cart abandonment
- 2nd Reminder: 6 hours after cart abandonment
- 3rd Reminder: 24 hours after cart abandonment
- Click Save to confirm.
Tip: For shipping updates, you may include dynamic variables like {{ shipping_tracking_link }} and {{ carrier_name }} for more informative messages.
Tip: Use progressively more persuasive language for each subsequent reminder (e.g., include a small discount code in the final reminder).